Re: New TTT - The Boxcar - New Sliding Bed

General Discussion about almost anything Teardrop or camping related

Postby bdosborn » Mon Jul 07, 2008 11:07 pm

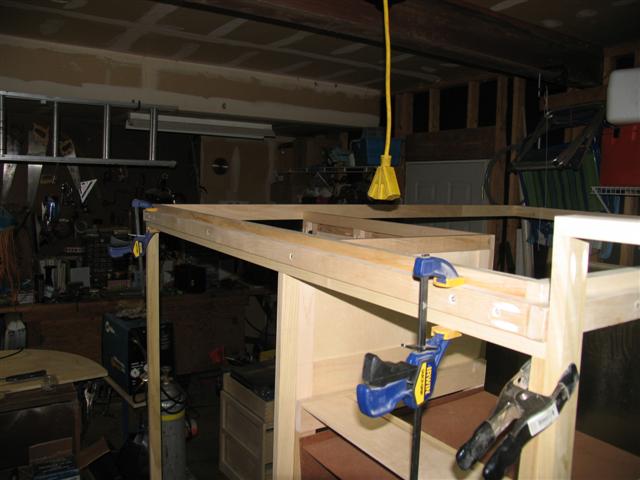
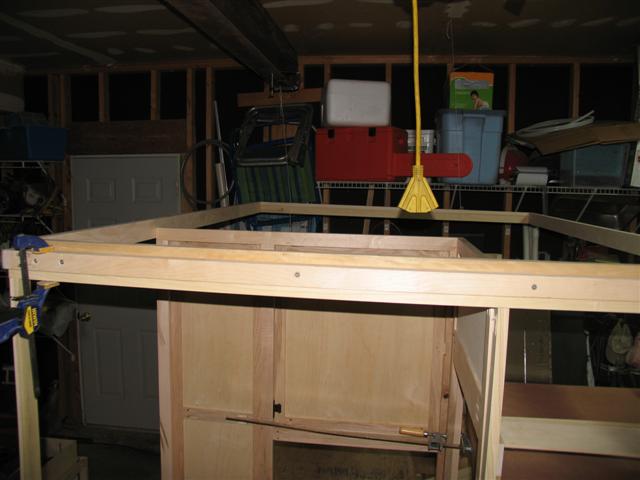
I've got a frame with a lip that the pop top sits on when its down. I'll weatherseal the bottom of the pop top, hopefully, water won't be able to get over the lip. I'm going to epoxy the frame so hopefully water won't get through any of the joints. I've definitely got to be careful to seal all the joints as there are several vertical joints that could potentially leak like a sieve.

Image

Image

Bruce
2009 6.5'X11' TTT - Boxcar
All it takes is a speck of faith and a few kilowatts of sweat and grace.
Image
Boxcar Build
aVANger Build
User avatar
bdosborn
Donating Member
 
Posts: 5493
Images: 772
Joined: Wed May 05, 2004 11:10 pm
Location: CO, Littleton

Postby asianflava » Mon Jul 07, 2008 11:45 pm

Hey Bruce... I take it by the pics that you aren't taking this one to IRG?
User avatar
asianflava
8000 Club
8000 Club
 
Posts: 8412
Images: 45
Joined: Mon Aug 02, 2004 5:11 am
Location: CO, Longmont

Postby bdosborn » Tue Jul 08, 2008 1:38 pm

Rocky,

I can't go. :cry: :cry: I have a good buddy who's getting married so I have to go to that instead. That's why my build has been going slowly lately, I lost some of my motivation after my deadline went away. :oops:
Bruce
2009 6.5'X11' TTT - Boxcar
All it takes is a speck of faith and a few kilowatts of sweat and grace.
Image
Boxcar Build
aVANger Build
User avatar
bdosborn
Donating Member
 
Posts: 5493
Images: 772
Joined: Wed May 05, 2004 11:10 pm
Location: CO, Littleton
Top

Postby asianflava » Tue Jul 08, 2008 2:06 pm

Even though I'm a lot closer now, I can't go either. We are supposed to be closing on our house the following Monday. I don't think it'd be a good idea to be out of town the week before closing.
User avatar
asianflava
8000 Club
8000 Club
 
Posts: 8412
Images: 45
Joined: Mon Aug 02, 2004 5:11 am
Location: CO, Longmont
Top

Postby bdosborn » Wed Jul 09, 2008 12:57 pm

Wait a minute, you're in Longmont now? Dude, lets go camping! I'll send you the email for the Last Gasp! :thumbsup: :thumbsup:
Bruce
2009 6.5'X11' TTT - Boxcar
All it takes is a speck of faith and a few kilowatts of sweat and grace.
Image
Boxcar Build
aVANger Build
User avatar
bdosborn
Donating Member
 
Posts: 5493
Images: 772
Joined: Wed May 05, 2004 11:10 pm
Location: CO, Littleton
Top

Postby bdosborn » Sun Jul 13, 2008 1:27 am

I started on the curved portion of the frame last weekend. My walls are going to be 1-1/2" thick so I had to make the curved portion of the walls out of two layers of 1X4" boards. I thought it would be really hard to make the curves but it wasn't hard at all.

Image

Image

Image

I took some pictures showing how I made the curves if anyone is interested.

Bruce
2009 6.5'X11' TTT - Boxcar
All it takes is a speck of faith and a few kilowatts of sweat and grace.
Image
Boxcar Build
aVANger Build
User avatar
bdosborn
Donating Member
 
Posts: 5493
Images: 772
Joined: Wed May 05, 2004 11:10 pm
Location: CO, Littleton
Top

Postby bdosborn » Sun Jul 13, 2008 11:19 pm

I made good progress framing the curb side wall:

Image

Image

Image

I stuck the various hatches in place in the openings that I've framed. I decided against the hatch in the rear that accesses the closet, I'll move it around to the back. This is the fun part, it's not too hard and the trailer finally is starting to take shape. Now I get to see if the stuff I built 6 months ago will fit.

:twisted:

Bruce
2009 6.5'X11' TTT - Boxcar
All it takes is a speck of faith and a few kilowatts of sweat and grace.
Image
Boxcar Build
aVANger Build
User avatar
bdosborn
Donating Member
 
Posts: 5493
Images: 772
Joined: Wed May 05, 2004 11:10 pm
Location: CO, Littleton
Top

Postby COMP » Sun Jul 13, 2008 11:22 pm

looking good :thumbsup:
COMP
Teardrop Builder
 
Posts: 32
Joined: Thu Jul 10, 2008 12:48 am
Location: so. in.
Top

Postby bdosborn » Sun Jul 20, 2008 9:58 pm

Still making good progress on the framing. I've got the street side wall done, the back and I'm moving on to the front bulkhead.

Here's the street side wall with the window and access hatch framed in. There's framing for an exterior shower (but the shower's not installed yet).

Image

Here's the back, you can see the shower pan with a box sitting in it. You can also see the where the back door is going to be. The diagonal bracing makes the walls solid as Sears.

Image

Here's the bed/dinette as seen through the front door. Boy, this is where everything comes together and all that time making sure the trailer is level and plumb pays off. I struggled for two hours to make the bed level with all the framing. Turns out the bulkhead framing was a 1/4" low. It doesn't take things being out of alignment by much to throw the bed out of wack.

Image

Now I'm working on the front bulhead. I need to frame in for the AC and the access hatch. There's still a long way to go....

Image

Bruce
2009 6.5'X11' TTT - Boxcar
All it takes is a speck of faith and a few kilowatts of sweat and grace.
Image
Boxcar Build
aVANger Build
User avatar
bdosborn
Donating Member
 
Posts: 5493
Images: 772
Joined: Wed May 05, 2004 11:10 pm
Location: CO, Littleton
Top

Postby COMP » Sun Jul 20, 2008 10:05 pm

lovin' this build :thumbsup:
COMP
Teardrop Builder
 
Posts: 32
Joined: Thu Jul 10, 2008 12:48 am
Location: so. in.
Top

Postby Catoosa Grani » Sun Jul 20, 2008 10:29 pm

Bruce, that is looking so nice. I am really getting anxious to see it finished.

Grani
ImageImage
User avatar
Catoosa Grani
Gold Donating Member
 
Posts: 1333
Images: 86
Joined: Tue Jan 30, 2007 8:45 pm
Location: Catoosa, OK.
Top

Postby bdosborn » Sun Aug 24, 2008 12:38 pm

More pictures of the framing, I've about finished glueing everything together:

Here's the A/C from the outside. There will be an access door over this when its skinned. There will also be a small fan in here to try and circulate air from the ceiling down to the bed area.

Image

Here's the A/C from the inside. The panel above the A/C will hold the radio, switches, voltmeter, inverter switch, DC outlet and weatherstation.

Image

I added another window for his and hers compatibility.

Image

Here's the framing for the benches, I forgot to take a picture before I took it all apart.

Image

I found this cool bench seat hinge on the internet, it makes adding a hinge to the seats real easy, especially if you fit everything before the walls are skinned. ;)

Image

Next I'll be taking everything apart down to the floor again so I can start skinning the walls and applying finish with everything flat. Oh and I have to paint the floor too.

Bruce
2009 6.5'X11' TTT - Boxcar
All it takes is a speck of faith and a few kilowatts of sweat and grace.
Image
Boxcar Build
aVANger Build
User avatar
bdosborn
Donating Member
 
Posts: 5493
Images: 772
Joined: Wed May 05, 2004 11:10 pm
Location: CO, Littleton
Top

Postby Miriam C. » Sun Aug 24, 2008 1:55 pm

:applause: :thumbsup: Wow! You really are getting a lot done. I forget how long you TTT is but our air flows up like the one you have and it tends to follow the curve of the roof. Actually it is colder on the front than the back. Image
“Forgiveness means giving up all hope for a better past.â€
User avatar
Miriam C.
our Aunti M
 
Posts: 19675
Images: 148
Joined: Wed Feb 15, 2006 3:14 pm
Location: Southwest MO
Top

Postby bdosborn » Sun Jan 11, 2009 12:01 am

Well its been 4 months since I posted last. I got side tracked with a bunch of other projects and haven't worked on the trailer *at all*! One of my New Years Resolutions was to get off my duff and get busy. Besides, Minden is coming up. I started skinning the framing, starting with the rear walls.

Here I'm prepping the exterior skin by tracing the framing on it so I know where to staple it to the frame. I also glued in blocking to screw through into the floor and roof.

Image

Here I'm about ready to attach the interior skin. The insulation has been added, wiring is installed and the glue has been applied.


Image

I attached the interior skin with 27G pins and then vacuum bagged the wall. I got a lot better glue adhesion this way.

Image


The walls on the rear of the trailer. Not attached yet, just a trial fit. I need to finish the side walls before I can attach everything.

Image

Here's what the interior wall looks like. This will be the inside of a closet so it was a good wall to practice vacuum bagging on.

Image

Now on to the side walls...
Bruce
2009 6.5'X11' TTT - Boxcar
All it takes is a speck of faith and a few kilowatts of sweat and grace.
Image
Boxcar Build
aVANger Build
User avatar
bdosborn
Donating Member
 
Posts: 5493
Images: 772
Joined: Wed May 05, 2004 11:10 pm
Location: CO, Littleton
Top

Postby Juneaudave » Sun Jan 11, 2009 12:18 am

Wow Bruce...your putting us all to shame!!! Glad you are back at it...we were really enjoying the build and learning alot from your techniques!!!!
:thumbsup:
User avatar
Juneaudave
Super Duper Lifetime Member
 
Posts: 3237
Images: 380
Joined: Sun Jul 03, 2005 12:11 pm
Location: Juneau, Alaska
Top

PreviousNext

Return to General Discussion

Who is online

Users browsing this forum: No registered users and 9 guests