Wall design for my Cub build

General Discussion about almost anything Teardrop or camping related

Wall design for my Cub build

Postby HunterStephens » Wed Oct 24, 2018 5:27 pm

Hello everyone!

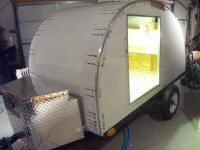
Its been a long time since I've posted here, life sure can get in the way of projects. But Im back and ready to really get moving on my Cub build. I have the frame built according to the Lightweight New Cub drawings in the library and now I am designing the walls. I am drawing them up in AutoCAD so I can cut them out on a CNC table but have some questions about the design. I am debating on how I should construct the walls. Whether I should do a solid wall or skeletonized plywood with foal insulation. I am really having a hard time deciding what to do as I have been reading that 3/4 insulation doesn't really prevent condensation, but then others say it does. If I go the skeletonized route how should I skin the inside and outside? I would like aluminum on the outside possibly? Or maybe a finish similar to the CLC trailers. I am seeking input on both methods.

Also, depending on what route I take I am trying to figure out how to mount the shelves. Whether I should cut pockets in the wall and tabs on the shelve boards to hold the whole thing like a puzzle or if I should use blocking.

You guys are the experts. Fill me in on your experiences!

Thanks,
Hunter
HunterStephens
Teardrop Inspector
 
Posts: 14
Images: 2
Joined: Mon Jan 30, 2017 6:21 pm

Re: Wall design for my Cub build

Postby exminnesotaboy » Wed Oct 24, 2018 7:41 pm

I built our 4’ wide cubby with the 3/4 insulation and it absolutely reduces the condensation. 14 years of camping in down to single digits a few times with 2 people and a small heater and the only condensation is on the aluminum door trim. Always have a window cracked or roof vent open a little.

My walls are:
(Outside)
Aluminum sheet
3/8” plywood
3/4” pink board insulation / 1x2 laid flat as “studs”
1/8” birch plywood
(Inside)

Hope that helps
exminnesotaboy
Gold Donating Member
 
Posts: 355
Images: 3
Joined: Tue Sep 28, 2004 4:23 pm
Location: Maple Grove, MN

Re: Wall design for my Cub build

Postby tony.latham » Wed Oct 24, 2018 8:03 pm

I am really having a hard time deciding what to do as I have been reading that 3/4 insulation doesn't really prevent condensation...


Hunter:

In 2004 I purchased a commercially built teardrop manufactured by Hunter (that's right). The roof was insulated and the walls were 1/2" ply. Even with the windows cracked a couple of inches we would get lots of condensation on the walls in semi-chilly temps. You can see it in the photo over on the left. I'm talking so much water it'd take a bath towel to sop it up in the morning.

In 2013 I built a 5-wide using sandwiched walls ––3/4" ply skeleton with 1/4" sheathing in and out and foam insulation. Virtually no more condensation. Pour an ice-cold gin and tonic in an insulated tumbler and tell me how many dewdrops form on the outside. It's probably got a 1/4" of insulation in the mug.

Shelf supports? Here's my better half brushing poly on a nearly finished wall. You can see green painters tape over the shelf supports made from 3/4" quarter-round. They are glued and screwed into the wall --through the 1/4" sheathing and into the skeleton designed to support these two shelves.

Image


The back of the top shelf will also be supported by strips of quarter round on the upper bulkhead. The shelves will be glued to the supports. That bottom shelf is also the galley countertop so it doesn't get support on the back. (It is supported by the lower bulkhead).

Here's a shot of the countertop/bottom shelf before the upper bulkhead is installed.

Image

And with the upper bulkhead set. The upper shelf can now be set in place. As I said, it'll be glued to the quarter round supports and then screwed to the bulkhead.

Image

:thinking:

You can sheath both sides of a skeleton wall with 1/8" Baltic birch. I prefer 1/4" subfloor ply since it has such a gorgeous grain and doesn't fail if exposed to water.

:beer:

Tony

p.s. A big advantage of building sandwiched walls is that 1" lip on the tops of the walls. Run a bead of poly glue on it, lay the finished ceiling in place and pop it down with 14" crown staples. Easy-peasy.
User avatar
tony.latham
Gold Donating Member
 
Posts: 6899
Images: 17
Joined: Mon Jul 08, 2013 4:03 pm
Location: Middle of Idaho on the edge of nowhere
Top

Re: Wall design for my Cub build

Postby HunterStephens » Wed Oct 24, 2018 9:33 pm

Okay here is what I have come up with for the skele wall. To make it 10ft long I made a huge puzzle joint that will be pulled apart before cutting so the walls will be in 2 pieces. The hatched areas will be foam insulation and I have left the shelves in on the diagram to show how the bracing will work. I think I will do blocking under the shelf boards that are shown. Tell me what you think.

Image
HunterStephens
Teardrop Inspector
 
Posts: 14
Images: 2
Joined: Mon Jan 30, 2017 6:21 pm
Top

Re: Wall design for my Cub build

Postby tony.latham » Wed Oct 24, 2018 10:10 pm

That'll work.

I do a simple 1/8" spline using a router. It's weak until the sheathing is glued on.

Image

Tony
User avatar
tony.latham
Gold Donating Member
 
Posts: 6899
Images: 17
Joined: Mon Jul 08, 2013 4:03 pm
Location: Middle of Idaho on the edge of nowhere
Top

Re: Wall design for my Cub build

Postby HunterStephens » Wed Oct 24, 2018 10:57 pm

Okay I made another version with a spline joint instead of the puzzle joint. When you say spline joint youre talking about cutting a groove in both pieces of plywood and then inserting another piece (spline) between them with glue correct? if so that will be much easier.
Also when you apply the underlayment how do you do it without a nasty seam showing? When I cut that stuff it always splinters out and looks ugly. Or do you find it in a 10ft length?
Image
Thanks so much for your help!
HunterStephens
Teardrop Inspector
 
Posts: 14
Images: 2
Joined: Mon Jan 30, 2017 6:21 pm
Top

Re: Wall design for my Cub build

Postby KTM_Guy » Wed Oct 24, 2018 11:06 pm

That joint is cool but way overkill for what you want to do. I just did a 2" half lap joint. You could just do a couple of bowties too.

Also check out Tony's last picture and you can see where he has a place to mount the fender to the wall. You might want to add that too. I wish I had more than I do for the fenders.

Todd
User avatar
KTM_Guy
500 Club
 
Posts: 571
Images: 193
Joined: Sun Mar 05, 2017 7:50 am
Location: Mesa, AZ near Usery
Top

Re: Wall design for my Cub build

Postby HunterStephens » Wed Oct 24, 2018 11:26 pm

KTM_Guy wrote:That joint is cool but way overkill for what you want to do. I just did a 2" half lap joint. You could just do a couple of bowties too.

Also check out Tony's last picture and you can see where he has a place to mount the fender to the wall. You might want to add that too. I wish I had more than I do for the fenders.

Todd
Wow I totally forgot the fenders in this version. Not sure how I did that! I still need to decide what size wheels and tires im gonna use too. Im using the 2000lb torsion stub axles from Northern Tool. They are branded as Ultra Tow but are made by Dexter. They are 45 deg. down. I will put 5x4.5 hubs that I already have on them so im not entirely sure what wheel and tire combo to get. I was thinking 165r15? Same size as my old VW at that point lol. I may ebd up doing with a lap joint if you think its strong enough. The spline would almost be easier to do and would give me the extra insurance. I like overbuilding ;)

Thanks again,
Hunter

Sent from my LGUS997 using Tapatalk
HunterStephens
Teardrop Inspector
 
Posts: 14
Images: 2
Joined: Mon Jan 30, 2017 6:21 pm
Top

Re: Wall design for my Cub build

Postby tony.latham » Wed Oct 24, 2018 11:48 pm

HunterStephens wrote:Okay I made another version with a spline joint instead of the puzzle joint. When you say spline joint youre talking about cutting a groove in both pieces of plywood and then inserting another piece (spline) between them with glue correct? if so that will be much easier.
Also when you apply the underlayment how do you do it without a nasty seam showing? When I cut that stuff it always splinters out and looks ugly. Or do you find it in a 10ft length?
Image
Thanks so much for your help!


That’s the joint.

If you look at the picture above, the eight foot panel ends in the galley. (“Sheathing Joint”) Since I use the Fredericks galley seal, it gets covered by a piece of 1/2” anyway.

The underlayment ply I use doesn’t splinter. I think it’s a birch.

T


Sent from my iPad using Tapatalk
User avatar
tony.latham
Gold Donating Member
 
Posts: 6899
Images: 17
Joined: Mon Jul 08, 2013 4:03 pm
Location: Middle of Idaho on the edge of nowhere
Top

Re: Wall design for my Cub build

Postby tony.latham » Thu Oct 25, 2018 9:15 am

I think you should move your skeleton seam in front of your door so that both sheathing layers reinforce it.

Thoughts? :thinking:

T
User avatar
tony.latham
Gold Donating Member
 
Posts: 6899
Images: 17
Joined: Mon Jul 08, 2013 4:03 pm
Location: Middle of Idaho on the edge of nowhere
Top

Re: Wall design for my Cub build

Postby HunterStephens » Thu Oct 25, 2018 11:24 am

tony.latham wrote:I think you should move your skeleton seam in front of your door so that both sheathing layers reinforce it.

Thoughts? :thinking:

T

Im not sure what you mean by this. Are you talking about moving the plywood joint to in front of the door?
HunterStephens
Teardrop Inspector
 
Posts: 14
Images: 2
Joined: Mon Jan 30, 2017 6:21 pm
Top

Re: Wall design for my Cub build

Postby tony.latham » Thu Oct 25, 2018 12:28 pm

HunterStephens wrote:
tony.latham wrote:I think you should move your skeleton seam in front of your door so that both sheathing layers reinforce it.

Thoughts? :thinking:

T

Im not sure what you mean by this. Are you talking about moving the plywood joint to in front of the door?


Yes. Both the interior and exterior sheathing should be placed in a position to reinforce this joint (as in a gusset). I assume you don't want to have a butt joint inside the cabin.

Tony
User avatar
tony.latham
Gold Donating Member
 
Posts: 6899
Images: 17
Joined: Mon Jul 08, 2013 4:03 pm
Location: Middle of Idaho on the edge of nowhere
Top

Re: Wall design for my Cub build

Postby HunterStephens » Thu Oct 25, 2018 3:28 pm

tony.latham wrote:
HunterStephens wrote:
tony.latham wrote:I think you should move your skeleton seam in front of your door so that both sheathing layers reinforce it.

Thoughts? :thinking:

T

Im not sure what you mean by this. Are you talking about moving the plywood joint to in front of the door?


Yes. Both the interior and exterior sheathing should be placed in a position to reinforce this joint (as in a gusset). I assume you don't want to have a butt joint inside the cabin.

Tony

Doing that would be weaker wouldnt it? 24" from the front comes up 3" away from the door opening which seems like its not enough meat to put the hinge on. If I went to say 36" thats right in the middle of the door.
Tell me what you think.
Thanks,
Hunter
HunterStephens
Teardrop Inspector
 
Posts: 14
Images: 2
Joined: Mon Jan 30, 2017 6:21 pm
Top

Re: Wall design for my Cub build

Postby tony.latham » Thu Oct 25, 2018 5:57 pm

Doing that would be weaker wouldnt it? 24" from the front comes up 3" away from the door opening which seems like its not enough meat to put the hinge on.


Then add some meat to the skeleton where your hinges are going. That's part of the beauty of using plywood instead of 1x4s.

Take another look at this photo. This is where I put the joint in my last teardrop. After the skins were glued on these walls were stiffer than a frozen fish.

Image

:thinking:

Tony
User avatar
tony.latham
Gold Donating Member
 
Posts: 6899
Images: 17
Joined: Mon Jul 08, 2013 4:03 pm
Location: Middle of Idaho on the edge of nowhere
Top

Re: Wall design for my Cub build

Postby HunterStephens » Thu Oct 25, 2018 10:00 pm

tony.latham wrote:
Doing that would be weaker wouldnt it? 24" from the front comes up 3" away from the door opening which seems like its not enough meat to put the hinge on.


Then add some meat to the skeleton where your hinges are going. That's part of the beauty of using plywood instead of 1x4s.

Take another look at this photo. This is where I put the joint in my last teardrop. After the skins were glued on these walls were stiffer than a frozen fish.

Image

:thinking:

Tony

Updated design! 8" of meat before the door once its bonded now.

Image
HunterStephens
Teardrop Inspector
 
Posts: 14
Images: 2
Joined: Mon Jan 30, 2017 6:21 pm
Top

Next

Return to General Discussion

Who is online

Users browsing this forum: No registered users and 20 guests