Portable Belt Sander 101
Portable Belt Sander 101
Is the belt sander a noisy, dusty, expensive, heavy, dangerous, and probable ruiner of fine woodworking projects? NO! This is a wonderful time-saving power tool and when understood and operated correctly, can make difficult sanding problems a thing of the past.
First we must be familiar with the simple mechanics that make the sander do what it does best......Sand. There are only 2 moving parts that one has to be concerned about, the rear drive roller, the front idle roller. Between these, is the stationary bottom skid plate. Tracking of the belt is accomplished by turning the tracking knob, located close to the front idle roller. With the sander on and held away from material, turning the knob will noticeably move the belt from side to side. The ideal position of the belt would be to make it flush with the left side of the skid plate. The sander can be damaged if the sanding belt is allowed to track off to the right side for any length of time where it can destroy the metal rub strip and ultimately the sander.
Prior to actual sanding, some precautions should be mentioned. Loose clothing or unbuttoned sleeves are a no-no. The dust bag should be emptied, and the location of the power cord should be monitored during sanding, since running over the cord usually ends up with it being wedged between the rubber drive roller and the sanding frame. Been there, done that. Next, most sanding belts have a rotation arrow printed inside, but some lack this feature and seem to work just fine regardless of how they are installed. The belt travels counterclockwise and can be easilly be inserted by releasing the tension lever, which moves the front roller and loosens it enough to slip the belt into place, then snaps tight to secure it. Check tracking after all belt changes, especially if sparks are occur due to improper movement against the rub strip.
Now we must decide what grit of belt to use. I like to have a good supply of new belts on hand, ranging from course (50 to 80) to fine (100 and up). Aggresive removal requires course belts, and here is where the trouble usually starts. New belts cut fast, yet the same grit that's well worn, removes less wood, is easier to control and after initial sanding, I often change to a less abrasive one.
A few words about the placement of a loose work piece prior to beginning. The stock to be sanded must be made immovable to prevent it from flying off the workbench. When I sand the surface of a flat board, I install a stop-block at the end that is a bit lower than the work piece. The sander wants to push the board backward, and the stop-block prevents movement. When sanding the edge, I mark it with cross-wise pencil marks and secure it in a bench vice or any other suitable clamping device. The trigger lock on sanders, in my opinion, should never be used. My trigger-finger is never too tired to squeeze it, and I don't want it racing off the work table when I plug it in. However if you are having a "sander race" with your neighbor and his sander, the trick is to lock both triggers and plug them both into a switched outlet, flip the switch and let the race beguin! Hmmm just like we did in high school wood shop.
Now comes the fun part, sanding the wood. If needed, I prepare the surface with the tell-tale pencil marks to determine where wood is being removed. I usually start the sander in mid air, letting it float onto the wood with just a little pressure, often not allowing the full weight of the machine on the belt right away. Using long, flowing strokes, monitor the gradual removal of the fading pencil marks. With a little practice, putting an ever-so-slight pressure on either the left or right side of the sander, the entire surface can be sanded uniformlyand all marks removed. The lengthy strokes should terminate with 1/2 of the sander extending over the end of the work piece, being careful not to 'nose-dive' it at either end of the stroke. This can be followed up with a finer grit belt, using the same proceedure. If extreme amounts have to be removed, more downward pressure or sanding crosswise to the grain will result in greater material removal then followed by with-the-grain strokes to do away with objectional cross-sander marks.
Don't fall in love with the belt that is in the sander, change belts accordingly to obtain the required finish. However, I usually keep a supply of "worn" belts to use when I want to remove paint. When sanding off old paint, I don't use long strokes but start at the front end of board, slowly sanding backward, allowing the rear roller to attack the painted area first. This allows it to remove and lift the gummy paint and pitch it behind the sander and reduces the clogging of the belt. I generally slide the sander from side to side and continue down the length of the board while removing paint. Of course when the paint is gone, normal steps listed above can be followed, and Bingo, you have a new board.
Now, the size of the sander itself. During my production work I used large, heavy, 4" wide beltsanders requiring both hands to operate. They can run longer without heating up and are more powerful and aggressive. After scaling back to my do-it-yourselfer projects, like my Woody Teardrop, I have found that the lighter the sander the better. Also, 4 x 24 belts are more expensive than the 3 x 18 size that I use now. Sometimes, I must hold the sander in one hand, and the big ones are just too heavy.
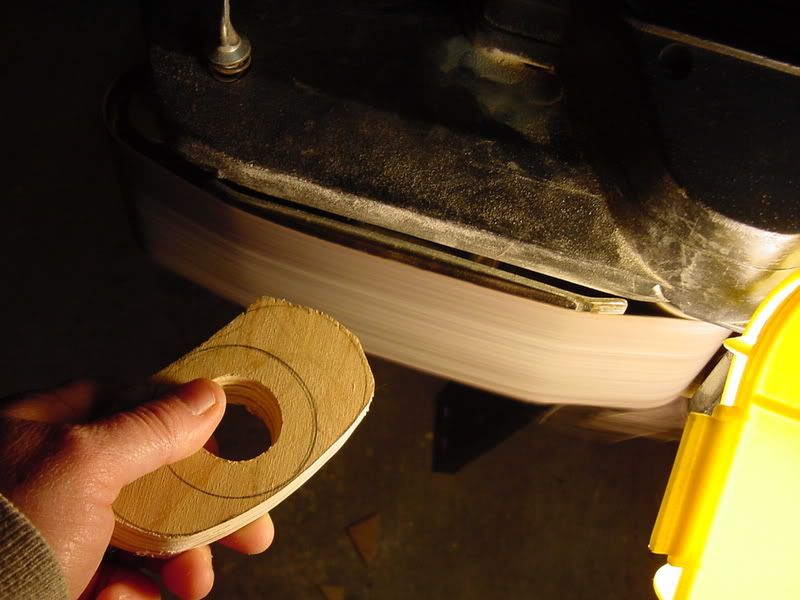
I have found that some foreign sanding belts are a smidge too big and they will slip if the front roller isn't tight enough against it. There are 2 methods I have used to solve this problem. One is to wrap the front idle roller with a few layers of duct tape and the other is to add a 1/4" secondary wood skid plate, and both methods work fine. Also, when sanding the inside of curved ribs, as in galley hatch, I cut a matching curved skid plate which allows sanding this curved surface easilly with no flat spots. Ocasionally I sand with just the front roller on a very tight inside radius curve, but this can be distructive if not done carefully.
When sanding intersecting wood members, as on the face frames of cabinets, I sand the intermediate members first, using the pencil mark trick, then finish off the longer, outside members, carfully watching the edge of the belt so it doesn't cross onto the adjoining cross-grain member. This move takes a tender touch, but that is what belt sanding is all about. It's quite a bit different than sanding down a big, gnarley 4 x 12 timber that will get stained in the ceiling of the great room.
In cabinetry, I have edge-banded walnut, birch, oak and ash plywood panels, with solid wood members that match the veneer of the plywood. I cut the solid edge members slightly wider than the plywood and when glued to end grain of the plywood, I sand it down to the flush surface of the plywood. To do this, the old pencil trick is involved again, and of course a very fine grit of sanding belt. One mistake in this process, and it becomes firewood. Often the edges of raw plywood must be sanded, such as cabinet doors or shelves. To accomplish this, I place the plywood flat on a low work bench, kneel on it, place the sander on it's side, start it in mid air then slowly engage the belt surface, in long, even strokes. Progress is checked with a square and more or less pressure is exerted as needed.
I am sure many accomplished belt sander users have even more tips to that could help us all become more proficient with these multi-use portable machines. If so, share them with us and if you take exception to any of my pointers, be sure to let me know as well. It is advisable to wear a dust mask and of course it would be nice to have an adequate dust removal system, but I have a covered, outside sanding area and the wind blows the dust into the neighbors yard....... :-)
Roly, just my 2 cents, and I hope this sheds a little light on successful beltsanding for everyone.
Is the belt sander a noisy, dusty, expensive, heavy, dangerous, and probable ruiner of fine woodworking projects? NO! This is a wonderful time-saving power tool and when understood and operated correctly, can make difficult sanding problems a thing of the past.
First we must be familiar with the simple mechanics that make the sander do what it does best......Sand. There are only 2 moving parts that one has to be concerned about, the rear drive roller, the front idle roller. Between these, is the stationary bottom skid plate. Tracking of the belt is accomplished by turning the tracking knob, located close to the front idle roller. With the sander on and held away from material, turning the knob will noticeably move the belt from side to side. The ideal position of the belt would be to make it flush with the left side of the skid plate. The sander can be damaged if the sanding belt is allowed to track off to the right side for any length of time where it can destroy the metal rub strip and ultimately the sander.
Prior to actual sanding, some precautions should be mentioned. Loose clothing or unbuttoned sleeves are a no-no. The dust bag should be emptied, and the location of the power cord should be monitored during sanding, since running over the cord usually ends up with it being wedged between the rubber drive roller and the sanding frame. Been there, done that. Next, most sanding belts have a rotation arrow printed inside, but some lack this feature and seem to work just fine regardless of how they are installed. The belt travels counterclockwise and can be easilly be inserted by releasing the tension lever, which moves the front roller and loosens it enough to slip the belt into place, then snaps tight to secure it. Check tracking after all belt changes, especially if sparks are occur due to improper movement against the rub strip.
Now we must decide what grit of belt to use. I like to have a good supply of new belts on hand, ranging from course (50 to 80) to fine (100 and up). Aggresive removal requires course belts, and here is where the trouble usually starts. New belts cut fast, yet the same grit that's well worn, removes less wood, is easier to control and after initial sanding, I often change to a less abrasive one.
A few words about the placement of a loose work piece prior to beginning. The stock to be sanded must be made immovable to prevent it from flying off the workbench. When I sand the surface of a flat board, I install a stop-block at the end that is a bit lower than the work piece. The sander wants to push the board backward, and the stop-block prevents movement. When sanding the edge, I mark it with cross-wise pencil marks and secure it in a bench vice or any other suitable clamping device. The trigger lock on sanders, in my opinion, should never be used. My trigger-finger is never too tired to squeeze it, and I don't want it racing off the work table when I plug it in. However if you are having a "sander race" with your neighbor and his sander, the trick is to lock both triggers and plug them both into a switched outlet, flip the switch and let the race beguin! Hmmm just like we did in high school wood shop.
Now comes the fun part, sanding the wood. If needed, I prepare the surface with the tell-tale pencil marks to determine where wood is being removed. I usually start the sander in mid air, letting it float onto the wood with just a little pressure, often not allowing the full weight of the machine on the belt right away. Using long, flowing strokes, monitor the gradual removal of the fading pencil marks. With a little practice, putting an ever-so-slight pressure on either the left or right side of the sander, the entire surface can be sanded uniformlyand all marks removed. The lengthy strokes should terminate with 1/2 of the sander extending over the end of the work piece, being careful not to 'nose-dive' it at either end of the stroke. This can be followed up with a finer grit belt, using the same proceedure. If extreme amounts have to be removed, more downward pressure or sanding crosswise to the grain will result in greater material removal then followed by with-the-grain strokes to do away with objectional cross-sander marks.
Don't fall in love with the belt that is in the sander, change belts accordingly to obtain the required finish. However, I usually keep a supply of "worn" belts to use when I want to remove paint. When sanding off old paint, I don't use long strokes but start at the front end of board, slowly sanding backward, allowing the rear roller to attack the painted area first. This allows it to remove and lift the gummy paint and pitch it behind the sander and reduces the clogging of the belt. I generally slide the sander from side to side and continue down the length of the board while removing paint. Of course when the paint is gone, normal steps listed above can be followed, and Bingo, you have a new board.
Now, the size of the sander itself. During my production work I used large, heavy, 4" wide beltsanders requiring both hands to operate. They can run longer without heating up and are more powerful and aggressive. After scaling back to my do-it-yourselfer projects, like my Woody Teardrop, I have found that the lighter the sander the better. Also, 4 x 24 belts are more expensive than the 3 x 18 size that I use now. Sometimes, I must hold the sander in one hand, and the big ones are just too heavy.
I have found that some foreign sanding belts are a smidge too big and they will slip if the front roller isn't tight enough against it. There are 2 methods I have used to solve this problem. One is to wrap the front idle roller with a few layers of duct tape and the other is to add a 1/4" secondary wood skid plate, and both methods work fine. Also, when sanding the inside of curved ribs, as in galley hatch, I cut a matching curved skid plate which allows sanding this curved surface easilly with no flat spots. Ocasionally I sand with just the front roller on a very tight inside radius curve, but this can be distructive if not done carefully.
When sanding intersecting wood members, as on the face frames of cabinets, I sand the intermediate members first, using the pencil mark trick, then finish off the longer, outside members, carfully watching the edge of the belt so it doesn't cross onto the adjoining cross-grain member. This move takes a tender touch, but that is what belt sanding is all about. It's quite a bit different than sanding down a big, gnarley 4 x 12 timber that will get stained in the ceiling of the great room.
In cabinetry, I have edge-banded walnut, birch, oak and ash plywood panels, with solid wood members that match the veneer of the plywood. I cut the solid edge members slightly wider than the plywood and when glued to end grain of the plywood, I sand it down to the flush surface of the plywood. To do this, the old pencil trick is involved again, and of course a very fine grit of sanding belt. One mistake in this process, and it becomes firewood. Often the edges of raw plywood must be sanded, such as cabinet doors or shelves. To accomplish this, I place the plywood flat on a low work bench, kneel on it, place the sander on it's side, start it in mid air then slowly engage the belt surface, in long, even strokes. Progress is checked with a square and more or less pressure is exerted as needed.
I am sure many accomplished belt sander users have even more tips to that could help us all become more proficient with these multi-use portable machines. If so, share them with us and if you take exception to any of my pointers, be sure to let me know as well. It is advisable to wear a dust mask and of course it would be nice to have an adequate dust removal system, but I have a covered, outside sanding area and the wind blows the dust into the neighbors yard....... :-)
Roly, just my 2 cents, and I hope this sheds a little light on successful beltsanding for everyone.


 You wouldn't happen to have a picture of this?


 Got any ideas on making a planner out of the belt sander? I can not find 1/4" thick boards for the top trim...still...
