
Very nice vehicles!
Is that a House of Kolor candy red?
Teardrops n Tiny Travel Trailersor t n ttt for short (tnttt.com) |
My New Build
Re: My New Build
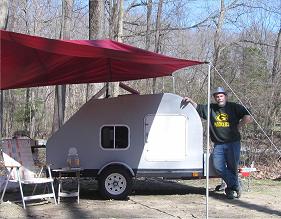
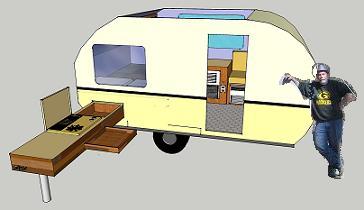
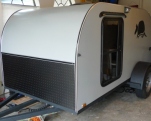
![]() by parnold » Tue Apr 10, 2012 7:38 am
by parnold » Tue Apr 10, 2012 7:38 am
-- Paul --
Build Thread
http://www.tnttt.com/viewtopic.php?t=35787
2nd Build Thread
http://www.tnttt.com/viewtopic.php?f=50&t=47901
 http://www.teartime.com
Build Thread
http://www.tnttt.com/viewtopic.php?t=35787
2nd Build Thread
http://www.tnttt.com/viewtopic.php?f=50&t=47901
-

parnold - Donating Member
- Posts: 2344
- Images: 302
- Joined: Mon Feb 08, 2010 4:49 pm
- Location: Northwest New Jersey
Re: My New Build
![]() by Rhino Ray » Tue Apr 10, 2012 12:01 pm
by Rhino Ray » Tue Apr 10, 2012 12:01 pm
Yes, you know your paint!
The eleventh commandment: Ye that snoozeth loozeth. Selling real estate in ALL of Jefferson State (Northern California and Southern Oregon)
My Build http://www.tnttt.com/viewtopic.php?f=21&t=49746
My Build http://www.tnttt.com/viewtopic.php?f=21&t=49746
-

Rhino Ray - Silver Donating Member
- Posts: 363
- Images: 60
- Joined: Sun Aug 28, 2011 6:02 pm
- Location: Roseburg, OR


 Sometimes I surprise myself.
  Looks good from the back, I will install the wiring latch and insulation before I put on the inner skin.


 ...!
...!