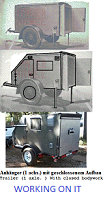
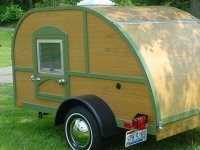
heavy hatch door has worn me down!

Anything to do with mechanical, construction etc

Re: heavy hatch door has worn me down!

Postby working on it » Wed Oct 29, 2014 10:45 pm

Received the parts today. The brackets are strong enough for the job, but I will still need to spread the loads. Just to see if I could do it, I tried pushing down on one gas spring, to see if I could even compress it at all. Not. If my weight will not do it, then perhaps just one will suffice for the hatch, in the center spot I created for the linear actuator. If that works, then I have spare parts! I'll make my first stab at mounting it Sat. a.m (I leave for work at 5, get home after 9; no time or energy left at the end of day, so I live for the weekends now). Stay tuned!
2013 HHRv "squareback/squaredrop", rugged, 4x8 TTT, 2225 lbs
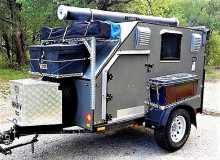
  • *3500 lb Dexter EZ-Lube braked axle, 3000 lb.springs, active-progressive bumpstop suspension
  • *27 x 8.5-14LT AT tires (x 3) *Weight Distribution system for single-beam tongue
  • *100% LED's & GFCI outlets, 3x fans, AM/FM/CD/Aux. *A/C & heat, Optima AGM, inverter & charger(s)
  • *extended-run, on-board, 2500w generator *Coleman dual-fuel stove & lantern, Ikea grill, vintage skillet
  • *zinc/stainless front & side racks *98"L x 6" diameter rod & reel carrier tube on roof
173193172890148599
User avatar
working on it
2000 Club
2000 Club
 
Posts: 2176
Images: 457
Joined: Tue Oct 04, 2011 9:05 pm
Location: DFW Texas

Re: heavy hatch door has worn me down!

Postby danlott » Wed Oct 29, 2014 11:24 pm

I am a little late to the conversation, but I did develop a spreadsheet and drawing to help determine proper gas strut/spring locations and force requirements.

Here is the link to the topic. http://www.tnttt.com/viewtopic.php?f=21&t=58263

It may be a little late to help since you have already purchased parts, but it may help anyone else reading this topic.

Dan
Hoplite Traveler Build thread
Image Image
Life is what happens to you while you're busy making other plans.
User avatar
danlott
Donating Member
 
Posts: 874
Images: 264
Joined: Fri Mar 06, 2009 2:18 pm
Location: Winnemucca, Nevada

Re: heavy hatch door has worn me down!

Postby working on it » Thu Oct 30, 2014 10:47 pm

I saw your calculator, & I calculated the force at a couple of locations, but I can't recall the results. My laptop with all my databases is powerless (power cord problem), and dead, so I can't access any figures. I think it showed around 125 lbs.
2013 HHRv "squareback/squaredrop", rugged, 4x8 TTT, 2225 lbs
  • *3500 lb Dexter EZ-Lube braked axle, 3000 lb.springs, active-progressive bumpstop suspension
  • *27 x 8.5-14LT AT tires (x 3) *Weight Distribution system for single-beam tongue
  • *100% LED's & GFCI outlets, 3x fans, AM/FM/CD/Aux. *A/C & heat, Optima AGM, inverter & charger(s)
  • *extended-run, on-board, 2500w generator *Coleman dual-fuel stove & lantern, Ikea grill, vintage skillet
  • *zinc/stainless front & side racks *98"L x 6" diameter rod & reel carrier tube on roof
173193172890148599
User avatar
working on it
2000 Club
2000 Club
 
Posts: 2176
Images: 457
Joined: Tue Oct 04, 2011 9:05 pm
Location: DFW Texas
Top

Re: heavy hatch door has worn me down! fixed!

Postby working on it » Sat Nov 01, 2014 9:07 pm

working on it wrote:I saw your calculator, & I calculated the force at a couple of locations, but I can't recall the results. My laptop with all my databases is powerless (power cord problem), and dead, so I can't access any figures. I think it showed around 125 lbs.
  • Computer back online! Project completed! It works!! I went with Plan 2b (Plan 1 was an electric linear actuator, Plan 2 was a single gas spring mounted off-center on the galley shelf, and Plan 3 was dual gas springs mounted next to the hatch prop rod mounts). I was not exactly sure of my first set of measurements, nor of how the gas springs actually would react to the extreme angle I was seeking to raise the hatch to, so though the calculators said that 120-130 lbs would work (it varied from one calculator to another, and since all calculated in metrics, I could've made more than one error), I went BIG and ordered two 150 lb rated springs. If I found that more force was needed for Plan 2 (single), then surely the two springs could be made to work in the outboard (Plan 3) position. If I guessed correctly, that 150 lbs was enough, if not slightly too much force for the off-center mount, then all was OK.
  • When I re-measured this morning, with "not-state-of-the-art" equipment, I noted them to report here, and proceeded (with great trepidation) to drill the mounting holes in the hatch (I had already mounted the shelf bracket, in the optimal position, as the only spot Plan 2 would work at!). After raising the hatch up to the stars (it seemed), I finally snapped the spring onto its mounts, and slowly started to close it. It closed with moderate hand force, as expected, until it was about 30% open. Wouldn't close any further. I figured that was due to using the curved bracket, that bent from the force of the spring (I thought the curved bracket would enable me to gain more lift/angle, but it wasn't to be).Then I used the standard ball mount, in the same spot I had tried to use the curved; better, but only closing to 15% open.
  • Did a frantic re-calculation (wow, did I screw this one up?) with my smartphone calculator, thinking that I needed to move the hatch bracket to my originally calculated spot, but using my latest set of measurements. I calculated 7.625 inches from the hinge. Angrily, fearfully, drilled the second set of holes (dadgum it!), and barely missing disabling my high-mounted tail light system, I bolted on the standard -heavy duty- bracket. Snapped the gas spring in place again, and voila!, success.
  • finalized galley with hatch lift assist.jpg
    finalized galley with hatch lift assist.jpg (30.29 KiB) Viewed 570 times
    finalized extension angle usage.jpg
    finalized extension angle usage.jpg (59.23 KiB) Viewed 570 times
    GAS SPRING SCHEMATIC ANALYSIS.png
    GAS SPRING SCHEMATIC ANALYSIS.png (44.22 KiB) Viewed 570 times
  • It works just like I wished, as an assist for lifting the heavy hatch high overhead (it is actually self-opening, up to 90 degrees, and floats there), holding it there while I attached the hatch prop rods, and lock them in place. I can easily install the extension for more angle (from 105 degrees to 110 degrees), if needed. The prop rods lock in place, to prevent wind from raising or lowering the hatch (no blow-over). Remove and stow the rods, use light hand pressure to close, and done. Hope my figures and experience will help someone else, especially a "vertical hatch trailer" builder, to install a gas spring assist on their trailer.
Last edited by working on it on Sun Aug 12, 2018 11:32 am, edited 2 times in total.
2013 HHRv "squareback/squaredrop", rugged, 4x8 TTT, 2225 lbs
  • *3500 lb Dexter EZ-Lube braked axle, 3000 lb.springs, active-progressive bumpstop suspension
  • *27 x 8.5-14LT AT tires (x 3) *Weight Distribution system for single-beam tongue
  • *100% LED's & GFCI outlets, 3x fans, AM/FM/CD/Aux. *A/C & heat, Optima AGM, inverter & charger(s)
  • *extended-run, on-board, 2500w generator *Coleman dual-fuel stove & lantern, Ikea grill, vintage skillet
  • *zinc/stainless front & side racks *98"L x 6" diameter rod & reel carrier tube on roof
173193172890148599
User avatar
working on it
2000 Club
2000 Club
 
Posts: 2176
Images: 457
Joined: Tue Oct 04, 2011 9:05 pm
Location: DFW Texas
Top

Great!

Postby noseoil » Sat Nov 01, 2014 9:48 pm

I've been wondering how this one went. Glad it ended up being a good solution. Sounds like you figured it out well enough & things are better now. Congratulations! Must make that hatch seem a bit more manageable. tim
Build log: viewtopic.php?f=50&t=60248
The time you spend planning is more important than the time you spend building.........

137905
User avatar
noseoil
1000 Club
1000 Club
 
Posts: 1820
Images: 669
Joined: Sun Apr 27, 2014 8:46 am
Location: Raton, New Mexico, living the good life!
Top

Re: Great!

Postby working on it » Sun Nov 02, 2014 9:00 pm

noseoil wrote:I've been wondering how this one went. Glad it ended up being a good solution. Sounds like you figured it out well enough & things are better now. Congratulations! Must make that hatch seem a bit more manageable. tim
  • I went to the garage this morning, temperature in the 40's, expecting to see a little cold-induced sag in the hatch (I injected PL adhesive into the holes I had drilled wrongly, as a patch, and had set the hatch at 90 degrees with tape underneath to catch drips). I placed a weight under it, by hanging an electric lantern from the inside hatch handle, to achieve the 90 degree set. I realized late last night that the morning cold might affect the gas spring, and it might contract and drop the lantern...but no change in height occurred overnight. I presume that the fresh spring is in much better shape than my sagging springs on my HHR hatch. I exercised the mechanism about 10 times, enjoying the ease of operation, at long last. Good deal!
  • I was explaining to my wife how I arrived at the placement of the brackets, and how I used a graph to find the optimal equilibrium point, where the hatch self-opens to 90 degrees and floats there, while the prop rods are leisurely assembled and locked-in-place. After I bored her thoroughly, I decided to make a visual aid, and now I can bore you guys, too.
    12.png
    preliminary rough graph, not linear scaled
    12.png (2.74 KiB) Viewed 556 times
    dimensional weight analysis graph- gas spring.gif
    prettied up graph
    dimensional weight analysis graph- gas spring.gif (77.08 KiB) Viewed 556 times
  • As I was installing the gas spring, I started out just going by my memory, as I had left my detailed graphs/print-outs/plans for world domination on my desk at work, 60 miles away. Not to be delayed in my few hours of freedom per week, I endeavored to install the spring & brackets relying on previously marked points, but not quite sure which ones correlated to which device (spring or actuator) or Plan 1,2, or 3 (with derivatives). After the first and second hatch bracket spots failed, I used the calculator and somehow plotted a graph on a scrap of wood, and was greatly surprised that my impromptu geometry actually worked. Every dog has his day.
2013 HHRv "squareback/squaredrop", rugged, 4x8 TTT, 2225 lbs
  • *3500 lb Dexter EZ-Lube braked axle, 3000 lb.springs, active-progressive bumpstop suspension
  • *27 x 8.5-14LT AT tires (x 3) *Weight Distribution system for single-beam tongue
  • *100% LED's & GFCI outlets, 3x fans, AM/FM/CD/Aux. *A/C & heat, Optima AGM, inverter & charger(s)
  • *extended-run, on-board, 2500w generator *Coleman dual-fuel stove & lantern, Ikea grill, vintage skillet
  • *zinc/stainless front & side racks *98"L x 6" diameter rod & reel carrier tube on roof
173193172890148599
User avatar
working on it
2000 Club
2000 Club
 
Posts: 2176
Images: 457
Joined: Tue Oct 04, 2011 9:05 pm
Location: DFW Texas
Top

Previous

Return to Teardrop Construction Tips & Techniques

Who is online

Users browsing this forum: No registered users and 32 guests

cron