SawTooth XL - Update 6.27.11 - Repairs started

Did you just design your very own teardrop or tiny trailer? Want to discuss it? Here's the place to post your design for discussion!

Postby stomperxj » Fri Mar 13, 2009 2:54 pm

S. Heisley wrote:Hi, stomperxj:

Your build really shows your knowledge and skills. You're doing a beautiful job! :thumbsup: If only we all were as capable as you!

As I was looking at your battery box and the underside of the deck, I noticed that the trailer appears to not have a water shield to protect all your hard work. Obviously, you are building this extra tough so it can handle rugged terrain and you will probably be fording some streams and occasionally will be in rain and/or snow; so, you probably have a plan that just isn't evident yet. (Please forgive me if I missed something in the 8 pages of build pictures and notations.)

What is your plan for the subflooring water shield? Are you going to lift the body above the metal chassis so you can get at the underside of all the deck plywood? Are you going to apply roof emulsion or you do you plan to use the Kilz listed in your spreadsheet or.....?

OOPS! :oops: Scratch the above. I went back and found the picture where you coated the floor; but, I don't understand why that black coating doesn't show in the pictures of the underside of the installed battery box. Isn't that built into the deck floor?


Hey Sharon - Good questions and thanks for the compliments. Hard to believe this is my first real wood working project. I'm just taking my time and I designed it around the tools I have available to me. I want it to be bullet proof too :)

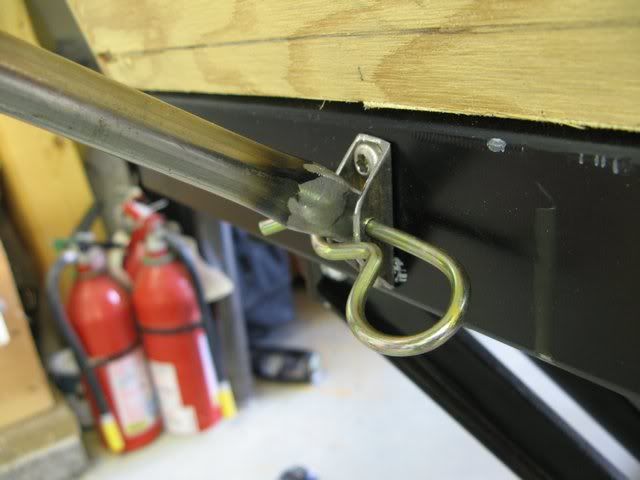
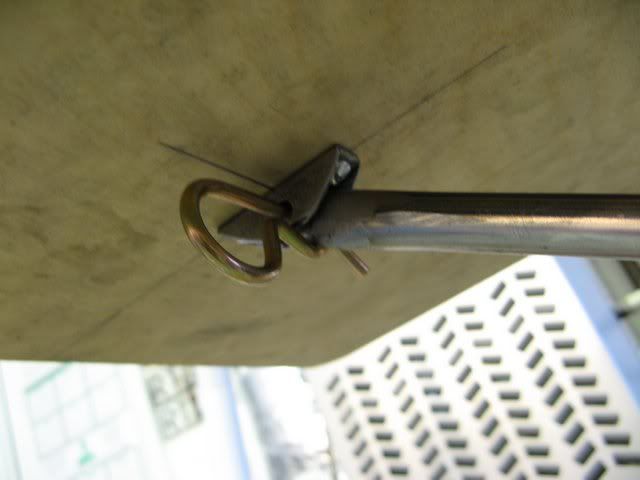
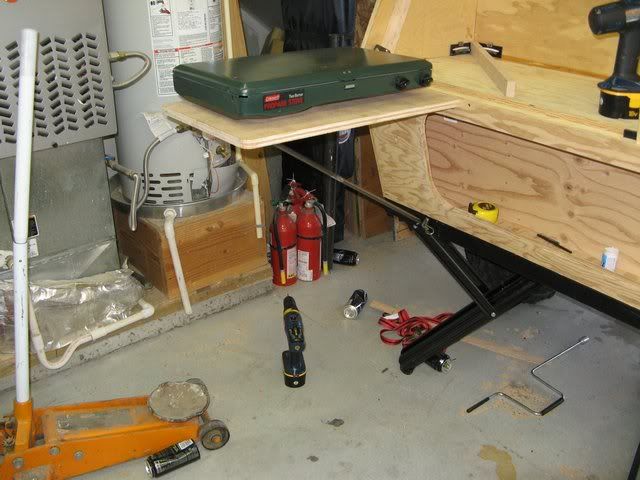
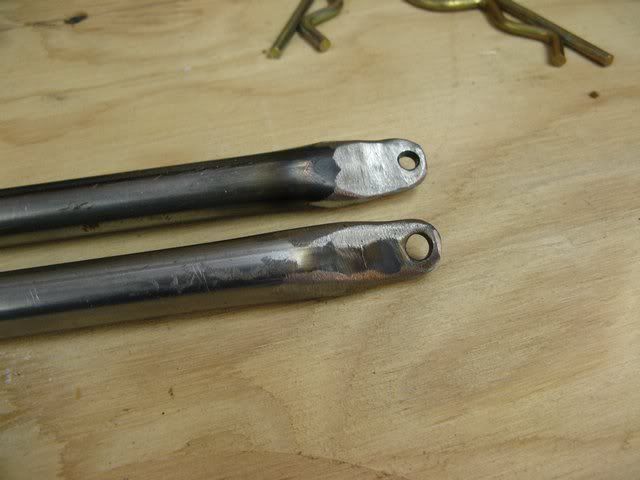
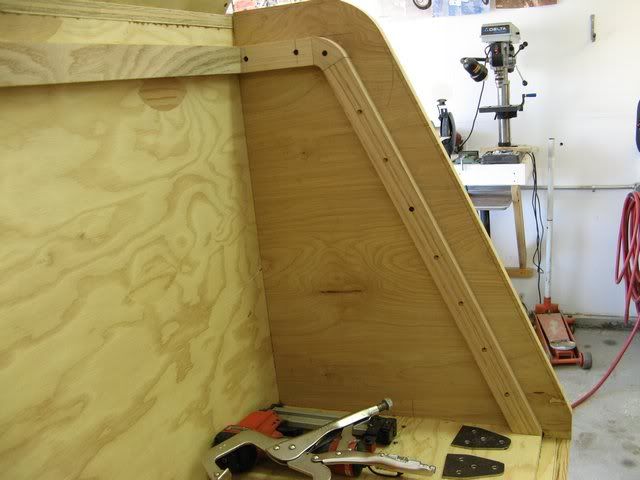
I did coat the underside of the subfloor with some Duplicolor bedliner at one point. Then I decided that 1/2" CDX was about the crappiest wood ever made so I pitched that subfloor and rebuilt a new subfloor out of 3/4" ACX. My plan is to lift the body off of the frame and coat the whole exterior and underside with CPES and then Kilz the whole underside too. Hopefully that will keep the water at bay. I lifted the body off of the frame one end at a time the other day to trim the bottom edges and repaint part of the frame. It is lighter than I thought it was going to be. I can pick up half the body by myself...

All I need now is money :)
User avatar
stomperxj
The 300 Club
 
Posts: 395
Images: 1
Joined: Tue Jul 29, 2008 12:25 am
Location: Kuna ID

hmmmmmmmm

Postby Jeeper92 » Fri Mar 13, 2009 4:30 pm

price?????
Jeeper92
500 Club
 
Posts: 529
Joined: Thu May 17, 2007 8:03 pm

Re: hmmmmmmmm

Postby stomperxj » Fri Mar 13, 2009 5:25 pm

Jeeper92 wrote:price?????


I'll break it down for you:

$2000 - Materials
$3000 - Labor, 300 hrs @ $10/hr (by the time its done)
$5000 - Sentimental value

$10,000 total

I don't take checks ;)

I seriously don't think I'll sell it for a long time, if ever. Too much time, thought, energy, splinters, blood and sweat involved to turn around and just sell it...
User avatar
stomperxj
The 300 Club
 
Posts: 395
Images: 1
Joined: Tue Jul 29, 2008 12:25 am
Location: Kuna ID
Top

Postby stomperxj » Fri Mar 13, 2009 8:42 pm

Another semi warm day today. I got some work done on the hatch area.

Drilled for the t-nuts and used 1/4-20 stainless button heads. I also got the seal surface temporarily screwed down too.

Image
Image
Image
Image
Image
Image

More soon hopefully...
User avatar
stomperxj
The 300 Club
 
Posts: 395
Images: 1
Joined: Tue Jul 29, 2008 12:25 am
Location: Kuna ID
Top

Postby Endo » Sun Mar 15, 2009 8:21 am

Looks great!
I have been following your progress on the exedition site.
I am getting hooked on that site, I need to sign up.
A lot of good "off-road trailer" ideas on that site.
Brad (aka Endo)
ImageImage Image
In God We Trust
User avatar
Endo
500 Club
 
Posts: 721
Images: 138
Joined: Fri Apr 01, 2005 9:59 am
Location: Ohio
Top

Postby Dewi » Fri Mar 20, 2009 2:58 pm

For starters, fantastic looking and a great build... really learned a lot just by watching your progress so far.

Could I ask though, the battery box, what is supporting it? Is there anything underneath it, or have you glued and screwed it to the under side of the floor?

Cheers, Dewi
User avatar
Dewi
Teardrop Master
 
Posts: 229
Images: 3
Joined: Mon Mar 09, 2009 3:35 pm
Location: Warrington, UK
Top

Postby stomperxj » Fri Mar 20, 2009 5:25 pm

Dewi wrote:For starters, fantastic looking and a great build... really learned a lot just by watching your progress so far.

Could I ask though, the battery box, what is supporting it? Is there anything underneath it, or have you glued and screwed it to the under side of the floor?

Cheers, Dewi


Thanks for the compliments Dewi-

The battery box is going to be held on with 38 wood screws and Titebond III glue. Nothing underneath. I should be able to stand in it no problem...
User avatar
stomperxj
The 300 Club
 
Posts: 395
Images: 1
Joined: Tue Jul 29, 2008 12:25 am
Location: Kuna ID
Top

Postby Dewi » Fri Mar 20, 2009 5:36 pm

You've just helped me again! I can buy Titebond III here in the UK and its cheap as chips!! :D Thank you!

Fascinated by the way you've constructed the walls and generally how it all sews together... realise it must be an expensive build, but can't wait to see it all complete.

Was speaking to someone today about your build, she owns her own woodlands and wants something that will go over the dirt track up to her chosen campsite... so no doubt she is following your build as well now!

Cheers, Dewi
User avatar
Dewi
Teardrop Master
 
Posts: 229
Images: 3
Joined: Mon Mar 09, 2009 3:35 pm
Location: Warrington, UK
Top

Postby timorjc » Sat Mar 21, 2009 7:22 pm

Awesome build man. One of the most interesting and coolest I've seen. I love the "off-road" design.

Do you plan to add any type of skid plate to the battery box?

Tim
timorjc
Teardrop Inspector
 
Posts: 5
Joined: Sat Feb 14, 2009 9:48 pm
Location: Coastal North Carolina
Top

Postby stomperxj » Sat Mar 21, 2009 10:10 pm

timorjc wrote:Awesome build man. One of the most interesting and coolest I've seen. I love the "off-road" design.

Do you plan to add any type of skid plate to the battery box?

Tim


Thanks Tim - no plans for a skid plate. The bottom of the battery box sits above the height of the axle so if i hit it on something I shouldn't have been there in the first place. :)


A few small updates. I added the angled part of the seal surface above the main header. I got the hinge drilled on the body side. 30 #10 screws should hold it. I also got my side table mounting brackets done. I used footman loops on the body side and i made the table brackets. Also got the hatch latch side plates done.

Image
Image
Image
Image
Image
Image
Image
Image

More later

Jess
User avatar
stomperxj
The 300 Club
 
Posts: 395
Images: 1
Joined: Tue Jul 29, 2008 12:25 am
Location: Kuna ID
Top

Postby stomperxj » Mon Mar 30, 2009 8:08 pm

Got some more done the last week or so. Finished the hatch latch mechanism, hinges on the rear cargo door and the side table leg. I machined some aluminum cable blocks from some 1" round stock. They are threaded for 3/8-16 on one end and have an 8-32 set screw on either side for the cable. I used McMaster Carr weld in pull pins for the latches located HERE I welded on some flanges and used some #10 screws to hold them on.

Here's a short video of the latch in action:
VIDEO

Image
Image
Image
Image
Image
Image
Image
Image
Image
Image

More soon hopefully. The weather is starting to look up and I have been getting a little more work lately. I'm hoping to be done by the end of May if everything goes well...

Thanks for looking and thanks for all the great feedback and comments...

:thumbsup:
User avatar
stomperxj
The 300 Club
 
Posts: 395
Images: 1
Joined: Tue Jul 29, 2008 12:25 am
Location: Kuna ID
Top

Postby S. Heisley » Mon Mar 30, 2009 11:50 pm

Hi, Stomperxj:

I just noticed you wrote that you're going to use CPES on the underside later on.... Ummmm CPES is very runny and will drip a lot. Also, to get a waterproof seal, you need to put 3 coats of the stuff on. I dunno how you're going to do that; but, protect anything underneath, including your skin and especially your eyes! The black goop may work better if you're working upside down?
User avatar
S. Heisley
Super Lifetime Member
 
Posts: 8774
Images: 495
Joined: Mon Sep 17, 2007 10:02 am
Location: No. California
Top

Postby stomperxj » Tue Mar 31, 2009 10:05 am

S. Heisley wrote:Hi, Stomperxj:

I just noticed you wrote that you're going to use CPES on the underside later on.... Ummmm CPES is very runny and will drip a lot. Also, to get a waterproof seal, you need to put 3 coats of the stuff on. I dunno how you're going to do that; but, protect anything underneath, including your skin and especially your eyes! The black goop may work better if you're working upside down?


Thanks for the tips about CPES. I'm going to pull the body off the frame and set it on jack stands for the CPES stage. It's not going to be super heavy so I think I can either just tip it up and coat the bottom or actually roll it onto its roof for that part. I didnt realize i needed 3 coats to be waterproof. How about 1 or 2 coats of CPES and a coat of good KILZ primer sealer?
User avatar
stomperxj
The 300 Club
 
Posts: 395
Images: 1
Joined: Tue Jul 29, 2008 12:25 am
Location: Kuna ID
Top

Postby S. Heisley » Tue Mar 31, 2009 12:57 pm

I didnt realize i needed 3 coats to be waterproof. How about 1 or 2 coats of CPES and a coat of good KILZ primer sealer?


2 coats will make it water resistant; but, if you plan to ford streams very often or splash around on rainy days, you may want that 3rd coating. The first application of CPES will be sucked up by the bare wood really fast and you'll be able to put on the second coat soon after. You'll see that each coating added takes less and less of the mixture; so, you may have enough to apply 3 coats with what you've already purchased. Please pay particular attention to seams and raw edges as these are particularly vulnerable. Of course, any spot you miss will be vulnerable. As far as adding an application of Kilz goes, I don't know if it would hold any benefit for you. I suggest you ask the experts. I don't have the phone number of the Kilz Company; but, below are phone numbers for CPES help:

Smith and company: 1-800-234-0330
www.smithandcompany.org
The Rot Doctor: 1-206-364-2155
www.rotdoctor.com

One of the things that I especially like about the ease of using CPES is that, unlike some other products, I can mix up a batch (warm weather version) in a lidded plastic container and, with the lid on it, I can walk away for a while and come back and it will still be usable. During a cool weather week this winter, I purposely left a small amount of mixed CPES in the bottom of a covered butter tub and it stayed usable for almost a week. When left in the open air with the lid off, it quickly solidified and I could peel it out of the container. (It doesn't seem to stick to plastic.) Yet, when soaked into wood, CPES binds, strengthens, and hardens the wood almost unbelievably well. (Be sure to use throw-away brushes as there is no saving the brush once it has been used to apply CPES. You can stick the brush head in a sealed plastic bag while you eat lunch; but, that's about as far as you can go with it.)

Please recognize that I am a rookie builder who just happens to really like this product. I am not an expert; so, my experiences and research are just that: my experiences. Someone else may come along with a better idea or new product that blows mine all the way to Mars. That's at least part of what this forum is about.

Best Wishes!
User avatar
S. Heisley
Super Lifetime Member
 
Posts: 8774
Images: 495
Joined: Mon Sep 17, 2007 10:02 am
Location: No. California
Top

Postby stomperxj » Fri Apr 10, 2009 8:48 pm

Thanks for all the CPES info Sharon...

I got a little done today. Got a wild hair a few days ago to start gluing stuff down and as soon as the glue was set, I realized something I forgot. Hatch strut mounts... oops. Here's a pictorial of how i solved the problem. I made some plugs from 3/4" poplar dowel, bored them to take a tee nut and used a 3/4" spade bit to drill the holes. Then made my brackets, welded a nut on the back side of the plates and made a pocket for that with a spade bit too. They sit nice and flush and cover my plugs...


Image
Image
Image
Image
Image
Image
Image

I did some other stuff too... Made my other fender flare and a couple other small things...

More later-
User avatar
stomperxj
The 300 Club
 
Posts: 395
Images: 1
Joined: Tue Jul 29, 2008 12:25 am
Location: Kuna ID
Top

PreviousNext

Return to Member Designs

Who is online

Users browsing this forum: No registered users and 2 guests