Page 2 of 4

PostPosted: Wed Feb 24, 2010 5:55 pm
by aggie79
Burke,

The maple leaf design and the extended length make a great impression. I like your changes. Now it is time to get started on the build (if you have a warm enough place for construction.)

Tom

PostPosted: Wed Feb 24, 2010 7:45 pm
by Shadow Catcher
Having inadvertently bought a grasshopper design we found it ideal as far as increased feeling of space and additional storage. I like your design and the maple lief design. I look forward to following the build.

PostPosted: Wed Feb 24, 2010 8:55 pm
by bve
mikeschn wrote:Burke,

It looks good, but you'll have a hard time bending plywood around a 9" Radius. Make that radius bigger, and you'll be much happier...

Mike...


Thanks Mike, do you have a 'recommended' minimum radius? I'm prepared to used bendy ply if I have to - I'd like to keep that curve as tight as possible.

Burke

PostPosted: Wed Feb 24, 2010 8:55 pm
by bve
aggie79 wrote:Burke,

The maple leaf design and the extended length make a great impression. I like your changes. Now it is time to get started on the build (if you have a warm enough place for construction.)

Tom


Thanks for the encouragement Tom.

It's still a bit early in the season to get too involved in a build. I also still need to clear some more room in the garage, firm up a galley plan, and do some weight analysis to finalize the axle placement. Then I can get my frame finished - what I have is tacked together.

Burke

PostPosted: Wed Feb 24, 2010 8:56 pm
by bve
Shadow Catcher wrote:Having inadvertently bought a grasshopper design we found it ideal as far as increased feeling of space and additional storage. I like your design and the maple lief design. I look forward to following the build.


Shadow Catcher the build of your 2nd MM and the work being done by Eye4Design have been inspirational. Your compass rose helped lead me to the maple leaf idea.

Burke

PostPosted: Wed Feb 24, 2010 9:18 pm
by S. Heisley
I had thought of copying an actual leaf or two from the Native California Big Leaf Maple tree onto my build....still haven't decided. Those leaves aren't as big as your planned one but are sometimes the size of a dinner plate (up to 9" across). So, obviously, I like your embellishment idea. I like your grasshopper trailer plan, too! :thumbsup:

PostPosted: Wed Feb 24, 2010 9:52 pm
by Shadow Catcher
Sharon
The folks that did the compass rose were very reasonable 18$ ea. I did however have a vector graphic prepared.

PostPosted: Thu Feb 25, 2010 4:31 am
by mikeschn
bve wrote:
mikeschn wrote:Burke,

It looks good, but you'll have a hard time bending plywood around a 9" Radius. Make that radius bigger, and you'll be much happier...

Mike...


Thanks Mike, do you have a 'recommended' minimum radius? I'm prepared to used bendy ply if I have to - I'd like to keep that curve as tight as possible.

Burke


I would make it at least 12".

http://www.google.com/url?sa=t&source=w ... YAVdq-G_3Q

Mike...

PostPosted: Fri Feb 26, 2010 1:28 am
by bve
S. Heisley wrote:I had thought of copying an actual leaf or two from the Native California Big Leaf Maple tree onto my build....still haven't decided. Those leaves aren't as big as your planned one but are sometimes the size of a dinner plate (up to 9" across). So, obviously, I like your embellishment idea. I like your grasshopper trailer plan, too! :thumbsup:


I don't know as I will go to the scale I have in there, but pretty close is what I'd like to do.

You should go for it on your build it will be a nice touch (I think) besides you already have one of the most ambitious builds on the site - many have talked about a raised roof - but you are doing it, and doing it well.


Burke

PostPosted: Fri Feb 26, 2010 1:30 am
by bve
mikeschn wrote:
bve wrote:
mikeschn wrote:Burke,

It looks good, but you'll have a hard time bending plywood around a 9" Radius. Make that radius bigger, and you'll be much happier...

Mike...


Thanks Mike, do you have a 'recommended' minimum radius? I'm prepared to used bendy ply if I have to - I'd like to keep that curve as tight as possible.

Burke


I would make it at least 12".

http://www.google.com/url?sa=t&source=w ... YAVdq-G_3Q

Mike...


Good link, but 12" wasn't the number I wanted to hear :( I'll have a go at it in SU and see how it pans out.


Thanks again,
Burke

PostPosted: Thu Oct 07, 2010 12:21 am
by bve
Well I guess it's time to report some build progress, since I've made some of this...

Image

I kind of got caught up in thinking, well it's just a floor nobody wants to see just that... then it's just a template... but when I finished framing the walls and stood them up - it dawned on me maybe I should have a build thread started.

I've been ticking away at this every so often, but not too often so this is really a progress report of what I have been able to get done over the summer when time permitted.

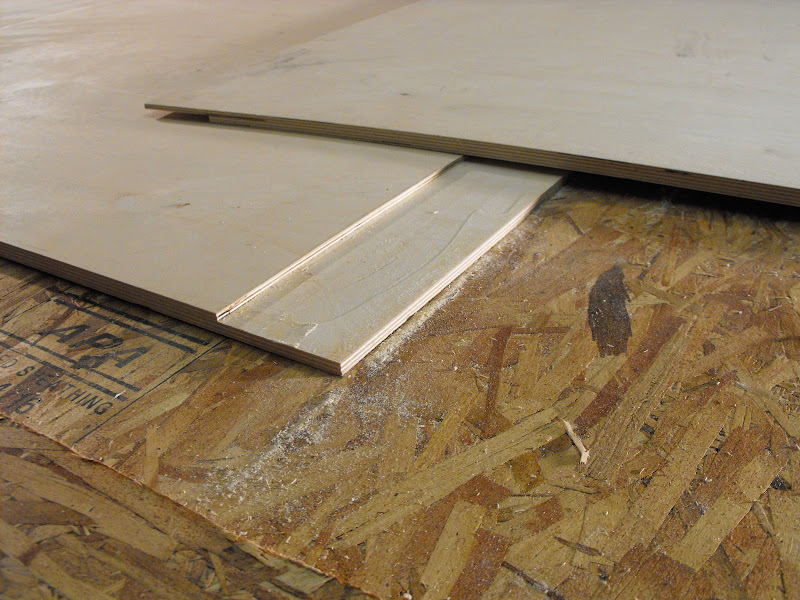
I started with the floor, using two sheets of 1/2" Baltic birch I cut a 3" lap in each piece.
Image

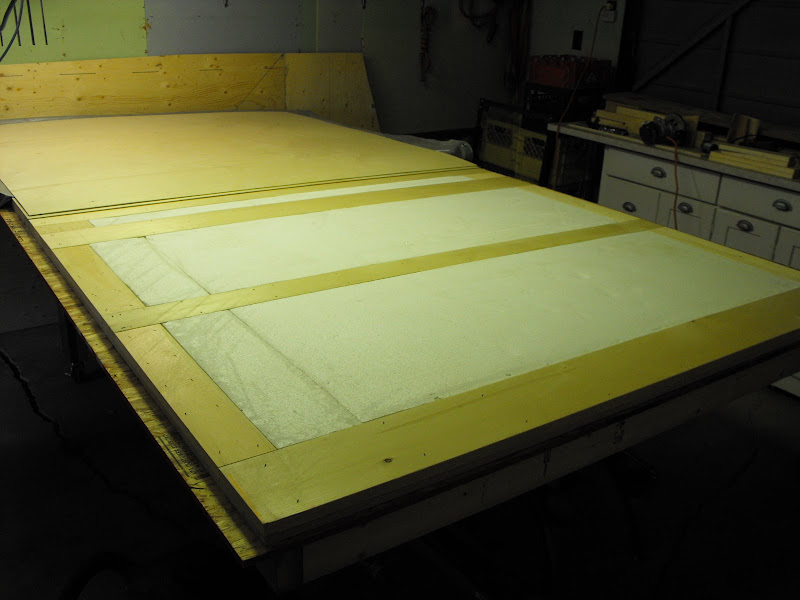
From there I framed it out using PL Premium and staples to hold it together. I filled the voids with foam - glued with PL300 (which I found annoying to work with), and covered the bottom with 1/8" BB. When I did the framing I left it a bit proud of the edge of the ply, I then came back and trimmed it flush with the router.
Image

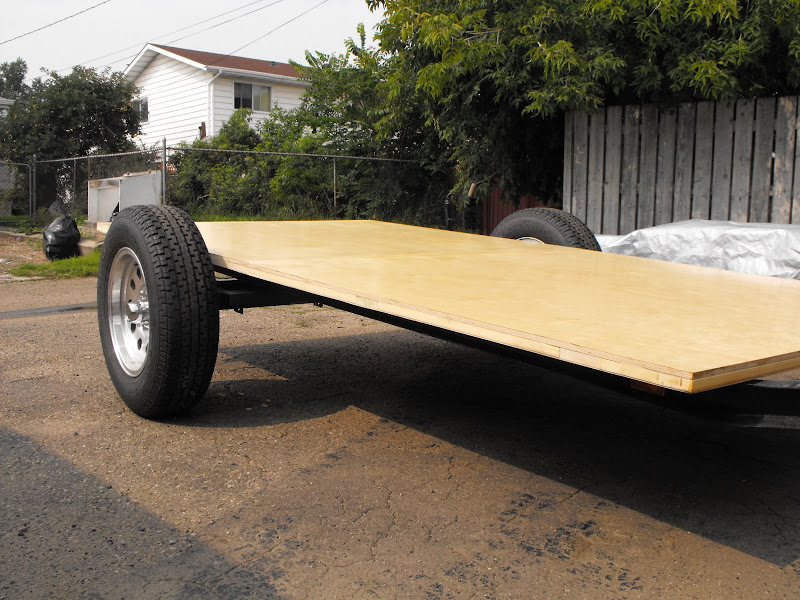
Gave it 4 coats of polyurethane on top, still need to coat the bottom with roofing tar, however as it sits it is about 3" longer than it needs to be, once the walls are skinned I'll trim it to fit the profile.
Image

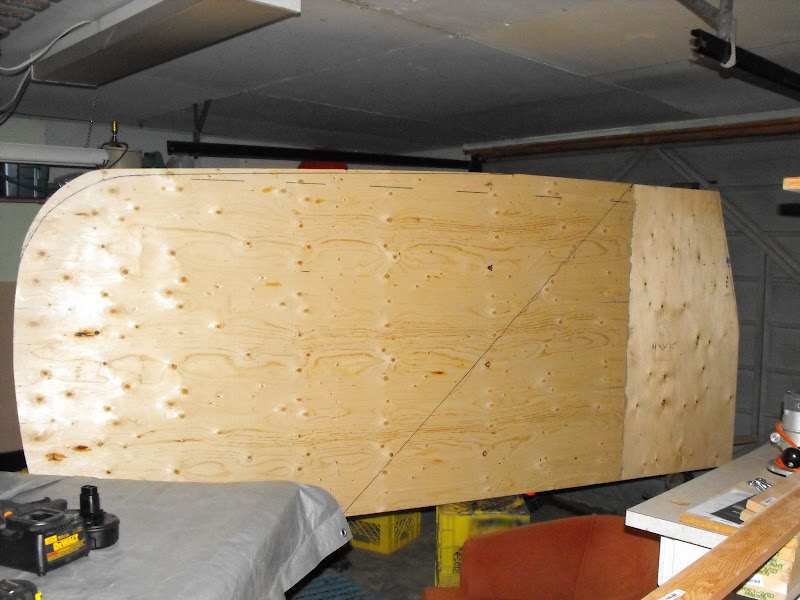
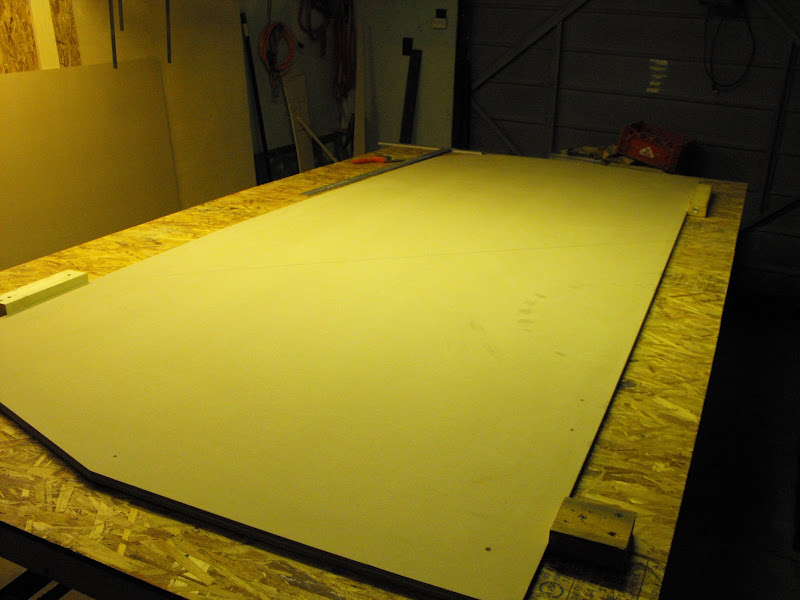
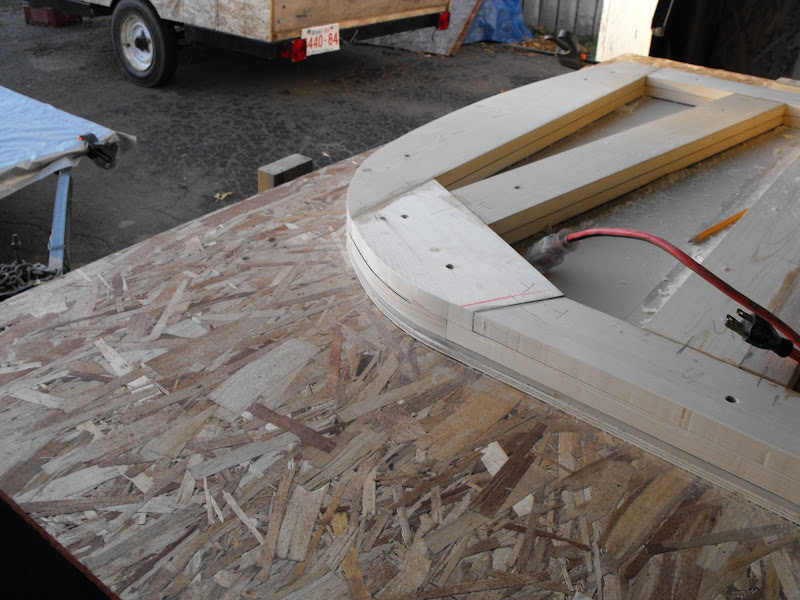
I did a bit of playing around with the profile and after cutting a template from some cheap 3/8" ply I decided the slope in the front, as well as the angle for the hatch needed to be a bit more pronounced, once I was happy I cut the profile into 1/4" MDF to create a template.
Image
Image

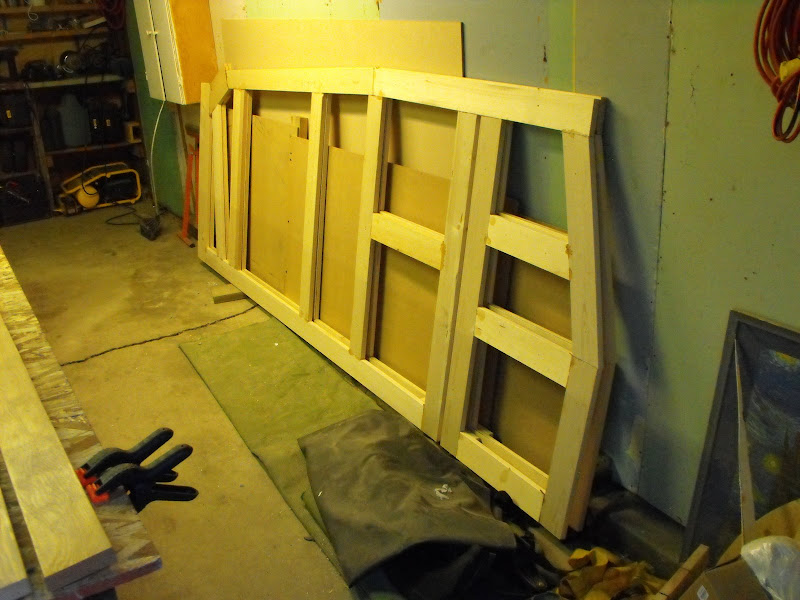
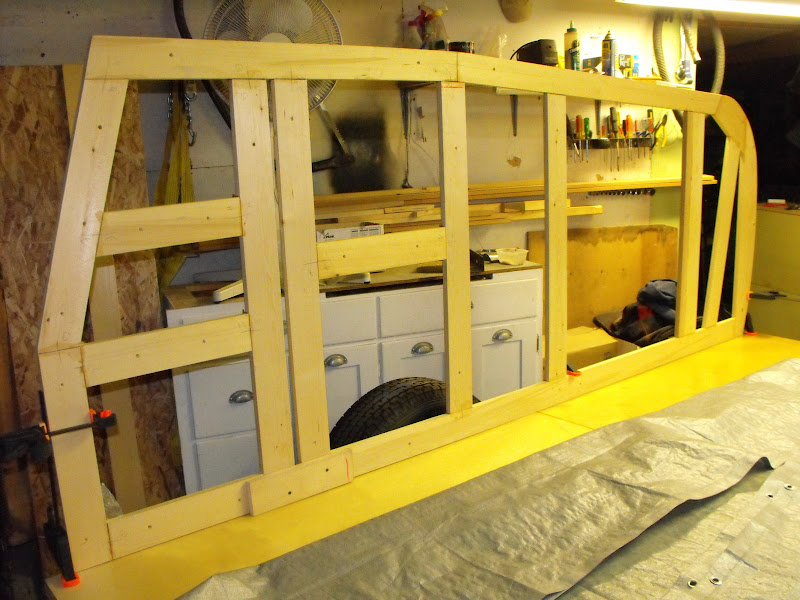
From there I started on the wall framing, cutting pieces and screwing them to the table until I had all the pieces for a wall cut.
Image

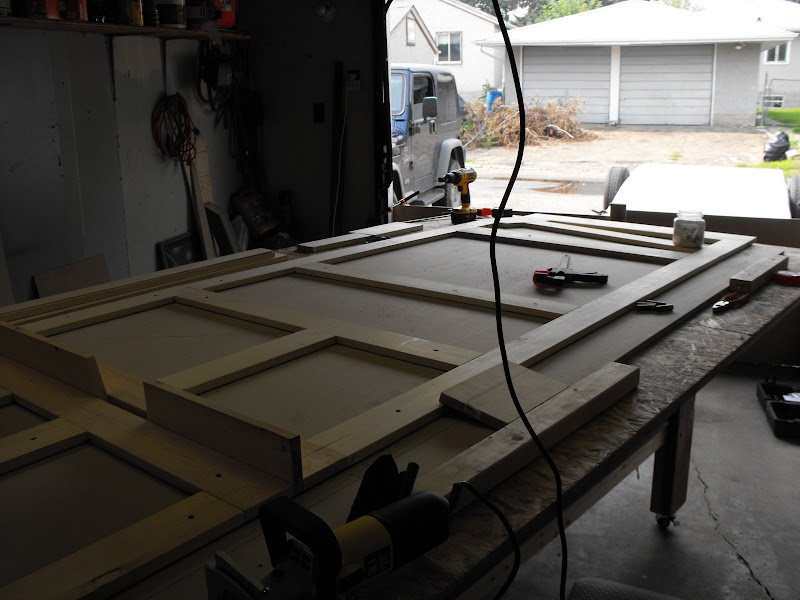
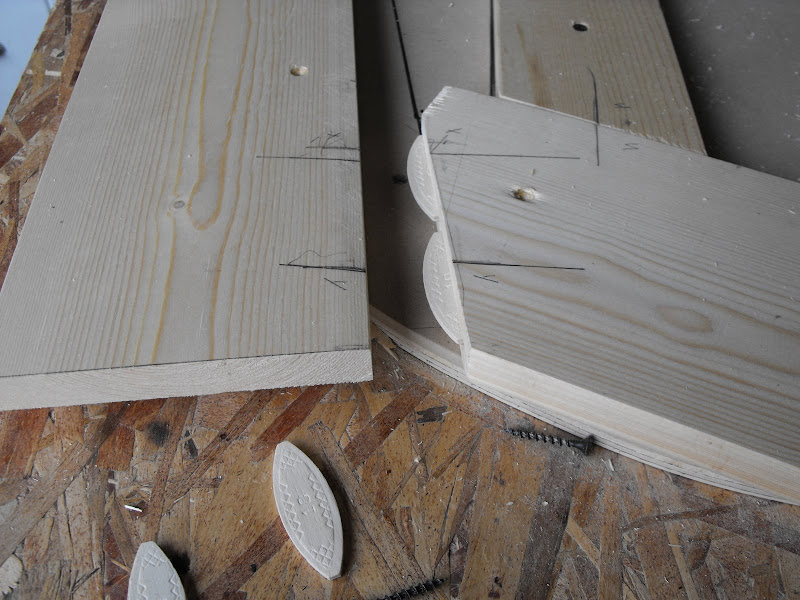
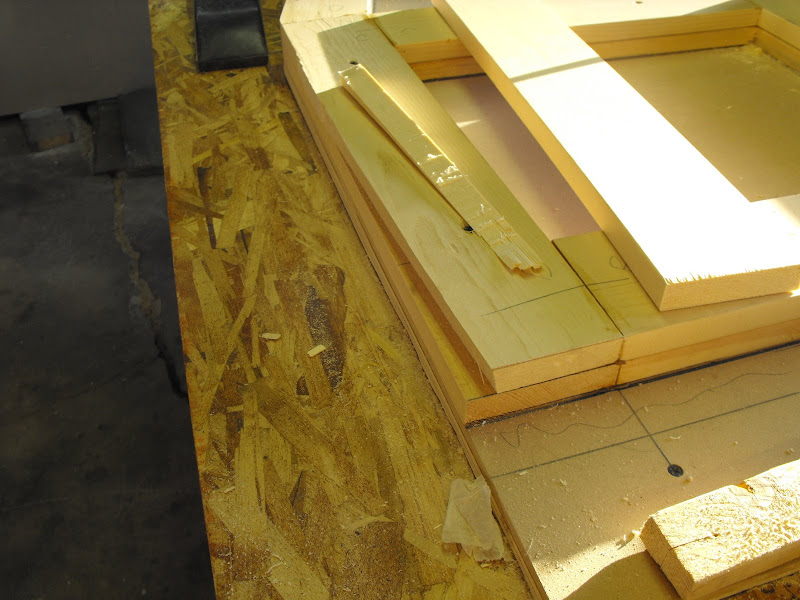
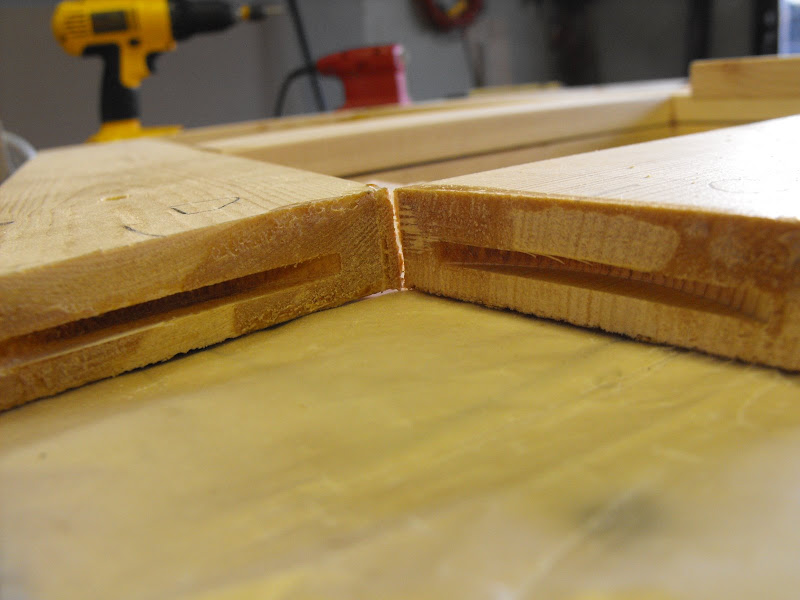
I then proceeded to cut all of the slots for the biscuits... in all I needed about 120 slots, roughly 30 biscuits in each wall... I grew tired of cutting slots before the first wall was done and stopped working on it for a while.
Image

I finally got back into it this past weekend and finished cutting all of the slots and glued up the frames.
Image

The next day I hit Lee Valley Tools for a new template bit for the router (I needed one with a longer cut than I had). From there I got to trimming the framing, which went mostly well...
Image

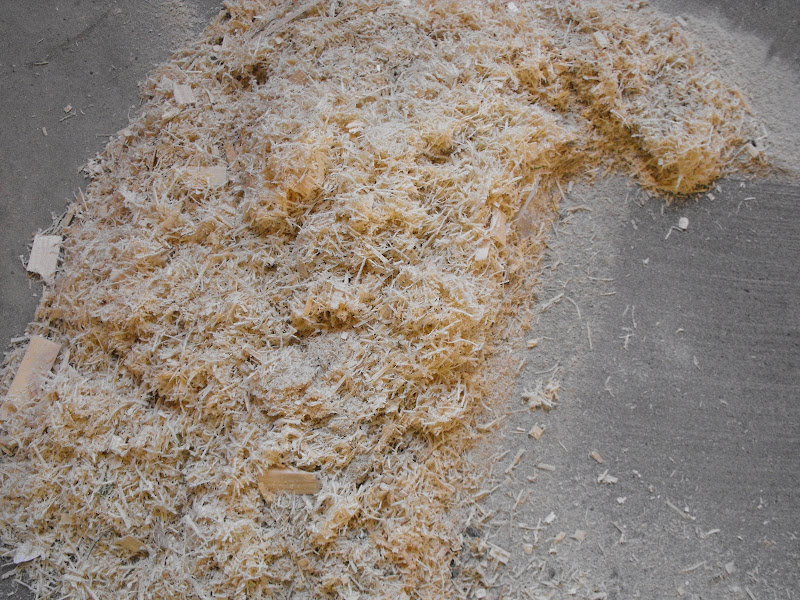
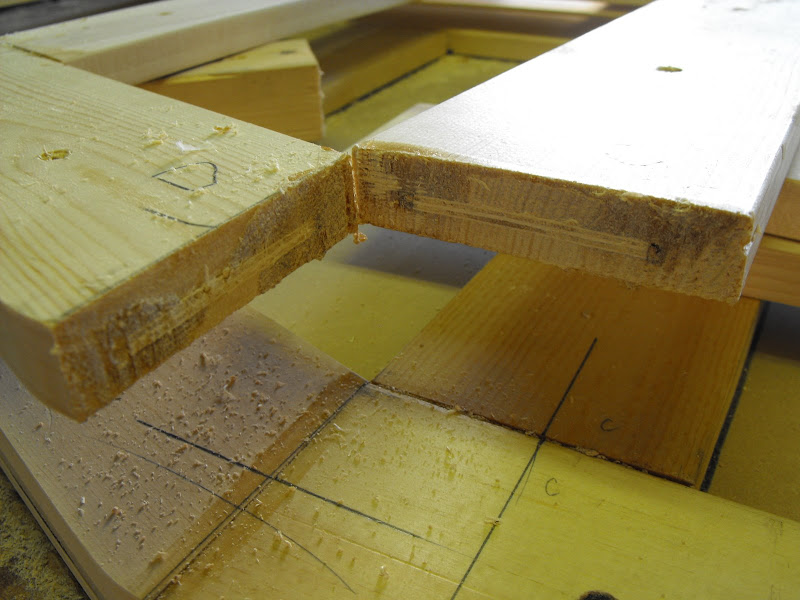
...until I was just about done, then this happened :(
Image

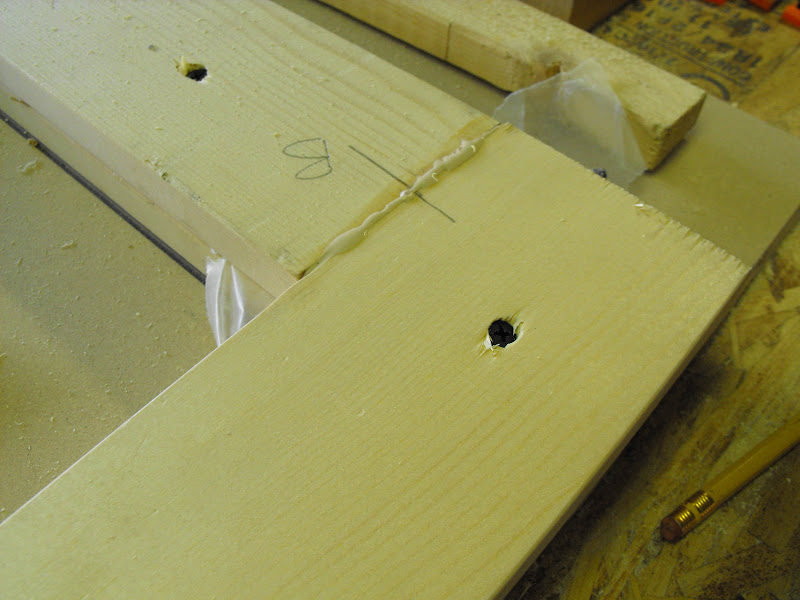
So after a few special words and a break, I came back and performed the first surgery on the tear, I cut the bad piece out at the joints with the jig saw.
Image

Did a bit of sanding and re-cut the slots for new biscuits.
Image

More glue, new biscuits, a few screws and a little more patience.
Image

After the glue dried and I finished trimming the replaced piece, I had to see how they looked up, so I propped them up to get a feel for things. This is when it dawned on me I should probably start on my build thread.
Image
Image

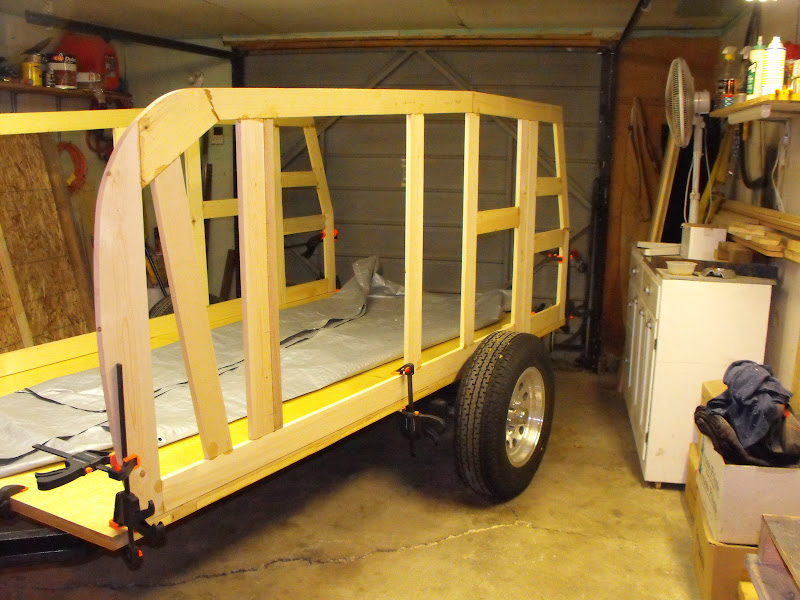
In addition to 'tweaking' the profile from the 'plan', I also decided to put the wheels outside the walls completely, this was more a matter of not wanting to deal with all the extra cutting and geometry involved in keeping the wheels inside the walls.


Burke

PostPosted: Thu Oct 07, 2010 6:11 am
by Cliffmeister2000
Burke, it's good to se you working on it! Looks like all the extra thought will pay off in the end! :thumbsup:

PostPosted: Thu Oct 07, 2010 7:49 am
by aggie79
Burke,

It looks like you've been holding back on us with your build pictures. Thanks for posting them. Your teardrop is looking great!

Tom

PostPosted: Thu Oct 07, 2010 9:42 am
by High Desert
:thumbsup: right on Burke! Great to see your plans coming to life!

PostPosted: Thu Oct 07, 2010 10:25 am
by S. Heisley
Burke:

I love the detail you are giving us on your build thread, though it hurt to see that broken board! ...Nice recovery on that! :thumbsup: I'm looking forward to seeing more. I hope to see pictures of you camping next summer! :vroom: