Bend some deadsoft 1 ½” aluminum angle around the side profile of the hatch. If you purchased your angle from a hardware store or a home depot type store, you’ll have to soften it first before you can bend it. You’ll anneal the angle with a propane torch. Heat a small section of angle up until the flame coming off the aluminum is orange, then move on to the next section. Wear gloves, the aluminum gets hot!
Fasten the aluminum angle to the skin with pop rivets. It should extend beyond the bottom skin by 5/8”.

Install a piece of 1/8” x 1” flat aluminum bar on the bottom edge of the hatch flush with the end of the angle.Fasten with stainless steel flat head screws. Then add your taillights, and license plate light. Round over the bottom corner of your aluminum angle.

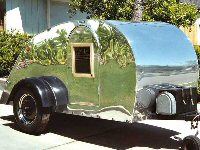
This is how your completed hatch should look.


