Page 5 of 13

Posted:
Wed Oct 05, 2011 8:43 pmby pmspirito
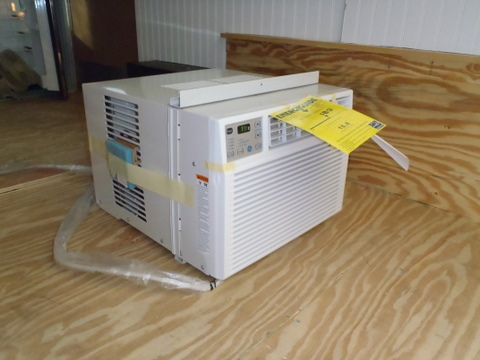
the portable a/c was a complete flop. So out it goes. I plan to install a thru the wall unit in the rear of the trailer. I will mount the a/c inside the trailer with the outside end of it butted up against the inside of one of the rear doors and have it blow the exhaust out the door thru a louver.
Now I am looking at a 12k thru the wall unit with heat for $549.00 at WalMart, or a 12k without heat for $295.00.
$250.00 more for the heat.
What does anyone think. Heat or no heat. $250.00 extra.
Posted:
Wed Oct 05, 2011 9:22 pmby pete42
I had a roof AC unit with the heat strip it put out 1500 watts same as a $20 ceramic heater
If you know the wattage of the AC then compare it to a ceramic or oil filled electric heater.
pete
Posted:
Wed Oct 05, 2011 9:37 pmby pmspirito
I took another look at the one with the heat. I just noticed it is a 220v unit with the heat. 220v in the trailer will not work for me.
I guess i will go for no heat and just carry a portable heater.
Thanks.
Posted:
Thu Oct 13, 2011 7:57 pmby pmspirito
No trailer work last weekend. I spent Saturday servicing my S-10 tow vehicle and Sunday I reorganized the shop.
I did purchase a 12,000BTU a/c from Walmart for $320. This weekend I shall put the trailer back in the garage and get back to work.
Trip 2 Interior
Posted:
Sun Oct 16, 2011 2:52 pmby pmspirito
Trip 2 is this coming this weekend. Two nights in Long Pointe Park Campground at Sebastian Inlet.
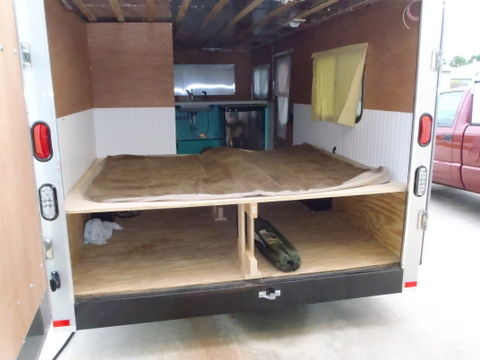
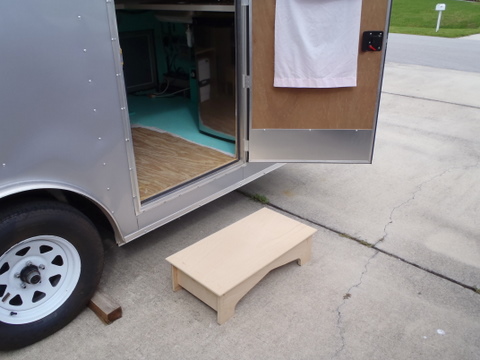
I put in a temporary bed platform (at the permanent height) for an air mattress, cut up some pillow cases for temporary curtains, made a little step bench for the doggies to get up on the bed, and built a "front porch".
I also made a check list of things to keep in the trailer (kitchen utensils, power cords, sewer and water hoses, etc) and a list of the things I need to put in for each trip (food, clothes, dog food). I then started gathering all of this stuff together in some plastic tote bins.
Posted:
Sun Oct 30, 2011 7:25 pmby pmspirito
Trip number 2 was a COMPLETE success. It was great having everything on hand.
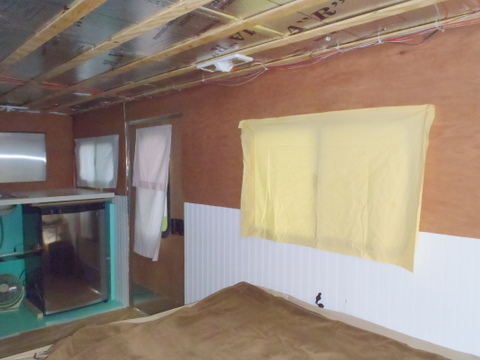
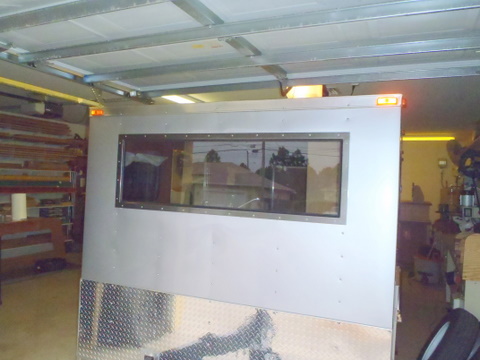
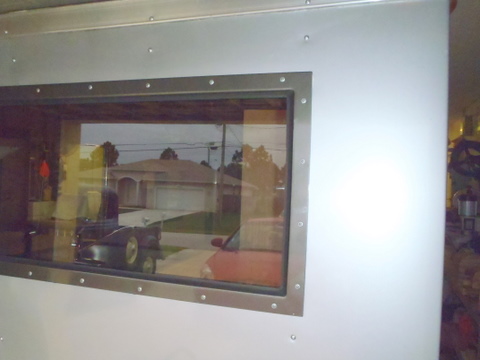
This Sunday Dad came over and we installed the front picture window. I am soooo glad I had the factory frame out the window opening for me. I cut out the sheet metal with a saber saw. On the window flange we attached a 1/8 by 1 inch butyl rubber caulking strip.
Posted:
Sun Oct 30, 2011 7:33 pmby pete42
that's-a one bigg-a window......
nice lots of light now
pete
Posted:
Sun Oct 30, 2011 7:55 pmby pmspirito
The size is 18 x 60 inches. (5Ft) The glass is the same glass we use here in Florida for hurricane impact resistant windows. It is made like a car windshield. Two layers of glass with a heavy plastic film in the middle. The total thickness is 5/16 of an inch. It also has a light charcoal tint also.
New Interior layout 11-14-11
Posted:
Fri Nov 18, 2011 7:17 pmby pmspirito
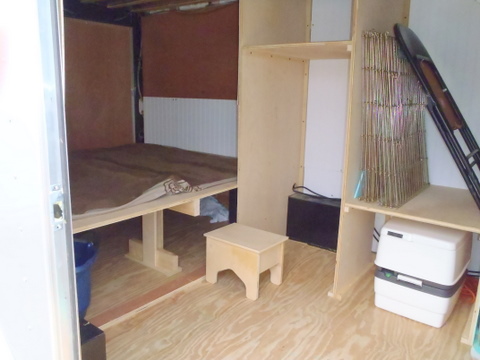
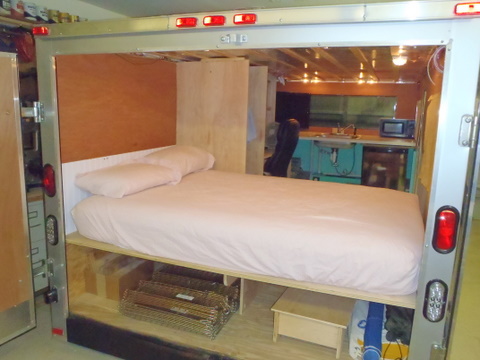
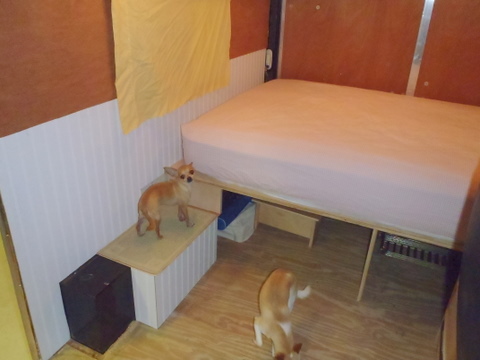
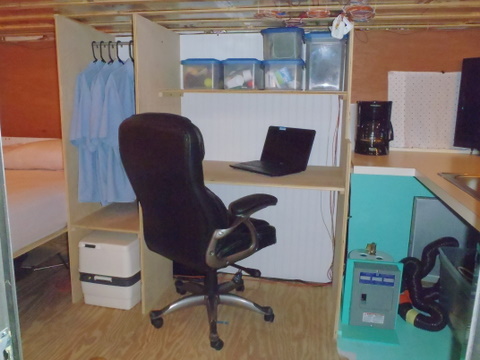
Lots of changes on this go-around. The permanent bed is in place. Note the doggie step for Tinky-Winky and Smiley-Riley to hop up onto the bed.
The center section has been changed. I added a desk and comfy chair. The space for the closet and Porti-Potti has been relocated and made smaller.
Leaving in the morning for trip number-3. Going to Georgia for five days.

Posted:
Sat Nov 19, 2011 12:03 pmby pete42
Looks like things are coming together for you and the puppies.
I have some ideas on what I want but I too will wait to see if I miss some things if I do I'll add them later
I would rather do it that way than add them and drag them all over the country only to find out they don't get used.
I may head up to Michigan I like the r-n-r trailers mostly because I had a dealer close
I was able to see many of the things I like actually on a trailer.
trip 3 to Georgia a success.
Posted:
Thu Nov 24, 2011 3:30 pmby pmspirito
After taking our third trip in our CT i believe i have all of the bugs worked out.
They layout with the new desk and chair worked out perfectly.
Two small changes though. One, the closet with the porta-potti is just about 3 inches too narrow to easily get the toilet in and out. Second, the bed is 3 inches too high. I don't know where i went wrong but it is 3 inches taller than my regular bed. Its tougher on the little dogs getting up and down and for me my feet don't reach the floor when i sit on the edge of the bed.
All in all i am done with any other changes. I will start doing the final cabinetry this week.
Posted:
Thu Nov 24, 2011 5:33 pmby BC Cargo
You could put a loose strap around the porta potty attached mid way at the back. Just put your one hand behind the strap in front and pull. I had to do this under my bed in my last pickup to get the "second row" of bins out.
Posted:
Thu Nov 24, 2011 6:26 pmby pmspirito
I plan to make a plywood "tray" with some rollers on it and put it under the PP. then I can roll in and out easily.
I also need to widen the space for when I do the cabinetry in order to add a face frame/door to the opening. there will be a lower door where the PP is and a taller door above it on the closet.
Posted:
Thu Nov 24, 2011 7:29 pmby pete42
I had a porta-potty in my pop-up but it didn't sit very high off the floor.
I built a riser/tray that it sat on, roll it out of it's cabinet to use push it back in when done.
worked very well.
pete
Posted:
Fri Nov 25, 2011 12:55 pmby pmspirito
that is exactly what I plan to do.