Page 6 of 11
Re: I've got another fastener question:

Posted:
Sun Apr 15, 2018 7:44 pmby flboy
FlyBye wrote:flboy wrote:FlyBye wrote:How did you guys attach your ceiling to the top of the trailer?
I ran furring strips down the length of the trailer and used that space to put another inch of insulation and then I screwed the Luan Plywood into the strips. I screwed the furring strips into the ceiling "beams" with self tapping screws.
How long were your screws into the furring strips? And did you have any problems with the thin Luan Plywood splitting?
My furring strips aren't going anywhere. They have been attached and should withstand doomsday! It's just that thin 5mm plywood that got me concerned
I'll see if I can find the screws I used and get the details, but I believe they were just 1/2 countersink wood screws going into the furring strips every 12 inches. As I recall, I pre-drilled and then used a hand screw driver the last part of the drive just to get the depth right (barely below flush with the surface). If you pre-drill, you should have no issues with splitting. If you use an electric drill with a screw driver bit and are not careful, you can drive right through that Luan.
BTW... you probably already know this, but paint the Luan before you install it. It will require some Kiltz to seal it and then a good coat of whatever paint you choose. It will be a huge mess trying to paint a ceiling after it is up. I learned that from my first CTC build. :-)
Also, if you want a little extra bonding, just run a bead of Liquid Nails down the furring strip before you put the Luan up. I did not do that because I figure the amount of screws I put in was sufficient, I had foil tape in the way (sealed the insulation air tight) , and I also knew I had cabinets and walls going in that would further support the ceiling since they are flush to the ceiling . Just some thoughts.
When I installed the Luan, I also ran a temporary rail down each side (1*2) that the Luan rested on in place with just on 2*4 cut to the right length in the middle holding the center while I positioned it into place. Made it an easy 1 man job. I moved the rails (held on with 4 screws into the plywood side) down as I went). If you look closely on the sides you will see the temporary rails.

Re: FlyBye's 7x16 Build
Posted:
Sun Apr 15, 2018 8:27 pmby FlyBye
Thanks for the reminder on pre-drilling the ceiling. Hopefully that and not over driving the screws will be enough. I''ll look for some 3/4" wood screws with a flat head, and I'll have some trim covering the screws.
We decided to stain the ceiling instead of painting it. My wife did all the stain work on the ceiling the other day and we are pretty happy with how it turned out. We originally wanted a lighter stain but ended up choosing a darker stain and will probably have to go with a much lighter wall color. We plan on painting the walls.
Thanks for mentioning the temporary rails. I would not have even noticed it if you had not mentioned it. Nice simple yet clever idea... I like it! And I thought that I was gonna have to learn to balance the ceiling on my head while standing on a step-stool :-)
I just used a 3 inch metal bracket. I used these so I wouldn't have to nail into the side wall, however I found that it would have been better if I would attached some thin plywood underneath the brackets in order not to scrape the wood any.
Thanks
Re: FlyBye's 7x16 Build
Posted:
Sat Apr 21, 2018 9:51 pmby FlyBye
My Quote for the Day: "By perseverance, the snail made it to the Ark!"
Made a little progress today. Still only two ceiling panels up, but I've got the 4 foot bedroom ceiling light completely installed and that's a relief. My wife stained our base cabinets and they are drying as we speak. Necessary odds and ends have taken up most of my efforts, but necessary non-the-less.
I've noticed that the stained ceilings have retained their strong odor even after they have aired out. Is there something that would neutralize or eradicate that strong smell? Also, What is the best stain sealant to use? Poly stuff?, Urethane? or something else?
Re: FlyBye's 7x16 Build
Posted:
Tue Apr 24, 2018 6:24 pmby FlyBye
I've got three ceiling panels cut and installed along with the light wires running through. I've got another 78"x46" panel to install along with cutting for the vee up at the front of the trailer. We still will need to add some trim, dust and add a sealant of some sort on it when we have all the panels up, but it's looking more and more like a potential camper instead of a construction zone little by little.
Re: FlyBye's 7x16 Build
Posted:
Fri Apr 27, 2018 5:54 amby flboy
It is all coming together. It look nice. This was one of my favorite parts of the build. Finally get to start building the walls and etc..

Re: FlyBye's 7x16 Build
Posted:
Sat Jun 09, 2018 4:09 pmby FlyBye
Little update but not much that shows...
I've been prepping the wall trim to reinstall. I've tried hammering some of the staples out, but noticed that it made the entry whole a little bigger so I discarded that idea for just using a pair of wire cutters and snipping them off. Monotonous endeavor but it had to be done before reapplying.
Re: FlyBye's 7x16 Build
Posted:
Sat Jun 09, 2018 4:24 pmby FlyBye
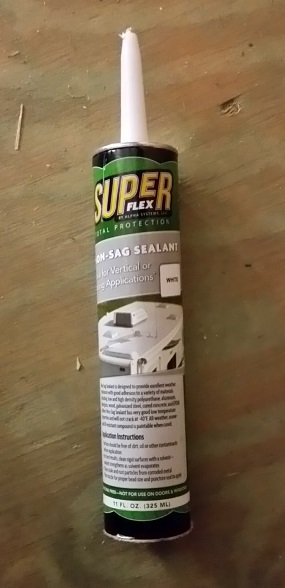
- Super Mess.jpg (65.36 KiB) Viewed 3642 times
I made a big mess by using some caulking that a fella at Camping World recommended with out reading the particulars first myself. I was wanting to seal up the back doors with some caulking without any water being able to soak through. The stuff I got said not to use it on doors and windows. Unfortunately I didn't notice the message until installing afterwards... I needed the kind that won't pull off like stringie chewing gum. What a mess but I'll get it off and try to get the right stuff next time.
Re: FlyBye's 7x16 Build
Posted:
Sat Jun 09, 2018 4:43 pmby FlyBye
We've got everything stained and I've got my evening crew putting some Poly on the ceiling as I speak/type. I'm pleased with the stain on the ceiling back doors and base cabinets. I still have got to place some ceiling trim up over the gaps where the panels come together. The walls ought to look nice with some lighter paint on them.
Re: FlyBye's 7x16 Build
Posted:
Sat Jun 09, 2018 5:13 pmby McDave
Hey FlyBye,
I really like the look of the stain on the doors. I may have to do that before I hang some artwork and a fire extinguisher on mine. So, about the staples. There is a tool for removing staples from upholstery and convertible tops that works great. It is a mini cats paw that has a screwdriver handle.. It pulls em out real fast and won't mar wood. I'd bet your local Ace Hardware has one. Or maybe you could fashion one from a medium sized flat blade. You'll need to put a "V" shaped groove in the center of the blade, and bevel so you can get under the staple, then put a slight bend in the blade for leverage like a cats paw. If I can locate mine I'll send a pic for reference.
McDave
Re: FlyBye's 7x16 Build
Posted:
Sat Jun 09, 2018 10:01 pmby hankaye
FlyBye, Howdy;
Here's what McD is talking about, get or make one that will fit inside the 1/4" staples loop.
https://www.google.com/search?q=staple+ ... 17&bih=718hank
Re: FlyBye's 7x16 Build
Posted:
Sun Jun 10, 2018 1:31 pmby FlyBye
Hank & McDave,
I have already completed the "Staple Conundrum" with wire cutters. We have one of those nifty tools floating around here somewhere, but the staple itself was implanted so deep that even with the specialized tool there was going to be some undesirable hole enlargement. When I get the trim up, I'll just putty over it before painting. Thanks for the suggestion though.
Re: FlyBye's 7x16 Build
Posted:
Sun Jun 10, 2018 4:29 pmby hankaye
flyby, Howdy;
Yah, know what you're talking about, mine were like that too. I just pried them off carefully
then tap-tap-tap with a hammer or the working end of the multi-tool then flip it over and pull
each one out and dump it in a jar with the rest of'em. Slow but methodical and you do get
all the bits-n-pieces that way. They sure do use a generous amount of air pressure when they
shoot them into the walls and I question if they used enough?
hank
Re: FlyBye's 7x16 Build
Posted:
Sun Jun 10, 2018 5:12 pmby featherliteCT1
FlyBye said: was wanting to seal up the back doors with some caulking without any water being able to soak through. The stuff I got said not to use it on doors and windows. Unfortunately I didn't notice the message until installing afterwards... I needed the kind that won't pull off like stringie chewing gum. What a mess but I'll get it off and try to get the right stuff next time.
In due course, let us know how you seal up your doors with caulk ... I may need to do something like that to seal a small section of my RV door where the factory seal is insufficient.
Keep up the good work!
Re: FlyBye's 7x16 Build
Posted:
Sun Jun 10, 2018 8:25 pmby hankaye
featherliteCT1, Howdy;
featherliteCT1 wrote:FlyBye said: was wanting to seal up the back doors with some caulking without any water being able to soak through. The stuff I got said not to use it on doors and windows. Unfortunately I didn't notice the message until installing afterwards... I needed the kind that won't pull off like stringie chewing gum. What a mess but I'll get it off and try to get the right stuff next time.
In due course, let us know how you seal up your doors with caulk ... I may need to do something like that to seal a small section of my RV door where the factory seal is insufficient.
Keep up the good work!
If you know the sectional profile you can chase some down using this link. Yea, it's a broad refrence
but should help you get into the right area.
https://www.google.com/search?tbm=isch& ... 18&dpr=0.9hank
Re: FlyBye's 7x16 Build
Posted:
Mon Jun 11, 2018 7:41 pmby FlyBye
featherliteCT1 wrote:In due course, let us know how you seal up your doors with caulk ... I may need to do something like that to seal a small section of my RV door where the factory seal is insufficient.
Camping World didn't have what I needed and they recommended that I just go to Home Depot/Lowes. I ended up getting some DAP waterproof caulking for doors, trim and windows (they have tons of choices to choose from). My challenge will be in getting old gooey stuff off for a clean start. I'll post when I get it done at least to the point where I'm not too embarrassed to show my effort! The areas of concern is where separate aluminum panels join each other even if the union is tight.