B@tt's 6X14 CTC Toy Hualer

Converting Cargo Trailers into TTTs

Postby BC Dave » Tue May 10, 2011 10:50 pm

Insulation! :thumbsup:

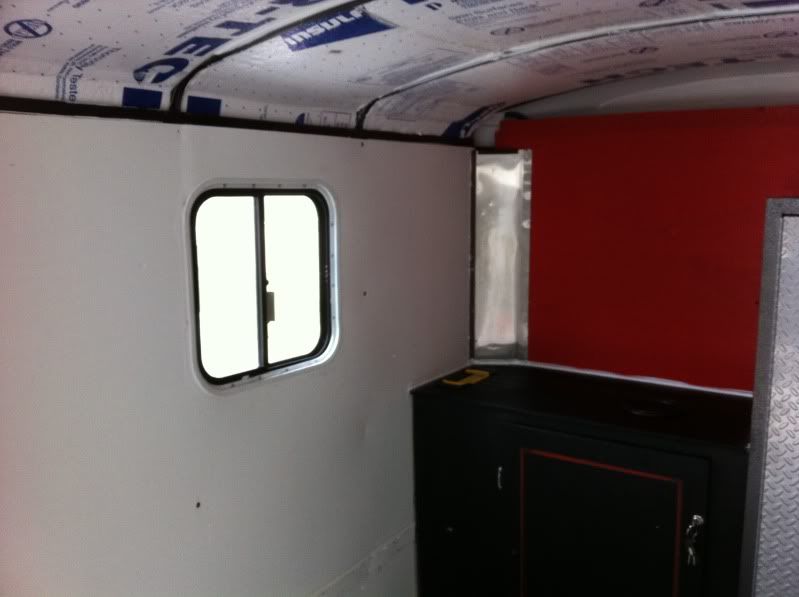
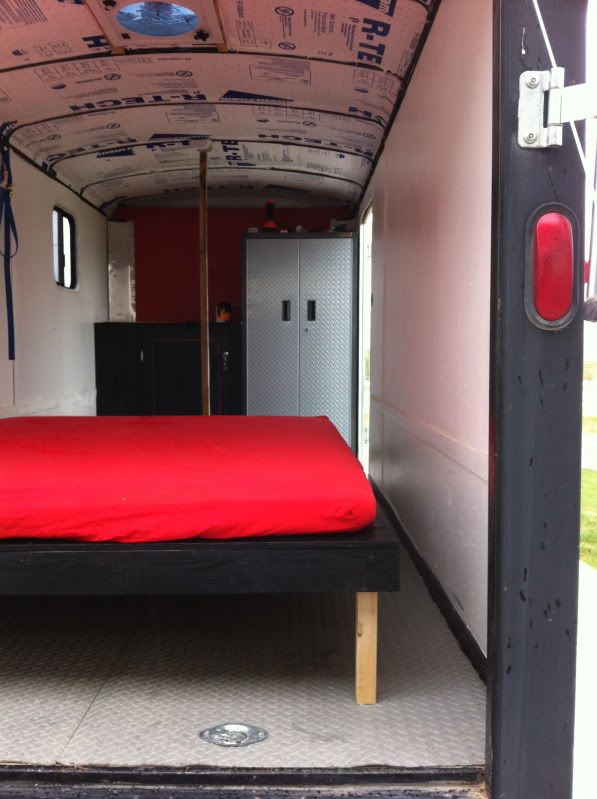
What type of insulation is that? Is that rigid foam?

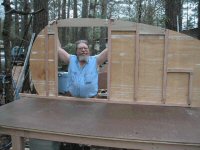
Interior roof covering; I used 1/4" ply sealed all sides with varitane; fastened with short (be carefull) self tapping metal screws with wide heads. Wood needs to be sealed with something waterproof; stain would do too; you'll see condensation where the steel ribs are located; if you have enough height you could run firring strips opposite direction to the ribs. I used firring strips on the walls and would have but needed evey inch of height on the 6-2" roof thats now about 6'-1"; I hit my head in boots ...

fantastic fan is great; I have yet to install one but im north so its usually cool at night.

:applause:
User avatar
BC Dave
Teardrop Master
 
Posts: 247
Images: 13
Joined: Sat Oct 31, 2009 12:32 am
Location: BC, Canada

Postby B@tt » Wed May 11, 2011 5:50 am

yep, it's 1" rigid foam.

I think I have decided to go with 1/8" birch sealed clear for the ceiling. Only set back I just realized is the factory wiring for the little 12v light is run inside the square steel tube of the roof frame. I will pull that out and run it along the side of the tube just to be sure I dont damage any wiring when installing the screws to hold up my ceiling.
B@tt
Teardrop Advisor
 
Posts: 67
Joined: Mon Apr 11, 2011 9:30 pm
Location: Mountain Home, Id

Postby BC Dave » Thu May 12, 2011 12:23 am

1/8" ply seems thin between the ribs; I think its 20-24 " centres on the steel ribs; I removed the 1/8 ply and used 1/4; 3/8 & 1/2 " for the lower walls.

good idea to remove the wiring; I think I hit one of the marker light wires and now its out of comission ... $#@%.
User avatar
BC Dave
Teardrop Master
 
Posts: 247
Images: 13
Joined: Sat Oct 31, 2009 12:32 am
Location: BC, Canada
Top

Postby B@tt » Sat May 14, 2011 6:42 pm

Picked up a window at a RV salvage store today. (man I gotta get back there, so much stuff, so cheap) Anybody have a step by step pictorial of a window install. Im fairly confident in what I need to do, but would sure like to see someone else cut a hole in their trailer wall before I go hacking mine up.
B@tt
Teardrop Advisor
 
Posts: 67
Joined: Mon Apr 11, 2011 9:30 pm
Location: Mountain Home, Id
Top

Postby k0py » Sat May 14, 2011 11:26 pm

where is there an RV salvage place around here?
k0py
Teardrop Inspector
 
Posts: 8
Joined: Wed Oct 06, 2010 11:13 pm
Location: Boise, ID
Top

Postby B@tt » Sun May 15, 2011 9:11 am

Im not sure I should let that info out to the masses........... :D


Just kidding, its in Marsing. I found it while searching Craigslist, just do a search for used RV parts. It will come up. I think the name was "All Seasons Sports" or something like that.

Pretty much a small gold mine for someone building a trailer. I picked up my 20x18 sliding window with screen and trim ring for $25.
B@tt
Teardrop Advisor
 
Posts: 67
Joined: Mon Apr 11, 2011 9:30 pm
Location: Mountain Home, Id
Top

Postby B@tt » Sun May 15, 2011 6:50 pm

Alrighty, the weather wasnt the best today; windy, chilly, overcast, and the occasional sprikle... but after searching through these forums for information I decided to go for the window install anyway. I stumbled across a post by Prem (I think) outlining some simple instructions for installing windows and figured "Hey, it cant be that hard... The government trusts me to work on multi-million $ aircraft, I gotta be able to put a window in a trailer."

So, Prem, thanks for the post you have floating out there. It gave me the confidence to go for it.

Here is my pictorial of todays work. I think it came out pretty good for a $25 window from the salvage lot.

first the template

Image

then the outline and tape to prevent scratches from the saw. **disclaimer- I dont recommend using standard masking tape unless its warm out. I had to get a hair dryer out to heat it back up or would have never come off the trailer skin.

Image

Drill a starter hole, then use a Jig-Saw to cut out along the outline

Image

cut hole here.

Image

and install the window. I used a C-Clamp to hold it in place with the trim ring while installing the first couple screws.

Image
Image
Image

and finally, while talking with a buddy of mine, he suggested what this rig really needs is a stripper pole... so I put one up temporarily for a pic to send him.

Image
B@tt
Teardrop Advisor
 
Posts: 67
Joined: Mon Apr 11, 2011 9:30 pm
Location: Mountain Home, Id
Top

Postby pete42 » Sun May 15, 2011 10:20 pm

Nice install the window looks good too. ;)
User avatar
pete42
Super Lifetime Member
 
Posts: 2203
Images: 13
Joined: Sat Nov 07, 2009 11:52 am
Location: SouthWest Ohio
Top

Postby BC Dave » Sun May 15, 2011 10:56 pm

.... beginning to look like a real shagin wagon ... with the red satin sheets ... and the stripper pole ... (oh but I hope that not for you??? (delete that thought ...)

nice install in the window; and you installed the right way up (little drain vents at the bottom, dont plug) and seal aroind the exterior flashing well with RV caulk.

interior ceiling; its hardest to trim out / finish off the rounded roof transition ... it would be easiest to use aluminum or stainless sheet metal ... rather than wood ...

.... your moving right along.
Last edited by BC Dave on Tue May 17, 2011 11:43 pm, edited 1 time in total.
User avatar
BC Dave
Teardrop Master
 
Posts: 247
Images: 13
Joined: Sat Oct 31, 2009 12:32 am
Location: BC, Canada
Top

Postby kickintail » Mon May 16, 2011 4:27 pm

looking good man.
Image
It makes sense if you don't think about it
kickintail
Donating Member
 
Posts: 50
Joined: Sun Mar 20, 2011 6:11 pm
Location: cape may court house N.J
Top

Postby B@tt » Sat May 21, 2011 7:07 pm

Put in some 12v today, surprisingly everything works. :D

First up today was to mount my tongue box; Rubbermaid 35 Gallon Action Packer. I thought long and hard about this purchase, and almost went with a more traditional steel tongue box, but then read a review from a Marine who's unit used these for a year in Afghanistan. According to him they put these boxes through the paces and every one of them came home intact, with the only damage being some scratches and one bullet hole. After reading that I figured it would probably hold up to my use on the trailer.

Image

I was going to mount a piece of sheet metal to bolt this box to, but then realized it would much be simpler (KISS) to just bolt it directly to the frame.

Image

Next up I built a simple little battery compartment for the box, installed a master switch, and ran all my wiring.

Image
Image
Image
Image

and last I put in a small marine fuze box hidden inside my cabinet for the two circuits I currently run.

Image

I think Im pretty much ready for the Memorial Day trip now, but Im sure more items will be added throughout the summer. A small sink, another window, and some solar panels come to mind right off the bat.

Thanks for all the inspiration and help through this forum. I look fwd to seeing more of these incredible builds that put mine to shame.

:thumbsup:

-B@tt
B@tt
Teardrop Advisor
 
Posts: 67
Joined: Mon Apr 11, 2011 9:30 pm
Location: Mountain Home, Id
Top

Postby 8ball_99 » Sun May 22, 2011 1:09 am

Looks good.. Those action packers are pretty good boxes. Should work well for a battery box and to hold a few odd and ends.. I like the battery cut off mounted for easy access.
8ball_99
500 Club
 
Posts: 623
Joined: Sun Mar 07, 2010 12:34 am
Top

Postby pete42 » Sun May 22, 2011 5:53 am

B@TT very well done and quick should make you a great trailer/toy hauler at a fraction of what the "real" ones cost.

One of these days when my health gets better I too want to build my version of a mobility scooter/ toy hauler.

pete
User avatar
pete42
Super Lifetime Member
 
Posts: 2203
Images: 13
Joined: Sat Nov 07, 2009 11:52 am
Location: SouthWest Ohio
Top

Postby B@tt » Thu May 26, 2011 10:00 pm

First trip since the build up starts tomorrow morning, 0800hr.

Sure hope it holds together. I have nightmares of the window flying out on the highway at 65mph and the bed crashing down on my precious cargo. At least Im not hauling the bike this trip so if things were to go wrong I wont have to cry too much.

Here's to everyone having a GREAT Memorial Day Weekend! Cheers.

-B@tt
B@tt
Teardrop Advisor
 
Posts: 67
Joined: Mon Apr 11, 2011 9:30 pm
Location: Mountain Home, Id
Top

Postby Jo » Sun May 29, 2011 12:32 pm

Nice trailer, I like the red, black and white color inside.
User avatar
Jo
Teardrop Advisor
 
Posts: 55
Joined: Sat Oct 16, 2010 10:29 am
Top

PreviousNext

Return to Cargo Trailer Conversions

Who is online

Users browsing this forum: No registered users and 16 guests