CrazyWolf's 7x14 toy hauler conversion

Converting Cargo Trailers into TTTs

CrazyWolf's 7x14 toy hauler conversion

Postby CrazyWolf450R » Mon Jan 16, 2012 10:54 pm

Hello all, just thought I would introduce myself and begin a build thread. First, I'd like to thank you ALL for your build threads, without them (and the pictures!) I never would have started this project!

Trailer Specs:

2011 Carry-On 7x14 Tandem Axle
3/4 ply floor, Ramp door, Side Access Door, Electric brakes
2 piece roof, no vent.


I'm an amateur motorcycle roadracer, and this trailer will be my home away from home, and also my garage/pit.

I hope to do half as good of a job with this thread and build as you all have done with yours!


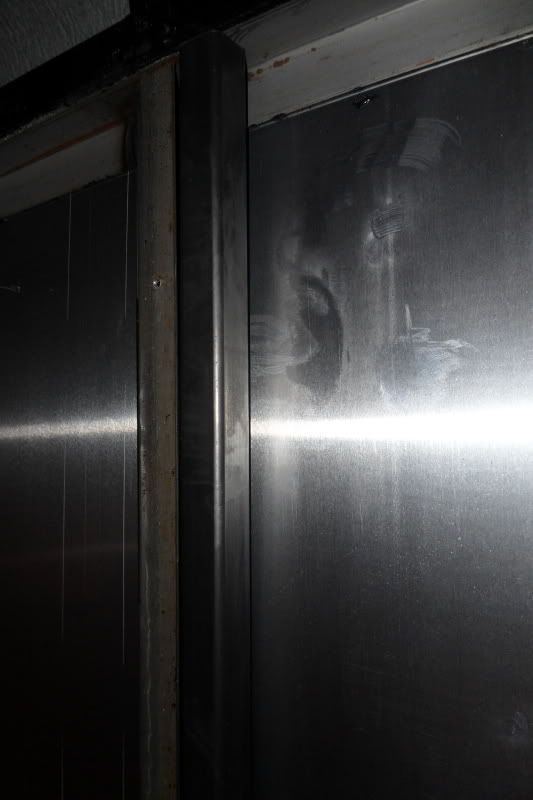
Lets start with some pictures!
<img src="http://i91.photobucket.com/albums/k290/crazywolf450r/Trailer/SAM_1733.jpg" border="0" alt="Photobucket"></a>


<img src="http://i91.photobucket.com/albums/k290/crazywolf450r/Trailer/SAM_1734.jpg" border="0" alt="Photobucket"></a>

<img src="http://i91.photobucket.com/albums/k290/crazywolf450r/Trailer/SAM_1735.jpg" border="0" alt="Photobucket">
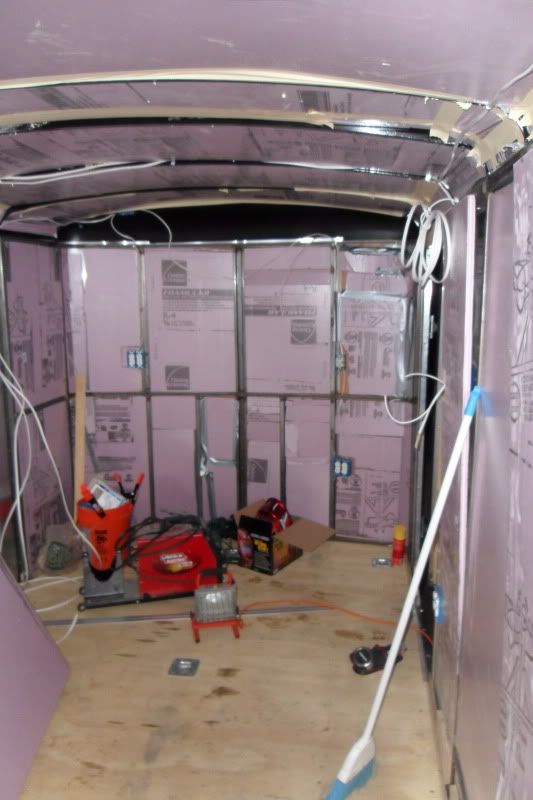
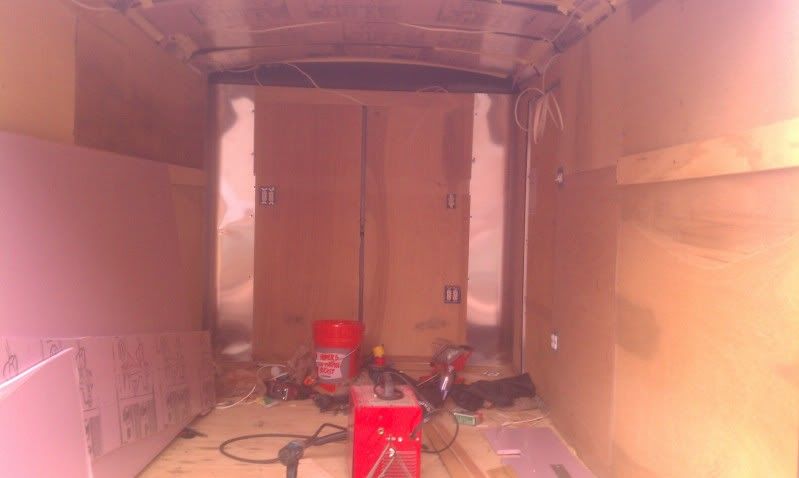
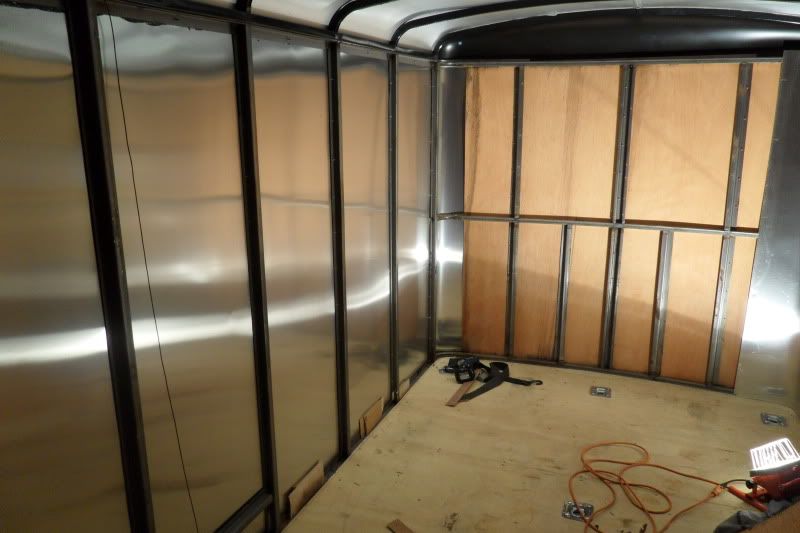
Getting started...

<img src="http://i91.photobucket.com/albums/k290/crazywolf450r/Trailer/SAM_1774.jpg" border="0" alt="Photobucket">

<img src="http://i91.photobucket.com/albums/k290/crazywolf450r/Trailer/SAM_1738.jpg" border="0" alt="Photobucket">

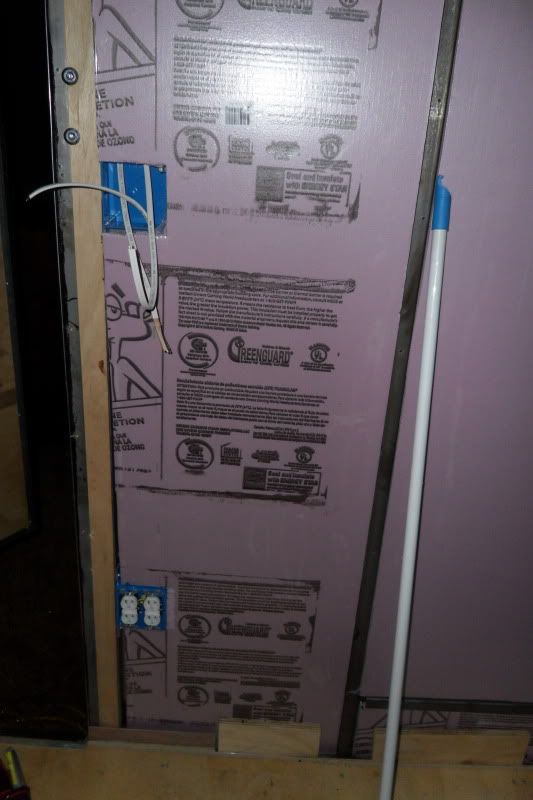
As you see, the 'studs' are folded 1/16th sheet metal basically...
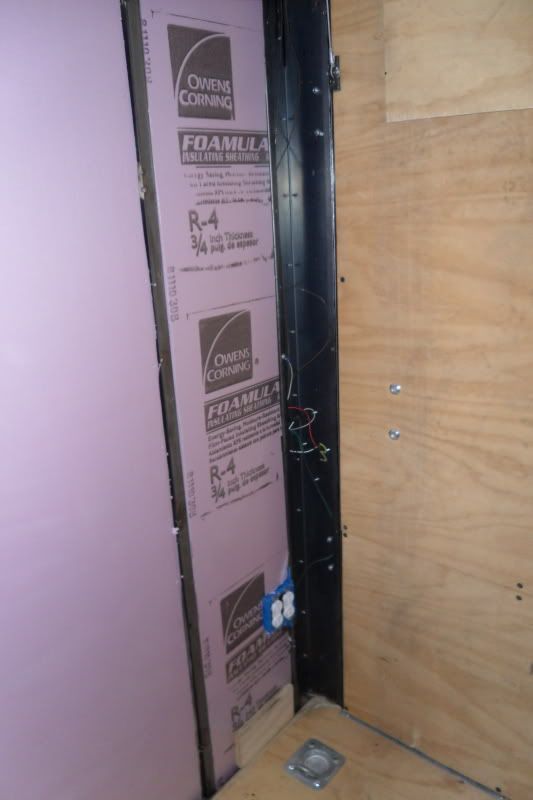
So I welded in some 1x1x1/8th square tubing behind the studs where my drop down beds will attach.

Image

<img src="http://i91.photobucket.com/albums/k290/crazywolf450r/Trailer/SAM_1785.jpg" border="0" alt="Photobucket">

Image

<img src="http://i91.photobucket.com/albums/k290/crazywolf450r/Trailer/SAM_1786.jpg" border="0" alt="Photobucket">

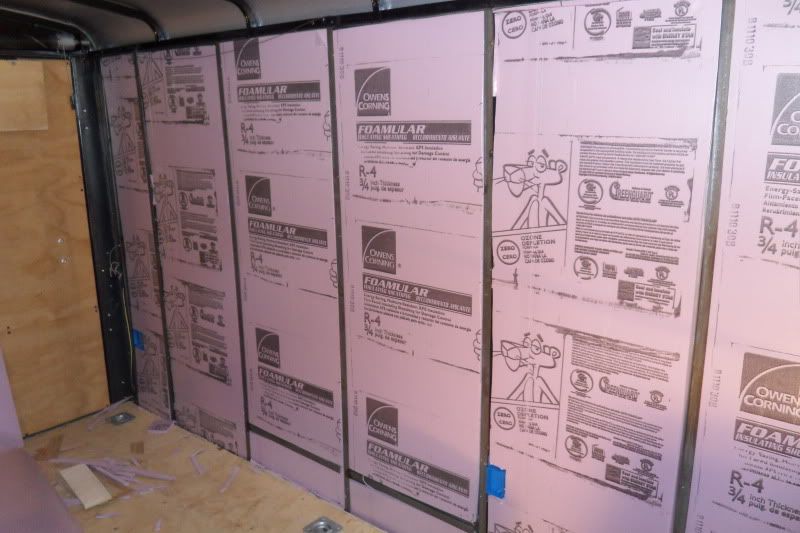
I used 3/4 inch owens corning foam insulation, 4.0 R rating.

Image

For the 110v service, I used 14/2 romex. I have a 2 gang box on each side of the rear of the trailer, mounted 16" high, a box on each side in the mid point of the trailer, and one above counter height for kitchen appliances, and one below counter height for mini fridge and water pump etc.

I've made some more progress since these pics, I'll update soon!

Thanks -

CrazyWolf
CrazyWolf450R
Teardrop Inspector
 
Posts: 9
Joined: Mon Jan 16, 2012 10:04 pm

Postby BC Cargo » Tue Jan 17, 2012 1:29 am

Looking good...Nice of them to not paint the studs...makes for better welds on the raw metal.
BC Cargo
Teardrop Advisor
 
Posts: 66
Images: 87
Joined: Sun Nov 06, 2011 10:11 pm
Location: Kelowna BC Canada

Postby pete42 » Tue Jan 17, 2012 8:04 am

welcome nice beginning
should make a great pitstop/camper combo

pete
User avatar
pete42
Super Lifetime Member
 
Posts: 2203
Images: 13
Joined: Sat Nov 07, 2009 11:52 am
Location: SouthWest Ohio
Top

Postby k1hog » Tue Jan 17, 2012 11:01 am

Great start, I am expecting my trailer to arrive late January, I look forward to your progress.

Johnnie
User avatar
k1hog
Teardrop Advisor
 
Posts: 82
Images: 33
Joined: Sun Jan 15, 2012 12:07 pm
Location: Lake Claiborne Louisiana
Top

Postby Gadget Man » Tue Jan 17, 2012 9:34 pm

Crazy Wolf;
Things look great so far. I remember the pink insulation days, It was about 95 degrees the weekend I insulated my trailer.

One thing I wished I would have done was install a light up high above my ramp door for loading the bikes in the dark or even for working on something behind the trailer. I did install a right side light next to my door.
Oh, and I also wished I would have added another 120 outlet closer to the back in my trailer. You have to do it now, cuz, it's hard to do it later.

I love the big long tongue, you can put a lot of stiff up there.

Gadget Man
My kids may be smarter than me,
But I know more.
User avatar
Gadget Man
Teardrop Master
 
Posts: 298
Images: 23
Joined: Tue May 10, 2005 4:41 pm
Location: Elk River MN
Top

Postby CrazyWolf450R » Tue Jan 17, 2012 9:59 pm

Gadget Man wrote:One thing I wished I would have done was install a light up high above my ramp door for loading the bikes in the dark or even for working on something behind the trailer.


I Knew I missed something! Thanks!

Gadget Man wrote:Oh, and I also wished I would have added another 120 outlet closer to the back in my trailer. You have to do it now, cuz, it's hard to do it later.


I have a 2 gang box on each side at the very back of the trailer, So a total of ( 8 ) 110v plugins within a few inches of the door. That *should* be enough!

If you have any other thoughts, I'd like to hear them. Your cabinet setup is one I greatly admire and am going to try to replicate.
CrazyWolf450R
Teardrop Inspector
 
Posts: 9
Joined: Mon Jan 16, 2012 10:04 pm
Top

Postby CrazyWolf450R » Tue Jan 17, 2012 10:35 pm

Ok, here are some pictures of how it sits as of now. Gotta let the bank account rest a few days!


Image

Electrical boxes just inside the side entrance door, to the left as you walk in. Top will be light switches.

Image

2 gang Box at the rear.


Image


The front wall insulation is a patchwork of scraps so none was wasted.

At this point, it's time to put the side walls back on and cut out the electrical boxes.


I need to decide on what lights to use inside. Thoughts?
CrazyWolf450R
Teardrop Inspector
 
Posts: 9
Joined: Mon Jan 16, 2012 10:04 pm
Top

Postby roadinspector » Tue Jan 17, 2012 10:56 pm

LED is the best that I know of. In the small tight cabinet spaces where you don't run power to, there are small battery LED lights that do a good job also.

FYI: Be careful with your 110 wiring. Romex is a solid wire as you know. Solid wire tend to crack or break over time where ever there is a nick or stress point due to the natural flex of the trailer as it is being hauled. This can cause you some real headaches or problems later.

Looking good!! :thumbsup:

Don't rush
Be Safe
Build well
Dadgum it! I cut that board 5 times and it's still too short!
2001 quad-cab Dodge Cummins 3/4 ton camper special, 16x7x7 CT work in progress toyhauler, 01 HD Ultra Classic, 98 HD Heritage Softail, 88 HD 1200 Sportster. viewtopic.php?f=42&t=51510
User avatar
roadinspector
500 Club
 
Posts: 599
Images: 127
Joined: Wed Mar 24, 2010 10:33 pm
Location: Texas
Top

Postby CrazyWolf450R » Tue Jan 31, 2012 8:44 am

Well heres a quick picture of the trailer, I was able to get all the side paneling cut out for the electrical boxes and reinstalled last night. Now this weekend I can begin work on the cabinets.


Image
CrazyWolf450R
Teardrop Inspector
 
Posts: 9
Joined: Mon Jan 16, 2012 10:04 pm
Top

Postby Wolfscout » Tue Jan 31, 2012 9:48 am

I went around the outside of my trailer with 12v lights that have switches on them. They come in very handy in lots of situation. I have clear & amber lenses for all of them.
Larry Fulmer, Jr.

2016 8X20 Homestead Patriot CTC
CTC 2

'90 6x12 Wells Cargo Trailer Conversion
my 1st build= CTC 1 FB album history.
User avatar
Wolfscout
500 Club
 
Posts: 511
Images: 32
Joined: Tue Jun 14, 2011 5:01 pm
Location: Newberry, S.C.
Top

Postby k1hog » Tue Jan 31, 2012 10:57 am

What are you going to put on the ceiling?

Looking Good!

Johnnie
User avatar
k1hog
Teardrop Advisor
 
Posts: 82
Images: 33
Joined: Sun Jan 15, 2012 12:07 pm
Location: Lake Claiborne Louisiana
Top

Postby CarlLaFong » Tue Jan 31, 2012 1:28 pm

Those welds look really, really bad. Sorry, but I have to call it as I see it. The one at the top has, absolutely, no penetration. The little tacks are marginally better, but pretty hinkey looking
http://jkcallin.blogspot.com/
"As I wandered, alone, through the endless fields of corn, I could hear the crows. They seemed to mock me, calling out my name, over and over", said Cawe
User avatar
CarlLaFong
500 Club
 
Posts: 701
Images: 5
Joined: Wed Jul 06, 2011 9:51 pm
Location: Sunny SoCal
Top

Postby CrazyWolf450R » Tue Jan 31, 2012 1:57 pm

CarlLaFong wrote:Those welds look really, really bad. Sorry, but I have to call it as I see it. The one at the top has, absolutely, no penetration. The little tacks are marginally better, but pretty hinkey looking


Truth.

I am a horrible welder.

Knowing is half the battle, right?
CrazyWolf450R
Teardrop Inspector
 
Posts: 9
Joined: Mon Jan 16, 2012 10:04 pm
Top

Postby CarlLaFong » Tue Jan 31, 2012 7:11 pm

CrazyWolf450R wrote:
CarlLaFong wrote:Those welds look really, really bad. Sorry, but I have to call it as I see it. The one at the top has, absolutely, no penetration. The little tacks are marginally better, but pretty hinkey looking


Truth.

I am a horrible welder.

Knowing is half the battle, right?
Denial isn't just a river in Egypt :lol:
I'm a certified welder, so I do have some credentials, though I am also an ordained minister in the Universal Life Church, which cost me a self addressed, stamped envelope.
Just keep practicing, look at some U tube videos and you'll catch on. Overhead welds aren't as scary as they seem. They're pretty much the same as flat. If you're using flux core (gasless MIG) vertical welds go up. Regular MIG can go down. Just watch the puddle and make it do what you want
http://jkcallin.blogspot.com/
"As I wandered, alone, through the endless fields of corn, I could hear the crows. They seemed to mock me, calling out my name, over and over", said Cawe
User avatar
CarlLaFong
500 Club
 
Posts: 701
Images: 5
Joined: Wed Jul 06, 2011 9:51 pm
Location: Sunny SoCal
Top

Postby CrazyWolf450R » Tue Jan 31, 2012 9:44 pm

Thanks for the tips :thumbsup:

I am using flux core wire on a lincoln weldpak 125, iirc.

I did get it dialed in a bit better on some of the other welds, but I was still extremely nervous about welding so close to the trailer skin that it was a lot of 1 second "burst"btype welds. The ones where I actually tried to make it good instead of just making.it stick turned out pretty good.

Maybe I should put a disclaimer? :lol:

Caution: I am not a certified welder, cabinet maker or electrician. If you are experienced in any of these professions please either help me improve, or hush yo mouf.


:thumbsup:
CrazyWolf450R
Teardrop Inspector
 
Posts: 9
Joined: Mon Jan 16, 2012 10:04 pm
Top

Next

Return to Cargo Trailer Conversions

Who is online

Users browsing this forum: No registered users and 17 guests