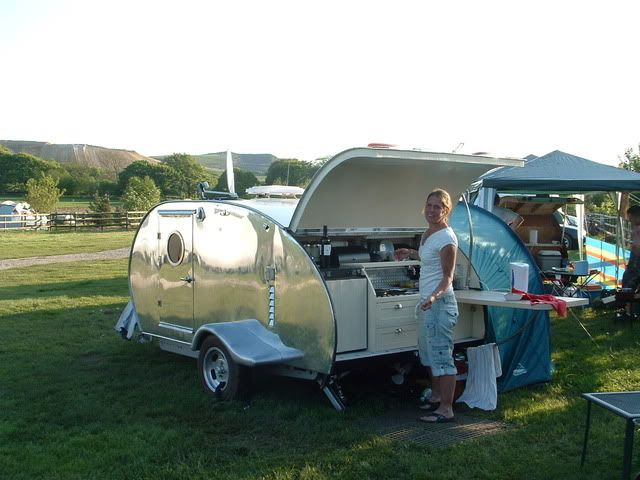
First post, my 5x10 v-nose build

Converting Cargo Trailers into TTTs

Re: First post, my 5x10 v-nose build

Postby flboy » Tue Dec 20, 2016 12:12 pm

That looks like the inside of a cozy cabin. Really nice job!

Sent from my SM-G935P using Tapatalk
Don (Flboy)

YouTube Video of Finished 6x12 Trailer:
https://youtu.be/6_-8cVdWUIA
YouTube Video of 7*18 with 2ft V-nose Trailer:
https://youtu.be/MUcMM86LA2g
User avatar
flboy
Gold Donating Member
 
Posts: 4218
Images: 378
Joined: Tue May 15, 2012 6:13 pm

Re: First post, my 5x10 v-nose build

Postby McDave » Tue Dec 20, 2016 1:46 pm

Wow! You don't mess around. That was knocked out in record time. Really nice job, lovin' the colors and overall feel. That looks like just the kind of place where I'd like to hang out. Your skills are showing....
Well done.. :applause: ..

McDave

PS, That cypress is some kind of beautiful...
User avatar
McDave
Donating Member
 
Posts: 2288
Images: 412
Joined: Sun Jan 25, 2015 5:21 am
Location: Tiny Town, Montana

Re: First post, my 5x10 v-nose build

Postby RandyH » Tue Dec 20, 2016 2:54 pm

Is that burlap on the ceiling? If so, did you glue it?

Randy
User avatar
RandyH
Teardrop Builder
 
Posts: 43
Images: 40
Joined: Mon Mar 21, 2016 3:31 am
Top

Re: First post, my 5x10 v-nose build

Postby Hader » Tue Dec 20, 2016 3:07 pm

Wow! :thumbsup:
User avatar
Hader
Silver Donating Member
 
Posts: 306
Images: 84
Joined: Mon Jul 04, 2016 5:00 am
Top

Re: First post, my 5x10 v-nose build

Postby tsyj » Tue Dec 20, 2016 5:25 pm

Thanks everyone, it's been a fun build. I'm lucky I am self employed, and am able to take the time to work on it when I want to.
I got the hitch mount done, and bike rack installed.

I'll post some pics of all that tomorrow if the weather is a bit nicer than it was today.


RandyH wrote:Is that burlap on the ceiling? If so, did you glue it?

Randy


Hey Randy, yes it is burlap from Amazon, here: https://smile.amazon.com/Wide-Yard-Long ... urlap&th=1

I screwed some 1.5" strips of 1/2" plywood to the roof members with some self tapping screws, then I stapled the burlap to the plywood strips. I made some cypress trim strips 1.5" wide and nailed them on top of the burlap to hide the staples.

I tried to do a panorama shot to show everything:

Image

I'm going to get the steam iron out and get some of those wrinkles out if possible.
tsyj
Silver Donating Member
 
Posts: 57
Joined: Sun Sep 18, 2016 1:09 pm
Location: Florida
Top

Re: First post, my 5x10 v-nose build

Postby RandyH » Thu Dec 22, 2016 10:55 am

tsyj wrote:Thanks everyone, it's been a fun build. I'm lucky I am self employed, and am able to take the time to work on it when I want to.
I got the hitch mount done, and bike rack installed.

I'll post some pics of all that tomorrow if the weather is a bit nicer than it was today.


RandyH wrote:Is that burlap on the ceiling? If so, did you glue it?

Randy


Hey Randy, yes it is burlap from Amazon, here: https://smile.amazon.com/Wide-Yard-Long ... urlap&th=1

I screwed some 1.5" strips of 1/2" plywood to the roof members with some self tapping screws, then I stapled the burlap to the plywood strips. I made some cypress trim strips 1.5" wide and nailed them on top of the burlap to hide the staples.


Great idea!
Just thinking...what if I sprayed a light coat of contact cement on the foam board insulation and attached the burlap to it? Then, run trim strips every so often to help hold in place. Maybe this would work and not have a bunch of wrinkles or sagging.
Randy
User avatar
RandyH
Teardrop Builder
 
Posts: 43
Images: 40
Joined: Mon Mar 21, 2016 3:31 am
Top

Re: First post, my 5x10 v-nose build

Postby McDave » Thu Dec 22, 2016 2:14 pm

@ Randy,
One thing that helps is to start at each end and have some tension in the headliner. Then add the next batten in at each end and that will make it a little tighter etc.etc.
The older cars used pockets sewn in the liner and wire rods across the liner in the pockets, newer cars are upholstered to foam, then installed into car.

McDave
User avatar
McDave
Donating Member
 
Posts: 2288
Images: 412
Joined: Sun Jan 25, 2015 5:21 am
Location: Tiny Town, Montana
Top

Re: First post, my 5x10 v-nose build

Postby tsyj » Sat Dec 24, 2016 8:19 am

RandyH wrote:Great idea!
Just thinking...what if I sprayed a light coat of contact cement on the foam board insulation and attached the burlap to it? Then, run trim strips every so often to help hold in place. Maybe this would work and not have a bunch of wrinkles or sagging.
Randy


Hey, I used foil duct tape to hold the foam board in place. It won't release like regular duct tape will.

If you pull the material tight when you are stapling it, it will be nice and tight.
Problem I had is that the burlap came off the roll with built in snags, and thread pulls...I think it just happens, burlap is kind of a rough fabric anyways.
I did double it up because you could see through it with only one layer.

I like McDave's idea of using an area rug for the headliner....Seems like it would finish a lot nicer.
tsyj
Silver Donating Member
 
Posts: 57
Joined: Sun Sep 18, 2016 1:09 pm
Location: Florida
Top

Re: First post, my 5x10 v-nose build

Postby tsyj » Mon Jan 02, 2017 7:59 am

Haven't done anything to the trailer since I've been in the mountains for a few days, but I did score something interesting I didn't even know existed.

A countertop, 110v icemaker. This thing makes ice every 8 minutes, and is going to be awesome when camping.

Image

Image
tsyj
Silver Donating Member
 
Posts: 57
Joined: Sun Sep 18, 2016 1:09 pm
Location: Florida
Top

Re: First post, my 5x10 v-nose build

Postby McDave » Mon Jan 02, 2017 11:50 am

What a great idea. I could make several batches of ice while charging the battery with the generator, maybe an hour or so.
I'm guessin' it keeps it cold as long as you have 120v? So, a little bit of modification and whamo!... instant frozen Margaritas'. mmm, mmmmm, mmm. Ice is good, too.

McDave
User avatar
McDave
Donating Member
 
Posts: 2288
Images: 412
Joined: Sun Jan 25, 2015 5:21 am
Location: Tiny Town, Montana
Top

Re: First post, my 5x10 v-nose build

Postby tsyj » Mon Jan 02, 2017 12:59 pm

McDave wrote:What a great idea. I could make several batches of ice while charging the battery with the generator, maybe an hour or so.
I'm guessin' it keeps it cold as long as you have 120v? So, a little bit of modification and whamo!... instant frozen Margaritas'. mmm, mmmmm, mmm. Ice is good, too.

McDave


Yeah, it will keep ice cold until the ice hopper fills up then it shuts off. So if you don't empty it the ice will melt back into water and it will start all over again.
It's going to be great to have continuous ice for drinks...been using the heck out of it at the house already.
If you're near electricity, this $90 ice maker beats the heck out of a $300 cooler.
tsyj
Silver Donating Member
 
Posts: 57
Joined: Sun Sep 18, 2016 1:09 pm
Location: Florida
Top

Re: First post, my 5x10 v-nose build

Postby beachguy005 » Sun Jan 29, 2017 8:58 am

Nice job on your project. I'm in the process of an 5x12 conversion and I was curious as to where, and how, you mounted the spare tire. I did see the drawing but not the actual.
beachguy005
Teardrop Master
 
Posts: 140
Images: 17
Joined: Sun Oct 02, 2016 4:34 pm
Top

Re: First post, my 5x10 v-nose build

Postby tsyj » Tue Jan 31, 2017 6:05 am

beachguy005 wrote:Nice job on your project. I'm in the process of an 5x12 conversion and I was curious as to where, and how, you mounted the spare tire. I did see the drawing but not the actual.


Hello, I bought this to mount the tire to one of the "studs" on the wall of my trailer: https://amazon.com/gp/product/B00RJKB2FQ/ref=oh_aui_search_detailpage?ie=UTF8&psc=1
But, as of now I have the tire laying down on the tongue and am using the u-bolts that came with the above kit to hold the tire in place.
Once I decide to mount a 20lb propane tank on the tongue, the tire will be moved. The tire makes a great spot for the garbage bag at camp, so I've left it as-is. :D
tsyj
Silver Donating Member
 
Posts: 57
Joined: Sun Sep 18, 2016 1:09 pm
Location: Florida
Top

Re: First post, my 5x10 v-nose build

Postby beachguy005 » Tue Jan 31, 2017 8:04 am

Hi, Thanks for the reply. I'm planning on mounting it like you drew it on your drawing. I'm using a U bolt style through the wall and while I've figured the support and bracing of it, I'm trying to figure the best way to protect the finish of the alu skin. Either a sacrificial panel of some sort or just ignore any abrasion to the finish because that's where the spare will always be.
I have a 5x12x5 high with a bullet nose like yours and I'd rather have a tongue box forward.
beachguy005
Teardrop Master
 
Posts: 140
Images: 17
Joined: Sun Oct 02, 2016 4:34 pm
Top

Re: First post, my 5x10 v-nose build

Postby tsyj » Tue Jan 31, 2017 2:22 pm

beachguy005 wrote:Hi, Thanks for the reply. I'm planning on mounting it like you drew it on your drawing. I'm using a U bolt style through the wall and while I've figured the support and bracing of it, I'm trying to figure the best way to protect the finish of the alu skin. Either a sacrificial panel of some sort or just ignore any abrasion to the finish because that's where the spare will always be.
I have a 5x12x5 high with a bullet nose like yours and I'd rather have a tongue box forward.


You can buy "clear bra" material and install it where the tire will hit against the trailer. I'm going to buy a long skinny strip to use as a back splash behind where my outside countertop is because I've noticed scratches on the paint from the camp stove, and other items being scooted and hitting the black paint.

https://amazon.com/VViViD-Vinyl-Clear-Protection-Inches/dp/B017IZZCPM/ref=sr_1_1?ie=UTF8&qid=1485891306&sr=8-1&keywords=24%22+clear+bra
tsyj
Silver Donating Member
 
Posts: 57
Joined: Sun Sep 18, 2016 1:09 pm
Location: Florida
Top

PreviousNext

Return to Cargo Trailer Conversions

Who is online

Users browsing this forum: No registered users and 24 guests