Page 2 of 3

Re: The Mick'en Coop

PostPosted: Mon Mar 02, 2015 2:34 pm
by 39Ratrod
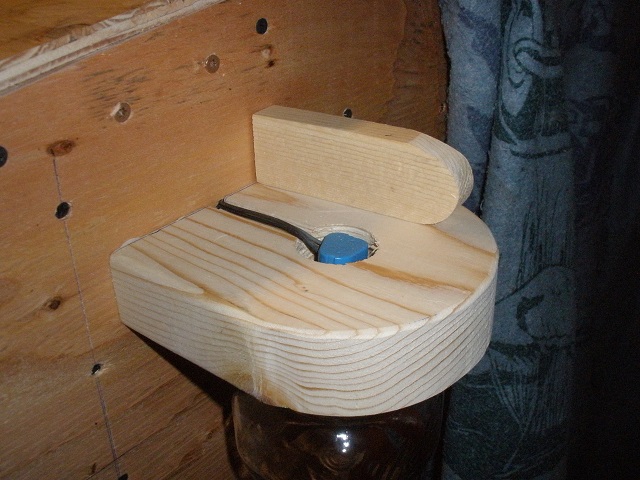
Put the lights on, then covered the wiring with a furring strip.
Image
Image

Re: The Mick'en Coop

PostPosted: Mon Mar 02, 2015 2:36 pm
by lrrowe
What a great idea and construction results. I see how it can be made waterproof for the outside (except you probably do not want glass on the outside).

Re: The Mick'en Coop

PostPosted: Mon Mar 02, 2015 11:05 pm
by 39Ratrod
lrrowe wrote:What a great idea and construction results. I see how it can be made waterproof for the outside (except you probably do not want glass on the outside).


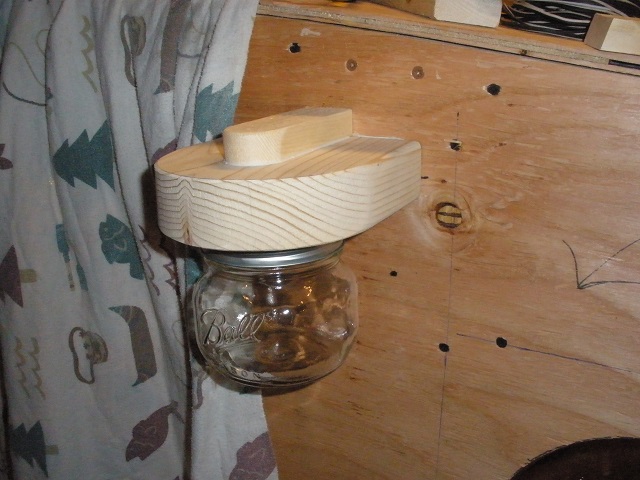
Thanks for the compliment! They are actually mount on the outside as the porch lights. The glass unthreads easily, so I could remove them during traveling. I think they will hold up pretty good. Those mason jars are tough!

Mick

Re: The Mick'en Coop

PostPosted: Fri Mar 13, 2015 8:27 am
by 39Ratrod
Welded up and installed the roof rack mounts.
Image

Cut the roof for the hatch. This was kindof a daunting task. Like when I chopped the top on my 39 Chevy truck. Once cut there is no turning back. Should work well.
Image

Re: The Mick'en Coop

PostPosted: Fri Mar 13, 2015 9:46 am
by KennethW
Way to think outside the box!! Pie plate windows,cool.It would be really cool if you could make them willys style that open.
Car lights in caning jars, Wow
The car light can be replaced with led at a very low cost to reduce you power requirements.(if you leave one on in the morning your battery would be dead!)

Re: The Mick'en Coop

PostPosted: Fri Mar 13, 2015 11:07 pm
by 39Ratrod
KennethW wrote:Way to think outside the box!! Pie plate windows,cool.It would be really cool if you could make them willys style that open.
Car lights in caning jars, Wow
The car light can be replaced with led at a very low cost to reduce you power requirements.(if you leave one on in the morning your battery would be dead!)


Thanks for the comment KW. I hear ya on the power drain of regular bulbs. Need to score a set of 3157 led's.

Re: The Mick'en Coop

PostPosted: Fri Mar 13, 2015 11:18 pm
by 39Ratrod
Took me long enough, but it is finally all skinned in ply. Had to finish some ribbing in the roof. Not visible is the framed area for the 9" roof vent In the rear sloping section before the hatch. Figured a 14" might not look right from an aspect ratio.
Image
Image
Image

Re: The Mick'en Coop

PostPosted: Mon Mar 16, 2015 8:25 am
by 39Ratrod
Got it on the trailer this weekend. Wife and I tipped on the rear wall, I painted the underside of the floor and add the 2x's to get the height to clear the rails of the trailer. I know, I know weight, weight, weight! Oh well it's down low so I don't mind so much. Also painted the areas the jack mounts and roof rack brackets will be.
For the jack mounts I used some 1/8" wall 3x3 tubing cut in half so it tuned it into angle iron, and bought a 18" receiver tube from HF and cut it into 4" chunks and welded it together and placed these at each corner.
Image

The roof rack mounts are just some random steel with a SPICER U-Joint strap from a semi for the crossbar attaching point.
Image

Pulled it out of the shop to look at it in daylight, and to see how the Eagle pulled it. It pulled it well. It should with a .060" over 258, 4.0 head, fuel injection, Comp cam, etc. I guess I better not get too excited, far from done, and far from it's finished weight.
Image

Made some progress on the galley too.
Image

Re: The Mick'en Coop

PostPosted: Mon Mar 16, 2015 11:25 am
by Patti
Considering the pie plate windows [which I think are awesome] and their potential to shatter, is there any kind of clear film you can put on them from the inside so that if they do break, they will stick to the film and be less likely to leave glass splinters everywhere?

Re: The Mick'en Coop

PostPosted: Mon Mar 16, 2015 11:50 am
by KennethW
Patti, One could paint the pie plates with clear rock guard paint. Rock guard paint is rubber like.

Re: The Mick'en Coop

PostPosted: Thu Mar 19, 2015 8:18 am
by 39Ratrod
Made a little more progress on the inside. Got most of the wall board up which as I may have mentioned earlier is some old flooring my wife got for free. It's the fax snap together stuff, but it looks good in here. Don't let the photos fool ya, taken with a GoPro so everything looks bigger with that lense up close. I painted the interior side of the galley wall the same color as the exterior. The curtains and other accents will be made from the flannel sheet I'm using as a door at the moment. Should match nicely.

Image

Some cushions out of our cabover camper, just to get the feel of it.

Image

A little more insulation and I'll finish the roof. Then onto the bed and doors!

Image

Re: The Mick'en Coop

PostPosted: Thu Mar 19, 2015 8:36 am
by Woodbutcher
Mick, you are moving along quickly. There should be no reason you can't be ready for camping season. :applause:

Re: The Mick'en Coop

PostPosted: Wed Mar 25, 2015 8:23 am
by 39Ratrod
Been working on it pretty steady. The doors are on and I have been skim coating the roof with Bondo. What a pain! This is my first time using the stuff and it's hard mix it in any large quantity, so it's been a tedious task. I like how it smoothes and seals everything up. Pulled it out into the pasture and my son and I stayed in it last Saturday night. It is pretty comfy. Also wired in my a/c lights. I scored 3 cases of light fixtures from Habitat For Humanity. They were having a huge sale where everything was 75% off, so it was $5 a case. There were 6 to a case! They are perfect! They have their own switch, and a built in outlet.

I'll post some pics here soon of the progress.

Re: The Mick'en Coop

PostPosted: Sun Mar 29, 2015 9:23 pm
by 39Ratrod
Got more of the body filler spread. Pulled it outside for sanding and thought I'd take a few pictures.
Image
Image
Image

One nice thing about using Mason Jars for the porch lights.....I always have a glass for cocktail!
Image

Placed a hook on the door for my bladder pack. Easy access for a necessary item.
Image

Re: The Mick'en Coop

PostPosted: Sun Mar 29, 2015 9:25 pm
by 39Ratrod
Oh Yeah! Got the struts installed on the hatch....works like a charm!
Image