Page 5 of 7

PostPosted: Fri Oct 15, 2010 2:37 am
by azmotoman
Looks GREAT! (but please) Clean up the corners on those clearance/marker light supports. They are an accident waiting to happen.

Nice job. :thumbsup:

PostPosted: Sun Oct 24, 2010 10:13 pm
by MKE_Tear
azmotoman wrote:Looks GREAT! (but please) Clean up the corners on those clearance/marker light supports. They are an accident waiting to happen.

Nice job. :thumbsup:


You're absolutely right!! Glad you mentioned it -- thanks!!


Well, I said earlier that I wasn't a big fan of the "you're on teardrop time" saying but I can certainly appreciate it. Lately, I've just needed to take some time off.

That being said, I really haven't gotten any dramatic changes done, mostly cosmetic.

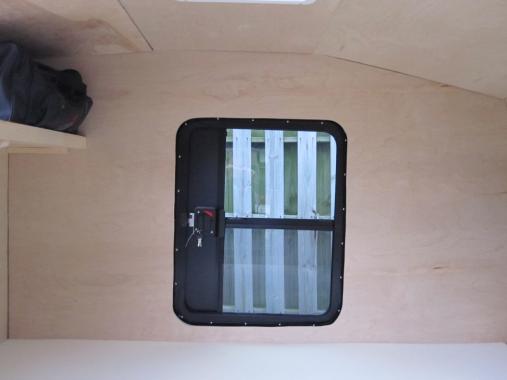
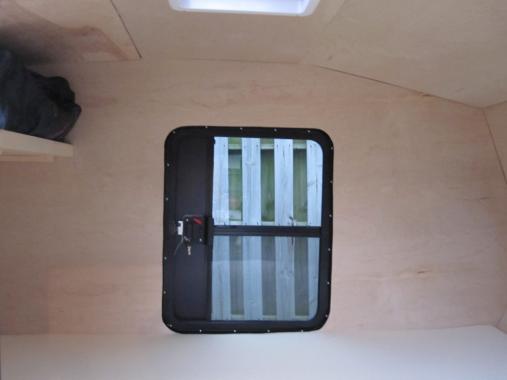
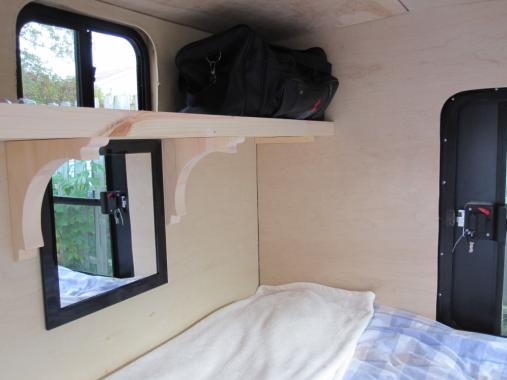
I added a second mattress. I had originally considered getting a thicker mattress, to raise the height to door level (as I've seen recommended), but I was concerned with losing space (read: height) inside. In the end I decided to get that second mattress -- it was just too uncomfortable climbing over the metal door frame.


First mattress:

Image


Second mattress:

Image


I then loaded up the galley area and tested how some of the things would fit:

Image

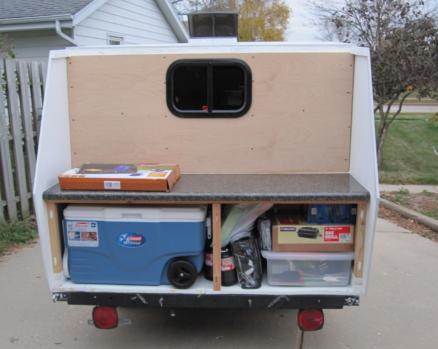
Anybody have experience putting tile on the galley wall? I'm concerned with whether or not it would pop out or break off due to the trailer bouncing around? (FWIW: I'm thinking on using 1" x 1" or even smaller, the stuff that comes on the mesh. And I'm not too overly concerned with the weight it would add. EDIT: I'm thinking a soft, pliable type of material like a caulk, would adhere yet be pliable enough to not crack (since it wouldn't be hard like grout). Thoughts/opinions are certainly welcome.)


Then sheets, duvet, pillows...

Image

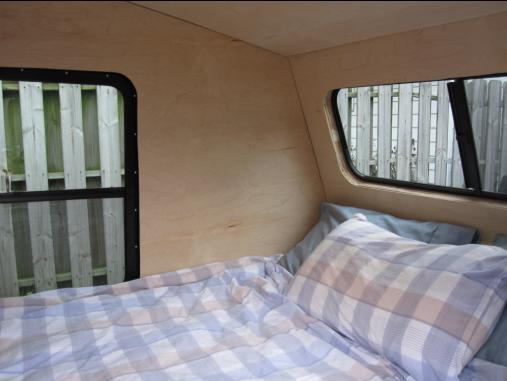
EDIT #2: The curtain rods and curtains haven't gone up yet.


and an inside mirror added on the back wall...

Image

PostPosted: Mon Oct 25, 2010 8:17 am
by GPW
Tile !!! :o " the Bird says NO ! "

PostPosted: Mon Oct 25, 2010 10:46 am
by bobhenry
I used the silicone white tub and tile caulk. I used it to adhere the tiles and then used it for the grouting also. It stays soft and pliable enough to take the road shock. On a vertical surface you may need to clamp it into place for a few hours for the initial set then remove and clean the grout lines with soap and warm water. I used a section of blue foam and some weights . The foam forms to the surface and will not readily adhere to the tile.

Mine has traveled 5000 + miles and looks like the day I put the tiles down.

You might also concider a tinted lexan or smooth plastic sheeting.

My counter is left over lexan from the roof.

Image

Image

Image

PostPosted: Sat Oct 30, 2010 3:01 pm
by MKE_Tear
Well, it's Halloween weekend so time to dress her up.

I added some diamond plate to the front...


Image


Image


Image


Image


Image


With a bunch of stainless steel screws, PL Premium (Urethane Construction Adhesive) and Silcone, it went (and stayed) up very nicely.

Happy Halloween everyone!!

PostPosted: Sat Oct 30, 2010 8:06 pm
by S. Heisley
She looks really good! :thumbsup: :applause:

PostPosted: Sun Nov 07, 2010 4:45 pm
by MKE_Tear
S. Heisley wrote:She looks really good! :thumbsup: :applause:


Thanks, Sharon!!


I added some eyebrows (a rain drip guard)...


Image

Image

Image

Image

Image


And began tiling the galley wall...


Image


Image


Image


Image


Image


Image


And the almond grout goes on...

Image

PostPosted: Sun Nov 07, 2010 5:06 pm
by parnold
That looks sharp!
:thumbsup:

Did you use regular grout, or something more flexible?

PostPosted: Sun Nov 07, 2010 5:12 pm
by MKE_Tear
parnold wrote:That looks sharp!
:thumbsup:

Did you use regular grout, or something more flexible?


Thanks!!

I'm sorry -- it's 100% Silicone (almond colored). I'm hoping that will survive the bumps down the road, whereas your typical grout would not.

PostPosted: Sun Nov 07, 2010 6:01 pm
by absolutsnwbrdr
The tile and counter definitely look great!

PostPosted: Sun Nov 07, 2010 9:08 pm
by Miriam C.
:applause: :thumbsup: Image

Very nice tile work. It just keeps getting better!

PostPosted: Mon Nov 15, 2010 8:43 pm
by MKE_Tear
Thanks, gang!!


I put up the tiles (12" x 12" sheets) but I have to give credit to my wife, as she is the one who is doing the grouting/caulking. Thankfully, she is doing that (it's not like typical grout that you just trowel in, it's much slower with a tube of caulk, and the clock is ticking to get everything done before it gets way too cold, so her help is greatly appreciated right now).

Speaking of that, we're not done with the caulk but we've had to move onto the next step: the hatch. Again, thankfully, my wife is helping with that as I've found out that is definitely a two person job/step (trying to hang, and hold and move everything).

I bought one of the "better than hurricane hinges" from Grant, but realized that something was a bit off, since it wouldn't close. It's not that anything was wrong, it's just that the drop wasn't enough. So I had to figure out what I was going to do. Thanks to Frank from teardroptrailerparts.com, he suggested I cut down the hinge. It was either cut it or cut down the (height of the) walls. I chose his/the easier way. Thanks, Frank!!

Before...

Image


After...

Image


Next, I needed to "build-out" the inside supports for the hatch, like on the inside (for the roof)...


Before...(not a great shot but the best I've got)

Image


And after, reverse angle, sorry...

Image

Image


And here we go...

Image

Image

Image

Image

Image

Image

PostPosted: Sat Nov 20, 2010 9:17 pm
by peggyearlchris
wow! It is looking so nice.I'm enjoying seeing your build. :thumbsup: :thumbsup: :applause: :applause: Peg

PostPosted: Sat Jan 22, 2011 2:22 pm
by MKE_Tear
Thanks, Peg!


This is (still) my off-season but I thought I'd post the shots before wrapping it up (storing it) for winter...


"Better than hurricane hinge" goes on (part of the metal gets trimmed so it can go up & down):


Image


Two types of weather seal go on the wall:

Image

Image

Image

Image


Aluthane goes on the top piece of the hatch:


Image


Back to the hinge:

Image

Image

Image


The grouting/caulking of the tile was finished, but I'm sorry I don't have any final pictures. My wife did a great job!


Lastly, the crazy garage-in-a-box goes up. Both my wife & I should be in jail for k!lling each other. It took us three days to do (over the Thanksgiving weekend) bec. one of the poles was missing in the box. Of course, there's a sheet of paper in the box that says if you are missing a piece don't go back to the store and call the company, but we didn't. We couldn't wait, a week or more to get it. This was the final warm weekend we had, and we were lucky to get this far with such good weather.

The thing is enormous, measuring 10' high x 20' deep and 12" wide:

Image

Image

PostPosted: Thu Feb 03, 2011 8:59 pm
by tearhead
Whoa, this is gorgeous! I just caught up with your build posts. Sounds like you like your aluthane only to a point!

You have a beautiful camper! Any chance you'll bring it to Cooler Near the Lake in April? Looks like your wife has caught the bug too, lucky for you! It would be great to meet both of you and see your masterpiece.