ultra lightweight floating popup camper

Design & Construction of anything that's not a teardrop e.g. Grasshoppers or Sunspots

Postby Mini Renegade » Fri Apr 25, 2008 2:19 pm

Mini Renegade wrote:Over here in the 70`s`s a company started selling a trailer called a caraboat which was a full size trailer with the back that folded down to form a rear deck, similar to your idea. This is a link for the early ones, the later that ones folded up the rear arent pictured though.
http://www.caraboat.com/main.php


After never seeing one in the flesh, I turned a corner today to see a familiar looking handrail over the top of a hedge, after a quick u turn I was looking at a caraboat mk1 in a driveway, will try and get a pic.
If evvr tha dus owt fr nowt, allus do it fr thissen
User avatar
Mini Renegade
500 Club
 
Posts: 520
Joined: Tue May 15, 2007 2:26 pm
Location: (Old) York

Re: 3 1/4 x 6

Postby bgordon » Mon Jul 07, 2008 4:43 am

Any progress on the B.U.B??


coal_burner wrote:After giving the garage a spring cleaning yesterday, i was able to get a little work done on the B.U.B. (Big Ugly Box).
I epoxied on a 3 1/4" by 6" foamed over fiberglass block to make the final structural connection holding my cap together. (i said a little work)
Image

Image

this is a side view of the bub. the bottom frame around the window cutouts are actually the 6" that i cut off the top of the base of the camper (previous post). Wetting out fiberglass around tight corners is a pain, so i decided to recycle them. The 3 x 6 block in the first picture is where the 2 recycled pieces are now joined.
once i put a layer of fiberglass over that joint, the top will be structurally stable enough for me to take the top off and start fiberglassing the inside.

On a separate note: the metal fabricator that had the equipment to bend an offset into 2x2x3/8 square steel tube for a new tongue went out of business. Now i have to find another tongue strategy.

Image

Here's another pic of the front of the trailer before the newest addition was epoxied into place (broomstick duct taped on to keep things from sagging too much).

Two more beers worth of work completed.
:guzzle:[/img]
Barrie

Keep moving forward.
Psalm 1:1-3.

Build Journal: bgordon's 5 week cardboard & fiberglass build
http://www.tnttt.com/viewtopic.php?f=50&t=38781
User avatar
bgordon
Teardrop Master
 
Posts: 299
Images: 122
Joined: Tue Apr 24, 2007 6:45 am
Location: Johannesburg, South-Africa

Postby slyeager » Wed Jul 09, 2008 7:09 pm

Love the BUB!!! Can't wait to see more.

45 min reading entire post, marveling at the genius of it.
3 beers

:guzzle: :thumbsup: :applause: :applause:
slyeager
Teardrop Builder
 
Posts: 48
Images: 42
Joined: Fri Mar 21, 2008 9:00 am
Top

Postby COMP » Thu Jul 10, 2008 2:41 pm

:thumbsup:
COMP
Teardrop Builder
 
Posts: 32
Joined: Thu Jul 10, 2008 12:48 am
Location: so. in.
Top

Postby slyeager » Thu Sep 04, 2008 5:58 pm

Bub Update??
slyeager
Teardrop Builder
 
Posts: 48
Images: 42
Joined: Fri Mar 21, 2008 9:00 am
Top

i'm back

Postby coal_burner » Tue Sep 09, 2008 8:22 am

Well, I haven't been looking on this sight for awhile because i've been busy with another project that had a deadline(nasa moon digging robot). But now that that is over with, the BUB has been moved back into my garage and work is beginning again (sort of).
The next stage of the build is to build a front fairing to reduce wind resistance and improve road manners. (i think i mentioned before that it feels like i'm towing a barn door down the freeway and my fuel economy drops down to about 35MPG) :cry:

So, i cut some foamboard, got my gloves on, opened the new cans of epoxy (that i bought 4 months ago) and lo and behold, epoxy bricks in cans.

Aircraft spruce & co says that everything should have a 1 year shelf life, and they are looking into replacing everything (really nice people).

Until then, the salesperson says that if i heat the cans up over 100 degrees F, they sometimes re-liquify. I'm going to try that tonight.

2 beers, no epoxy fumes. it could have been worse. :beer:

I'm still trying to figure out what to do with the tongue. I'm vacillating between a straight piece of 1/8" wall square tube mounted on the top of the camper deck, or a 3/8" wall square tube, cut and welded into a 6" offset mounted to the underside of the deck. The bent tube under the deck would be heavier, reduce ground clearance, and worry me structurally(welds rust much easier than smooth tube). It would however simplify the fiberglass work.
The straight tube is lighter, easier to calculate structurally, and a bit cheaper, but i will have to make an 7" tall notch in the front of the cap so that everything can seat for towing. when the top is up for camping i'm going to have to find a "non gay" method of plugging a 3" wide by 7" tall hole.

Lets hop that tomorrow i can post some pictures of more foam glued to the front of BUB.
We may have philosophy and opposable thumbs, but most humans show all the wisdom of starved raccoons. It's amazing that more of us aren't found flattened on the side of our own roads.
the original bub build thread http://www.tnttt.com/viewtopic.php?f=5&t=19227
User avatar
coal_burner
Teardrop Advisor
 
Posts: 75
Images: 92
Joined: Mon Oct 01, 2007 11:08 am
Location: Berkley, Michigan
Top

it worked

Postby coal_burner » Wed Sep 10, 2008 9:07 am

The epoxy took about 3 hours to become fully liquid, but it did work.

Image

its amazing how much heat can be thrown off by a thousand watts of halogen lights. The epoxy can is spray painted black to absorbe a little more of the light (they start off silver).

there is now a 2" thick by 6" deep piece of pink foam glued across the front of the bub. the space above it will be filled with pink foam scraps and spray in expanding foam, then sanded down so that i have a 45 degree angle as the leading edge of the top of my camper.
Image

I pondered the math behind just cutting a piece of pink foam to bridge the bowed roof at a 45 degree angle to the flat front window area, but decided that i probably wouldn't have been able to accurately cut all of the angles into the edge of the foam anyway.

:beer:

4 beers today and hopefully much more visible progress tomorrow.[/img]
We may have philosophy and opposable thumbs, but most humans show all the wisdom of starved raccoons. It's amazing that more of us aren't found flattened on the side of our own roads.
the original bub build thread http://www.tnttt.com/viewtopic.php?f=5&t=19227
User avatar
coal_burner
Teardrop Advisor
 
Posts: 75
Images: 92
Joined: Mon Oct 01, 2007 11:08 am
Location: Berkley, Michigan
Top

Re: it worked

Postby angib » Wed Sep 10, 2008 5:31 pm

coal_burner wrote:The epoxy took about 3 hours to become fully liquid, but it did work.

Yup, and I can confirm it doesn't seem to affect its strength. The same heating process works fine if you have epoxy that has gone cloudy/waxy - rather than use it in this condition, heat it and the cloudi/waxiness will disappear.

Andrew
User avatar
angib
5000 Club
5000 Club
 
Posts: 5783
Images: 231
Joined: Fri Apr 30, 2004 2:04 pm
Location: (Olde) England
Top

Postby slyeager » Wed Sep 10, 2008 8:03 pm

when the top is up for camping i'm going to have to find a "non gay" method of plugging a 3" wide by 7" tall hole.


Sure would be cool if you could somehow dispense beer cans/bottles through that hole........lol
slyeager
Teardrop Builder
 
Posts: 48
Images: 42
Joined: Fri Mar 21, 2008 9:00 am
Top

Postby bgordon » Thu Sep 11, 2008 3:35 am

Hi,

I'm really glad to see you're working on the BUB again. This is a fascinating thread.

Two questions, if I may?
1. What do you estimate will the weight of the completed trailer be?
2. How are you going to finish it off, i.e. are you going to paint it, or shoot it with gel coat?

Looking forward to your progress!
Barrie

Keep moving forward.
Psalm 1:1-3.

Build Journal: bgordon's 5 week cardboard & fiberglass build
http://www.tnttt.com/viewtopic.php?f=50&t=38781
User avatar
bgordon
Teardrop Master
 
Posts: 299
Images: 122
Joined: Tue Apr 24, 2007 6:45 am
Location: Johannesburg, South-Africa
Top

a little more progress

Postby coal_burner » Thu Sep 11, 2008 9:43 am

Today's scheduled work went really quickly 1 1/2 hours work - 4 beers.
:beer:
misc. foam scraps were glued into place using a 50/50 mix of 5 minute epoxy and glass micro balloons (the mixture which henceforth shall be referred to as "wet micro").

Image

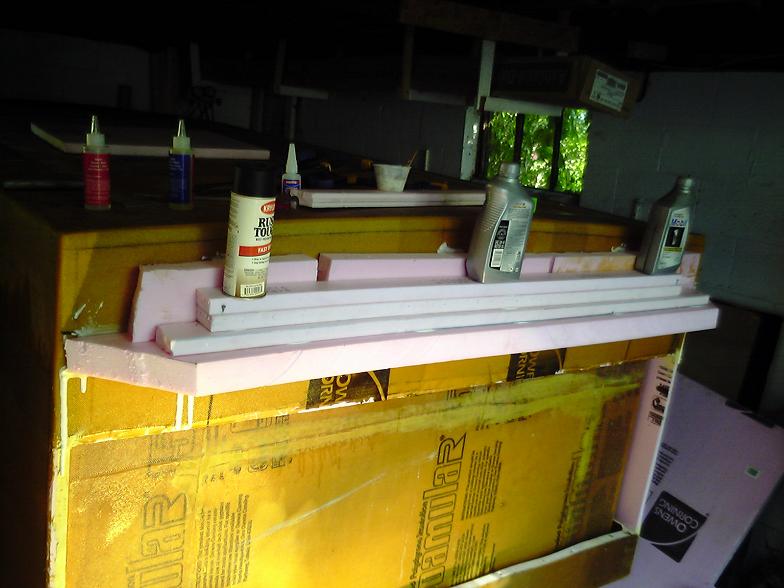
Exactly one can of spray in expanding foam insulation was sprayed into place, and began expanding.
Image

Image

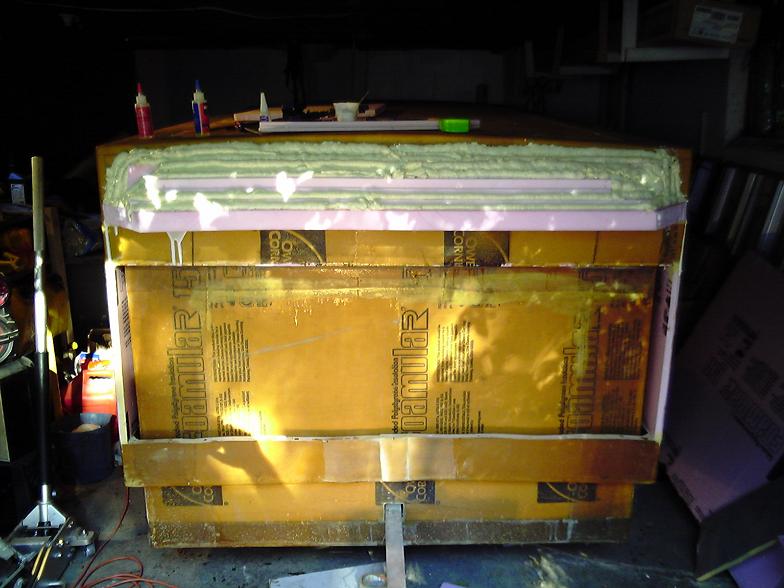
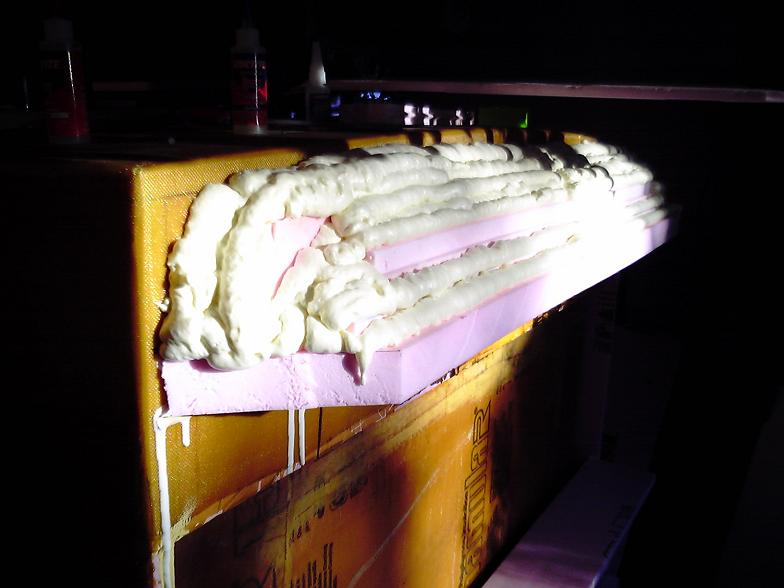
The next morning, things were a lot more expanded than in these pictures, but the lighting wasn't good enough for a pic.

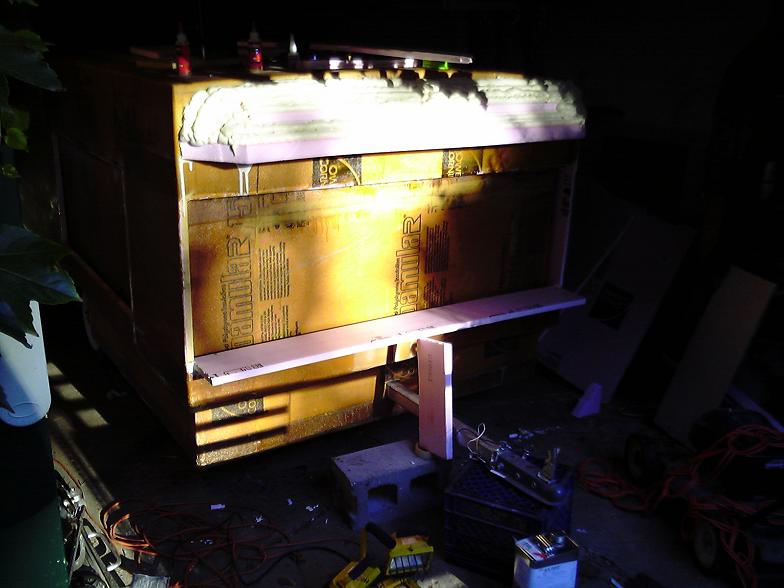
The next step was to start on the bottom portion of the fairing. A piece of 1" thick foam was wet microed into place extending 6" forward of the front wall of the trailer. this will give me a 7" deep shelf at the head of the bed when the sides and window are in place, and should also give me enough room to hang curtains/blinds/window shade/whatever without having to remove them when i lower the top.

Image

I'm making a slight design change. Originally, when the top was lowered, the lower edge of the top was even with the lower edge of the trailer deck. This required a seven inch tall gap to be cut into the cap so that it can be lowered around the tongue. I've now decided to not lower the top completely for towing. It will stop 2" short of the bottom of the camper. This will do 2 things for me. The tongue gap can be reduced to only 3" by 5", which is pretty easy to do structurally, and shouldn't require any gap filling when the top is raised.
Secondly: with a ground clearance of only 8", i am a little worried about the lower edge of the cap having to absorb the full force of a frontal impact with the ground when hitting a pothole while navigating a steep driveway (it could happen). If the top isn't completely lowered, the camper deck will be the thing that makes contact with the ground, and that is so tough that i'm not worried in the least about it. I have some kevlar cloth that i'm going to epoxy into place on the leading edge of the deck just like the fiberglass cloth. This stuff is used by kayakers to prevent abrasions to their boats when they come into contact with boulders, so i think it will be good enough for my purposes. remember also that this camper is going to act as a kind of base camp while canoeing, so it's going to scrape along a lot of submerged rocks while floating down the river.

slyeager
Teardrop Inspector

Sure would be cool if you could somehow dispense beer cans/bottles through that hole........lol


funny story: my brother in law made a similar remark when he was helping me carry in several hundred pounds of ceramic tile to install around my new bathtub/2 person hot tub. "sure would be cool if you installed a T.V. into the wall at the foot of the tub and had a few hundred watts of surround sound in there."
3 weeks and $1,100 later, there was a 14" LCD flat screen TV recessed into the wall behind the tile, and a pair of custom fiberglass speaker enclosures in the tub (only 200 watts of stereo sound though).

The moral of this story: Be careful what you say around me. If the idea is crazy/strange/cool enough, i might have to do it as a matter of pride, no matter what the cost or time spent.

Two questions, if I may?
1. What do you estimate will the weight of the completed trailer be?
2. How are you going to finish it off, i.e. are you going to paint it, or shoot it with gel coat?


The weight, fully outfitted with a queen sized futon, air conditioning, refrigerator,heater, microwave oven, and 2 group 31 AGM batteries to run it all is..... wait for it....... 750 pounds.
the bare camper, not outfitted, but tow-able, and water tight is only going to weigh about 350 pounds. I actually could have built this a lot lighter if i had only understood at the beginning of this project, exactly how strong and rigid foam cored fiberglass construction really is. I could have lost about a hundred pounds of wooden deck framing and plywood flooring without making the BUB any less durable.

As far as an exterior coating goes, i'm going to smooth out the surface by applying a layer of wet micro, sanding everything flat and smooth, and then painting in the same fashion that you paint a car. I'm not sure whether i'm going to do the painting myself, or drag the bub to an auto body shop.
The one limiting factor i have in painting is color and it's associated temperature when exposed to sunlight. Any dark colors convert enough of the sunlight to heat, that the foam will begin to shrivel and pull away from the fiberglass. This really starts to happen at about 200 degrees F but i want to take no chances, and am planning on a white camper with some small colored accents. Any creative ideas with colors and patterns would be appreciated.
:beer:
We may have philosophy and opposable thumbs, but most humans show all the wisdom of starved raccoons. It's amazing that more of us aren't found flattened on the side of our own roads.
the original bub build thread http://www.tnttt.com/viewtopic.php?f=5&t=19227
User avatar
coal_burner
Teardrop Advisor
 
Posts: 75
Images: 92
Joined: Mon Oct 01, 2007 11:08 am
Location: Berkley, Michigan
Top

i'm so proud of myself

Postby coal_burner » Thu Sep 11, 2008 10:01 am

WOW! Over 10,000 page views of BUB. This has to put me in the top 10 list of most viewed projects. Or, if not, pretty close.
:wine party:

:banana: :woohoo: :banana: :woohoo: :banana: :woohoo:
We may have philosophy and opposable thumbs, but most humans show all the wisdom of starved raccoons. It's amazing that more of us aren't found flattened on the side of our own roads.
the original bub build thread http://www.tnttt.com/viewtopic.php?f=5&t=19227
User avatar
coal_burner
Teardrop Advisor
 
Posts: 75
Images: 92
Joined: Mon Oct 01, 2007 11:08 am
Location: Berkley, Michigan
Top

Re: a little more progress

Postby bgordon » Fri Sep 12, 2008 2:23 am

coal_burner wrote:The weight, ..... wait for it....... 750 pounds.
the bare camper, not outfitted, but tow-able, and water tight is only going to weigh about 350 pounds.


There's only one thing to be said about that; WOW!
And if I have to say anything else, it would be: AMAZING.
I would LOVE to get my trailer that light!

coal_burner wrote:As far as an exterior coating goes, i'm going to smooth out the surface by applying a layer of wet micro, sanding everything flat and smooth, and then painting in the same fashion that you paint a car. I'm not sure whether i'm going to do the painting myself, or drag the bub to an auto body shop.
The one limiting factor i have in painting is color and it's associated temperature when exposed to sunlight. Any dark colors convert enough of the sunlight to heat, that the foam will begin to shrivel and pull away from the fiberglass. This really starts to happen at about 200 degrees F but i want to take no chances, and am planning on a white camper with some small colored accents. Any creative ideas with colors and patterns would be appreciated.


I am really looking forward to your progress, especially the finishing with wet micro-part. Please take lots of pictures!! :pictures: :pictures: :ok: :pictures: :pictures:
Barrie

Keep moving forward.
Psalm 1:1-3.

Build Journal: bgordon's 5 week cardboard & fiberglass build
http://www.tnttt.com/viewtopic.php?f=50&t=38781
User avatar
bgordon
Teardrop Master
 
Posts: 299
Images: 122
Joined: Tue Apr 24, 2007 6:45 am
Location: Johannesburg, South-Africa
Top

Re: a little more progress

Postby bgordon » Fri Sep 12, 2008 2:31 am

coal_burner wrote: I actually could have built this a lot lighter if i had only understood at the beginning of this project, exactly how strong and rigid foam cored fiberglass construction really is. I could have lost about a hundred pounds of wooden deck framing and plywood flooring without making the BUB any less durable.


Oh, yes, I forgot to ask... How would you have constructed the floor if you had to do it over again? (I know, with pink foam and fiberglass, but how thick?)

Thanks!
Barrie

Keep moving forward.
Psalm 1:1-3.

Build Journal: bgordon's 5 week cardboard & fiberglass build
http://www.tnttt.com/viewtopic.php?f=50&t=38781
User avatar
bgordon
Teardrop Master
 
Posts: 299
Images: 122
Joined: Tue Apr 24, 2007 6:45 am
Location: Johannesburg, South-Africa
Top

how i am going to do it next time

Postby coal_burner » Fri Sep 12, 2008 8:05 am

Oh, yes, I forgot to ask... How would you have constructed the floor if you had to do it over again? (I know, with pink foam and fiberglass, but how thick?)


I've been pondering the construction of a more traditionally shaped teardrop after the BUB is done, using the skills i've aquired during this build. I'll describe the mental picture of the construction of the new deck.

The size is 4 by 8 feet. I would wet micro 2 sheets of 2" thick foamboard together to get 4" thickness. I would then cut (using a tablesaw with a very large outfeed and side table) this into 4 2 foot by 4 foot rectangles. Then i would reassemble the 4 sections back into a 4 by 8 sheet, sandwiching 3 layers of 8" tall fiberglass tape soaked in epoxy between each section. the fiberglass tape would be folded over(top and bottom) the 3/8" quarter rounds that i didn't tell you would be carved out of the edges of the foam sheets. A layer of a product called "peel ply would be placed over the tape to texture the surface, and weights would be placed over the peel ply to keep the fiberglass tape from lifting off of the foam where it made the bend.
after all of that cures.
All edges would be sanded or routed into a 3/4" quarter round profile for structural as well as ease of fiberglassing reasons.
The top and bottom would each be covered in 4 layers of fiberglass cloth (alternating between straight and diagonal strand orientation between layers).
At the point where the axles connect to the deck, i would cut 1 foot by 2 foot pieces of 1/2" plywood to use as weight spreaders(washers) on the top and bottom of the deck. bolts would go through the torsion axle mount plate, through wood, through the deck, through more wood, then into a nut.

instead of wood, you could alternatively cover a sheet of (very expensive)
3/4" PVC foam with a few layers of fiberglass. This would be lighter than the wood and pretty much rot proof. The crush strength of the PVC foam is immense, so it is perfect for a highly concentrated point load like this. Unfortunately it's price is commensurately immense- $50 for a 3 foot by 3 foot by 3/8" thick sheet.
A couple pieces of aluminum channel could be bolted to the bottom of the deck, to form an a frame tongue. I would use 6" diameter washers on the upper side of the deck to spread the load across more foam.

This deck and tongue would probably come in at about 50-60 pounds.
now i need to find a reeeaaaallllly lightweight axle and suspension setup to mount this on. It would almost be a shame to mount a 125 pound torsion axle to the bottom of this.

All that said, I did some foam cutting/sanding on the bub front fairing yesterday. The pictures just don't really show any difference from the previous day so i'll just wait until i get more foam added before i post more pix.

At least i got 2 more beers drank.
:beer:
We may have philosophy and opposable thumbs, but most humans show all the wisdom of starved raccoons. It's amazing that more of us aren't found flattened on the side of our own roads.
the original bub build thread http://www.tnttt.com/viewtopic.php?f=5&t=19227
User avatar
coal_burner
Teardrop Advisor
 
Posts: 75
Images: 92
Joined: Mon Oct 01, 2007 11:08 am
Location: Berkley, Michigan
Top

PreviousNext

Return to Non-traditional Designs

Who is online

Users browsing this forum: No registered users and 10 guests