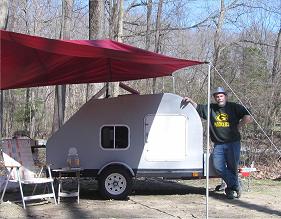
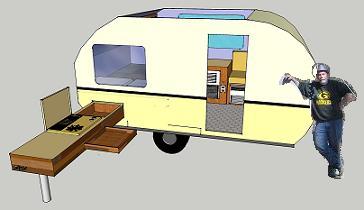
Modified Grasshopper, more diamond plate

Design & Construction of anything that's not a teardrop e.g. Grasshoppers or Sunspots

Postby parnold » Sat Sep 25, 2010 7:06 pm

Looking really good! I love those doors!!

:thumbsup:
User avatar
parnold
Donating Member
 
Posts: 2344
Images: 302
Joined: Mon Feb 08, 2010 4:49 pm
Location: Northwest New Jersey

Postby MKE_Tear » Sun Sep 26, 2010 3:30 pm

Cliffmeister2000 wrote:It's looking very nice!


Thanks, Cliff!!


Cliffmeister2000 wrote:Go UCLA! :D


Wow, was that a big win yesterday.

Go anybody! (As long as they aren't playing against the Badgers or Packers :D )


parnold wrote:Looking really good! I love those doors!!

Thumbs Up


Thank you!!

They are quite a price tag if you buy them both (at the same time). But I started doing the math on (two each of) all the hinges, handles, seals, locks, windows, etc. and weighing that with my knowledge of how to do that PLUS my desire in getting things waterproof, all in a timely manner, and it seemed like the best decision (for me). Maybe not everyone, but for me it was.

All the best!
User avatar
MKE_Tear
Teardrop Master
 
Posts: 130
Images: 243
Joined: Sat May 08, 2010 6:28 pm
Location: Milwaukee, WI

Postby MKE_Tear » Sun Sep 26, 2010 6:35 pm

More paneling...


Image

Image


The vent is not permanently in -- have to attach & seal it to the roof -- but I wanted to get a feel for what it will be like with the trim.
User avatar
MKE_Tear
Teardrop Master
 
Posts: 130
Images: 243
Joined: Sat May 08, 2010 6:28 pm
Location: Milwaukee, WI
Top

Postby Weirdnerd » Wed Sep 29, 2010 11:12 am

That grasshopper sure looks nice!, and it gave me some ideas for my next project too. :thumbsup:
This is my build thread...
Weirdnerd's teardrop
User avatar
Weirdnerd
The 300 Club
 
Posts: 318
Joined: Thu Sep 23, 2010 3:03 pm
Location: Denver, Co ( USofA)
Top

Postby MKE_Tear » Wed Sep 29, 2010 8:44 pm

Weirdnerd wrote:That grasshopper sure looks nice!, and it gave me some ideas for my next project too. :thumbsup:


Thank you!!

Great, and if that idea comes to life, please come back and share it!

All the best!
User avatar
MKE_Tear
Teardrop Master
 
Posts: 130
Images: 243
Joined: Sat May 08, 2010 6:28 pm
Location: Milwaukee, WI
Top

Postby MKE_Tear » Sun Oct 03, 2010 7:07 pm

Here comes the galley wall, and stuff...

First, gotta clean up:

Image


Image


Rolling out the carpet:

Image


Framing & insulating the wall:

Image


Image

Image

Image


Wait, here comes a window:

Image


Image


And now the countertop install:

Image

Image

Image

Image
User avatar
MKE_Tear
Teardrop Master
 
Posts: 130
Images: 243
Joined: Sat May 08, 2010 6:28 pm
Location: Milwaukee, WI
Top

Postby rmclarke » Tue Oct 05, 2010 6:22 pm

:applause: :applause: :thumbsup:
That's lookin' really good.....you're really on a roll there! Keep it going, the world needs more hoppers!

Richard
"When a hammer is the only tool you own, every problem begins to look like a nail..."

ImageFrom this: Image to this: Image Finally!!
User avatar
rmclarke
The 300 Club
 
Posts: 384
Images: 231
Joined: Mon Apr 09, 2007 3:22 am
Location: North Jefferson State
Top

Postby MKE_Tear » Thu Oct 07, 2010 7:29 am

rmclarke wrote::applause: :applause: :thumbsup:
That's lookin' really good.....you're really on a roll there! Keep it going, the world needs more hoppers!

Richard


Thanks, Richard!!

Monday morning we awoke to a hard frost, which meant I had to scrape the cars, so I feel like I have to keep moving (and fast!). My wife has been kind enough to let me use the garage during all of this (half the garage has the camper, the other half has the supplies) and when we got that frost that just sped things up. As I write this the weather is just perfect.

As for that window in the galley wall, here's the view from the inside. To keep the claustrophobia or cramped feeling to a minimum, I put in a shelf, rather than a typical cabinet for our clothes. We won't be camping for any longer than what we can carry in an airline carry-on size bag anyway, so load up the bag, take it down when needed, etc. Again, I'll come back and clean up the trim at a later date -- at this point I'm thinking that will be next year (based on the previous weather discussion) so that's probably it for the inside.


Image

Image


And speaking of weather, the final skinning has begun:


Image

Image


Oh yeah, and I permanently installed the roof vent. Glued and screwed it down, sealed up the edges.
User avatar
MKE_Tear
Teardrop Master
 
Posts: 130
Images: 243
Joined: Sat May 08, 2010 6:28 pm
Location: Milwaukee, WI
Top

Postby Steve_Cox » Thu Oct 07, 2010 7:35 am

Nice job! :thumbsup: Are you going to keep it in the garage after you are finished? I never really thought about how much garage space I was going to loose when I completed my trailers... :lol:
Steve
User avatar
Steve_Cox
4000 Club
4000 Club
 
Posts: 4903
Images: 196
Joined: Sun Apr 03, 2005 8:46 am
Location: Albuquerque New Mexico
Top

Postby Miriam C. » Thu Oct 07, 2010 8:52 am

:applause: :thumbsup: :thumbsup: :thumbsup:
And a beautiful skinning it is! Your windows are really nice. Will give a lot of light without being too bright. :thumbsup:
“Forgiveness means giving up all hope for a better past.â€
User avatar
Miriam C.
our Aunti M
 
Posts: 19675
Images: 148
Joined: Wed Feb 15, 2006 3:14 pm
Location: Southwest MO
Top

Postby MKE_Tear » Thu Oct 07, 2010 7:47 pm

Steve_Cox wrote:Nice job! :thumbsup: Are you going to keep it in the garage after you are finished? I never really thought about how much garage space I was going to loose when I completed my trailers... :lol:


Thanks, Steve!

No, I wish though. I'm probably going to get one of those Garage-In-A-Box things. Really don't want to buy one but considering how much time & $ I've put into it already I think it will be good for peace of mind.


Miriam C. wrote::applause: :thumbsup: :thumbsup: :thumbsup:
And a beautiful skinning it is! Your windows are really nice. Will give a lot of light without being too bright. :thumbsup:


Thank you, Miriam!!

I agree about the windows -- they'll be just right. :lol:

You can really tell in some of the pictures. I'm sure I'll look into getting some curtains but that will be in the future.

I've just got to get to the hatch. That's the next step.

If anyone has any ideas, mistakes not to make, links, etc. I'd be happy to entertain anything right now. I do have the new hurricane hinge. Just have to figure out all of the engineering for the entire backside.
User avatar
MKE_Tear
Teardrop Master
 
Posts: 130
Images: 243
Joined: Sat May 08, 2010 6:28 pm
Location: Milwaukee, WI
Top

Postby MKE_Tear » Sun Oct 10, 2010 8:38 pm

Latest in updates...


Trimming the sides:

Image


Front angles fit:

Image


Working on slight gap in front -- where bottom panel meets the deck:

Image

Image

Image

Image

Image


Here you can "see the light" (on the inside, the gap can be seen):

Image

Image


So this is what I'm really trying to fix -- should have shown this earlier:

Image


And the fix, primed twice on all sides except the front (which will have aluthane on it):

Image

Image

Image

Image


No more light -- gap gone, inside edge also sealed:

Image


Last piece of paneling installed, first layer of padded carpet rolled back:

Image


Second layer of padded carpet added:

Image


Mattress in -- perfect fit!!

Image


I can't tell you how happy I am to have unrolled the mattress -- and to see where I am now, knowing that I am just "that" close. :D

Well, if you've built your own camper, you've probably felt this already. 8)


Next up: aluthane & paint for the front, and then on to the hatch!!!
User avatar
MKE_Tear
Teardrop Master
 
Posts: 130
Images: 243
Joined: Sat May 08, 2010 6:28 pm
Location: Milwaukee, WI
Top

Postby absolutsnwbrdr » Thu Oct 14, 2010 7:47 am

MKE_Tear wrote:I can't tell you how happy I am to have unrolled the mattress -- and to see where I am now, knowing that I am just "that" close. :D

Well, if you've built your own camper, you've probably felt this already. 8)


Definitely know that feeling! Except for the part about unrolling the mattress. I have mattress envy. :lol:

One day I'll get one!

You've really pulled it all together! When do we get to see the hatch?! :twisted:
Zach
Coming Soon...
Image Image
User avatar
absolutsnwbrdr
Donating Member
 
Posts: 2657
Images: 412
Joined: Mon Jan 25, 2010 6:10 pm
Location: Hanover, PA
Top

Postby Shadow Catcher » Thu Oct 14, 2010 3:36 pm

MKE one piece of advice, seal around the edges of your countertop, water particularly if you don't have some sort of backsplash will absolutely get in there. You might be able to do what we have done with ours and adapt a 5000 BTU with hoses that can be attached to the trailer for the goesinta and the goesouta using 4 inch ducting.
User avatar
Shadow Catcher
Donating Member
 
Posts: 5993
Images: 234
Joined: Sat Apr 11, 2009 8:26 pm
Location: Metamora, OH
Top

Postby MKE_Tear » Thu Oct 14, 2010 9:13 pm

Shadow Catcher wrote:MKE one piece of advice, seal around the edges of your countertop, water particularly if you don't have some sort of backsplash will absolutely get in there. You might be able to do what we have done with ours and adapt a 5000 BTU with hoses that can be attached to the trailer for the goesinta and the goesouta using 4 inch ducting.


Shadow: Great piece of advice -- thanks!!

I was thinking that I would just put some molding around the edges but I guess that still doesn't address sealing the edges.

Thanks again!


absolutsnwbrdr wrote:You've really pulled it all together! When do we get to see the hatch?! :twisted:


Hey, Zach, thanks! Unfortunately, it might not be for another couple of weeks. Work, fun & other stuff are getting in the way right now, plus I still have to "engineer" the thing.

I was able to seal up that little piece of wood in the front & get the aluthane on the last front panel...


The before:

Image


and the after:

Image


The before:

Image


and the after:

Image


And this upside down picture shows that I caulked the heck out of the gap, too.:

Image


Now, the aluthane:

Image

Image


And an even better "after" shot:

Image


I'll come back and scrape off the messy caulk and paint over the aluthane on the metal frame:

Image

Image
User avatar
MKE_Tear
Teardrop Master
 
Posts: 130
Images: 243
Joined: Sat May 08, 2010 6:28 pm
Location: Milwaukee, WI
Top

PreviousNext

Return to Non-traditional Designs

Who is online

Users browsing this forum: No registered users and 2 guests