Teardrops n Tiny Travel Trailersor t n ttt for short (tnttt.com) |
Rob's Cabin (warning lots of pictures)
Re: Rob's Cabin (warning lots of pictures)
![]() by aggie79 » Mon Nov 19, 2012 1:38 pm
by aggie79 » Mon Nov 19, 2012 1:38 pm
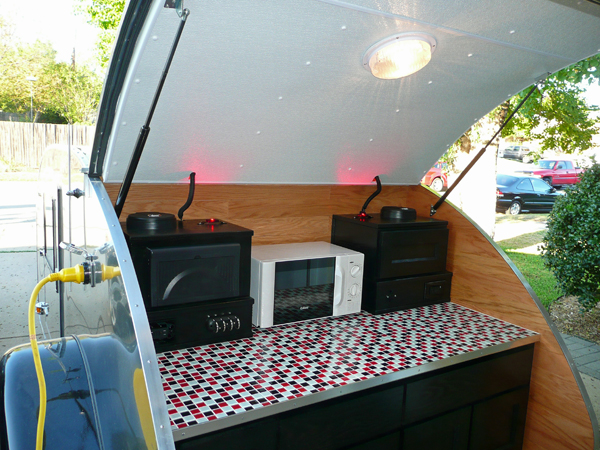
I have glass mosaic tile on my galley counter. The tile is installed over 1/2" ply using PL Premium. The joints are filled with epoxy grout. I've not had any cracking of the joints or tile.
-

aggie79 - Super Duper Lifetime Member
- Posts: 5405
- Images: 686
- Joined: Tue Aug 07, 2007 5:42 pm
- Location: Watauga, Texas
Re: Rob's Cabin (warning lots of pictures)
![]() by droid_ca » Mon Nov 19, 2012 1:44 pm
by droid_ca » Mon Nov 19, 2012 1:44 pm
aggie79 wrote:I have glass mosaic tile on my galley counter. The tile is installed over 1/2" ply using PL Premium. The joints are filled with epoxy grout. I've not had any cracking of the joints or tile.
Thanks that helps a lot...great pictures by the way I wonder if the PL Premium would work for marble tile with no grout lines as I'd like to have it butted up together.....
Thanks for following my build
There is a world, just beyond now,
where reality runs a razor thin seam between fact and possibility;
Anywhere I roam where I lay my head is home....

♥♠ “Fide Canem” ♦♣
Please check out my build thread
viewtopic.php?f=5&t=52816
where reality runs a razor thin seam between fact and possibility;
Anywhere I roam where I lay my head is home....
♥♠ “Fide Canem” ♦♣
Please check out my build thread
viewtopic.php?f=5&t=52816
-

droid_ca - Donating Member
- Posts: 1981
- Images: 176
- Joined: Thu Sep 30, 2010 5:08 am
- Location: Prince George BC Canada
 here is an updated picture of it
 and then just do a little
 I'm sure we all have had a few of those days


 's It Didn't Happen.... So here are some pictures