first build

...ask your questions in the appropriate forums BUT document your build here...preferably in a single thread...dates for updates, are appreciated....

Re: first build

Postby unamonkey » Tue Jun 10, 2014 9:33 pm

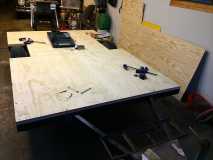
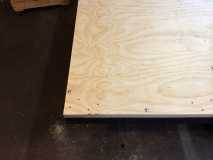
Screwed the bits together, left the floor in separate sections for well, ease of movement:
121317
121318

"Completely" together:
121319

I've got it flipped over to start some water-proofing. I had to take break tonight for overtime and some yard work - I'll get some emulsion tomorrow and start applying. I have to travel for work again this weekend :x but I'll be home Monday night and I've been promised to take a day off next week to make up for my lost weekend, so maybe some walls by then!
User avatar
unamonkey
Teardrop Inspector
 
Posts: 14
Images: 42
Joined: Sun Mar 16, 2014 6:33 am
Location: SE Minnesota

Re: first build

Postby unamonkey » Wed Jun 18, 2014 9:36 pm

ok haven't updated in a week but here goes.

Found some asphalt emulsion and got the underside coated - however, I was in a rush to get it all done before the monsoon season hit southern Minnesota and I had weekend work in another state (Sat to Mon travel) so I forgot to take any pics. Looks all the same anyway, right?

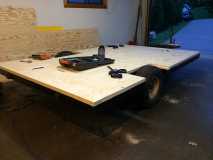
After I got back, I started bolting down the bed using 3/8" x 2 1/2" carriage bolts with a washer, lock washer and nut underneath.
121544
121545
About this time, my hands were starting to go numb from drilling through the frame (8 bolts in out of 12) and called it a night.

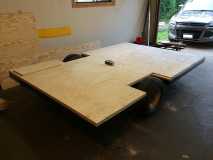
Finished today:
121546

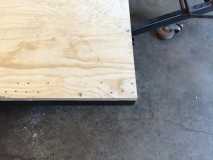
And realized I didn't get close enough to the front corner as I did with the rear, but I have the remaining two bolts and can put them closer. Thoughts?
121548
121547

My external skin will be covering the frame, and I'm going to bolt it directly to it on the corners, and get some wood-to-steel self-tapping screws to reinforce holding the mess down (as the original pop-up had) - I also need these for narrow portion between the wheels as the frame is boxed in and I can't through a washer/nut through. I also found out after testing some weight (read: stood on it) that I need to add a bow-to-stern support 1x4 up the middle as it bows a bit and I can attach it to steel frame. I should have done this to begin with, but as with Wife's Doubt, she said to work smart, not fast. My other goal by the end of the weekend is to make some boxed fenders. I have an extra 1x12 from another project I can hack up for those instead of using straight-up plywood.

I was hoping to get some comp time for last weekend's work but the outlook isn't good with my backlog at home base. :NC I'll squeeze in the time when I can.
User avatar
unamonkey
Teardrop Inspector
 
Posts: 14
Images: 42
Joined: Sun Mar 16, 2014 6:33 am
Location: SE Minnesota

Re: first build

Postby unamonkey » Mon Jul 07, 2014 10:05 pm

Alas I'm back from many travels - and I have some updates, when I remembered to grab my phone and take a couple pictures.

I was getting paranoid about the floor and its security to the frame, so I got some counter-sunk self-tapping screws and went across the cross beams to secure it (this is how the original pop-up floor was secured, sans carriage bolts).
122133

Wheel wells! I decided to stick with a boxy design since I'm a bit of a square anyway. Used leftover 3/4" ply and board I had sitting around the shop.
122135
122134

Bought some cheap 1"x3" furring straps from Menards and used them to secure to the floor.
122136
122137
122138

The goal is to seal it up, take the wheel off and coat the inside with asphalt emulsion. Dry, repeat on the other side.

In between glue times, I dug out some old cardboard and cut out a profile.
122139

I haven't decided if I'll go Benroy with the back or leave it squared off. I've got the cabin portion all down in my head but still mulling about the galley - do I want split doors or a Dutch-door like system? Or just a traditional hatch? If I do a hatch, I'll have to go with the Benroy template on the rear as well...
User avatar
unamonkey
Teardrop Inspector
 
Posts: 14
Images: 42
Joined: Sun Mar 16, 2014 6:33 am
Location: SE Minnesota
Top

Re: first build

Postby Sidekick » Sun May 27, 2018 2:20 pm

nice progress. Make sure you waterproof or tar the wheel wells to keep water from getting in and the wood rotting
" Chances are- if you don't know where you are going, you will never get there"
User avatar
Sidekick
Teardrop Master
 
Posts: 170
Images: 82
Joined: Fri Feb 28, 2014 5:38 pm
Location: Michigan
Top

Previous

Return to Build Journals

Who is online

Users browsing this forum: No registered users and 6 guests

cron