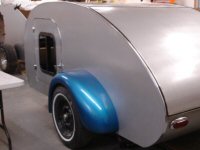
THE Teardrop Explorer

...ask your questions in the appropriate forums BUT document your build here...preferably in a single thread...dates for updates, are appreciated....

Re: 2013 Teardrop Explorer

Postby PubUltraStar » Tue Oct 15, 2013 1:25 pm

Image

Finished installing the last segment of the upper deck, and sealed the screw holes. Last step will be painting deck. I had originally planned on putting down nice flooring, but since a majority of it will be hidden underneath the mattress, I'm just going to paint it. I will probably put some flooring in the galley, but don't need to worry about that now. I'm done traveling for work, so I hope to put in a few weekends in the next month on the project.
Image
There is always risk in being awesome!
http://www.diy-teardrop.com/
http://www.m2-photo.com
User avatar
PubUltraStar
Gold Donating Member
 
Posts: 184
Joined: Thu Jul 26, 2012 8:11 pm

Re: 2013 Teardrop Explorer

Postby rebapuck » Tue Oct 15, 2013 6:02 pm

The money saved on flooring can just be used elsewhere so good move.
Judy
1966 VW camper
1967 VW singlecab
Image
User avatar
rebapuck
.
 
Posts: 2243
Images: 1
Joined: Thu May 14, 2009 1:55 pm
Location: Chapel Hill NC

Re: 2013 Teardrop Explorer

Postby PubUltraStar » Sun Oct 20, 2013 4:02 pm

Painted the deck, and still debating on if I should put down some type of flooring. Either way, finally got to start working on the walls.

Image

The inner wall and the inner wall template didn't match up perfectly, so I used my plunge router to create matching lines for the wall. You'd think that they would have been more exact since they were cut with CNC, but I'm fine with the small modifications. I plan on using cedar on the inside for the walls, and hope to have that started by next weekend.

Image
Image
There is always risk in being awesome!
http://www.diy-teardrop.com/
http://www.m2-photo.com
User avatar
PubUltraStar
Gold Donating Member
 
Posts: 184
Joined: Thu Jul 26, 2012 8:11 pm
Top

Re: 2013 Teardrop Explorer

Postby PubUltraStar » Tue Oct 22, 2013 7:26 pm

Got a couple of hours out in the driveway today working on the tear. Had picked up the interior cedar planks that I will be using for the inside walls. Sadly, it gets dark way too soon, and will soon be impossible to work on this outside of weekends.

Routed a tiny channel into the inner wall template for the marker wiring to run through.
Image

Planed the rough surfaces off the cedar boards so all the planks have the same thickness.
Image

I'm using my Harbor Freight trailer as my workbench now, and here is the template on top of the cedar planks.
Image

Using a plunge router, I cut the cedar to match the template exactly.
Image

Flipped over, Here is the left inside wall. This weekend, I'll try to make a matching right wall and secure the planks to the inner template. The board that this is currently attached to is just a template, and will not be used in the final build. It was decidedly too heavy, and cedar smells much better. I have marked where the door needs to be cut out, but this can be done with a jig saw once the boards are free. Hoping for some warmer weather too, my legs were chilled standing outside for a couple of hours.
Image
Image
There is always risk in being awesome!
http://www.diy-teardrop.com/
http://www.m2-photo.com
User avatar
PubUltraStar
Gold Donating Member
 
Posts: 184
Joined: Thu Jul 26, 2012 8:11 pm
Top

Re: 2013 Teardrop Explorer

Postby PubUltraStar » Thu Oct 24, 2013 6:31 pm

I marked the where the door would be before I removed the boards from the template. Using a jigsaw, I cut each of the cedar boards so that it's ready to attach to the inner template.

Here is the top piece just laying on the template. The section where the door was removed has about 1/8" of excess which will be trim routed off after the boards are secured to the template.
Image

If the weather is warm enough this weekend, I plan on using adhesive to glue the boards to the template and then flip the whole thing over and add wood screws from the back.
Image

Image
Image
There is always risk in being awesome!
http://www.diy-teardrop.com/
http://www.m2-photo.com
User avatar
PubUltraStar
Gold Donating Member
 
Posts: 184
Joined: Thu Jul 26, 2012 8:11 pm
Top

Re: 2013 Teardrop Explorer

Postby PubUltraStar » Fri Oct 25, 2013 8:02 pm

I got all of the boards glued and screwed to the inner wall tonight. Sadly, I was out in the driveway in the dark finishing up. The good news is that I have the next 2 days without anything to do but tinker with the teardrop build. I'd like to finish this wall, and then start on the other side. I could also start on fabricating the door as well, and also add the 1/2" insulation to the backside. Than, I need to sand the inside cedar wall and then seal it. I think my goal by Sunday night is to have this wall finished, standing, and attached to the deck.

Here is yet another picture, in process of clamping boards before they are screwed from the back to the inner template wall.
Image
Image
There is always risk in being awesome!
http://www.diy-teardrop.com/
http://www.m2-photo.com
User avatar
PubUltraStar
Gold Donating Member
 
Posts: 184
Joined: Thu Jul 26, 2012 8:11 pm
Top

Re: 2013 Teardrop Explorer

Postby PubUltraStar » Sat Oct 26, 2013 7:12 pm

A crisp fall day in Wisconsin and I got some more work done on the tear. I had already traced the outlines onto the insulation before I attached it to the cedar boards, and I just used a jigsaw to cut out the foam for the inner wall. Here is the wall without the insulation.

Image

As you can see, the pink panther insulation is slightly thicker than the 1/2" wall, so I'll need to do some "shaping," like a surfboard. Now that I think of it, my biggest project I've ever done from scratch before this teardrop was shape and build my own windsurfing board. There was a LOT more foam to be removed on that project.

Image

Using a surfoam, I took enough material off so that the insulation would be flush. I also placed some pull wiring through the gap so that I can easily get the wiring for the marker lights.

Image

What's a surfoam you ask??? Think of it as a cheese grater, but for foam. I have a couple of these from my windsurfer project, and they still work like a charm.

Image

Foam in a can was on sale today for $2.99 at the local True Value, so I scored a few cans. I filled the gaps between the signboard and the insulation. Should be air tight, and ready for the outside layer.

Image
Image
There is always risk in being awesome!
http://www.diy-teardrop.com/
http://www.m2-photo.com
User avatar
PubUltraStar
Gold Donating Member
 
Posts: 184
Joined: Thu Jul 26, 2012 8:11 pm
Top

Re: 2013 Teardrop Explorer

Postby KCStudly » Sat Oct 26, 2013 8:15 pm

The cedar looks nice. :thumbsup:
KC
My Build: The Poet Creek Express Hybrid Foamie

Poet Creek Or Bust
Engineering the TLAR way - "That Looks About Right"
TnTTT ORIGINAL 200A LANTERN CLUB = "The 200A Gang"
Green Lantern Corpsmen
User avatar
KCStudly
Donating Member
 
Posts: 9616
Images: 8169
Joined: Mon Feb 06, 2012 10:18 pm
Location: Southeastern CT, USA
Top

Re: 2013 Teardrop Explorer

Postby PubUltraStar » Sun Oct 27, 2013 7:39 pm

I never seem to get as much done as I plan, but still had a productive day working on the tear. Here is the wall with the expandable foam trimmed down.
Image

I was ablet o start working on the outside, oak wall. I planed down the 8" wide oak boards to about 1/4" and began gluing them to the inner wall. I only got about half way. I set up the GoPro to do a time lapse.

Click on the image below to view time lapse movie.
Image
Image
There is always risk in being awesome!
http://www.diy-teardrop.com/
http://www.m2-photo.com
User avatar
PubUltraStar
Gold Donating Member
 
Posts: 184
Joined: Thu Jul 26, 2012 8:11 pm
Top

Re: 2013 Teardrop Explorer

Postby Hvysteel » Mon Oct 28, 2013 12:18 pm

Cool time lapse! Just goes to show that you can never have too many clamps.

By the way, what did you use to move the camera while it was shooting?
Hvysteel
Teardrop Inspector
 
Posts: 10
Joined: Tue Jun 30, 2009 7:15 pm
Location: Kansas City
Top

Re: 2013 Teardrop Explorer

Postby PubUltraStar » Mon Oct 28, 2013 12:22 pm

Hvysteel wrote:By the way, what did you use to move the camera while it was shooting?


I didn't use anything. All done in Post. Basically, the camera takes images over 5,000 pixels wide. The video was done at 1920x1080 HD, so I used Adobe After Effects to create the motion, if that makes any sense.
Image
There is always risk in being awesome!
http://www.diy-teardrop.com/
http://www.m2-photo.com
User avatar
PubUltraStar
Gold Donating Member
 
Posts: 184
Joined: Thu Jul 26, 2012 8:11 pm
Top

Re: 2013 Teardrop Explorer

Postby Hvysteel » Tue Oct 29, 2013 12:06 pm

Ahh...yeah, that makes sense.
Hvysteel
Teardrop Inspector
 
Posts: 10
Joined: Tue Jun 30, 2009 7:15 pm
Location: Kansas City
Top

Re: 2013 Teardrop Explorer

Postby PubUltraStar » Fri Nov 08, 2013 11:09 am

Sadly, I need to post that updates on the Teardrop Explorer will be few and far between for the next few months. First, the weather has gotten really cold, and I tried to get as much done as I could while it was still tolerable to work outside. With high temperatures in the 40's and potentially 30's within the next couple of weeks, it looks like the teardrop build is on hold until the spring. I also re-injured my back a few weeks ago when I was in San Francisco. MRI results came back, and need to have surgery. I had the same surgery in 2007, so I'm not concerned. I should have a full recovery in the next couple of months. I plan on getting things put away in the garage this weekend, and maybe bend a few last boards in the steamer and on the template. :(

Image
Image
There is always risk in being awesome!
http://www.diy-teardrop.com/
http://www.m2-photo.com
User avatar
PubUltraStar
Gold Donating Member
 
Posts: 184
Joined: Thu Jul 26, 2012 8:11 pm
Top

Re: 2013 Teardrop Explorer

Postby mezmo » Sat Nov 09, 2013 12:50 am

'Sorry to hear of your back problems. A hiatus from the build
will not matter. Just get healthy again and resume your efforts
when the weather warms again. One of the beauties of a home build is
that the "deadline" is easily moved when "life in the meanwhile" needs it
to be adjusted.

Cheers,
Norm/mezmo
If you have a house - you have a hobby.
User avatar
mezmo
1000 Club
1000 Club
 
Posts: 1817
Images: 194
Joined: Fri Jan 01, 2010 4:11 am
Location: Columbia, SC
Top

Roof Rack

Postby PubUltraStar » Tue Feb 04, 2014 11:02 pm

It's been a while since I've posted, but I'm still recovering from back surgery and the Polar Vortex has kept cold weather in Wisconsin preventing any work on the Teardrop. Another month or so, and the weather should break, and I can get back in the garage. In the meantime, I've made some decisions and purchases on the roof rack. I really like some of the custom racks that people have put on their tear. But, as a long-time customer of Yakima racks, I like the look and functionality of their brand. I also wanted to have a solution that was easily removed so that I could travel with or without a rack, depending on how much crap I was transporting. Using a combination of permanently mounted landing pads and removable control towers, I can have a load warrior gear basket up top to carry my crap, or nothing at all. The Yakima brand is aesthetically pleasing to me, and functional. I have a ton of Yakima accessories, so it made sense to go with that brand.

Image

Image

I got a big discount on the Yakima stuff, but it will probably sit in my basement rotting until I get the teardrop finished. I already have a Yakima rack on my Highlander, so I could use the cargo basket in the meantime if needed. I have a Rocketbox cargo carrier too, which used in tandem with the cargo basket will allow me to carry as much gear as I need on my adventures. I doing physical therapy for my back, and hope to be ready to make a big push on the teardrop as soon as it warms up.
Image
There is always risk in being awesome!
http://www.diy-teardrop.com/
http://www.m2-photo.com
User avatar
PubUltraStar
Gold Donating Member
 
Posts: 184
Joined: Thu Jul 26, 2012 8:11 pm
Top

PreviousNext

Return to Build Journals

Who is online

Users browsing this forum: No registered users and 6 guests