Terry's TTT Garageable Standy Build modifications

...ask your questions in the appropriate forums BUT document your build here...preferably in a single thread...dates for updates, are appreciated....

Postby ocb_dave_ocb » Fri Aug 12, 2011 7:30 pm

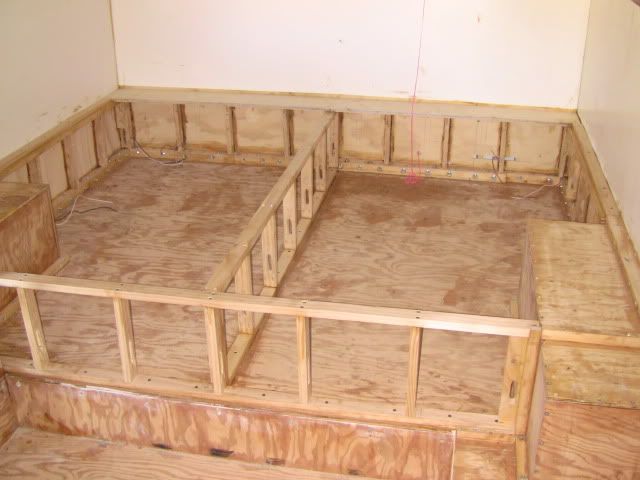
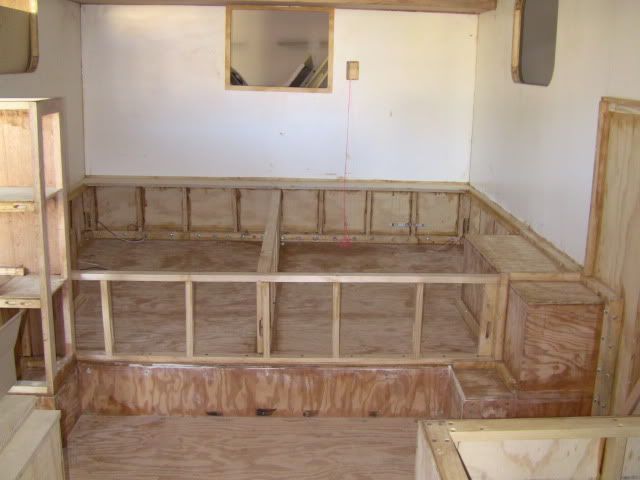
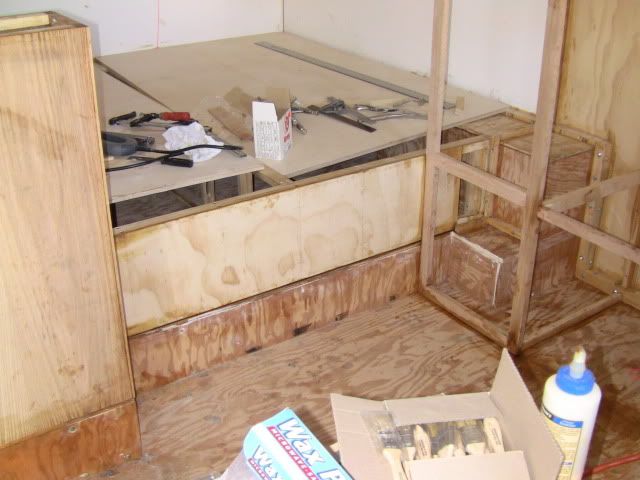
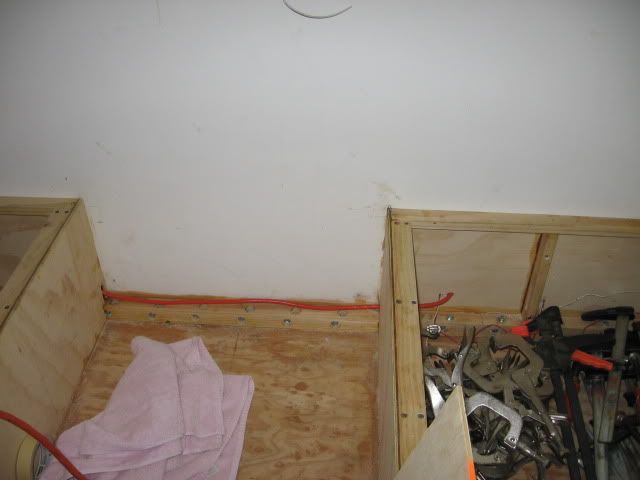
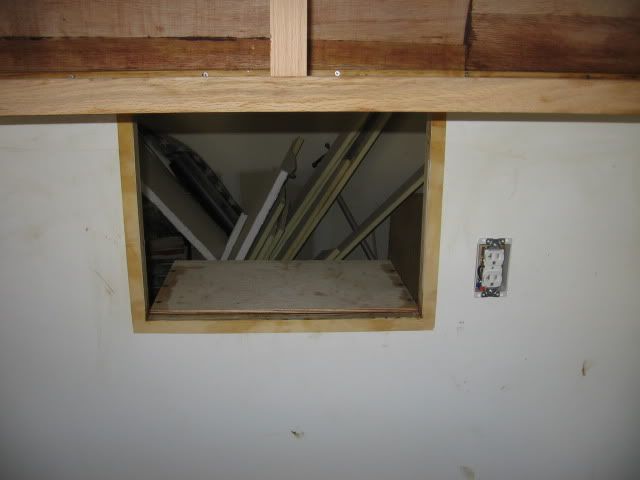
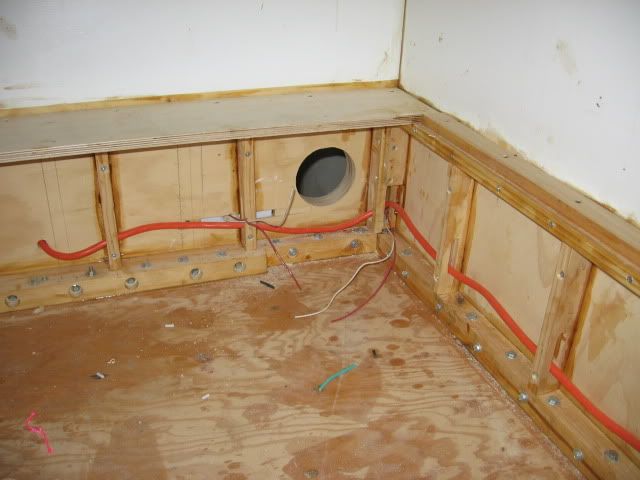
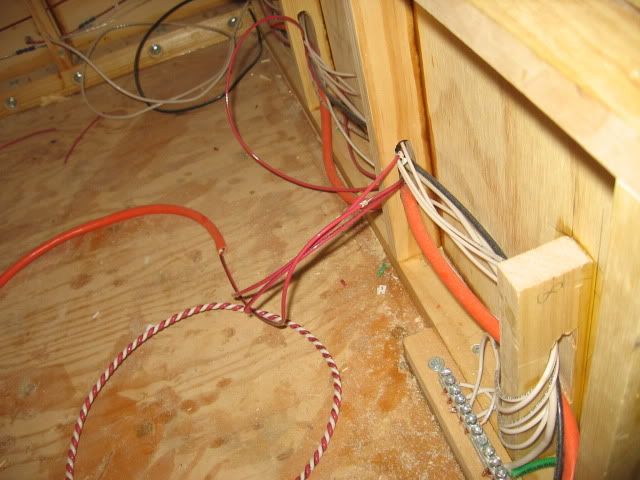
Camper is coming along very nicely but I do have to agree with the others. That is a lot of screws lol. There is one thing that does seem to be concernin me though. Are you compromising the integrity of the wood by placing the screws in such close proximity. The screw on the vertical plane is only what looks to be just a cm or so from the other screw on the horizontal plane. For structural strength would it have been better to place the vertical screws in between the horizontal screws.

Instead of
•| •| •| •|

Should it be like this
• | • | • |

I hope that made since. Are really it doesn't matter now because it is already done lol
THE SMITH FAMILY
David, Jessica, Kylie & Riley

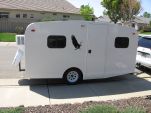
2012 12FT Travel Trailer
2011 Kia Sorento
2010 Chevy Camaro
2002 KIa Rio
ocb_dave_ocb
Teardrop Inspector
 
Posts: 19
Joined: Sun Jul 10, 2011 10:57 am

Postby bdosborn » Sat Aug 13, 2011 9:35 am

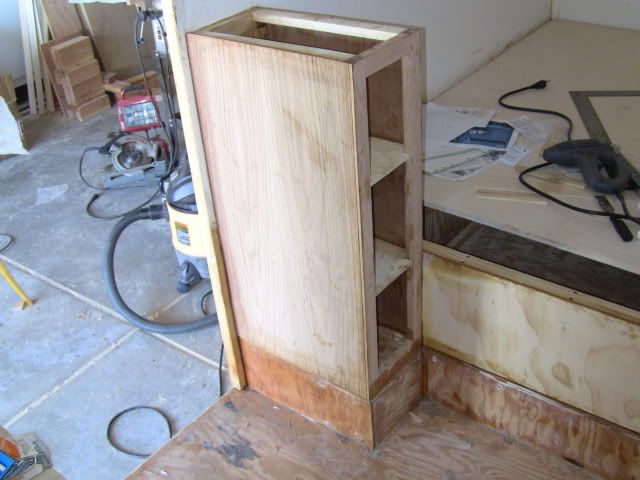
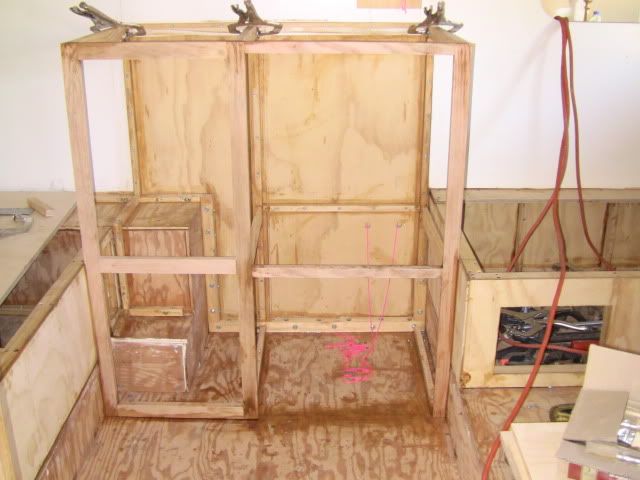
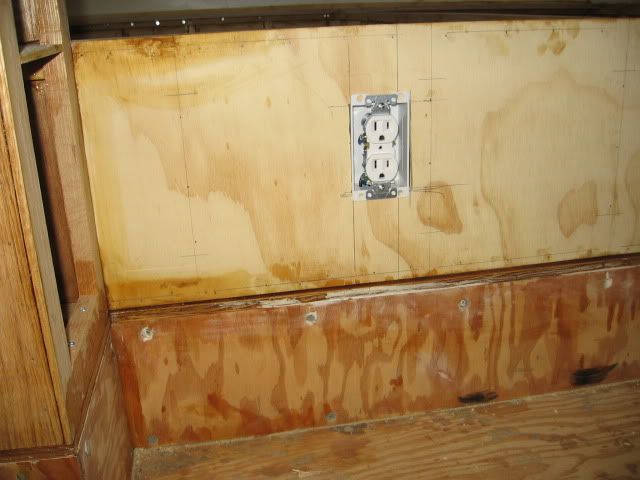
Terry uses epoxy on all his joints. While he uses more screws than I would have, I think he's fine structurally since he does use the epoxy.

Bruce
2009 6.5'X11' TTT - Boxcar
All it takes is a speck of faith and a few kilowatts of sweat and grace.
Image
Boxcar Build
aVANger Build
User avatar
bdosborn
Donating Member
 
Posts: 5506
Images: 777
Joined: Wed May 05, 2004 11:10 pm
Location: CO, Littleton

Postby angib » Sat Aug 13, 2011 10:12 am

ocb_dave_ocb wrote:For structural strength would it have been better to place the vertical screws in between the horizontal screws.

I can't see any structural reason why that is true - indeed I think what Terry's done is absolutely correct.

Except that most of the fasteners are a waste of time if the joints have also been epoxied - many forum members seem to think bolts are inherently strong, but they are only as strong as the wood they are attached to. Epoxy (or any good glue) joins every inch of one timber to another while bolts just join them intermittently, where the bolts are.
User avatar
angib
5000 Club
5000 Club
 
Posts: 5783
Images: 231
Joined: Fri Apr 30, 2004 2:04 pm
Location: (Olde) England
Top

Postby terryjones1 » Mon Aug 15, 2011 11:00 am

Shown below is a photo of the bed platform framing.
The deminsions are 76" side to side x 64-1/2" front to back.
The 5/8" x 6" Baltic Birch plywood at the back end of the trailer is where the two 5/8" Baltic Birch plywood bed platforms will be attached using two piano hinges.
Each platform will be 36-1/2" wide.
The center wall is where one side of each bed platform will rest.
The other side of each platform will, of course, rest on the outside walls.


Image

Shown below is another view.

Image
My TTT Garageable Standy Build Journal: viewtopic.php?f=50&t=40591
User avatar
terryjones1
Gold Donating Member
 
Posts: 266
Images: 1
Joined: Wed Aug 25, 2010 2:09 pm
Location: Lincoln, Ca
Top

Postby myoung » Mon Aug 15, 2011 11:16 am

angib wrote:Except that most of the fasteners are a waste of time if the joints have also been epoxied - many forum members seem to think bolts are inherently strong, but they are only as strong as the wood they are attached to. Epoxy (or any good glue) joins every inch of one timber to another while bolts just join them intermittently, where the bolts are.


I agree that epoxy can and is an effective and often superior fastening system. Just look at fiberglass boats that have virtually no fasteners. My Father built a 44-foot trawler yacht will lots of wood encapsulated or bonded with epoxy. Traditional screw or bolt fasteners were kept to an absolute minimum, usually just to hold things together until the epoxy cured. That boat is still plying the waterways 35 years after launching without a single instance of joint failure or cracking.
Mike Young
build thread: viewtopic.php?t=40459
User avatar
myoung
500 Club
 
Posts: 644
Images: 250
Joined: Sat Aug 07, 2010 11:21 am
Location: Nipomo, CA
Top

Postby 2bits » Mon Aug 15, 2011 10:00 pm

Are you planning any cabinets under the bed? Seems like a good opportunity for storage space!
Thomas

Image
User avatar
2bits
2bit Member
 
Posts: 5131
Images: 8
Joined: Thu Dec 27, 2007 6:04 pm
Location: Lake Tawakoni, TX
Top

Postby terryjones1 » Tue Aug 16, 2011 10:07 am

2bits wrote:Are you planning any cabinets under the bed? Seems like a good opportunity for storage space!


I will certainly use that area for storage.
I do not have any plans for cabinets under the bed.
The battery will be located in that area on the door side.
I will, also, have my wine cellar under the bed.
The cellar will not require the whole area. :D
My TTT Garageable Standy Build Journal: viewtopic.php?f=50&t=40591
User avatar
terryjones1
Gold Donating Member
 
Posts: 266
Images: 1
Joined: Wed Aug 25, 2010 2:09 pm
Location: Lincoln, Ca
Top

Postby terryjones1 » Sat Aug 20, 2011 7:39 pm

I am on delay for a week.
I will be on vacation in Oregon.
Maybe this year I will have a photo of me feeding a panther.
I was hoping to get a picture of a lion cub; but the wild animal park does not have one this year.
I will post more when I return.
My TTT Garageable Standy Build Journal: viewtopic.php?f=50&t=40591
User avatar
terryjones1
Gold Donating Member
 
Posts: 266
Images: 1
Joined: Wed Aug 25, 2010 2:09 pm
Location: Lincoln, Ca
Top

Postby terryjones1 » Tue Aug 30, 2011 12:51 pm

terryjones1 wrote:I am on delay for a week.
I will be on vacation in Oregon.
Maybe this year I will have a photo of me feeding a panther.
I was hoping to get a picture of a lion cub; but the wild animal park does not have one this year.
I will post more when I return.


I did not visit the Wild Animal Park.
Therefore, there is no animal pictures.

Shown below is a photo of the small cabinet by the door.
The cabinet needs to be sanded and varnished.

The top 1/2" plywood and plastic laminate still needs to be installed.

Image

Shown below is the bed platform with front plywood installed.
It needs to be sanded and painted.
The two tops need to be sanded, painted. and installed.

Image

Shown below is the large cabinet frame.
It has been installed.
The large opening at the right, is where the refrigerator will be installed.
The opening below that is where the Porta Potti will reside.
Notice, there is no bottom framing on the Porta Potti side.
This will allow the Porta Potti to slide out and in easily.

The shelves and sides should be installed tomorrow.

Image
Last edited by terryjones1 on Tue Aug 30, 2011 4:51 pm, edited 2 times in total.
My TTT Garageable Standy Build Journal: viewtopic.php?f=50&t=40591
User avatar
terryjones1
Gold Donating Member
 
Posts: 266
Images: 1
Joined: Wed Aug 25, 2010 2:09 pm
Location: Lincoln, Ca
Top

Postby kinto » Tue Aug 30, 2011 1:16 pm

terryjones1 wrote:I will, also, have my wine cellar under the bed.


uh, oh... hopefully my girlfriend doesn't read this or i'll need to incorporate one of those into mine! :tipsy: :lol:

your build is looking great! :thumbsup:


kent
:)
Is a hippopotamus just a really cool opotamus?

imay ildbay urnaljay

Image
User avatar
kinto
Gold Donating Member
 
Posts: 228
Images: 465
Joined: Tue Jul 19, 2011 10:20 am
Location: STL
Top

Postby terryjones1 » Sun Sep 04, 2011 11:29 am

Shown below is a photo of the large cabinet accross from the entrance door.
I will probably install a secod shelf on the left side of cabinet.
The shelves have not been permanently installed.
I need to remove them to work on installing electrical wiring.

Image

Next I will be working on the Air Conditioning cabinet in back of the bed.
My TTT Garageable Standy Build Journal: viewtopic.php?f=50&t=40591
User avatar
terryjones1
Gold Donating Member
 
Posts: 266
Images: 1
Joined: Wed Aug 25, 2010 2:09 pm
Location: Lincoln, Ca
Top

Postby terryjones1 » Fri Sep 16, 2011 3:16 pm

This posting shows photos of most of the 110 ACV wiring.

Shown below is a photo of the 110 ACV Duplex recepticle that is in the front, next to the hole that will be where the Fantastic Vent will be installed.

Image

Shown below is a photo of the 110 ACV wiring that comes from above photo of recepticle. It will go to the converter.

Image

Shown below is a photo of the 110 ACV Duplex recepticle that is in the back, next to the hole, that will be where the Air Conditioneer will be installed.

Image

Shown below is a photo of the 110 ACV wiring that comes from above photo of recepticle.
It will go to the converter.
The hole in the middle is for mounting the tail light/stop light.
Of course there is one on the other side.

Image

Shown below is a photo of the 110 ACV Duplex recepticle that is in the side of the bed platform.

Image

Another 110 ACV Duplex recepticle will be installed above the large cabinet.


.
Last edited by terryjones1 on Fri Sep 16, 2011 3:28 pm, edited 1 time in total.
My TTT Garageable Standy Build Journal: viewtopic.php?f=50&t=40591
User avatar
terryjones1
Gold Donating Member
 
Posts: 266
Images: 1
Joined: Wed Aug 25, 2010 2:09 pm
Location: Lincoln, Ca
Top

Postby terryjones1 » Fri Sep 16, 2011 3:23 pm

Shown below is a photo of the large cabinet.
The 1/2" plywood top has been installed.

Image

Shown below is a photo of the small cabinet.
The 1/2" plywood top has been installed.

Image

I ordered the "plastic laminate" yesterday. It will take a week and a half to arrive.

Shown below is the mounting platform for the rear window Air Conditioneer.
The Air Conditioneer is pretty heavy, therefore, I built a solid platform.
Note - The platform slopes down 1/2".
I have checked to insure that the platform clears the rear spare tire when it is mounted.

Image


.
My TTT Garageable Standy Build Journal: viewtopic.php?f=50&t=40591
User avatar
terryjones1
Gold Donating Member
 
Posts: 266
Images: 1
Joined: Wed Aug 25, 2010 2:09 pm
Location: Lincoln, Ca
Top

Postby terryjones1 » Tue Sep 27, 2011 2:12 pm

Shown below is a photo of the large cabinet with the plastic laminate top installed. A sink will be added later

Image

Shown below is a photo of the outlets that are just above, and to the right side of the large cabinet.
The grey cable to the left is two twisted pair of electric wire that will be used for connecting the Trimetric meter.
The larger orange cable will be connected to a 110 ACV recepticle.
The larger black cable is RG-6U coax cable that will be for a TV recepticle.
The red and white wir will be used for a 12 DCV recepticle.
The Duplex recepticle, TV recepticle, 12 DCV recpticle mounting is raised 1" for clearance purposes.

Image

Shown below is a photo of the small cabinet with the plastic laminate top installed.
The two black wires above will be used for installing a switch to control the outside porch light.
The switch mount is raised 1" for clearance purposes.


Image

The photo shown below shows the twisted pair of red and whit wire that will be used for connecting the Norcold DC0051 12 DCV refridgerator.

Image
My TTT Garageable Standy Build Journal: viewtopic.php?f=50&t=40591
User avatar
terryjones1
Gold Donating Member
 
Posts: 266
Images: 1
Joined: Wed Aug 25, 2010 2:09 pm
Location: Lincoln, Ca
Top

Postby terryjones1 » Tue Sep 27, 2011 2:38 pm

Shown below is a photo of the rear clearance light, tail light, license plate light buss (5 connections).
One wire goes to the front where it is connected to the front clearance light buss (2 more connections).
I will install tie wraps to make a nice neat bundle later.

Image

Shown below is a photo of the rear ground buss.
It is connected to the front ground buss with the # 8 green wire.
Later, it will be connected through the Trimetric Shunt to battery -.
The # 8 black wire is for + 12 DCV power to the converter, and will be connected through a 60 amp circuit breaker, and a switch to battery +.
I will install tie wraps to make a nice neat bundle later.

Image

Shown below is a photo of the front ground buss. The # 8 green wire goes back and connects to the reear ground buss, and later, will be connected to the converter ground.
I will install tie wraps to make a nice neat bundle later.

Image

All rough-in wiring is now complete.


.
My TTT Garageable Standy Build Journal: viewtopic.php?f=50&t=40591
User avatar
terryjones1
Gold Donating Member
 
Posts: 266
Images: 1
Joined: Wed Aug 25, 2010 2:09 pm
Location: Lincoln, Ca
Top

PreviousNext

Return to Build Journals

Who is online

Users browsing this forum: No registered users and 6 guests