Un-named Travel Trailer Build - 99% Done! April 18

...ask your questions in the appropriate forums BUT document your build here...preferably in a single thread...dates for updates, are appreciated....

Postby S. Heisley » Thu May 20, 2010 9:02 pm

Amazing! Thanks for all the pics and detail. :thumbsup: :applause:
User avatar
S. Heisley
Super Lifetime Member
 
Posts: 8774
Images: 495
Joined: Mon Sep 17, 2007 10:02 am
Location: No. California

Postby fromeo » Sun May 23, 2010 11:08 pm

Thanks everyone for the feedback, it is *greatly* appreciated!

I have learned a lot from this forum and it's members over the past couple of years. It is wonderful to be able to share the build with people who "get" why we are doing this! :)

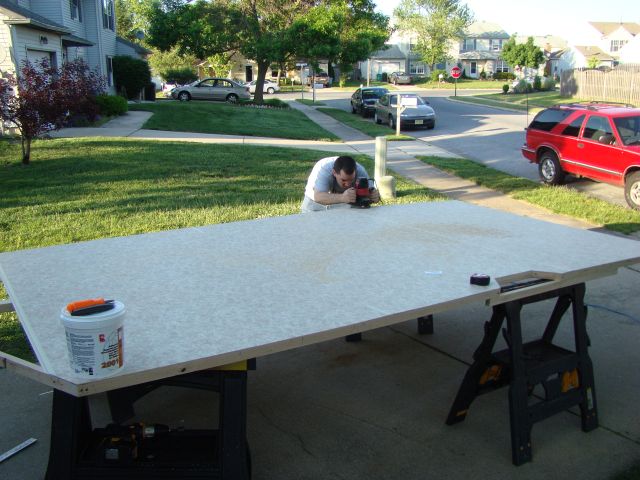
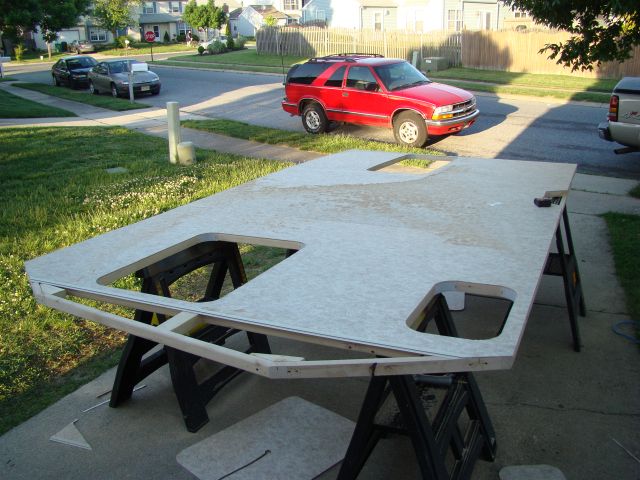
I don't want to leave anybody hanging, so here's my update for this week. On with the pics!

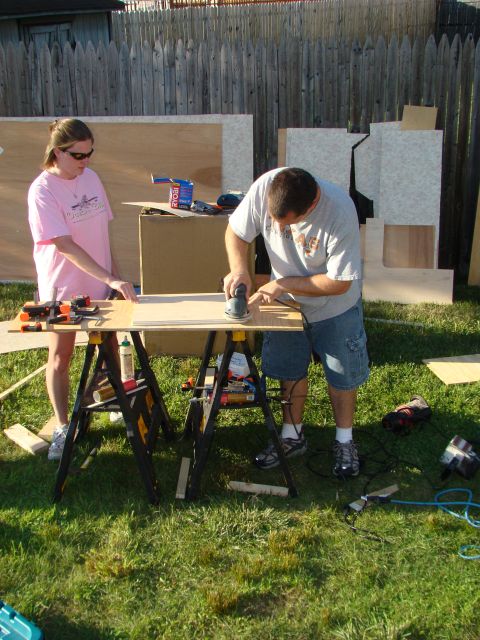
Thursday May 20. We started the day with a run for a piece of vinyl. The remnant my brother picked up was free floating and could not be installed with glue. We were able to exchange it for a full glue type.


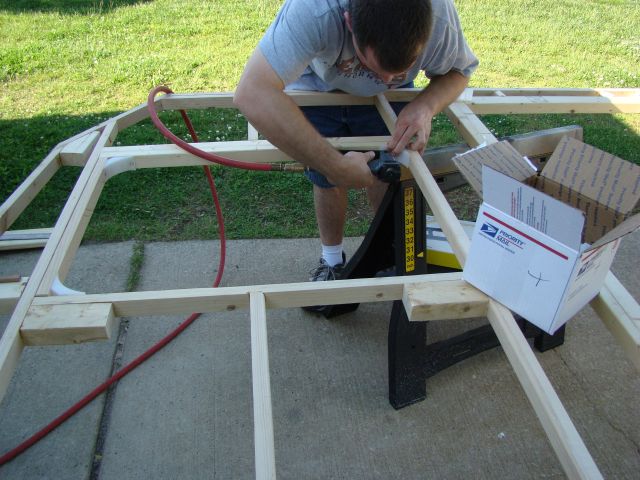
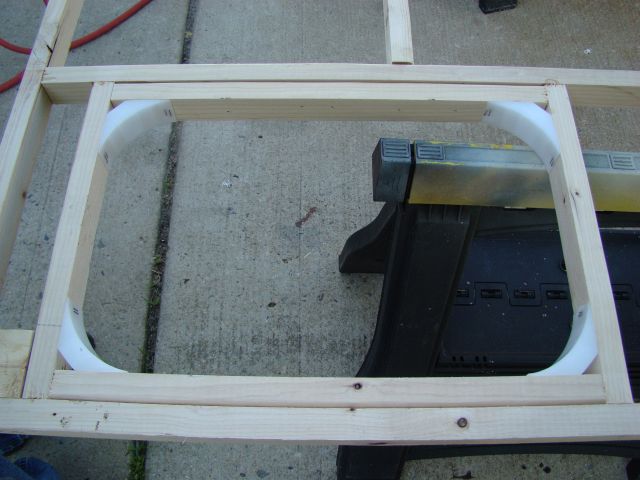
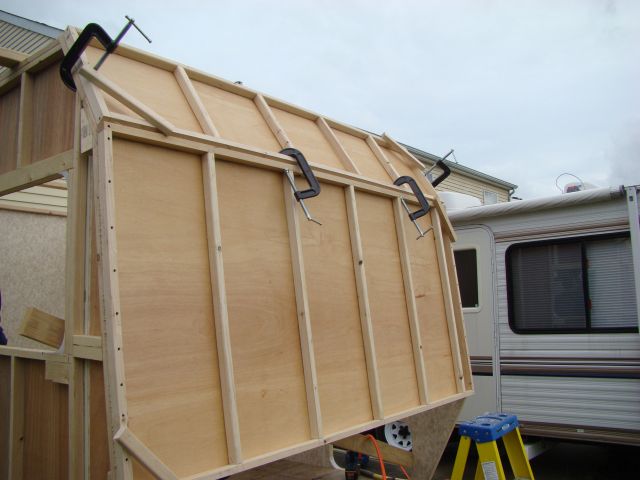
After the store run, we broke out the box of 3.2" radius corner blocks. These are a real time saver.

Image


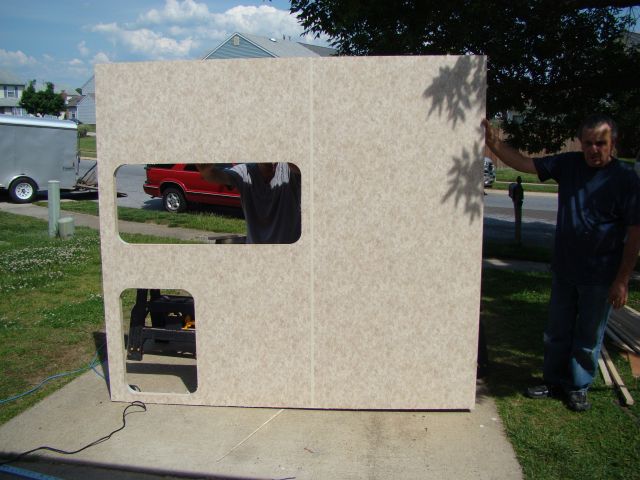
Then we pull out the door side wall and get it up on the sawhorses. The corner blocks are attached with staples to the corners of the openings for the windows and cargo doors:

Image

Image


Once the corner blocks are stapled in, we're ready for the interior skins. Here's my brother applying liquid nails to the framing members:

Image


Then the first sheet of paneling is put into place and attached with some brads:

Image


Keep applying sheets and trim with the router and a flush trim bit:

Image


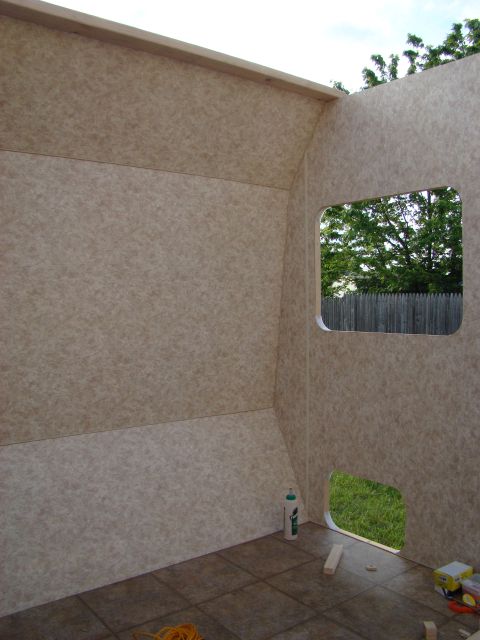
Then trim out the window openings and the cargo door opening, again with the router. Lots of sawdust!

Image


Finally we applied the last section of paneling and trimmed that flush. Then my brother climbed in and trimmed out the door opening:

Image


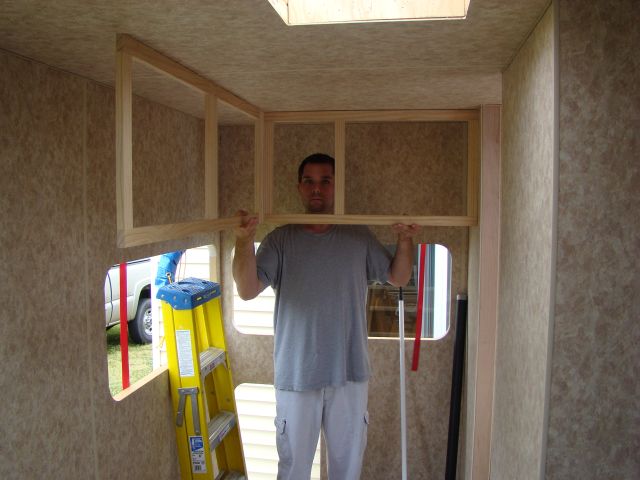
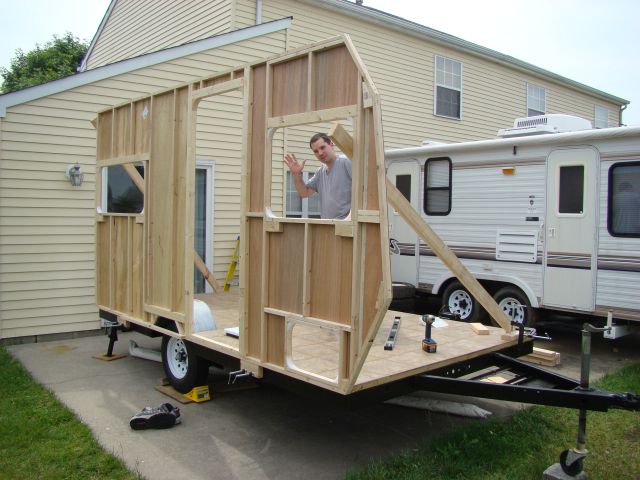
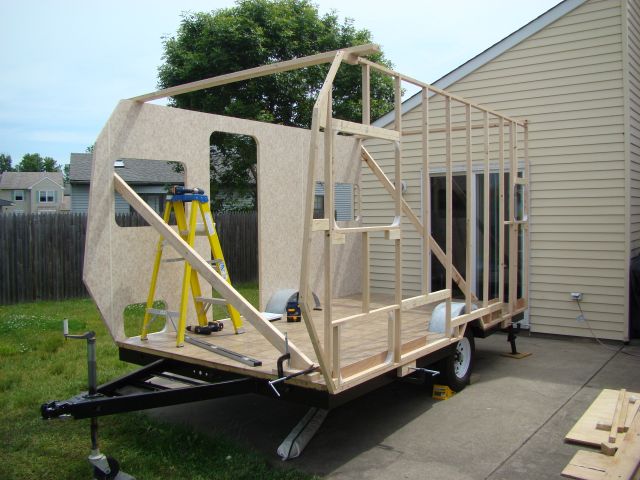
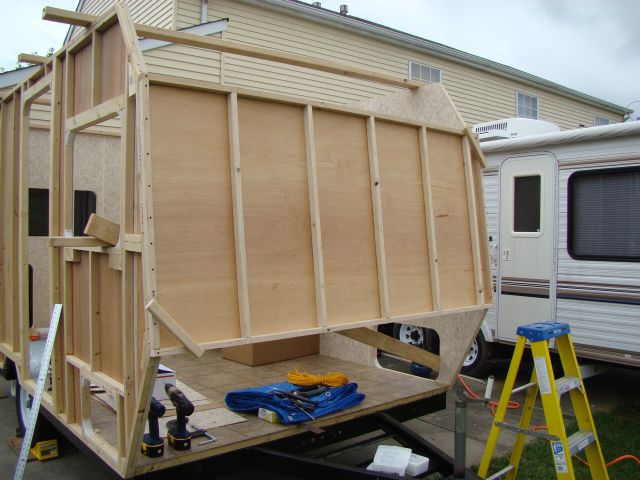
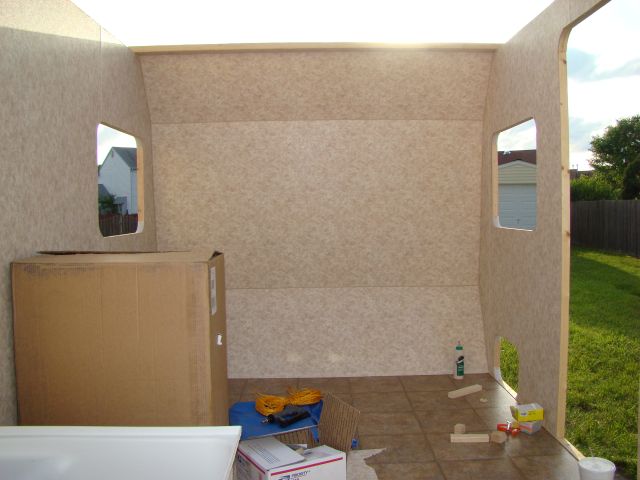
Here's the completed door side wall. My brother in the doorway gives a sense of scale - he's 5'10.

Image


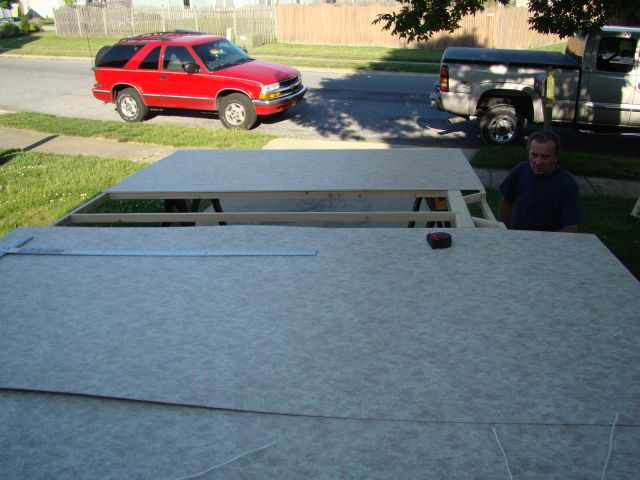
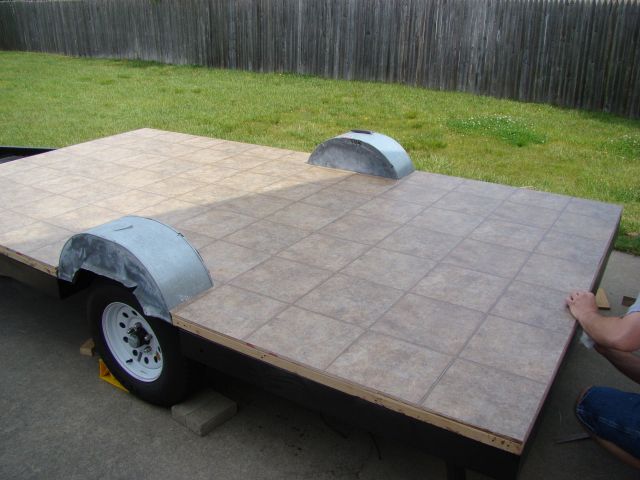
While we worked on the wall skin, my dad was out back putting down the vinyl flooring:

Image


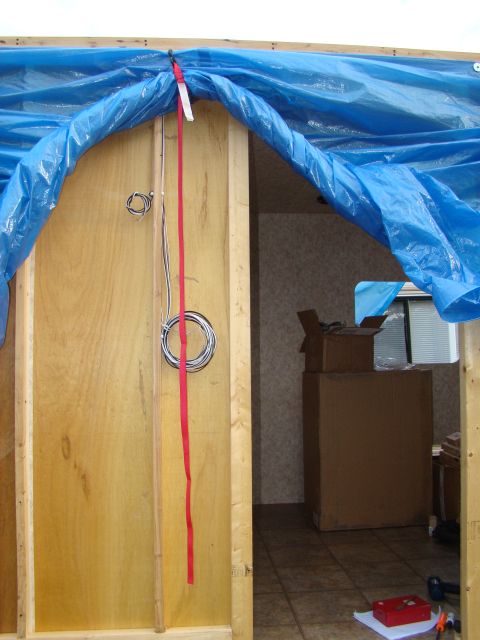
Obviously it was getting dark so we packed it in for the night.


Friday May 21. My brother got his hours in early for the week, so he had off Friday as well. This allowed us to get a nice, early start.

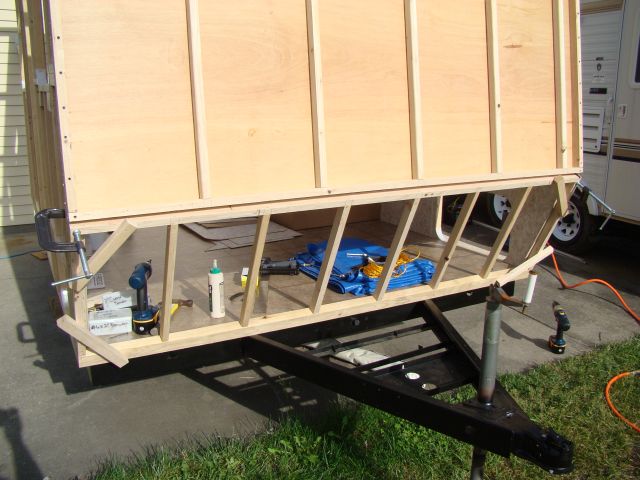
We trimmed the vinyl down to the size of the floor and cleaned up some of the adhesive squeeze-out:

Image


Then clamped some temporary support blocks to the frame. These will hold the weight of the wall while we plumb, attach and brace it:

Image


Carried the door side wall out and placed it on the blocks. Pinned it in place with a couple of screws and attached some 2x4's as support to hold it plumb:

Image


My brother, very proud of the first wall is waving to his new found friends on the internet ;)

Image


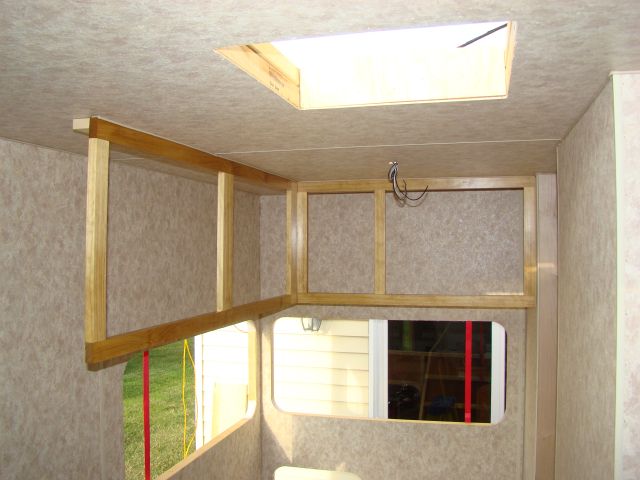
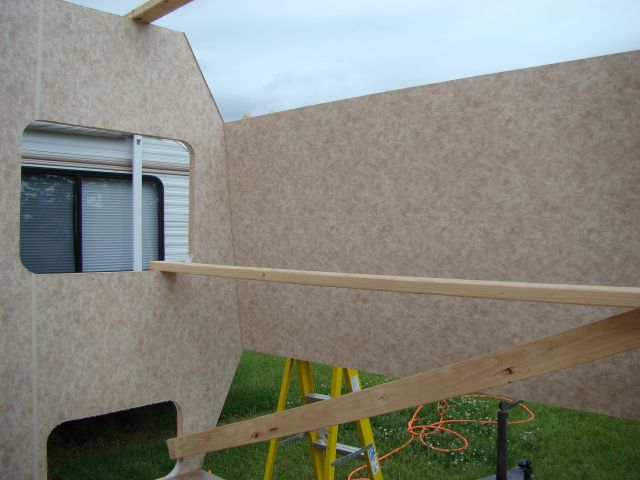
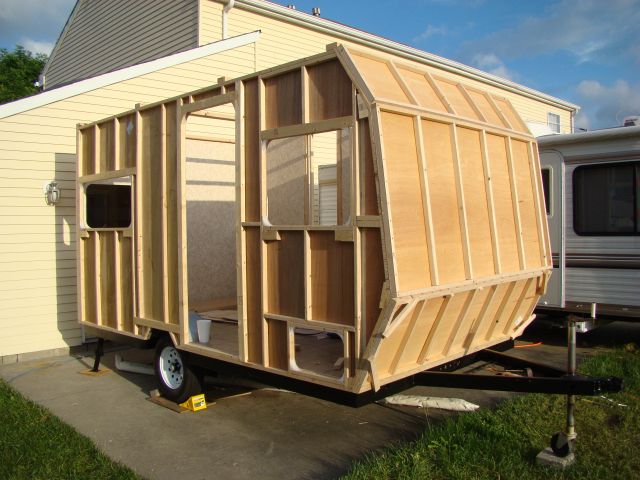
Next we put the road side wall up temporarily and brace it with a couple of 2x4s.

Image


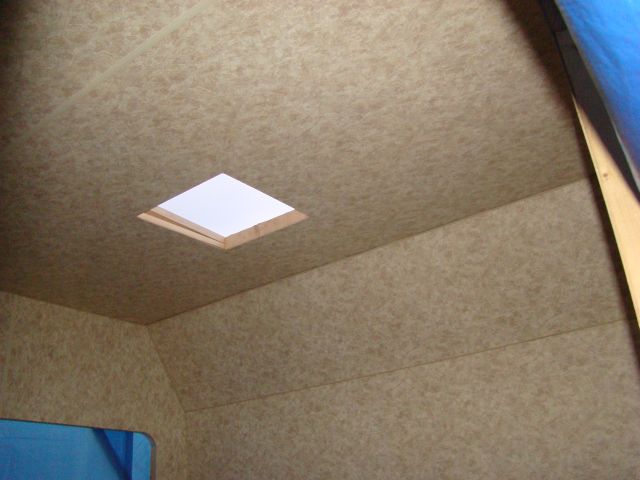
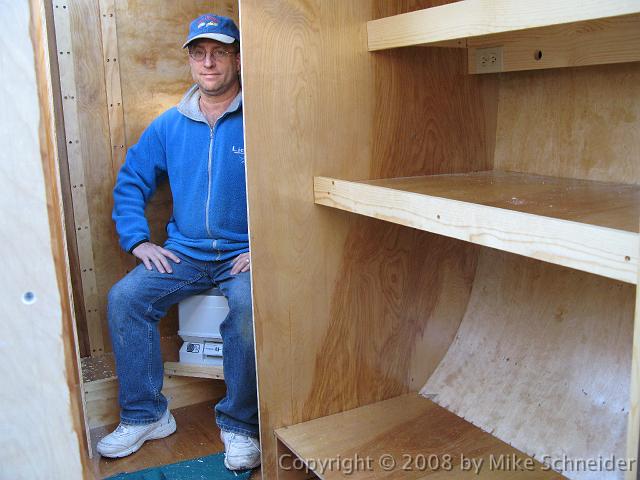
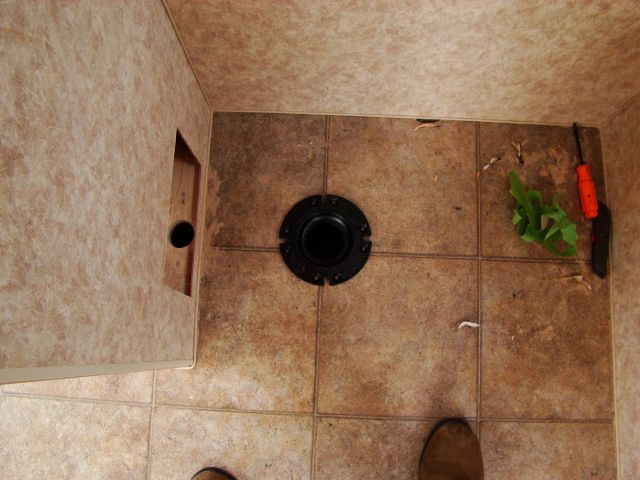
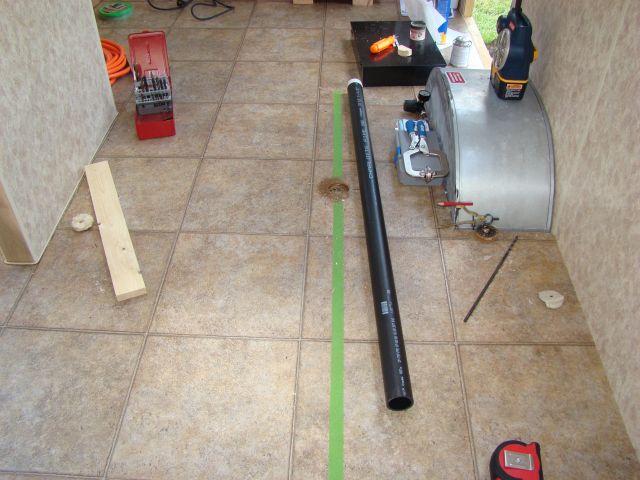
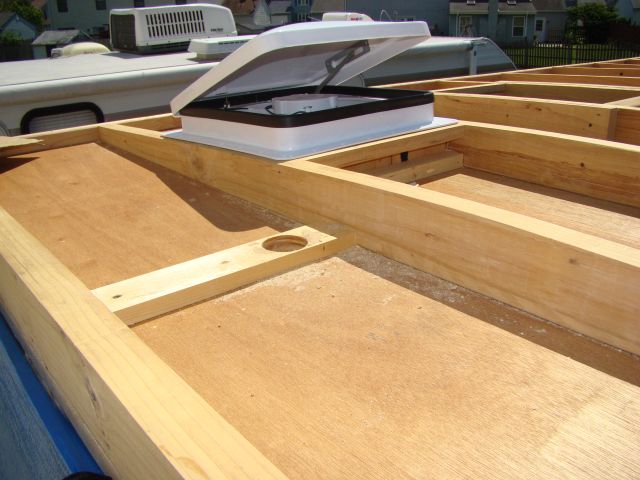
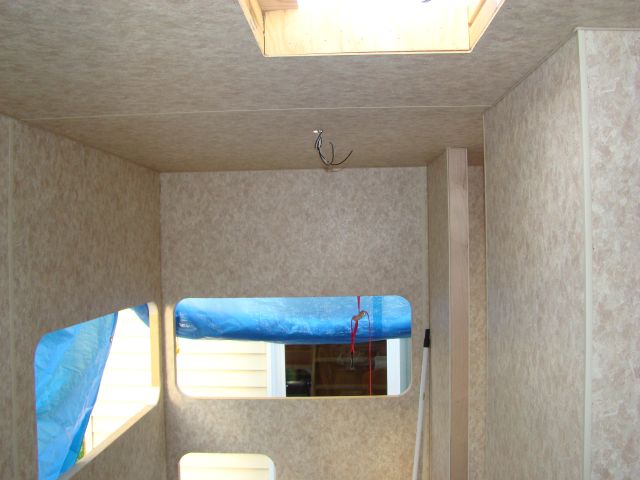
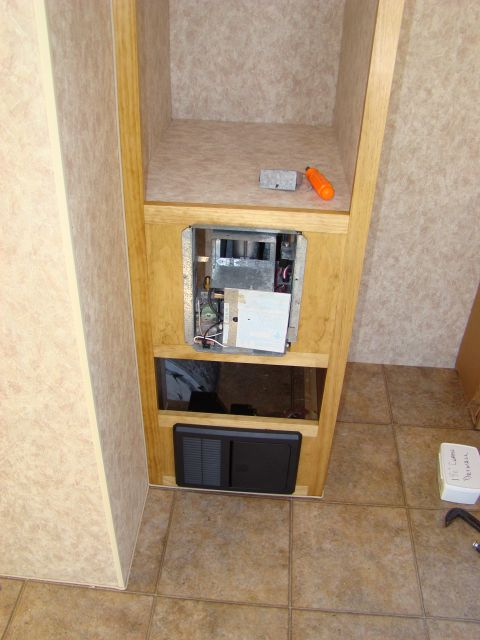
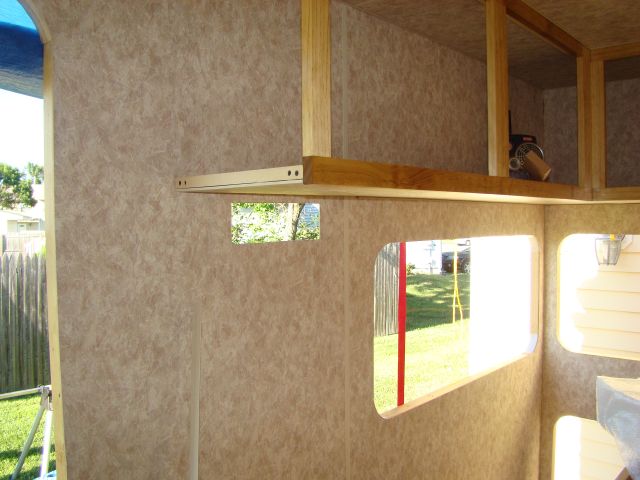
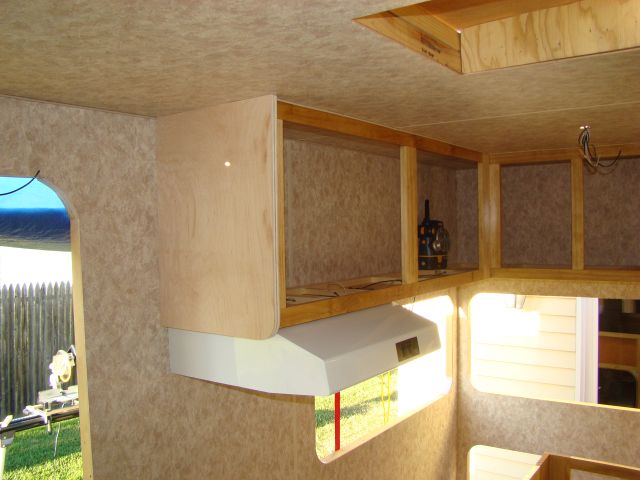
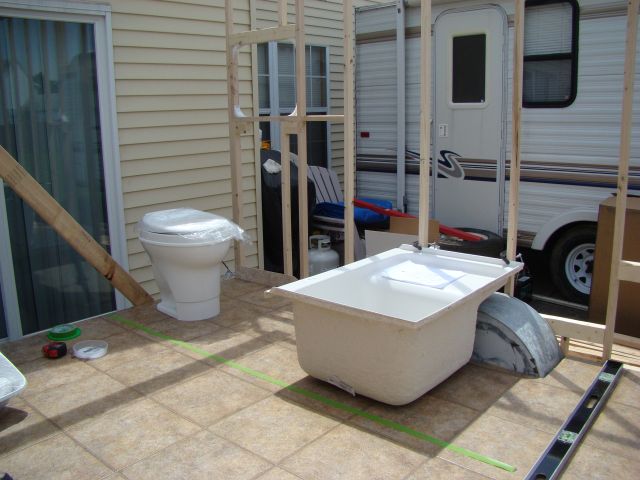
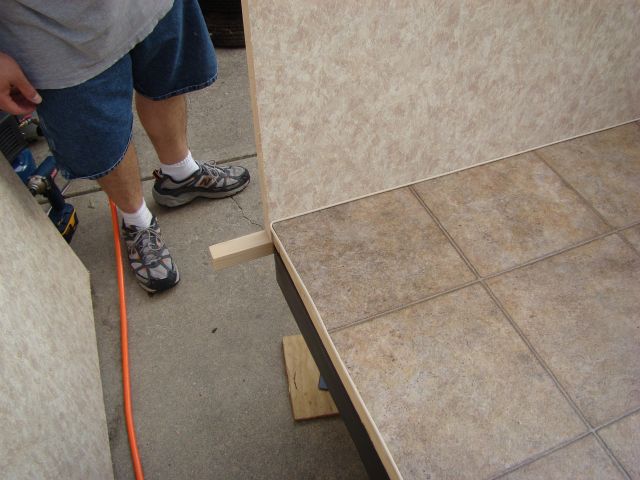
This allows us to double check the bathroom layout and then add some additional support in the walls to accomodate the shower surround. In this picture you can see how the step tub is used to clear the wheel well (I know Steve Cox had asked about this earlier). In the end, the tub will actually sit on a small platform a couple of inches off the main floor to provide clearance for the p-trap. A small skylight bubble over the tub will provide additional headroom (the walls are 6'4" interior height). The green tape line on the floor will be the location of the bath wall:

Image

Image


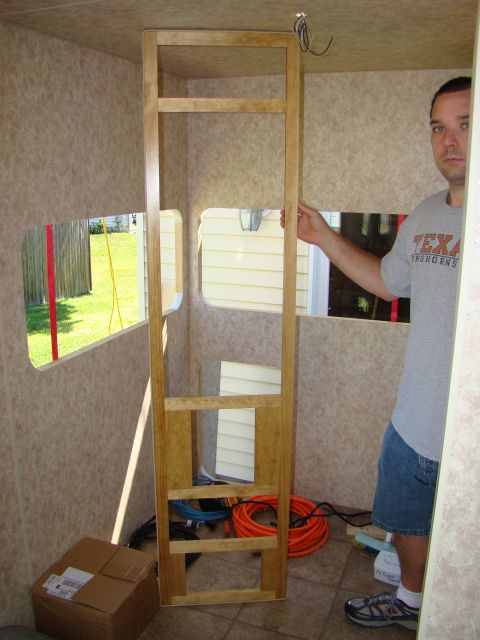
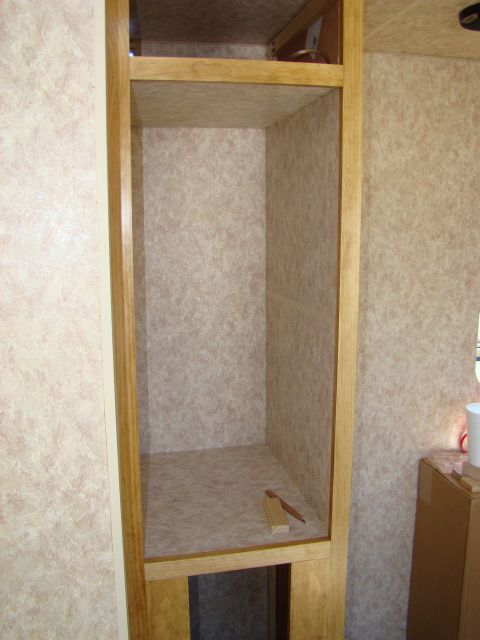
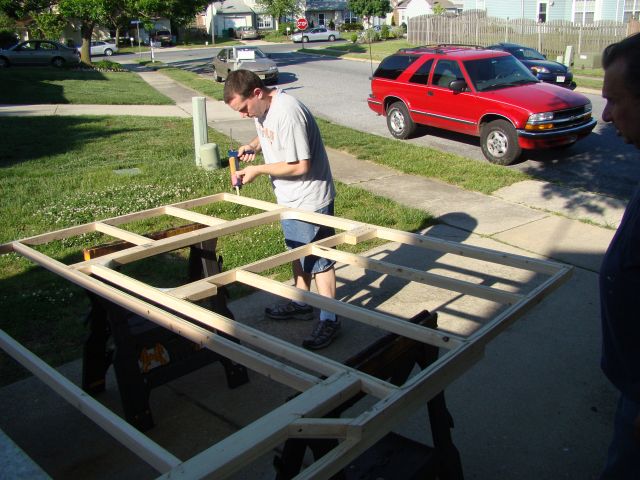
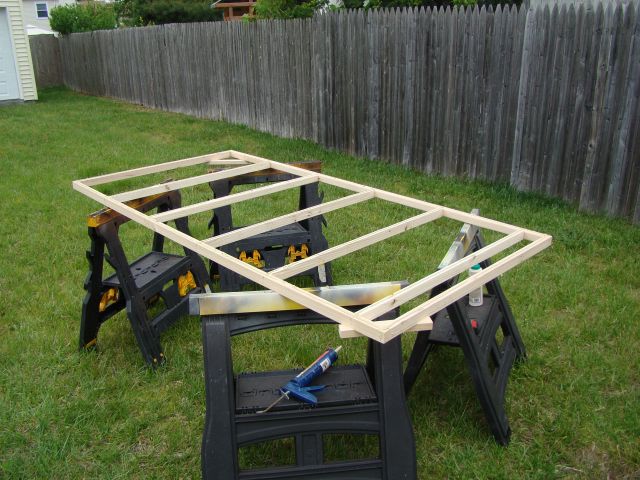
Next we framed up the rear wall:

Image

Image

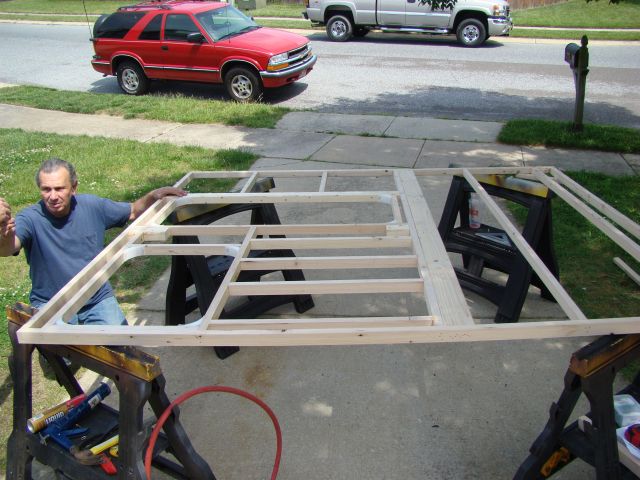
The sideways 2x4 next to the window is a tie-in for the bath wall.
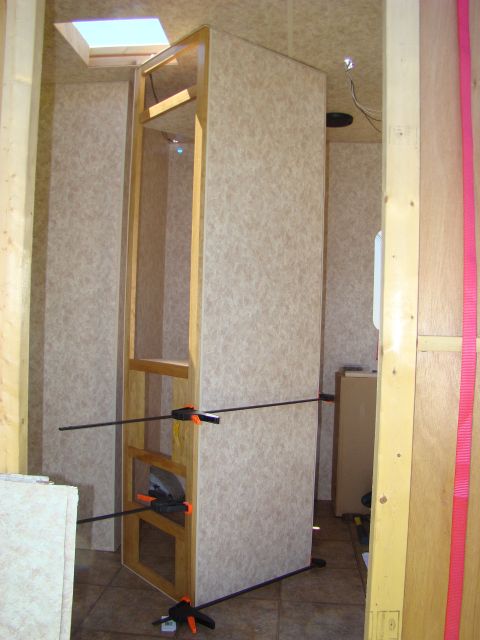
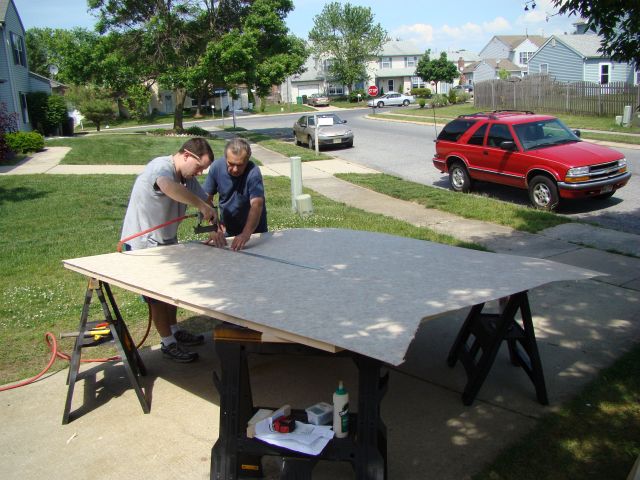
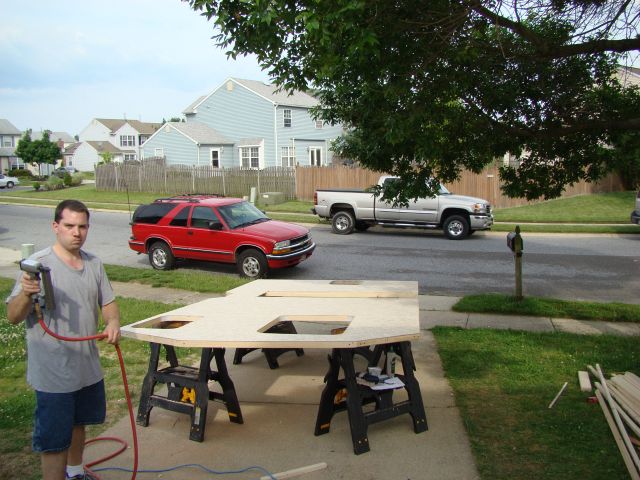

Skin goes on

Image


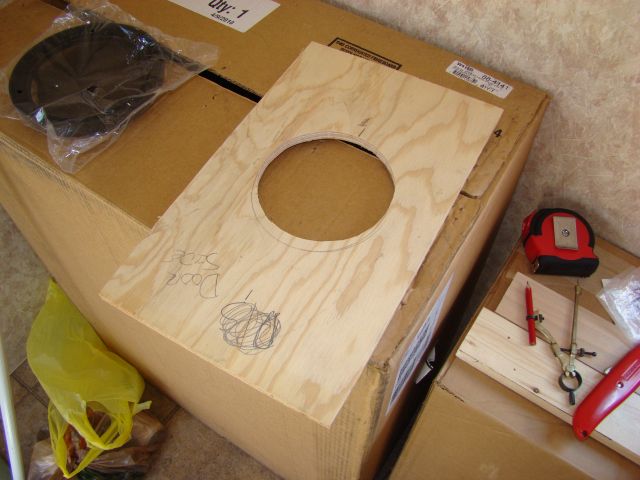
All cut out and ready for installation!

Image


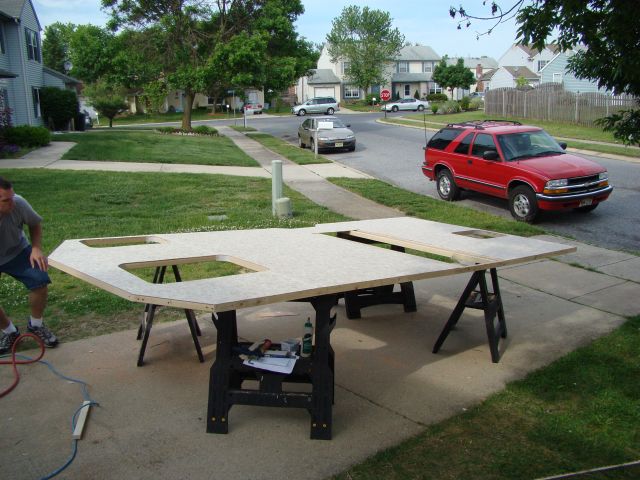
Next up, skinning the road side wall. Same deal as the others:

Image

Image

Image


The road side wall was then re-attached, this time permanently with construction adhesive and screws. Once that wall was back up, we attached some temporary supports to hold the weight of the rear wall and get it aligned correctly:

Image

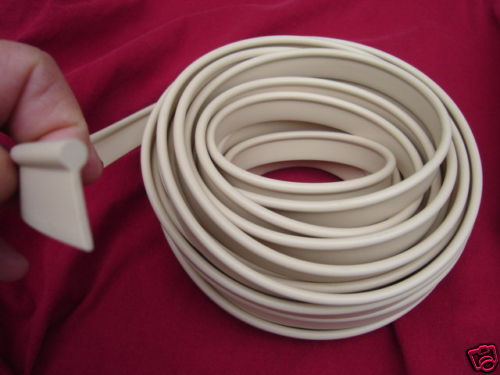
In this picture you can also see the vinyl welt bead trim we used to pretty up the joints. It's very affordable, very flexible and easy to work with, you can wrap this stuff around almost any shape. It also looks nice in my opinion.

Image


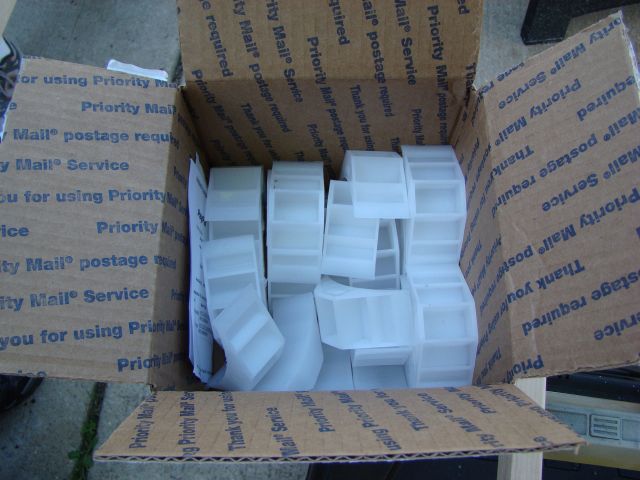
I should have taken a picture of the trim stock but didn't think about it. Stole this one off ebay, this is the exact stuff we bought:

Image

Here's Chris attaching more of that welt trim. Goes on quick and easy with a staple gun:

Image


Once the trim is stapled on, the rear wall gets put up, aligned and held in place with some clamps. Then it's attached with more construction adhesive and screws:

Image


Inside view, from the tongue looking towards the rear:

Image


And that's as far as we got on Friday. A couple more shots:

Image

Image

Image


Friday night my brother had to head home so he could go back to work on Saturday. Saturday I headed outside to get the front wall done so things could get covered up being that we were expecting rain the next day.

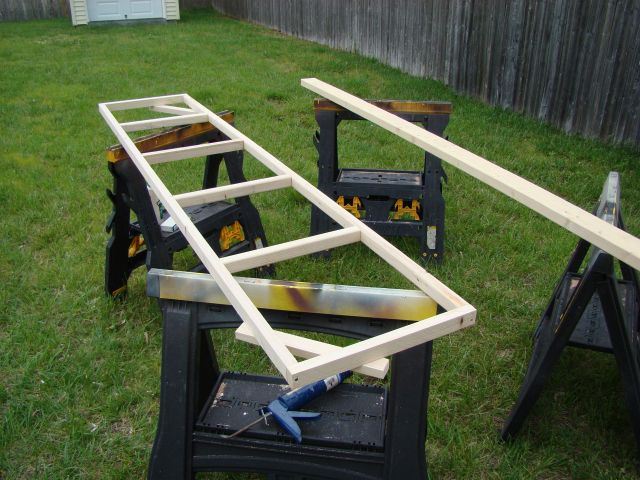
The front wall is done in 3 sections because of the shape. I started with the center section because it was the largest and would allow me to square up the front half of the side walls. First I frame the wall section, then square it up and hold it square with some diagonal bracing:

Image


Then I got the skin on and trimmed, attached the bead trim to the side walls and attached the center front wall section:

Image

Image


Next I moved on to the top section of the wall. Same process, frame, square, brace:

Image


Then the trim goes on the edge and the wall section is put in place, lined up, clamped down and attached:

Image


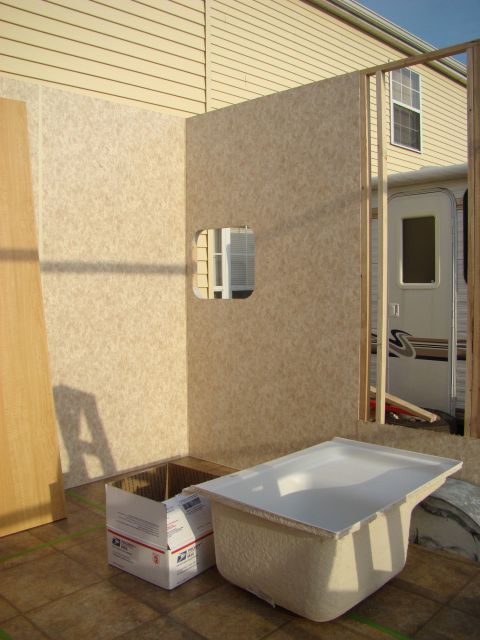
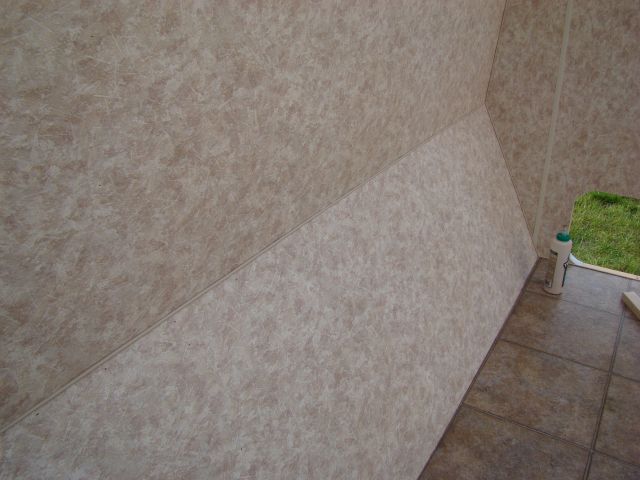
From the inside, if you look real close you can see the bead trim..

Image


Finally, the lower section of the wall is built. This section was a little tricky and tight, so I framed this one in place, then braced it for skinning:
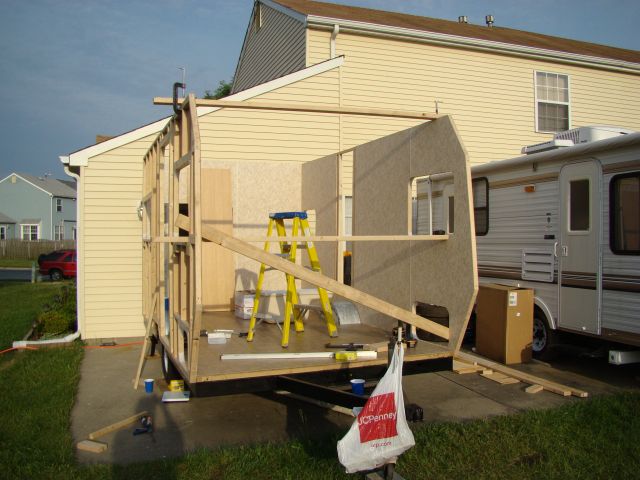
Image


Front wall done!

Image

Image


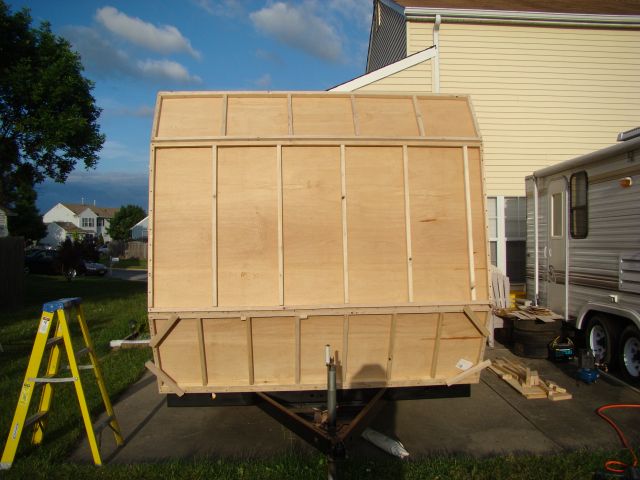
Time for a quick walk around..

Image

Image

Image

Image

Image

Image

Image


And that's it for this weekend! Hoping to get the bath walls framed and put in place by mid-week. Then I need to figure out how to do the roof. Hoping to have the roof framing in place by this time next week.

- Frank
fromeo
Teardrop Master
 
Posts: 157
Joined: Tue Feb 27, 2007 2:01 pm
Location: Sicklerville, NJ

Postby Alan Wood » Sun May 23, 2010 11:24 pm

Wow! Looking good there!
Alan Wood
User avatar
Alan Wood
5000 Club
5000 Club
 
Posts: 5130
Images: 2
Joined: Tue Feb 07, 2006 1:26 am
Location: Sacramento California
Top

Postby stomperxj » Sun May 23, 2010 11:59 pm

Looking great fromeo...

Couple questions though:

1. what kind of vinyl are you using for the interior skin?

2. What are you going to do about sealing the wood to prevent rot in the future?

3. what are you skinning the outside with?

Again, looking really good :applause:

Jess
User avatar
stomperxj
The 300 Club
 
Posts: 395
Images: 1
Joined: Tue Jul 29, 2008 12:25 am
Location: Kuna ID
Top

Postby Wolfgang92025 » Mon May 24, 2010 12:45 am

great progress.........:applause:

Keep the pic's coming.

Wolfgang
Wolfgang

Image
User avatar
Wolfgang92025
Lifetime member
 
Posts: 1064
Images: 651
Joined: Fri Apr 18, 2008 10:16 pm
Location: Salt Lake City area, Utah
Top

Postby rxc463 » Mon May 24, 2010 4:23 am

Now that's what I'm talkin about! 6ft + of headroom and a private throne. Little trailers for real people. :thumbsup: :thumbsup: Great job.
Russ

Politicians and diapers have one thing in common. They should both be changed regularly, and for the same reason.
User avatar
rxc463
The 300 Club
 
Posts: 488
Images: 20
Joined: Wed Mar 12, 2008 6:05 pm
Location: Allentown, Pennsylvania
Top

WOW

Postby Chuckles2153 » Mon May 24, 2010 7:31 am

That's some fast demo and rebuilding there!! and it's looking sharp also.
Were you able to salvage most of the cabinets or are you going with custom built ?

Chuck
Chuckles2153
Teardrop Master
 
Posts: 154
Images: 74
Joined: Wed Mar 24, 2010 2:00 pm
Location: Franklin. Indiana
Top

Postby fromeo » Mon May 24, 2010 8:51 pm

Thanks everyone for the compliments!


stomperxj wrote:Looking great fromeo...

Couple questions though:

1. what kind of vinyl are you using for the interior skin?

2. What are you going to do about sealing the wood to prevent rot in the future?

3. what are you skinning the outside with?

Again, looking really good :applause:

Jess


Jess,

Thanks for the feedback. Glad to see you are back on the sawtooth, I really love the shape. And your fab work is top notch man!

The interior skin is a vinyl coated paneling, made by a company named PGM products. I think they may actually be out of business now, which would explain why I was able to find a large pile of it at a building surplus place dirt cheap. It's 1/8" Luann ply with the vinyl coating. Looks decent and I think it will be easy to clean, so that's a plus. Did I mention it was cheap? :)

There should not be any exposed wood in the end. The body will be skinned with some kind of aluminum siding. Real deal RV siding might be out of the budget due to shipping costs, but Len's method/tutorial with the trim brake looks promising. Plus, trim coil is very affordable at about $70 for a 24" x 50' roll.

Even with the aluminum skin, there's a couple of areas I have a little concern about. Those being the lumber surrounding the wheel wells (where I fear condensation more than leakage) and the bottoms of the walls which will be covered in aluminum but make me nervous anyway. Those areas will be hit with a coat of the evil black goo before they are covered up. I'm also waiting on a freebie roll of tyvek which I'm considering putting on before the siding. Tyvek is decent at shedding water and should be an extra layer of protection.


Chuckles2153 wrote:That's some fast demo and rebuilding there!! and it's looking sharp also.
Were you able to salvage most of the cabinets or are you going with custom built ?

Chuck


Chuck,

The cabinets in the original pop-up were pretty well shot. They were also made from a lot of particle board... talk about heavy! That said, all the cabinets will be made to fit. I'm both nervous and looking forward to that part - I've never built cabinets before! I've never built a trailer before either, but framing is a far far cry from cabinet making.

- Frank
fromeo
Teardrop Master
 
Posts: 157
Joined: Tue Feb 27, 2007 2:01 pm
Location: Sicklerville, NJ
Top

Postby pete42 » Mon May 24, 2010 10:46 pm

very nice job you and your family are doing.
I can almost feel how proud you are about the look so far.
pete
User avatar
pete42
Super Lifetime Member
 
Posts: 2203
Images: 13
Joined: Sat Nov 07, 2009 11:52 am
Location: SouthWest Ohio
Top

Postby vtx1029 » Tue May 25, 2010 12:31 am

Looks awesome! keep up the good work :thumbsup:
User avatar
vtx1029
Teardrop Master
 
Posts: 251
Images: 70
Joined: Fri Apr 23, 2010 11:42 pm
Location: MN
Top

Postby greekspeedoman » Tue May 25, 2010 12:40 am

great reading. Keep it coming. Your build is so well thought out. Good work.
User avatar
greekspeedoman
Donating Member
 
Posts: 312
Images: 12
Joined: Fri Jul 11, 2008 9:35 am
Location: Coeur d'Alene, ID
Top

Postby fromeo » Mon May 31, 2010 9:57 pm

Thanks again for the compliments!

Hopefully everybody had a good holiday weekend. We managed to accomplish exactly what we wanted to for the weekend, but nothing went easy. It was just one of those times where everything just wants to fight you every step of the way.

Here's what we accomplished this week.


Thursday, May 27. My brother got stuck in horrible traffic on the way here, so the trip took something like 4 hours instead of the normal 2. This was the first sign of a rough weekend. :) Despite the late start, we ran out for a dozen 2x4s, then slapped together a quick jig to cut the roof rafters. Nothing special, just a piece of plastic wood bent and clamped to the curve we wanted. My brother then used the router to cut the curves. Each rafter was made in 6 router passes - make 3, flip the rafter over, make 3 more. The ends are 1.5" tall with the center peak being 3.5" tall. The overall length is just a little under 7'.

Cutting out the rafters:

Image


Here's another shot that shows our quick & dirty cutting jig:

Image


Pile of cut rafters:

Image


Clamped together for a little love from the belt sander to get everything nice and smooth:

Image


Friday May 28. Got the rafters up on top of the walls and pinned in place. We used leftover framing members (1 x 1.5 finished size) to make the finished edge of the roof. With the rafters in place, we wanted to check the headroom for the shower. Put the pan up on a couple of blocks and had my brother climb in for a trial run. You can just barely see the plastic skylight dome over his head

Image


From a little higher up to give an better idea of the clearance

Image


Then we boxed out openings in the roof for a fantasic fan in the bath area, the skylight dome over the shower, the air conditioning in the center of the roof and a roof vent in the front. Then slid the assembly off the trailer and got it skinned. We had a rough time so I didn't get to grab the camera as much as I would have liked. Here's the skinned ceiling/roof assembly sat on top of the walls, this is as far as we made it on Friday night.

Image

Image

Image

In the last shot you can see how the front two rafters are made with progressively less height. This is to allow the roof plywood to make a smooth transition from the curved top to the flat front wall. Big thanks to "BobsYourUncle" over on rv.net and his very informative trailer re-build documentation for that tip!


And the view from the inside. We could not find any kind of suitable paneling in white that my brother liked for the ceiling, so he decided we should use the same stuff up there. I would have liked to see it different, but it still looks pretty good.

Image

Image

Image


Saturday May 29. Time to frame out the bathroom walls. First we frame the end wall and put it in place for a test fit. This is just framed up out of 1x2 pine to keep it as light as possible:

Image


Then the two side walls are framed and put in place. These are framed from 1x3 pine to make room for the 1.5" ABS pipe tank vents that need to run through the walls and up through the roof. It's hard to tell in the pictures but the door "jamb" sides are made from 1x3 maple, which is what the cabinet face frames will be made from. It will eventually all be stained to match. We attached the maple jamb ends with the kreg pocket hole jig for a clean, no visible fastener appearance. Also not visible in the picture is the bracing that was added to the hinge side strip of maple - just a 1x attached sideways to the maple strip, again with a series of pocket holes and titebond 3.

The two of us aligning the walls and marking the position on the floor with tape:

Image


And a shot from a better angle, without me in the way:

Image


If you look real close in those last two pictures you can see the fan-tastic fan, powered up and sitting in it's hole. With the roof enclosed, it started to get pretty darn hot in the trailer, so we sat the fan in place and I powered it up from a spare 12V power supply I had hanging around. In less than 10 minutes it had to drop over 10 degrees in there, made it much easier to work. This also convinced my brother that the $100 fan was worth every last penny.


Next we remove the wall assemblies from the trailer and get them skinned.

Image

Image


Then lifted the roof a few inches off the walls, and jockied the wall assembly through the door and into place. Here's Chris getting it all lined up:

Image


Nestled into it's final resting place

Image


A shot from the rear cargo door:

Image


And from inside the bath. The interior of the walls are left open until the tub is installed. Then we'll cover it with 1/8" ply and finally FRP for the shower surround.

Image


We then skinned the other wall section and got it in place. My brother had to give the new bathroom a test drive, so we sat the toilet in it's approximate position. The king and his throne :lol:

Image


You can blame Mike for starting that tradition!

Image


Last job for the day is to permanently attach the roof structure to the walls. Lots of clamps and screws for this job.

Image

Image


And the inside all buttoned up

Image


The proud trailer parent getting the bird's eye view of the progress :lol:

Image


That's it for this week! I picked up most of the electrical supplies today and should be starting on the wiring soon. Also expecting UPS to deliver the three tanks tomorrow so we may hang them and get the rough drain plumbing in this week.


- Frank
fromeo
Teardrop Master
 
Posts: 157
Joined: Tue Feb 27, 2007 2:01 pm
Location: Sicklerville, NJ
Top

Postby bve » Mon May 31, 2010 11:01 pm

Awesome build, great documentation, progress and pictures.

Thanks for sharing the build with us.


Burke
Burke

KISS > COMPLEX
Image
Image

Build threads converted to PDFs.
As of 2008-08-08 I have added more build threads to the pdf collection
User avatar
bve
500 Club
 
Posts: 694
Images: 98
Joined: Sat Aug 25, 2007 1:44 am
Location: Edmonton, Alberta, Canada
Top

Postby fromeo » Sun Jun 13, 2010 8:19 pm

It's been a couple of weeks, so I'm a bit overdue for an update.

We're getting very close to wiring time, so I spent some time mapping out locations and circuits.

First, the 120VAC locations:

Image


And the circuit breakdown, we're using a Progressive Dynamics 4000 Series converter/distribution panel (http://www.progressivedyn.com/all_in_one_pd4000.html)

Image


Here's the 12V plan:

Image


And the 12V circuit layout:

Image


Last weekend was a bit tight, my brother had to work some extra hours and we only had about a half day to get work done. The water tanks had come in, so we started mounting up the black tank.

Bare tank as it arrived:

Image

Image


We mounted the tank in it's location under the floor, then drilled some pilot holes through the floor and down through the top of the tank. This gets everything lined up right where it needs to be.


Image

In that picture you can see the pilot hole for the closet flange, and in the opening in the wall you can see where a holesaw was used to make way for the vent pipe that runs up through the roof.


Next we use the hole saw to make holes in the top of the tank to accomodate the fittings. Here's the vent fitting installed:

Image

Apparently I forgot to take a picture of the treaded fitting installed for the closet flange. :(


With the fittings installed on top of the tank, the tank is ready to go back into position. Here you can see the fitting in the floor to accept the closet flange.

Image


And the closet flange sitting in place (did not screw it in, want the fitting to have time to set up):


Image


Here's how the tank looks underneath the floor:


Image


Then we start prepping the grey tank for installation. First drill pilot holes for mounting

Image


We were able to get the grey tank mounted under the floor, but ran out of time. So we picked it back up this week.

Same process, with the tank temporary put in place we locate the position of the pipes and drill pilot holes. Then the tank comes out and the fittings get installed:

Deciding which fittings to use:

Image


Holes drilled:

Image


Bricks hold the fittings in place while the glue sets up:

Image


While the glue sets, we grab a hole saw and enlarge the pilot holes in the floor to accept the pipes. This is for the galley sink:

Image


And this is in the bath. The hole in the center of the floor is for the bath sink, while the hole in the wall is for the shower and the roof vent:

Image


Looking up the wall you find a matching hole for that vent pipe:

Image


Here's a piece of pipe set into the hole to give an idea. In the end, it will need a Tee fitting down bottom to accept the shower grey water..

Image


The grey tank from underneath:

Image


If you look real close at that picture you can see the electrodes installed in the tank side for the monitor panel (not known for their accuracy, but better than guessing). We also installed some in the black tank:

Image


Next we got out the step tub and mocked up the drain plumbing:

Image


Take a bunch of measurements off that mock-up and built a small platform to elevate the tub for trap clearance:

Image

We also sat the tub in place and cut out the paneling where it hit the tub. You can see the cut-outs in that picture.


Here's that tub in it's final position:

Image


And under the tub you can see how the trap and waste plumbing will be handled. Note the cutout in the floor which provides extra clearance for the trap. Without this hole (covered on the bottom of the insulation by the tank) we would have to elevate the tub much higher, resulting in not enough headroom to stand in there!

Image


An elbow will be added to the other tank fitting to accomodate a short run of pipe for the bath sink. Like this:

Image


During the week I also worked on the cabinet layouts. First, a cabinet to run across the front of the trailer, over the couch/bed:

Image


The "wardrobe" cabinet, which mounts next to the bathroom. This also houses the furnace, converter, radio and monitor panel:

Image


The bath cabinet:

Image


The rear side of the galley:

Image


And finally, the side of the galley:

Image


After we finished up with that tub, we moved onto making some cabinet face frames.

Here's the front cabinet:

Image


The wardrobe:

Image

which will be mounted here:

Image


The galley side cabinet:

Image


Test fitting the galley overhead:

Image


And the galley base test fit:

Image


I had my brother hold the overhead up to get a good idea of where we're headed:

Image

Image


Finally, the bath cabinet:

Image

Image

Image


And that's it for this week. Hope to get a few days in this week, and then we'll be taking a one week break.


- Frank
fromeo
Teardrop Master
 
Posts: 157
Joined: Tue Feb 27, 2007 2:01 pm
Location: Sicklerville, NJ
Top

Postby fromeo » Tue Jul 06, 2010 2:10 pm

My brother and his girlfriend went out to Las Vegas for a week so we had a little bit of a break from the build. We were able to sneak in a few hours before they left so we used the opportunity to tackle a couple of small jobs and finish up a few other things.

June 18:

First we finished securing the black and gray water tanks under the floor. We had previously only had them held up with a couple of screws to get things lined up. We now have screws all the way around the mounting flanges and the tanks are tight to the underside of the floor. I still need to make up some supporting straps for the tanks, hopefully get to that soon.

Once those tanks were secure, we cut a couple of holes in the ceiling for a pair of speakers:

Image


Then cut some supports for the speakers out of 1/2" ply:

Image

Image


And finally mounted up the speakers with the backings:

Image

Image


Then we finally drilled the last hole for the black tank vent pipe. This one had to land in the bathroom wall and line up perfectly with the one in the floor. It was a bit nerve-racking.. off by 1/4" and the wall and ceiling would have been damaged. Thankfully we got it in the right place.

Image


With that out of the way, we moved onto some rough wiring. Broke out the diagrams, marked the locations of some of the light fixtures, punched some holes and started pulling copper:


In the bath, a double fixture will go over the sink and a single fixture will be over the shower:

Image


There will be wall mounted switches for the sink light and the fan-tastic fan. These wires run down the wall for the switches:

Image


Up front, there's a single bulb fixture right over the entry door, and a double in the middle of the "living area":

Image


Back in the galley, a double fixture centered over the standing space:

Image


Next the switches next to the entry door. These will do the outside "porch" light, the inside fixture over the entry door, and also a small amber light under the trailer to illuminate the step. Also seen is a loop of wire destined to feed the range hood and the under cabinet lights:

Image


Up front outside we have a provision for a single bulb fixture over the hitch & LP tanks:

Image


Here's a couple of shots to give an idea of how the wiring is being run through the roof. Keeping everything tied off to the sides to allow for easier placement of insulation later:

Image

Image


That about sums it up for that day.

When my brother got back from his trip we were able to get two days in before he had to head home and back to work.


July 1-2:

We have all the cabinet fronts back at my place and stained/polyurethaned. Time to start installing the cabinets. First we start with the wardrobe, the bare face frame finished:

Image


I had made up the side for the wardrobe the day before but the camera was dead so I couldn't get any in progress pictures. :( Anyway, here's us mating up the side to the face frame. Each piece had a little bit of a twist in it making this installation a real bear.

Image


After a lot of wrestling, in place and secured (something like 4 hours later)!

Image


The inside of the wardrobe area is lined with paneling as well:

Image


With the cabinet in place, we mounted up the power converter:

Image


Then built a support shelf and mounted the furnace:

Image


Cut out and framed the opening for the furnace air intake/exhuast vent:

Image


Next we moved on to the galley cabinets. Start with the overhead so we don't have to try to reach over the base cabinet to work on it. First order of business is to mount the face frame to the ceiling in the appropriate position:

Image

Image


Now we start framing the floor of the cabinet. Whenever possible, I like to frame this stuff in place because it takes out a lot of variables and results in a perfect fit.

Image

Image

Image

Image


Next we brace the framing, and pull it out of the trailer to skin the bottom. Hard to see in the pictures but we use the plastic trim against the face frame and on the edges. The edge against the wall gets a length of the bead trim. Skinned and ready for installation:

Image


Time to get it in place and secured. The floor is attached to the face frame with the Kreg jig and to the wall from the outside with screws, through the studs. A couple of screws are then added from outside, through the paneling into the framing to keep everything tight.

Image

Image


Done!

Image

Image

Image


Moving onto the base cabinet, same deal. Get it in place and secured to the floor, then frame up the end panel:

Image

Image


Then skin it and mount it in place:

Image


The whole works:

Image


With the cabinets in place I mocked up the range hood so I can cut a hole for the vent and get it framed out:

Image

Image

Image


Then I started running wires through the cabinet floor for the range hood and the two under cabinet lights:

Image

Image

Image


Finally pulled the switch wiring through the wall. We will mount the light switches on the side of the lower galley cabinet:

Image


Meanwhile, my brother was outside making up an end cap for the upper galley cabinet:

Image

Image

Image

Image


To finish off the edge of the end cap, we will use plastic T-molding:

Image


Installation is simple, you use the router to cut a 1/16" groove in the edge with a slot cutting bit:

Image


Then put the stuff in with a rubber mallet:

Image


The little piece is just for illustration. After he finishes the endcap we will do the whole edge in one piece and mount the panel with the Kreg jig.


And that's it for this week's update. Starting to look like something though! Hoping for cooler days later this week so we can get more work done. Not really wanting to work when it's 98 degrees out. :(


- Frank
fromeo
Teardrop Master
 
Posts: 157
Joined: Tue Feb 27, 2007 2:01 pm
Location: Sicklerville, NJ
Top

PreviousNext

Return to Build Journals

Who is online

Users browsing this forum: No registered users and 4 guests