Yesterday I took the trailer for a wild ride to the welders...reminded me of Mr Todd's Wild Ride at The Magic Kingdom. Picture this...a 2000 pound capacity trailer, with no load, over the pot holes and frost heaves of Massachusetts roads in the middle of winter. The trailer was airborne more often than both tires actually touching the pavement. I made some makeshift fenders for the trailer to make it legal to take on the road. I lost the first fender about a quarter mile from my house, and the second fender flew off after a bad frost heave less than a mile from my house. I'm sure the fenders would have made it on "summer roads" because it is only 3 miles, but the frost heaves and pot holes this year are for the record books. I knew these were flimsy to start with and only meant to go 6 miles round-trip, but I seriously thought, that maybe they would make it. I am building the teardrop much sturdier, and as most state in here, probably over built.
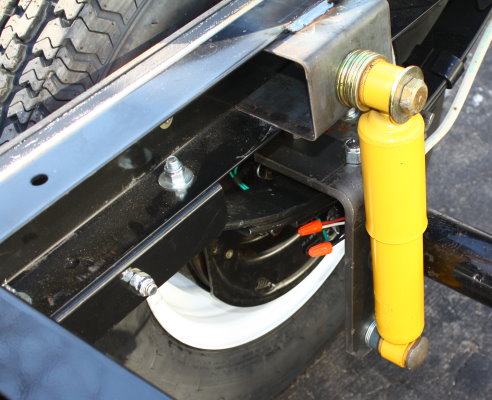
I couldn't believe the racket coming from the rear of my car. There is a lot of "slop" where my ball mount slips into the receiver. I have to do something to take up the slack. I used to have a boat trailer, and I found that spraying the ball mount where it slips into the receiver with a half dozen coats of primer took up the slack and almost eliminated all noise. I also have slipper style springs on this thing and have read that those make a racket bouncing up and down on the frame with no load. I also read that not having the trailer level (the reason it is at the welders) also can cause some noise. I'm hoping that a level trailer, with full load (maybe around an additional 1000 pounds), plus some paint on the trailer hitch will make it sound much quieter.
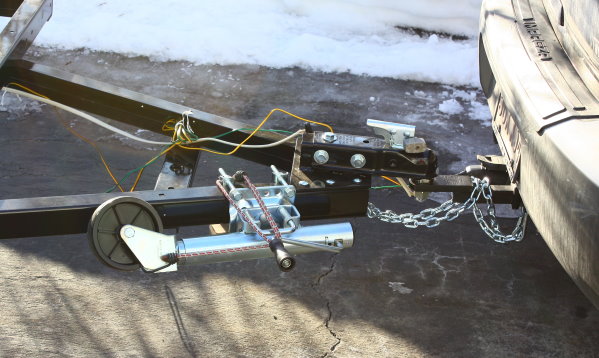
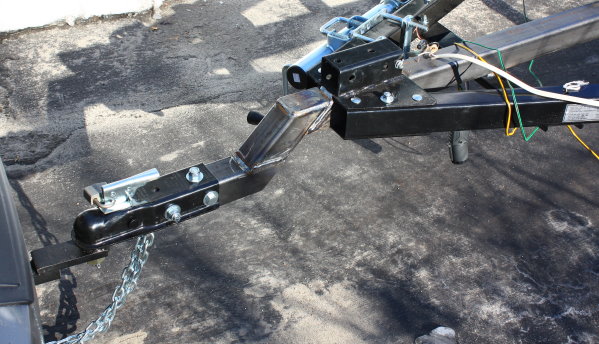
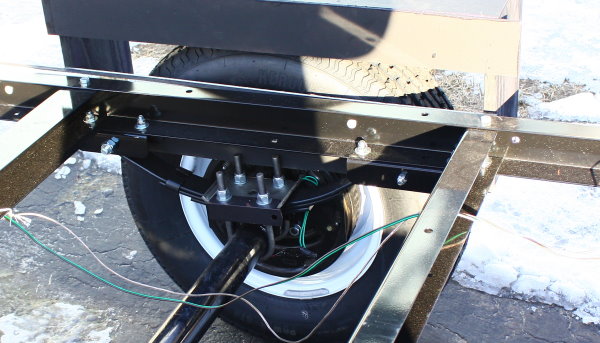
The welder welded on a new trailer tongue to strengthen and lower it so my trailer rides level, and he fabricated lower shock supports and welded on upper shock supports, as described in earlier posts. The new tongue now goes back to the second cross member. Just brought the trailer home. As expected, the ride home was no better than the ride to get it there...airborne almost half the time. The shocks have no effect what so ever on an empty trailer, and if possible might have even stiffened an already "solid" suspension. I was nervous I would run in to the police bringing it home. Not only had my fenders fallen off getting it there, but the welder extended the tongue by 15 inches, which I had previously agreed to, but now the temporary electrical doesn't reach the connector. No fenders, no brake lights, no directionals...anybody else see a problem if I was stopped?
I hope my neighbors were not watching when I brought the trailer home. I have not back up a trailer in over 10 years, and that was a trailer holding a 16 foot boat. A trailer about half the length is a little bit trickier backing up. I have a skinny driveway, narrowed by winter snow banks. Let's just say that I did not get it in the driveway first shot.
Below is the before and after. Cost, $200, trailer sits level, and under a full load the shocks should improve the ride. Should look better in the spring when it is warm enough to paint it all up.
*When doing anything, if there exists no possibility of failure, then any feeling of success is diminished.
**The glass is neither half full nor half empty...it is simply twice as big as it needs to be.
***If at first you don't succeed, redefine success.
****When I die, I want to die like my grandfather, who died peacefully in his sleep. Not screaming like all the passengers in his car.