Back at it again this morning. Started locating things a bit more, worked on the bumpers, latch mechanism & strut attachments. Here's the latch block, 3/4" plywood with "T" nuts to hold the 1/4" bolts. I counter-bore the back side with a speed-bore bit to set the inserts flat to the block & flush so the 1/8" goes on without any lumps when it's time to do the plywood skin.
After things are located, I mix up some 5 minute epoxy to pot the inserts & make sure they stay put once things go back together again. Screw it all together & let it sit, all set in no time in the heat! Have to work fast and have everything mapped out or the epoxy kicks off too fast and I run out of time.
Same thing for the strut braces. All of this will be glued in place with titebond for the final assembly, but as I said, it's all just a dry fit for now to check things & locate all of it first. The last thing I need now is to get out of sequence on something at this point. It's enough work without the mistakes.
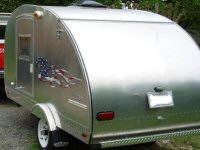
Here's the hatch now with a few more things in place. The bumpers are located, but I still need to pot the inserts once the hatch is out of its opening. For now just a few drywall screws are holding them in place in the pilot holes. The latch handle is located, but I will still need to drill for the rods & cut them to length so they extend into the sides when they lock. With this latch type, the rods travel about an inch with a 1/4 turn of the handle, so I'll have about 5/8" engagement on both sides, which should be plenty for what I have. I may leave the rods out about 1/8" if the hatch doesn't have any twist when it's done, so there might be more like 3/4" of grab into the sides.
What's left still in the hatch framing department? Need to do the blocking for the back-up lights. They will be above the bumpers and routed into blocks. Need to make a jig for the cuts as I'm using a reverse flush cut bit & the plunge router. Stereo speakers will need enclosures which hang down from the inside the hatch and miss the cabinets, struts, etc. Galley light blocking, license plate blocking & paper towel holder all need to be located. Wire runs & grounds will need to be located as well, so I'm not there quite yet. All in all it was a good weekend of work.


