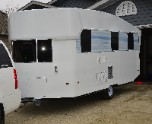
Tucson tortoise: Edit for photos

...ask your questions in the appropriate forums BUT document your build here...preferably in a single thread...dates for updates, are appreciated....

Re: Tucson tortoise

Postby OP827 » Wed Sep 02, 2015 9:29 am

You are most welcome. I agree about skins and sorry I did not read the whole thread and didn't know that you were planning on good structural external skins. Now I think a soft light wood blocking would be more than enough. The skins will provide all the rigidity, once they are glued good to the ribs, then it's the skins that will in fact take all the stress, not the internal ribs and it will be rock solid. Are you anticipating any springback from skin or the skin materials you are using are too flexible to cause the ribs to flex during glueup?

Also the horizontal wood blocking could be made lighter by drilling a series of big holes in them to reduce weight as all they do is keeping the ribs in place before the skins are glued, after the skins are glued they will only "help" with skin geometry stability needing a very little strength in them. Just a thought.
User avatar
OP827
Donating Member
 
Posts: 1561
Images: 405
Joined: Fri Apr 25, 2014 7:27 pm
Location: Bruce County Ontario

Re: Tucson tortoise

Postby aggie79 » Wed Sep 02, 2015 5:38 pm

Your hatch - as well as the rest of your teardrop - looks fantastic!

I built my hatch similar to yours (other than my "ribs" are only 1-1/2" deep). It was a little floppy until I added a few corner gussets and the skins. My outer skin is 1/8" plywood and my inner skin is white FRP (no plywood). My hatch is solid and does flex at all even with the comparatively extreme curves.
Tom (& Linda)
For build info on our former Silver Beatle teardrop:
Build Thread

93503
User avatar
aggie79
Super Duper Lifetime Member
 
Posts: 5405
Images: 686
Joined: Tue Aug 07, 2007 5:42 pm
Location: Watauga, Texas

Re: Tucson tortoise

Postby capnTelescope » Wed Sep 02, 2015 11:04 pm

My hatch is kinda floppy, but I see that as a feature and not a bug. It helps the hatch settle on the gasket better.
I'll burn that bridge when I come to it.

Brad
ImageImageImage

Building the Bed & Breakfast
User avatar
capnTelescope
Lifetime member
 
Posts: 1218
Images: 368
Joined: Sun Jun 27, 2004 3:44 pm
Location: Round Rock, TX
Top

Re: Tucson tortoise

Postby noseoil » Sat Sep 05, 2015 11:50 am

Thanks for the input on my work in progress.

I can't believe it, it's raining this weekend! I have a three day weekend & there's enough rain to keep me from peeling off the tarps & working outside on the build today. I've gone into the shop to do a little on the speaker boxes, so all isn't lost. Last weekend I cut a piece of cardboard to make a pattern for the speaker boxes, so I built them this morning in the shop. Basically, they need to conform to the curve of the underside of the hatch, screw in place & not stick down too far when the hatch is open. Don't want a head-knocker when I'm in the galley cooking.

Here's the cardboard pattern I used to rough-in the curve. I drew the shape on some 1/2" baltic birch, made a pattern with one piece, then used the router to make the other three sides for the boxes.
160090

The boxes with the pattern in front of them. They hang from the hatch & point back & down from the galley a bit, to send the tunes out into our campsite. I'll put another 1/8" skin on the sides & faces to clean them up a little, do the stain & a couple of coats of urethane to seal them up. I need to wait & see how close I've come to the curve on the hatch when it's actually skinned. If it isn't a good enough fit, I'll use some upholstery piping on the back side of the curve to act as a gasket & trim. They'll just screw in place against blocking when it's time to install them. Don't want any chattering from vibration against the hatch. Again, it won't be too soon at this rate, but they'll be ready when the hatch is done.
160091
Last edited by noseoil on Wed Nov 06, 2019 7:51 am, edited 1 time in total.
Build log: viewtopic.php?f=50&t=60248
The time you spend planning is more important than the time you spend building.........

137905
User avatar
noseoil
1000 Club
1000 Club
 
Posts: 1820
Images: 669
Joined: Sun Apr 27, 2014 8:46 am
Location: Raton, New Mexico, living the good life!
Top

Re: Tucson tortoise

Postby KCStudly » Sat Sep 05, 2015 3:07 pm

Looks good. I bet If you screw thru the sides and nestle them up to the ribs they will help stiffen the hatch up some more, too. :thumbsup:
KC
My Build: The Poet Creek Express Hybrid Foamie

Poet Creek Or Bust
Engineering the TLAR way - "That Looks About Right"
TnTTT ORIGINAL 200A LANTERN CLUB = "The 200A Gang"
Green Lantern Corpsmen
User avatar
KCStudly
Donating Member
 
Posts: 9616
Images: 8169
Joined: Mon Feb 06, 2012 10:18 pm
Location: Southeastern CT, USA
Top

Re: Tucson tortoise

Postby noseoil » Sun Sep 06, 2015 1:49 pm

Finally, blue skies & the heat's back again! Did some more work this morning on the hatch. I've added a 1/16" filler strip to the top edge on the front side, as it was a little sloppy when the hinge went in place. With the high humidity these last few days, the hatch did swell a little bit, but nothing bad. It didn't get wet. Time for the outside hatch skin.

Since the hatch & body are both oversize by 1/2" (60 1/2" due to the frame size being slightly over 5' wide), I decided I would just use 2 sheets of 1/8" BB & do it in two halves instead of one entire sheet. Figure I will use the material that's cut for something sooner or later. I wanted to make sure the fit is right before the aluminum goes on. I don't mind having a 1/4" void under the trim where the aluminum is short along the edges, but I do want the hatch build-up to be right underneath it for support of the metal when it goes down & gets glued along the edges. With 1" wide aluminum trim & a good bedding compound, it should be fine once the skin & trim are all buttoned up.

Here's the first half glued & stapled in place.
160093

Here's the full skin in place & the back-up lights routed out. Progress!
160092

I have a question I've been pondering for a while & would like some input from those who have faced this decision already & have seen how it worked out.

I need to drill the two latch rods in the side of the body, where they engage when the handle is turned & in the "closed" position. I'm trying to decide if it would be better to mount the hinge, mount the struts & then drill for the rod holes, or wait until the gaskets are all in place before I drill for the actual closed position on both rods. I'm fairly confident that I have a good fit & uniform gap around the hatch at this point, but I'm wondering if a hollow gasket will have that much resistance and make closing the hatch a PITA if the gaskets don't compress very easily.

The gaskets are the 5/8" X 0.40" hollow type & will have to compress down to .31" on the bottom edge & about 1/4" along both sides. They seem fairly soft & compress very easily between two fingers, so I'm not sure on this one. Appreciate your input on this question. Thanks, tim
Last edited by noseoil on Wed Nov 06, 2019 7:54 am, edited 1 time in total.
Build log: viewtopic.php?f=50&t=60248
The time you spend planning is more important than the time you spend building.........

137905
User avatar
noseoil
1000 Club
1000 Club
 
Posts: 1820
Images: 669
Joined: Sun Apr 27, 2014 8:46 am
Location: Raton, New Mexico, living the good life!
Top

Re: Tucson tortoise

Postby KCStudly » Sun Sep 06, 2015 3:46 pm

Are you planning to use draw latches as well (belt and suspenders)? If so, I would wait and do it later. You would be able to adjust the draw latches to close the hatch against the seal just so; built the handle and rod assembly; then put something like lipstick on the ends of the rods to transfer the exact location of where to put the holes (or at least get you close enough to creep up on it).

As always, your work is looking very good. :thumbsup: Any thoughts about adding a second layer on the hatch? Just thinking that it would reinforce the join between the two halves if you were to add another layer with offset seams. But then again that would add weight.
Last edited by KCStudly on Sun Sep 06, 2015 5:23 pm, edited 1 time in total.
KC
My Build: The Poet Creek Express Hybrid Foamie

Poet Creek Or Bust
Engineering the TLAR way - "That Looks About Right"
TnTTT ORIGINAL 200A LANTERN CLUB = "The 200A Gang"
Green Lantern Corpsmen
User avatar
KCStudly
Donating Member
 
Posts: 9616
Images: 8169
Joined: Mon Feb 06, 2012 10:18 pm
Location: Southeastern CT, USA
Top

Re: Tucson tortoise

Postby tony.latham » Sun Sep 06, 2015 4:28 pm

NoseOil: Your hatch (and the rest of your build) look great. :thumbsup:

I have a question I've been pondering


I really think you need to get the hinge on and the seals installed before you drill the side holes. It's going to fit a tiny bit different after they're on.

I'm scratching my head trying to figure out the best way to mark the rod holes––I use draw latches so I haven't done that––maybe some lamp black on your rod ends? Six bits says you've got that step figured out though.

Isn't it amazing how much time you spend thinking things through, way out ahead of the next step?

Tony
User avatar
tony.latham
Gold Donating Member
 
Posts: 6912
Images: 17
Joined: Mon Jul 08, 2013 4:03 pm
Location: Middle of Idaho on the edge of nowhere
Top

Re: Tucson tortoise

Postby Dalorin » Sun Sep 06, 2015 4:46 pm

Good looking build noseoil. Very spacious. That galley will be fantastic.
Dalorin
Teardrop Master
 
Posts: 135
Joined: Wed Dec 31, 2014 4:50 am
Top

Re: Tucson tortoise

Postby KCStudly » Sun Sep 06, 2015 5:25 pm

Lamp black, lipstick, maybe even shoe polish. Something soft, gooey and easy to clean off after the fact.
KC
My Build: The Poet Creek Express Hybrid Foamie

Poet Creek Or Bust
Engineering the TLAR way - "That Looks About Right"
TnTTT ORIGINAL 200A LANTERN CLUB = "The 200A Gang"
Green Lantern Corpsmen
User avatar
KCStudly
Donating Member
 
Posts: 9616
Images: 8169
Joined: Mon Feb 06, 2012 10:18 pm
Location: Southeastern CT, USA
Top

Re: Tucson tortoise

Postby noseoil » Mon Sep 07, 2015 8:16 am

I guess it'll be better to wait for now to drill the holes. The hatch won't take its final shape until I get everything loaded (both in and on it) & fasten it all down. As far as marking the holes, that's an easy one. I'll use a couple layers of blue tape or foam tape to make a "soft" landing spot, then use some lamp black on the rod ends to mark the holes. An awl to mark the center & it's ready to drill. I still may try to find some metal sleeves to press into the holes to act as liners so the wood doesn't get too worn from movement over time. A dirt road could cause wear in the wood if it's pretty bumpy.

I wasn't planning on a set of draw latches at this point, but I'm not going to rule them out yet either. If the gaskets don't pull up & seal properly, or if there are any issues with the hatch over time, I might add a pair to help hold things in place. Will have to wait & see how it works out once it's "finished" if that ever happens, no time soon. Who knows, I might be done in time for a Christmas trip somewhere (this year).
Last edited by noseoil on Tue Sep 08, 2015 7:34 am, edited 1 time in total.
Build log: viewtopic.php?f=50&t=60248
The time you spend planning is more important than the time you spend building.........

137905
User avatar
noseoil
1000 Club
1000 Club
 
Posts: 1820
Images: 669
Joined: Sun Apr 27, 2014 8:46 am
Location: Raton, New Mexico, living the good life!
Top

Re: Tucson tortoise

Postby Vedette » Mon Sep 07, 2015 10:53 am

If you are not going to make a metal striker plate (like you have on the doors in your house) for the rods to pass through, and you want to pursue a sleeve type receiver, you could think outside the box and go down to you local Automotive store and look at "door hinge bushings". They come in various sizes and could be pressed and glued into your wood, as the have a shoulder. They are usually brass or bronze.
Keep up the Great Work! :thumbsup: Remember it is a Labour of Love! ;)
Good Roads
Brian & Sandi
Good Roads
Brian & Sandi
Here is a link to my Build Journal
viewtopic.php?f=50&t=50912
Image109106109111109110138766
User avatar
Vedette
Silver Donating Member
 
Posts: 5141
Images: 443
Joined: Thu Dec 01, 2011 4:28 am
Location: Westbank B.C.
Top

Re: Tucson tortoise

Postby KCStudly » Mon Sep 07, 2015 11:48 am

I, too, was thinking striker plate let in. Easier to adjust or replace the hole location if you need to make an adjustment later. Putting a little bevel on the ends of the rods would also help the rods engage and perhaps pull the hatch that little bit more if you have to push to seat the seal.
KC
My Build: The Poet Creek Express Hybrid Foamie

Poet Creek Or Bust
Engineering the TLAR way - "That Looks About Right"
TnTTT ORIGINAL 200A LANTERN CLUB = "The 200A Gang"
Green Lantern Corpsmen
User avatar
KCStudly
Donating Member
 
Posts: 9616
Images: 8169
Joined: Mon Feb 06, 2012 10:18 pm
Location: Southeastern CT, USA
Top

Re: Tucson tortoise

Postby noseoil » Mon Sep 07, 2015 3:05 pm

Thanks guys, I'll look into those bushings to see what's available. I have about 3/8" of side clearance between the hatch & the side panel, so there should be plenty of room to set a bushing in place. I would prefer a metal on metal fit for the rods. I did put a slight amount of taper on the rods already, just broke the corners really when I trimmed them to length, but I might do a bit more if the latch doesn't close easily enough. Have to see when it's time how they engage & how much force is necessary to close them.

Finished for the day again, but it was a good weekend for work. Here's a shot of gluing up an 1/8" strip on the inner edge of the curve. This will be where the gasket is glued for the edge seal. It helps stiffen things up prior to skinning with the aluminum and gives a better area to run the fasteners in for a better hold. The 1/8" isn't too strong by itself on the edge, pretty flimsy really, but with a second layer it's good.
160094

I'm adding some 1/8" birch to the edges of the hatch to cover up the 3/4" plywood & all the screw heads, just some trim strips. This is showing a partial scribe & rough cut for the piece. They'll be stained, finished & then glued in place so the edges look a bit better once the hatch is open. The ribs have been laying around for over a year now so it's looking a bit tired & baked by the sun.
160095

Checking the fit of the "flex-conduit" and making sure there's enough room for everything to fit once it's all put together. It's 10# of you-know-what in a 5# bag at times for wire runs, but it should work well enough when it all goes back together for good.
160097

Finally, here's the back showing the "bumpers" & latch handle in place. The hinge is now drilled & there are a couple of screws holding the hatch in place for this shot & to check the conduit runs. It fits fine so far & closes up nice & snug. Should be a good tight fit once things are actually assembled for real. Wondering about the back-up lights now that I have things in place, hmmm. Did a sketch & it looked OK on paper....
160096
Last edited by noseoil on Wed Nov 06, 2019 8:00 am, edited 1 time in total.
Build log: viewtopic.php?f=50&t=60248
The time you spend planning is more important than the time you spend building.........

137905
User avatar
noseoil
1000 Club
1000 Club
 
Posts: 1820
Images: 669
Joined: Sun Apr 27, 2014 8:46 am
Location: Raton, New Mexico, living the good life!
Top

Re: Tucson tortoise

Postby dales133 » Mon Sep 07, 2015 4:06 pm


That finish lines looking closer
User avatar
dales133
4000 Club
4000 Club
 
Posts: 4605
Images: 1
Joined: Mon Oct 13, 2014 5:26 pm
Top

PreviousNext

Return to Build Journals

Who is online

Users browsing this forum: No registered users and 16 guests