"Silver Nugget" Teardrop Trailer

...ask your questions in the appropriate forums BUT document your build here...preferably in a single thread...dates for updates, are appreciated....

Postby grizz » Sat Sep 25, 2010 3:18 pm

down under tech wrote:Thanks Grizz: I'm glad you are back up and running again. I hope all is well with your home purchase and the move in was smooth. When you say they are making you redundant, I hope that your company is not kicking you to the curb.

I will post an update later today. All I can say is ALUMINUM... This might keep everyone guessing on what is up on the build.

More to come. 8)


They have, after 14 years service all I can say is ...... not much.

I trust I will be able to find something else, with another company.
Greetings from England.

Rian.


Hoping to get it all done in time.
User avatar
grizz
1000 Club
1000 Club
 
Posts: 1210
Images: 29
Joined: Mon Sep 21, 2009 2:37 pm
Location: Rochester, Kent, UK

Update, 9-25-2010

Postby down under tech » Sat Sep 25, 2010 7:15 pm

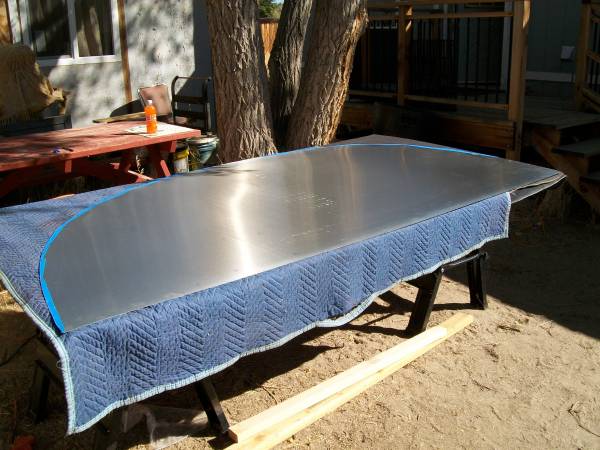
Hey everyone: I got some time today to cut out the aluminum skins for the sides of the "Silver Nugget". I went to Harbor Freight last week end and I bought an electric metal cutting shear. It was on sale and I also had a 20% off coupon. It cost me $36.00. I found it cuts better with WD40 on the blades. I learned this reading on this forum. It would stop cutting, but it flew through the aluminum like butter after the WD40. I had to apply it several times on each cut.

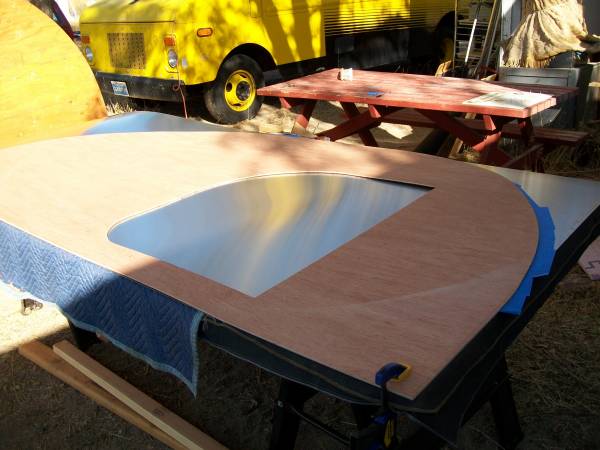
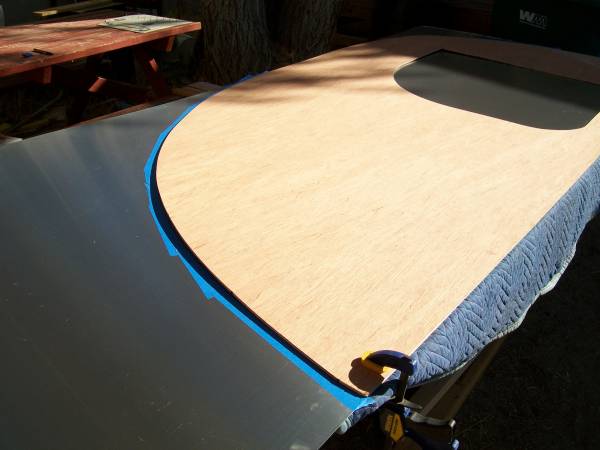
I had made an 1/8" template pattern when I made the the side walls earlier in my build. It came in handy for setting up the cut lines on the skins.

Image

Image

Image

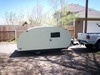
This is how they turned out...

Image

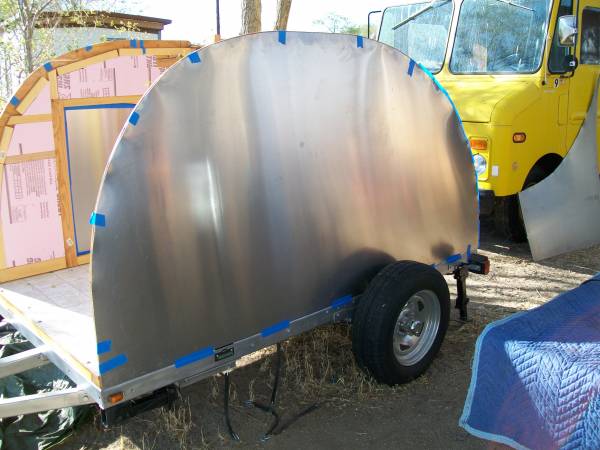
I just have the skins taped in place so I could snap a couple of pics. I almost can't believe it has aluminum on it.

Image

Image

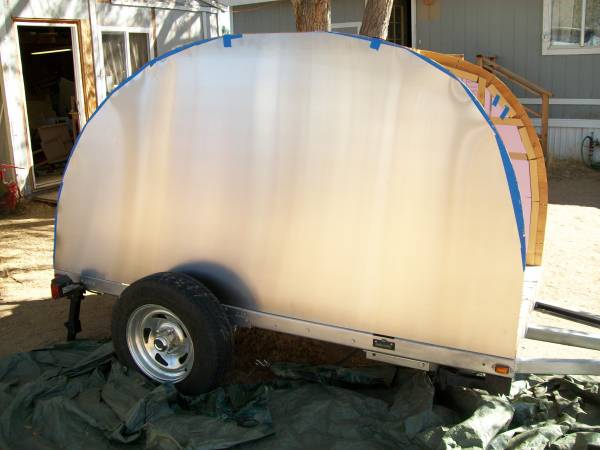
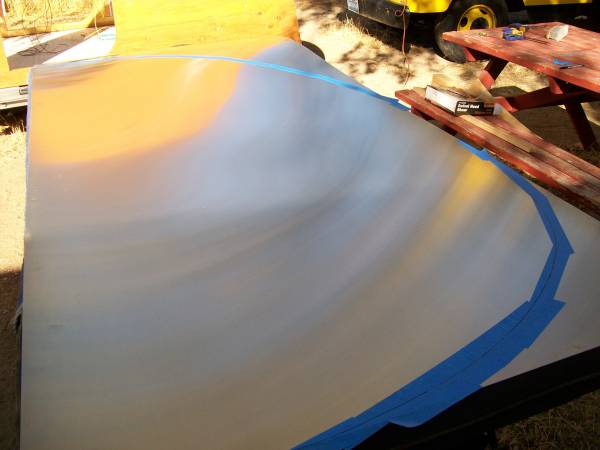
Next, if I have enough time today, is to cut out the door openings and the holes for the wires for the porch lights. I placed everyone's favorite BLUE TAPE by the door openings and traced the shape on the aluminum from the inside of each opening. I know I will get accused of using up all of the BLUE TAPE and that will cause them to raise the cost of it, LOL.

I hope you all are having a great week end !!! :peace:
Johnny D.

"If you think you can, you can. If you think you can't, your right !" ... Henry Ford

"The Silver Nugget" Build
viewtopic.php?t=35314&postdays=0&postorder=asc&start=0
User avatar
down under tech
Silver Donating Member
 
Posts: 565
Images: 571
Joined: Sat Feb 06, 2010 10:01 pm
Location: Reno, Nevada

Postby Weirdnerd » Sat Sep 25, 2010 7:21 pm

Beautiful, I have to get me one of those shears, normally I would use an angle grinder with a cutting wheel, or a pneumatic nibbler, cutting aluminum can be quite a problem.
This is my build thread...
Weirdnerd's teardrop
User avatar
Weirdnerd
The 300 Club
 
Posts: 318
Joined: Thu Sep 23, 2010 3:03 pm
Location: Denver, Co ( USofA)
Top

Postby down under tech » Sat Sep 25, 2010 7:45 pm

Weirdnerd: Here is a pic of the shears I used to cut the aluminum. I added this so you could see what was used. This way if you or anyone else wanted to buy one you have an idea of what you are looking for.

Image
Johnny D.

"If you think you can, you can. If you think you can't, your right !" ... Henry Ford

"The Silver Nugget" Build
viewtopic.php?t=35314&postdays=0&postorder=asc&start=0
User avatar
down under tech
Silver Donating Member
 
Posts: 565
Images: 571
Joined: Sat Feb 06, 2010 10:01 pm
Location: Reno, Nevada
Top

Postby Weirdnerd » Sat Sep 25, 2010 9:37 pm

is there an appropriate " drool" smiley?..hehehe,, I would get one for home, and other for work ( but they don't recommend using electric tools of aircraft...risk of static build up and subsequent release of smoke on electronic equipment)...so it will have to be an air tool....nice machine ...
This is my build thread...
Weirdnerd's teardrop
User avatar
Weirdnerd
The 300 Club
 
Posts: 318
Joined: Thu Sep 23, 2010 3:03 pm
Location: Denver, Co ( USofA)
Top

Postby down under tech » Sat Sep 25, 2010 9:59 pm

Weirdnerd: Here are two air operated versions of the metal shears. $29.99 each.

http://www.harborfreight.com/pistol-gri ... 98580.html

http://www.harborfreight.com/inline-air ... 98833.html
Johnny D.

"If you think you can, you can. If you think you can't, your right !" ... Henry Ford

"The Silver Nugget" Build
viewtopic.php?t=35314&postdays=0&postorder=asc&start=0
User avatar
down under tech
Silver Donating Member
 
Posts: 565
Images: 571
Joined: Sat Feb 06, 2010 10:01 pm
Location: Reno, Nevada
Top

Postby Weirdnerd » Sat Sep 25, 2010 10:15 pm

I have to...must...agh...I have a harbor freight ten minutes from home....deng!
This is my build thread...
Weirdnerd's teardrop
User avatar
Weirdnerd
The 300 Club
 
Posts: 318
Joined: Thu Sep 23, 2010 3:03 pm
Location: Denver, Co ( USofA)
Top

Aluminum skins are all cut out...

Postby down under tech » Wed Sep 29, 2010 8:43 pm

Hi All: With the help of my girlfriend Terry, I was able to cut the door openings in the aluminum sides with my jig saw. I drilled the holes needed for the porch lights and the A/C power inlet and the cable TV connector to go through the left side wall today. I only had to cut the door opening & drill the holes for the porch light on the right side wall.

Image

Image

I need to finish the front overhead cabinet frame so I can be sure it gets placed right, then I can put the spars in and then the roof inner plywood on and I will feel like I have accomplished something. :)
Johnny D.

"If you think you can, you can. If you think you can't, your right !" ... Henry Ford

"The Silver Nugget" Build
viewtopic.php?t=35314&postdays=0&postorder=asc&start=0
User avatar
down under tech
Silver Donating Member
 
Posts: 565
Images: 571
Joined: Sat Feb 06, 2010 10:01 pm
Location: Reno, Nevada
Top

Update 10-13-2010

Postby down under tech » Wed Oct 13, 2010 8:58 pm

Hi everyone: I was able to work on the "Silver Nugget" over the last couple of nights. Yesterday, while my girlfriend Terry was here, we made a pattern for the inside galley side walls. We cut the aluminum to fit after we made a templet out of heavy poster board. Then we traced it onto the leftover aluminum I had from the outside wall pieces. I cut them out with my jig saw along with the holes where the 120 volt A/C electrical inlet comes through the left wall. Today I cut a piece of aluminum for the back splash. I then glued them into place with PL Premium construction adhesive. I drilled a hole in the top of the back splash and put a nail in it to hold it up while glue dries. It wanted to drop down behind the counter top. It will later be covered by the galley cabinet. This way the hole will not show.

Image

Image

Image
Johnny D.

"If you think you can, you can. If you think you can't, your right !" ... Henry Ford

"The Silver Nugget" Build
viewtopic.php?t=35314&postdays=0&postorder=asc&start=0
User avatar
down under tech
Silver Donating Member
 
Posts: 565
Images: 571
Joined: Sat Feb 06, 2010 10:01 pm
Location: Reno, Nevada
Top

Postby S. Heisley » Wed Oct 13, 2010 9:02 pm

Very neatly done! :thumbsup:
User avatar
S. Heisley
Super Lifetime Member
 
Posts: 8774
Images: 495
Joined: Mon Sep 17, 2007 10:02 am
Location: No. California
Top

Postby down under tech » Wed Oct 13, 2010 9:14 pm

Thanks Sharon: I will trim off the edges with some aluminum trim and silicone to make it water tight so it looks better and finished later on.
Johnny D.

"If you think you can, you can. If you think you can't, your right !" ... Henry Ford

"The Silver Nugget" Build
viewtopic.php?t=35314&postdays=0&postorder=asc&start=0
User avatar
down under tech
Silver Donating Member
 
Posts: 565
Images: 571
Joined: Sat Feb 06, 2010 10:01 pm
Location: Reno, Nevada
Top

Update 10-14-2010

Postby down under tech » Thu Oct 14, 2010 9:12 pm

All Righty Then: I spent this afternoon mocking up the fender fitment on the TD. I only got one side done but it should be pretty easy doing the other side tomorrow after work. Here are some pictures of how it looks. I had placed the axle 36" from the back of the TD. I drew a line in the center of the fender and across the top of it. I put some dreaded blue tape on the side of the wall so I could draw a line up from the frame at 36" using a carpenter's square. It was simple after I figured how high I wanted the fender to set above the tire. It looks high in the center of the fender because I have the trailer jacked up of the ground. It will look better after the weight of the TD is on the axle. I used a couple of the frame bolts to secure the bottom of the fenders to the frame. I drilled three other holes in the fender skirt and then drilled through the wooden wall where I will place t-nuts in the 3/4" thick wood framing inside the trailer walls. I will pick them up on my way home tomorrow. I will have to use some spacers behind the fender between the wall and fender in the three upper mounting holes.

Image

Image

Image

I hope you are all doing well. Take it easy... :)
Johnny D.

"If you think you can, you can. If you think you can't, your right !" ... Henry Ford

"The Silver Nugget" Build
viewtopic.php?t=35314&postdays=0&postorder=asc&start=0
User avatar
down under tech
Silver Donating Member
 
Posts: 565
Images: 571
Joined: Sat Feb 06, 2010 10:01 pm
Location: Reno, Nevada
Top

Update 10-17-2010

Postby down under tech » Sun Oct 17, 2010 11:24 am

Yesterday morning, I made a pattern for the lower galley side panels of aluminum. I traced the cut lines on the aluminum and cut them out. There is a visable seam where the upper and lower panels meet, but I will use a small piece of aluminum over the seams to give it a finised look.

Image

Image


I also worked on the bulk head section under the counter to give it a finished look. No pictures of that yet. It will look good though.


Parnold: I know you have been watching for this part of the build. It will really look nice when I install the rear cabinet along with what i have planned for under the counter.

I will post pictures when I get done with that part of it. :twisted:
Johnny D.

"If you think you can, you can. If you think you can't, your right !" ... Henry Ford

"The Silver Nugget" Build
viewtopic.php?t=35314&postdays=0&postorder=asc&start=0
User avatar
down under tech
Silver Donating Member
 
Posts: 565
Images: 571
Joined: Sat Feb 06, 2010 10:01 pm
Location: Reno, Nevada
Top

Postby S. Heisley » Sun Oct 17, 2010 11:49 am

It's looking better and better, Johnny. :thumbsup:

Do you have a place to store your TD or will you have it water-proof before the snow flies?
User avatar
S. Heisley
Super Lifetime Member
 
Posts: 8774
Images: 495
Joined: Mon Sep 17, 2007 10:02 am
Location: No. California
Top

Postby down under tech » Sun Oct 17, 2010 12:12 pm

I have a storage unit I can keep it in. I need to make room for it though. It is too far away from my house to make working on the TD practical there.
I might move it there and work on it through the winter. :roll:
Johnny D.

"If you think you can, you can. If you think you can't, your right !" ... Henry Ford

"The Silver Nugget" Build
viewtopic.php?t=35314&postdays=0&postorder=asc&start=0
User avatar
down under tech
Silver Donating Member
 
Posts: 565
Images: 571
Joined: Sat Feb 06, 2010 10:01 pm
Location: Reno, Nevada
Top

PreviousNext

Return to Build Journals

Who is online

Users browsing this forum: No registered users and 16 guests