Summertime Benroy Build- Finally named: The "Towster"!

...ask your questions in the appropriate forums BUT document your build here...preferably in a single thread...dates for updates, are appreciated....

Re: Summertime Benroy!

Postby Babartlett » Sat Aug 16, 2014 11:57 pm

Well I have gotten a lot done so far this month. My fiancee and I have decided to take a 4 day mini-moon in the trailer after our wedding in October so I have a hard deadline to finish by!

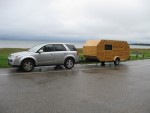
This is going to be a long post so please bear with me! Lots of pictures..

Starting on the bulkhead. I am using the same sandwitch method as the walls.
Image
Image
Image
Image

Testing out the bulkhead fit after gluing on one of the skins.
Image

Just cut out the counter!
Image

Got Clamps??
Image

Shaping the top of the bulkhead to match the roof liner. Decided that it was best to use a circular saw with a fence set at 18 degrees. This was definitely a daunting cut.
Image

Looks like the bulkhead fits! I still plan on pulling it out later to finish the surface.
Image

This is how Im getting the wires from the battery to the roof.
Image
Image

Working on the floor that covers up the rear hatch in the cabin. Again, the same construction method as the composite walls.
Image

Here it is installed. I used a 48" piano hinge on the back and flush mount rings for the handles.
Image
Image

I am using a WFCO 35 amp power converter to charge the battery and provide 12v when on shore power. I decided to make this little power center in the corner below the galley cabinet to hide the mess of wires that is bound to happen.
Image
Image

Working on the galley cabinets. I am definitely getting good at using the pocket screws at this point.
Image
Image

I was daunted about the idea of making this sliding compartment. I just went for it and it worked great!
Image

The galley cabinets are snug, but thats what I wanted! This is my first time doing any sort of cabinets. I was very pleased with the results!
Image


Working on the cooler slide that will reside under the galley counter. I plan on this Yeti 50 quart cooler lasting forever, and I basically designed the trailer around it..
Image
Image
Image
Image

Constructing the slide out stove/ storage cabinet that will mirror the cooler.
Image

Looks like all fits! Im not going to know what to do with all of the extra space. I spent way too much time figuring out where to store my beloved cast iron griddle. I fashioned the cabinet so that it can slide in just under the stove for storage.
Image

I had to do a little fixin to the the stock coleman propane attachment.
Image

With less than 1/4" clearance It is definitely a tight fit back there! The optima battery will also slide behind the stove cabinet.
Image

Working on the cabin cabinets. I routed the bottom of the face frame smooth so that it wont hurt as bad when I hit my shins on it.
Image

Testing out the face frame in the cabin.
Image
Image
Image


I still have more work to do on this but at least it fits!
Image
Last edited by Babartlett on Mon Aug 18, 2014 6:32 am, edited 2 times in total.
User avatar
Babartlett
Teardrop Builder
 
Posts: 39
Images: 345
Joined: Tue May 20, 2014 1:01 pm

Re: Summertime Benroy!

Postby Gunguy05 » Sun Aug 17, 2014 8:50 am

Great attention to details, and great documentation of it. Looks like you are on a roll, and it looks great!
Brian


Checkout my buildThe Regal Eagle Bow front for 4
Image
Also my teardrop updates from blog on Dad Rambles
User avatar
Gunguy05
The 300 Club
 
Posts: 385
Images: 6
Joined: Mon Dec 02, 2013 4:45 pm
Location: South GA

Re: Summertime Benroy!

Postby KCStudly » Sun Aug 17, 2014 2:47 pm

Very nice work. You are doing a great job! :thumbsup:

I haven't put so much thought into how I will stow individual items in my galley, but you have me thinking that I should be looking at that closer now, not later. I, too, had my cooler in mind during the very onset of the design process. Good thinking!
KC
My Build: The Poet Creek Express Hybrid Foamie

Poet Creek Or Bust
Engineering the TLAR way - "That Looks About Right"
TnTTT ORIGINAL 200A LANTERN CLUB = "The 200A Gang"
Green Lantern Corpsmen
User avatar
KCStudly
Donating Member
 
Posts: 9616
Images: 8169
Joined: Mon Feb 06, 2012 10:18 pm
Location: Southeastern CT, USA
Top

Re: Summertime Benroy!

Postby pchast » Sun Aug 17, 2014 9:55 pm

Nice cabinet work.
:thumbsup:
pchast
Platinum Donating Member
 
Posts: 2036
Images: 97
Joined: Mon Jan 28, 2013 5:47 pm
Location: Athens, NY
Top

Re: Summertime Benroy!

Postby Chuckles » Sun Aug 17, 2014 10:09 pm

Second that on the nice cabinet work :thumbsup: I like the look of your sliding doors. I have to make some myself for the interior cabinets in my trailer. Hope they come out as nice as yours did.
User avatar
Chuckles
Teardrop Master
 
Posts: 141
Images: 48
Joined: Thu Jan 26, 2012 10:42 pm
Location: NE Wisconsin
Top

Re: Summertime Benroy!

Postby Babartlett » Mon Aug 18, 2014 7:29 am

I am approching the point where I am about to turn around and take everything apart to apply stain and polyurethane. I am going to stain both the galley and cabin cabinets and leave everything else natural. I then plan on applying poly to just about every exposed surface. I have rustoleum 1 step oil based stain and rustoleum satin polyurethane.

This is going to be a long couple days and I would hate to mess something up! What brushes to use? Should I pull the cabinets fully apart? Does anyone have any tips regarding this process?

Also I am currently struggling with the decision to use wood glue on my face frames. I would like to use glue, but I have never dealt with glue and stain before. I do know that if used wrong glue can ruin a stain job. I I also know that people just leave pocket screw as the sole means of adhesion.

Please let me know what you all you guys use glue for and if you have any tips! By the way I am using Titebond II for interior applications..
User avatar
Babartlett
Teardrop Builder
 
Posts: 39
Images: 345
Joined: Tue May 20, 2014 1:01 pm
Top

Re: Summertime Benroy!

Postby noseoil » Mon Aug 18, 2014 7:51 am

First of all, great job in design & execution on the cabinetry. About glue, the screws will hold everything in place without it. If you used screws & glue, any place the glue isn't sanded off will not take stain and leave a light spot. If the face frame is glued, figure you will be sanding the thing entirely. A wet rag with water can be used to wipe off and glue before it dries, but it will lift the grain. Not sure if it is finish-sanded now or not, but to get a good finish the sanding must be done very well. Break all the edges slightly, so you don't have a hard edge (1/16" or so) on all openings, drawers & doors, etc. It's just like painting a house, the prep time pays off in the end.

I would use a bristle or foam brush, but don't just gob it on and leave it there. The idea is to have a smooth sanding on everything, then lay the stain down, let it sit a few minutes, and wipe it off with a soft cloth (old cotton t shirts work well). Two light coats of stain (and finish as well for that matter) are better than one heavy one. Don't lay down so much stain that it's dry when you get back to wiping it off.

About the color, remember, the inside is very small, so use a light colored stain. An ebony color would turn it into a cave or dungeon in short order. A darker color on the face frame, with lighter doors & drawer faces would be OK, but try to keep it light and it will feel larger inside. Use scraps to practice the stain, sanding & finish first. Use a 320 grit WD paper between finish coats & wipe with a tack cloth between coats. Whenever possible, keep surfaces horizontal for applying finish to avoid runs, sags & dribbles. Thin the base coat about 10% for the first pass, dries quicker & flows out better. It's just a sealer before building the real finish on the surface. Once you have the look you want, have at it!
Build log: viewtopic.php?f=50&t=60248
The time you spend planning is more important than the time you spend building.........

137905
User avatar
noseoil
1000 Club
1000 Club
 
Posts: 1820
Images: 669
Joined: Sun Apr 27, 2014 8:46 am
Location: Raton, New Mexico, living the good life!
Top

Re: Summertime Benroy!

Postby KCStudly » Mon Aug 18, 2014 9:12 am

+1 on thorough sanding and breaking edges.

I am using a contrasting color scheme with natural Maple frames and darker Okoume panels. I have used painters tape extensively to help control glue squeeze out. It can be a tedious process that sometimes requires an extra dry fit to figure out where to mask and/or scuff.

I am using TB2 at all of my cabinet frame joints and the interior wall to cabinet joints, in addition to the biscuits and screws (which I am attempting to keep hidden).

On the poly, I have been using a high build type applied with synthetic brush intended for oil based products. Brush with the grain in long strokes to keep the bubbles down, then drag the brush back over again in long overlapping strokes from end to end after most of the bubbles have subsided (the wheeled office chair in the loft makes it easy to scoot along holding the brush at a consistent angle with eyes at work bench level). Make sure to check every inch of your work at a shallow angle in good light looking for dry areas and brush marks; they are much easier to avoid when wet than they are to blend in after they dry.

The longer you can wait between coats of poly, the better, especially when using the high build stuff. Weather and humidity make a big difference.

I have tried the foam brushes, but do not like them because they always seem to break down and make a mess on me. I also tried one of the wool pad applicators; did not like that at all. For the stain I have used wiping clothes from the paint department. I like that they are consistent and lint free, and there is a ready supply of them.

On the darker colored stains; if you find you are getting blotches or uneven absorption into the grain, you can sand the first application back partially and stain again. The second application will go on better. The Okoume takes the stain very well, so this hasn't been a problem for me; but I did have to sand back my ceiling panel to take care of some unwanted sanding scratches and the second application went on even better than the first.

I'm trying to mask all of my glue joints so that there would be raw wood (no stain or poly) leaving just a little margin to be sure that the finish goes under the edges of the joints by about 1/8 inch. On the few occasions that I had to sand thru the finish the masking tape was sufficient to keep from damaging the adjacent areas.

Also, I didn't do as good a job planning my galley as you did, so, unlike the interior cabinets, I am not gluing any of that in permanent. In case I decide I want to change anything, it will all be able to be removed (I sure hope it doesn't break apart going down the road :roll: :worship: ).
KC
My Build: The Poet Creek Express Hybrid Foamie

Poet Creek Or Bust
Engineering the TLAR way - "That Looks About Right"
TnTTT ORIGINAL 200A LANTERN CLUB = "The 200A Gang"
Green Lantern Corpsmen
User avatar
KCStudly
Donating Member
 
Posts: 9616
Images: 8169
Joined: Mon Feb 06, 2012 10:18 pm
Location: Southeastern CT, USA
Top

Re: Summertime Benroy!

Postby Gunguy05 » Mon Aug 18, 2014 11:11 am

+1 on all of what was said above, plus I would highly recommend trying out all of the finishing stain, poly etc on a scraps first. Ours didn't turn out like I had envisioned, and now I'm glad that we screwed up on the scraps rather than the real deal.

Good luck and keep us posted.
Brian


Checkout my buildThe Regal Eagle Bow front for 4
Image
Also my teardrop updates from blog on Dad Rambles
User avatar
Gunguy05
The 300 Club
 
Posts: 385
Images: 6
Joined: Mon Dec 02, 2013 4:45 pm
Location: South GA
Top

Re: Summertime Benroy!

Postby pchast » Mon Aug 18, 2014 10:26 pm

I found it was better not to use a wet rag on the glue.
Let it dry and scrape off the squeeze out.

The wet rag can dilute the glue and aid its penetration
into your face frame... We had a lot of trouble with
this when doing a cedar canoe.
pchast
Platinum Donating Member
 
Posts: 2036
Images: 97
Joined: Mon Jan 28, 2013 5:47 pm
Location: Athens, NY
Top

Re: Summertime Benroy!

Postby StockCube » Tue Aug 19, 2014 5:33 am

Really beautiful work - looking forward to seeing how this pans out.
StockCube
Teardrop Builder
 
Posts: 36
Images: 0
Joined: Mon Apr 14, 2014 5:37 pm
Location: Scotland
Top

Re: Summertime Benroy!

Postby Sheddie » Wed Aug 20, 2014 5:52 am

Hi Brian.
Really nice work, this is a real credit to you.
I have just found this build tonight, and was impressed right from your first post. To see that you had designed in the variable location for your axle, so that you can finally position it when you have a better idea of the weight distribution. Your cabinet work is very nice, and the light colour of the wood will give it a light and spacious feeling. Your time frame is about the same as our build.
All the best with the build and your up coming wedding.
Cheers Frank :ok:
User avatar
Sheddie
1000 Club
1000 Club
 
Posts: 1499
Images: 1129
Joined: Mon Jul 01, 2013 3:26 pm
Location: Whangarei, New Zealand
Top

Re: Summertime Benroy!

Postby Chuckles » Wed Aug 20, 2014 5:49 pm

I have been following this build and you are doing a fantastic job :applause:

I'm in the 'no wet rag"crowd for handling glue squeeze out. I do a lot of woodworking where glue is the only fastener and I have had too many bad experiences with diluted glue being pushed into the wood pores only to screw up your staining and finishing. With maple being a closed-pore wood this will be less of a problem...not sure about your plywood.

Masking the areas to eliminate glue squeeze out works well but takes a lot of time. I generally go for letting it dry then removing it with a very sharp chisel and sanding. If you do a good job of finish sanding you won't have to worry about it. Use hard sanding blocks in the corners.

I'm not one for trusting pocket screws alone. I always add glue to the joints. even on a but joint the glue adds a lot of strength. Especially where you can only fit one pocket screw.

You might want to try a water based varnish on the interior of the camper. It dries very quickly, allowing for more rapid re-coating. It does raise the grain but a light sanding after the first coat or two will remove the problem. Water based poly doesn't yellow like the oil based stuff. I use the satin sheen because I like the softer look.

Just my 2-cents
User avatar
Chuckles
Teardrop Master
 
Posts: 141
Images: 48
Joined: Thu Jan 26, 2012 10:42 pm
Location: NE Wisconsin
Top

Re: Summertime Benroy!

Postby Babartlett » Thu Aug 21, 2014 9:10 am

Thanks for the advice everyone! That is exactly what I was looking for!

I have decided to compromise and use glue with my pocket holes but not enough to squeeze out on the front of the face frame. I was very careful about adding glue to one face frame and it worked great! I know that it will not be the strongest glued joint but I feel much better about it having the frames 75% glued rather than none.

As for the poly, I actually have water based and not oil as I mentioned earlier! I quickly found this out after I opened up the can and it was white!? It is also satin. I had a similar feeling about sheen.

I bought brushes for oil so I will need to get different ones. I used a small foam brush on my test pieces and it seemed to work well. Is it worth dropping the big bucks on a nice bristle brush over foam?

I also did notice that the water based poly does raise the grain a bit! Should I keep using 220 to flatten it down between coats or should I go higher? Also, how many coats should I do? I definitely want a solid barrier on surfaces like the counter top.

Thanks agin for the help!

Brian
User avatar
Babartlett
Teardrop Builder
 
Posts: 39
Images: 345
Joined: Tue May 20, 2014 1:01 pm
Top

Re: Summertime Benroy!

Postby Babartlett » Thu Aug 21, 2014 6:33 pm

As I have sanded and sanded for the last couple afternoons I have started to think about all of the brushing I will be doing soon.

I have done a little research on spraying water based polyurethanes and it seems like a promising method. I am debating whether to pick up a not to expensive HVLP sprayer to get out of spending a million hours brushing.

Does anyone have any experience or tips regarding spraying water based poly with a HVLP gun?

I also saw a video where a guy sprayed the work piece lightly with water so the grain rose and then he sanded it with 320. This apparently eliminates the possibility of the grain rising again when applying water based finishes. Anyone done this?

Thanks!!
User avatar
Babartlett
Teardrop Builder
 
Posts: 39
Images: 345
Joined: Tue May 20, 2014 1:01 pm
Top

PreviousNext

Return to Build Journals

Who is online

Users browsing this forum: No registered users and 13 guests