Regal Eagle Done! Video Tour 6/29/15

...ask your questions in the appropriate forums BUT document your build here...preferably in a single thread...dates for updates, are appreciated....

Postby Gunguy05 » Sat Feb 15, 2014 5:08 pm

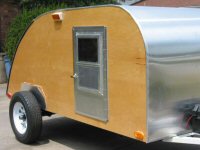
Have a big (relative) hurdle behind us now. I was finally able to get a buddy of mine to inspect the trailer and sign off on my DMV form yesterday....so after 30 min in a line and (only) 12 bucks . We now have a tag... Not a huge deal I know, but the trailer will also serve as our method of transportation for the larger materials, mainly plywood.

Next step is to get the trailer to the welder, hopefully this week, and get the chop, chop and tucks done to it.
Brian


Checkout my buildThe Regal Eagle Bow front for 4
Image
Also my teardrop updates from blog on Dad Rambles
User avatar
Gunguy05
The 300 Club
 
Posts: 385
Images: 6
Joined: Mon Dec 02, 2013 4:45 pm
Location: South GA

Re: First Build for 4, bow front- Sawdust Soon

Postby Gunguy05 » Tue Mar 11, 2014 9:37 pm

Things have been going seemingly slow lately, but in fact we are very close to making sawdust... hopefully by the weekend.

The build is going to take place in my parents garage. I would like to do it our house, but his garage is much bigger and we will have a much bigger working area. The downside is that we had to put forth a MAJOR cleanout to get things where they needed to be organizational wise... needless to say that was a job in itself. However, we do have it to a workable space at this point, and now is the time to finalize all of the important stuff, and get the ball rolling.

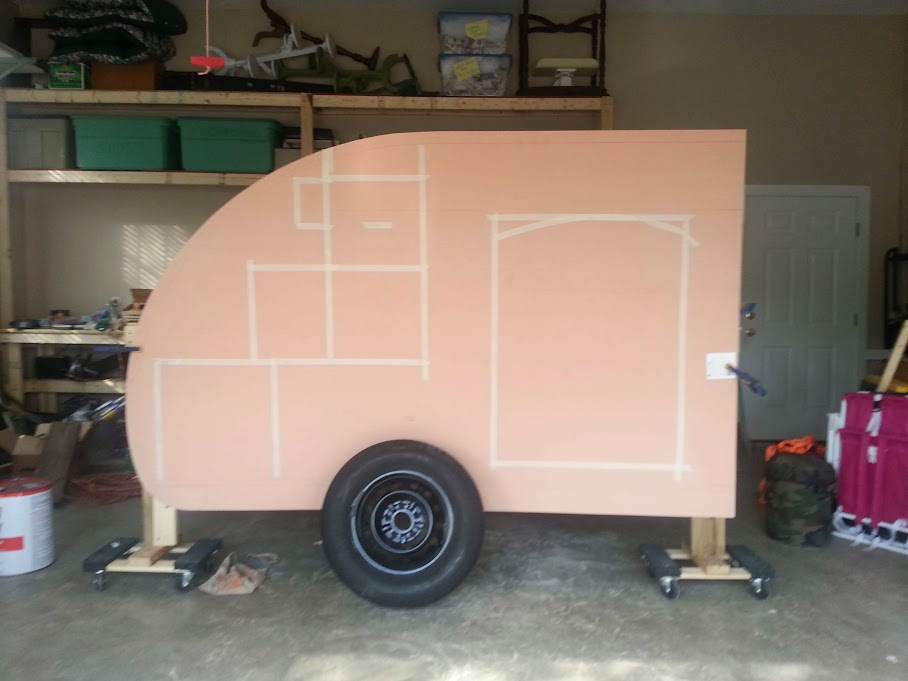
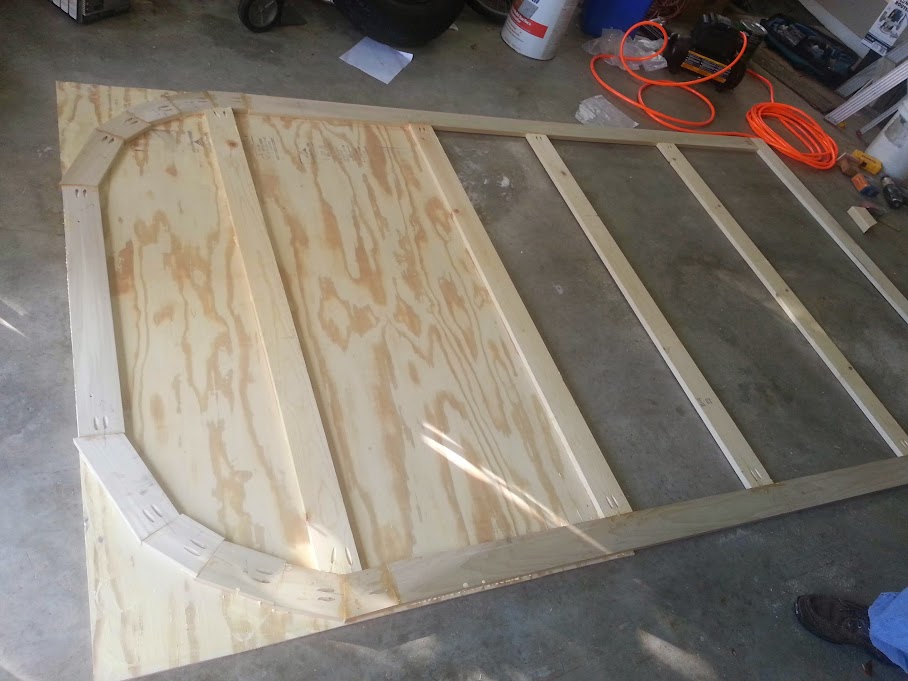
As far as we can tell, this below is the final profile (very simple, but I had to take out all of the extras) I couldn't see the forest for the trees. I do have most of that worked out though, at least in sketchup. (door location(s), axle (44" from rear), fenders (will fit), fan/moon roof, etc)

Image
Image

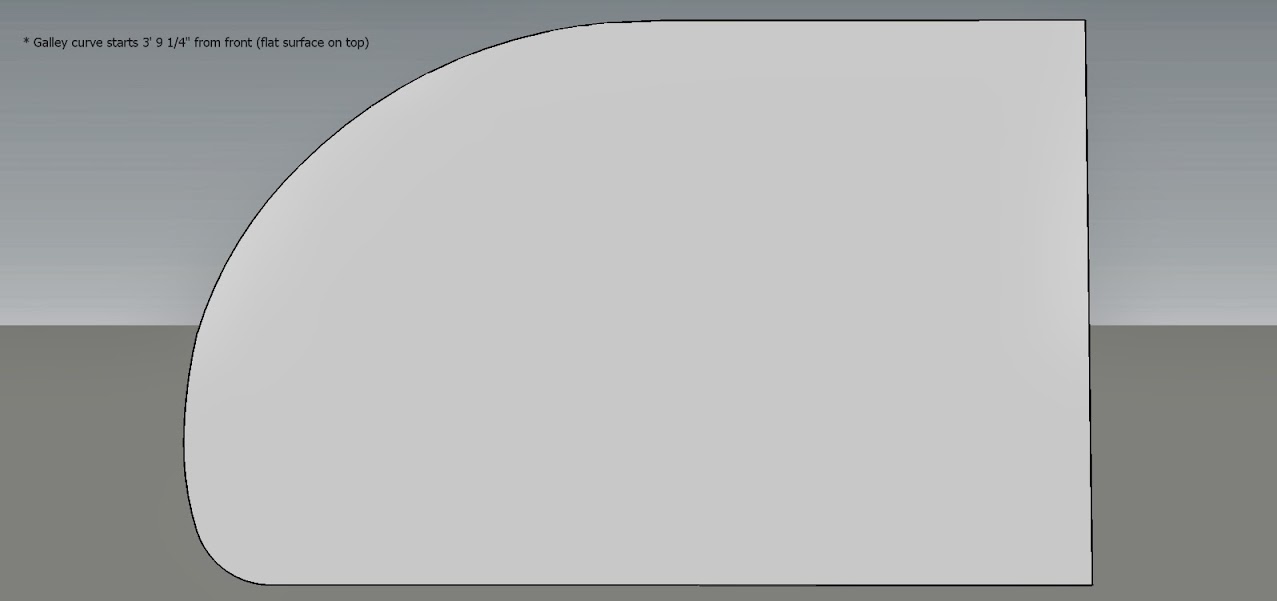
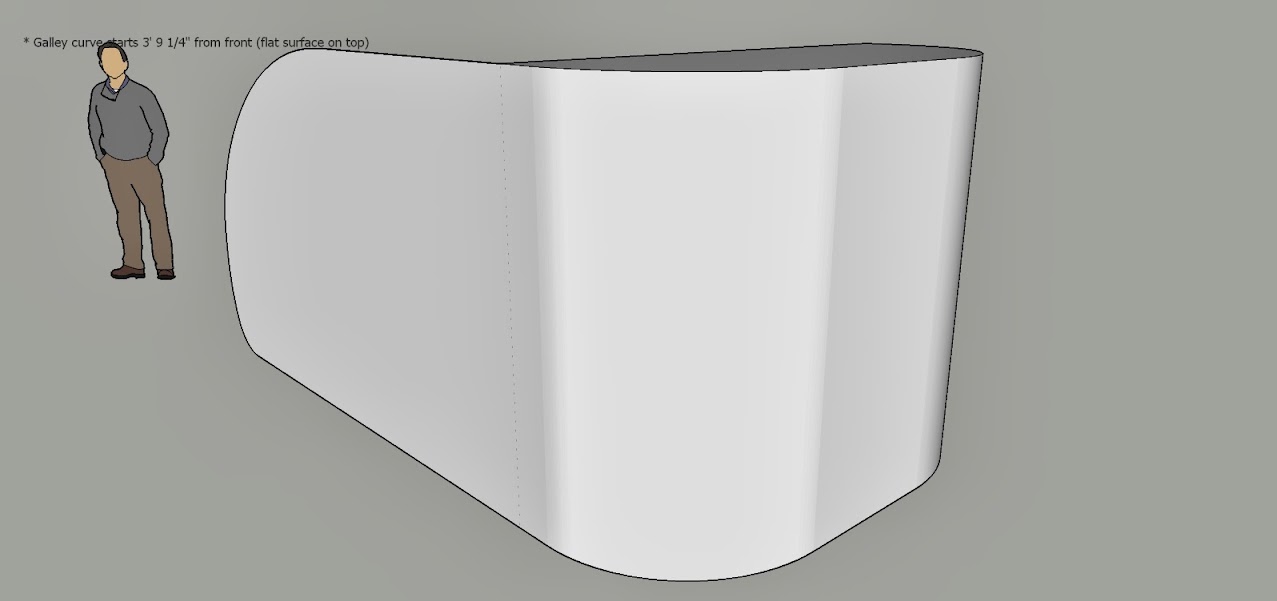
Basically it is a 30" deep bunk area in the front, with a 24" radius off of the front. i would have liked it a little more rounded in the front, but I do like the little bit of extra space with the tighter radius in the front corners.

Total cab length is 10 - 6, and we are going to add a box on the front, build in to be accessible from the inside, much like the camp-inn, and another build that I saw here recently (http://tnttt.com/viewtopic.php?f=50&t=59086). Haven't worked it out completely, but probably 12-18 inches on the front, curved to fit with the radius.

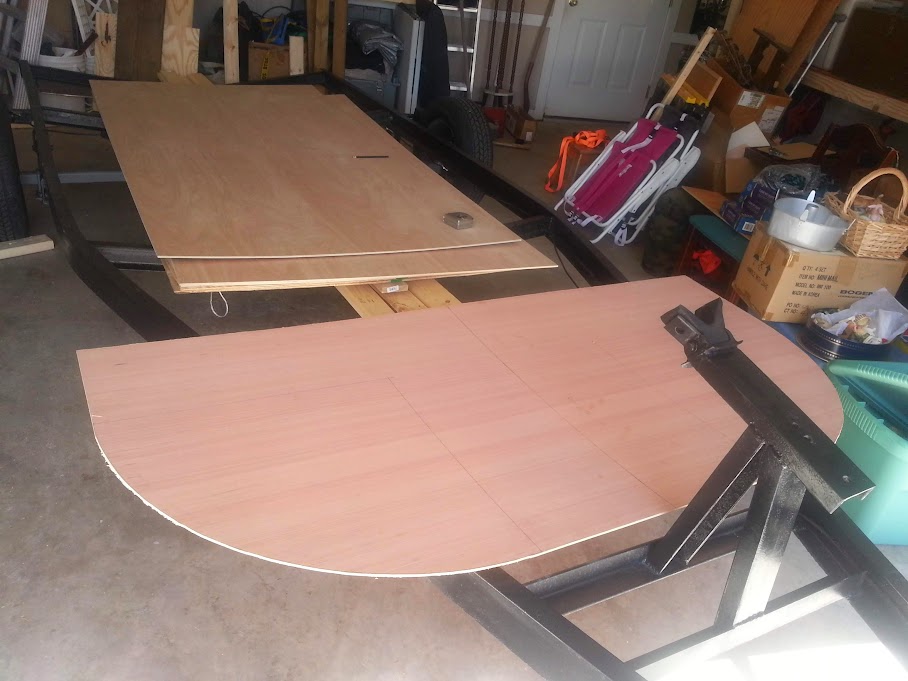
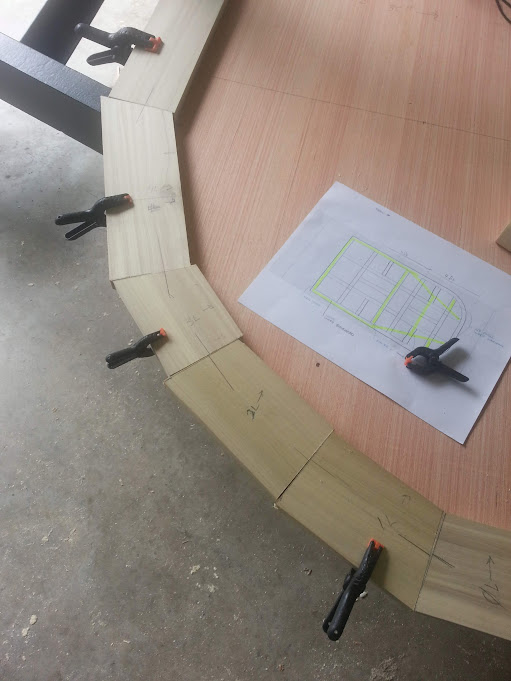
We are going to cut out a template from the drawings here. I already used sketcup to do an x/y, and took measurements from a reference point.

Once we have the template, we are going to mock up (with tape) the bulkhead locations, interior cabinets, bunk heights, and door location.

Trailer is in limbo right now. We have a friend who is going to move the axle (more on that in a minute), and cut back off, weld a couple new crossmembers in. Not a lot, but not my specialty... welding is not a hobby that I have jumped on (at least yet).

The axle-- while looking at the axle the other night, i noticed that it had a *very* little bit of lateral play in it. i.e. if I yank on the tire, it (the hub) would move from side to side.. maybe 1/16 to 1/8 of an inch.. not much, but noticeable. Not sure here what the deal is, or if this is normal, but as far as I know if shouldn't have any play in it... suggestions?? Other thoughts are that they axle is heavy (3500), so we are probably (most definitly) going to have to remove the smallest leaf spring, or it will be rough. Sooooo.. after reading another thread and noticing that a torflex is only about $250, we can pick it up at the dealer, we are leaning toward replacing the axle completely.

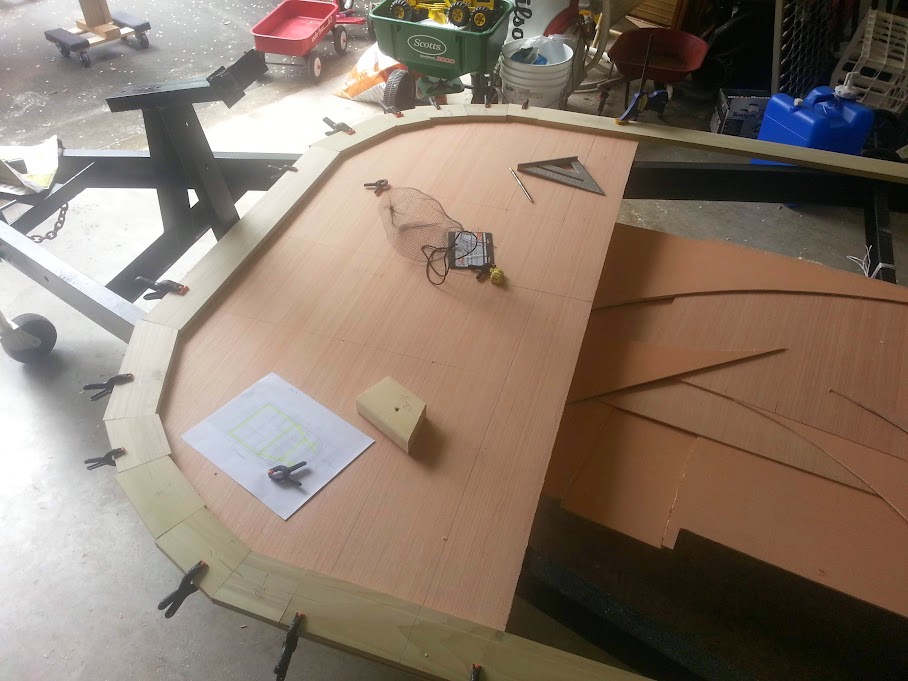
In the mean time, we are going to work on the final locations of bulkhead etc, mentioned above, and start the floor... gotta make some progress, and I figure maybe we will have an ah ha! moment about the axle and decide what to do with it.
Brian


Checkout my buildThe Regal Eagle Bow front for 4
Image
Also my teardrop updates from blog on Dad Rambles
User avatar
Gunguy05
The 300 Club
 
Posts: 385
Images: 6
Joined: Mon Dec 02, 2013 4:45 pm
Location: South GA

Re: First Build for 4, bow front- Sawdust !!!

Postby Gunguy05 » Sat Mar 15, 2014 3:28 pm

We have Sawdust!!!

Went to the local big blue the morning. Picked up the framing for the floor, plywood for top (1/4 birch) and bottom (1/4 plytanium) of floor. Framing will be 1x4 combination of poplar and pine. We are using the poplar on the outside frame where the walls will be. Figure this will give a little better wood for the screws to bit into for the attachment of the walls.

Also, picked up some underlayment 5mm, for the pattern for the sides, and the front radius. Will be using Frederick's method for both of those.

I have told my dad throughout the design process "think plane, not tank"... well..one of the pieces of underlayment that we bought for the patterns turned into a plane on the way home. Luckily we can salvage it to use for other odds and ends, templates, radius jigs, and other stuff.... and we managed not to take anyone else with it either, so that is a plus.

Image

Image

Had to leave to take care of some other stuff. Will hopefully get some more done tomorrow, maybe get the side profile laid out and cut.

It feels great to finally be at this point. A LOT of planning had to happen to get this far, and I feel like A LOT is left to get figured out. I'm sure it will all come together in time though. Just have to take it one step at the time, and make sure we don't get ahead of ourselves.
Brian


Checkout my buildThe Regal Eagle Bow front for 4
Image
Also my teardrop updates from blog on Dad Rambles
User avatar
Gunguy05
The 300 Club
 
Posts: 385
Images: 6
Joined: Mon Dec 02, 2013 4:45 pm
Location: South GA
Top

Re: First Build for 4, bow front-Sawdust !!!!

Postby RandyG » Sat Mar 15, 2014 7:44 pm

Congrats on getting this far. Just a little tip ~ keep a piece cut in the shape of your bow front as a template, it makes getting your pieces cut and lined up easier. :thumbsup: now keep on truckin'!
Randy
Aircraft fabricator, novice carpenter, electrical apprentice, audio engineer dropout.
Build thread - http://www.tnttt.com/viewtopic.php?f=50&t=54126
User avatar
RandyG
500 Club
 
Posts: 695
Images: 115
Joined: Thu May 10, 2012 6:52 pm
Top

Re: First Build for 4, bow front-Sawdust !!!!

Postby Gunguy05 » Sat Mar 15, 2014 8:24 pm

RandyG wrote:Congrats on getting this far. Just a little tip ~ keep a piece cut in the shape of your bow front as a template, it makes getting your pieces cut and lined up easier. :thumbsup: now keep on truckin'!


Thank you Randy,

Oh yes, definitely!. That piece is gold as far as I am concerned (it is the template) along with the next template that we are making for the sides. I forsee it being used to cut the floor sandwich pieces (framing) for the front, the top framing, an almost anything else that has to be fitted to that area.

I see it being really useful for designing the beds in that area as well, one will be removeable.. still haven't decided if that is going to be solid 3/4 or go ahead make it a 1/4, 3/4 + foam, 1/4 , sandwich like the floor.. Will probably go that route.
Brian


Checkout my buildThe Regal Eagle Bow front for 4
Image
Also my teardrop updates from blog on Dad Rambles
User avatar
Gunguy05
The 300 Club
 
Posts: 385
Images: 6
Joined: Mon Dec 02, 2013 4:45 pm
Location: South GA
Top

Re: 1st Build - Regal Eagle- We have Sawdust !!!!

Postby Gunguy05 » Sat Mar 22, 2014 10:18 pm

We got a little done today. Worked on the overall profile, got it plotted out on the x/y coordinates using the drawings and measurements that I had taken from sketchup.

After we got got the curve traced out, we cut it out with a jigsaw.. seemed like I had that thing on forever, and the cut was "off the line" quite a bit.. but no fear, I used the RO sander to get ti right to the line. I was actually quite impressed at how good of a job it did at smoothing things down to the line and making a nice fair curve.

After the hatch curve was cut, we decided to play with 1. the height of the profile, relative to the frame and the axle (we are replacing with a torflex). This should drop it down about 2 1/2 - 3 inches from where it is now using a 10degree down. This will, IMHO, make it ride a little closer (since it is a 5ft tall) and also, give us a little more room under the cabinets in the back without having the counter top at an unreasonable height. Also, the current axle/spring is 3500lb so this is soften it up a bit as well.

We got most of the main galley cabinets areas laid out (at least roughly) using tape. A couple areas that I am not sure about, but we will work those out soon enough.

We still haven't decided on the location of
1. the spare tire (bracket underneath), on tongue, or in box accessible from inside the cab.
2. The AC. Originally we were going to go with the up top/middle like the camp inn (and still may). I saw a post by Zach http://tnttt.com/viewtopic.php?f=50&t=58625&start=60where he is using steel hangers to make a cage to enclose his batteries underneath the frame. This got my wheels turning as to the possibility of doing the same with the AC and modifying it to vent through ducts into the cabin. I'm still not sure if we want to go to all that trouble. Also, there isn't enough clearance (I don't think) underneath the trailer to make the entire approx 14" AC fit, without it being 1/2 above the floor.. so what really is the point of doing it then. Probably will go top/middle, but we will make that decision when we put framing together for the floor.

We will probably decided to go 1 of 2 routes, 1. both framed in under the floor, or 2. bracket under floor for tire, and AC up top. I figure if we are going to do 1 or the other we might as well do both assuming we can work the ducting out for the AC if it's underneath.

As it stands right now, the side template, with approximate cabinet locations. (disreguard the top one, it will be a electrical chase, not quite there yet).

Image


With dad holding it up, Bow in the front.

Image
Brian


Checkout my buildThe Regal Eagle Bow front for 4
Image
Also my teardrop updates from blog on Dad Rambles
User avatar
Gunguy05
The 300 Club
 
Posts: 385
Images: 6
Joined: Mon Dec 02, 2013 4:45 pm
Location: South GA
Top

Re: 1st Build - Regal Eagle- We have Sawdust !!!!

Postby aggie79 » Mon Mar 24, 2014 11:26 am

Very cool Bryan! :thumbsup: :applause: :thumbsup:
Tom (& Linda)
For build info on our former Silver Beatle teardrop:
Build Thread

93503
User avatar
aggie79
Super Duper Lifetime Member
 
Posts: 5405
Images: 686
Joined: Tue Aug 07, 2007 5:42 pm
Location: Watauga, Texas
Top

Re: 1st Build - Regal Eagle- We have Sawdust !!!!

Postby Gunguy05 » Thu Mar 27, 2014 10:48 am

Well, after 47 emails, a few phone calls, and MUCH deliberation, the new torflex has been ordered. Now I can relax for a few days... Or maybe not.

It's tough to pull the trigger sometimes on a non-returnable item... But sometimes you just have to make the call!

Axle should be here by April 7th at the latest....gotta get to work. Much quicker production time that I had anticipated.
Brian


Checkout my buildThe Regal Eagle Bow front for 4
Image
Also my teardrop updates from blog on Dad Rambles
User avatar
Gunguy05
The 300 Club
 
Posts: 385
Images: 6
Joined: Mon Dec 02, 2013 4:45 pm
Location: South GA
Top

Re: 1st Build - Regal Eagle- We have Sawdust !!!!

Postby KCStudly » Thu Mar 27, 2014 11:19 am

Sometimes it helps to remind ourselves of a little saying I like to throw out in times like these, paraphrasing, "if it can be built, it can be fixed". So don't worry so much. Once you have the axle in hand you can move forward and for any issues that may or may not arise, there will be a solution... sometimes difficult and costly ( :? :frightened: :? ), sometimes easy, but that is the journey we builders have chosen. Enjoy the ride! :thumbsup:
KC
My Build: The Poet Creek Express Hybrid Foamie

Poet Creek Or Bust
Engineering the TLAR way - "That Looks About Right"
TnTTT ORIGINAL 200A LANTERN CLUB = "The 200A Gang"
Green Lantern Corpsmen
User avatar
KCStudly
Donating Member
 
Posts: 9616
Images: 8169
Joined: Mon Feb 06, 2012 10:18 pm
Location: Southeastern CT, USA
Top

Re: 1st Build - Regal Eagle- We have Sawdust !!!!

Postby Gunguy05 » Fri Mar 28, 2014 2:00 pm

KCStudly wrote:Sometimes it helps to remind ourselves of a little saying I like to throw out in times like these, paraphrasing, "if it can be built, it can be fixed". So don't worry so much. Once you have the axle in hand you can move forward and for any issues that may or may not arise, there will be a solution... sometimes difficult and costly ( :? :frightened: :? ), sometimes easy, but that is the journey we builders have chosen. Enjoy the ride! :thumbsup:


The funny thing is, I REALLY like to build stuff, even if i do get stressed over the details. I can go out in the garage for what seems like a few minutes, and next thing I know it has been 4 hours.. I find it relaxing.

Heck, I already catch myself planning a "simple" build for when we are done with this one... and we don't even have a floor yet. :shock:

I do sometimes forget that saying "if it can be built, it can be fixed".... gotta remember that.

Thanks for the words of encouragement,
Brian


Checkout my buildThe Regal Eagle Bow front for 4
Image
Also my teardrop updates from blog on Dad Rambles
User avatar
Gunguy05
The 300 Club
 
Posts: 385
Images: 6
Joined: Mon Dec 02, 2013 4:45 pm
Location: South GA
Top

Re: 1st Build - Regal Eagle- Floor started

Postby Gunguy05 » Sat Mar 29, 2014 9:44 pm

We did more work on the floor today. Had to recut.. didn't really have to, but I wanted to make the angles on the front bow framing a little more perpendicular to the sides. One of those things that when I looked back at it I thought "what the heck were we thinking"? So we redid it, only took a few minutes, an I go a little more practice that I'm sure will some in handy when we frame the hatch section of the wall.

Image

Image
Pocket holes, glue, screws and we got a lot of it done. We are going to add some more pieces to block in the larger spans, but this is the basic outline and the major supports. Still have to route out the front to the template that we made.
Image

Also... it was perfect product placement... so I had to. 8)

Image

The axle should be in late in the week (hopefully) or by monday, the 7th.. Then it's off to my buddy to do a little chop chop and weld weld on the frame. Going to order the rims this week... :R
Brian


Checkout my buildThe Regal Eagle Bow front for 4
Image
Also my teardrop updates from blog on Dad Rambles
User avatar
Gunguy05
The 300 Club
 
Posts: 385
Images: 6
Joined: Mon Dec 02, 2013 4:45 pm
Location: South GA
Top

Re: 1st Build - Regal Eagle- We have Sawdust !!!!

Postby Ron Dickey » Sat Mar 29, 2014 11:28 pm

Like the design, I am a little confused about the drawings of the rear extended plat form will it fold up? I took a fast look and did not read every thing so if I missed it sorry.

What I would like to see is pictures of those dolly support units. Looks like a smart Idea.

In mine I am putting our heads in the front arch areas and leaving more space for the rear. I will have a chest of drawers and a hanging close closet. The drawers will be made of cloth.
How will you make storage in your trailer cabin? I also am adding a shelf above our head for a spare blanket or such.

Ron
121377......134179
Inside almost done--Trolly top has opening windows & roof.doors need assembling--pictured above waley windows..galley 1/3 done
Cross Bow in Build Journals....http://www.tnttt.com/viewtopic.php?f=50&t=54108
User avatar
Ron Dickey
Silver Donating Member
 
Posts: 3078
Images: 711
Joined: Tue Apr 20, 2004 5:56 pm
Location: Central Coast, CA
Top

Re: 1st Build - Regal Eagle- We have Sawdust !!!!

Postby Gunguy05 » Sun Mar 30, 2014 12:13 am

Ron Dickey wrote:Like the design, I am a little confused about the drawings of the rear extended plat form will it fold up? I took a fast look and did not read every thing so if I missed it sorry.

What I would like to see is pictures of those dolly support units. Looks like a smart Idea.

In mine I am putting our heads in the front arch areas and leaving more space for the rear. I will have a chest of drawers and a hanging close closet. The drawers will be made of cloth.
How will you make storage in your trailer cabin? I also am adding a shelf above our head for a spare blanket or such.

Ron


No problem , I actually was going to go back and take that drawing off because I thought it was a little confusing too, but I decided to leave it because it was part of the "story". The trailer we are using is a 6ft wide and about 17 ft long boat trailer. We are chopping that part off, almost 4 foot, from the back ,hopefully next week.

After that the new axle will be placed at a mark 44 in from the back if the cab.

The dollies are from harbor freight, we got them on sale, with coupon, for about 7 bucks a piece. We decided that since we didn't have a lot of work room, that we would make a mobile work/ junk table, when we are finished for the day , we slide the trailer back in the garage and table rolls nicely over the top of it. They are just toenail screwed on two sides into the legs of the table. Works pretty well for a plywood storage location at the moment, and to lay plywood on cut as we need to. The side template is leaned up against it in the photo.

For storage we are going with a design similar to the raindrop..right now we are trying to decide, and are leaning toward putting the ac unit in the galley facing forward and vented into a chase / vent . I saw a design by oak interiors on his benroy build that inspired me.....still working on that though. Will have just simple storage and doors , 2 rows, above the foot area. Maybe work in some above the bottom bunk, again, like the raindrop, unless I can come up with a better plan.

Galley will have cabinets, water storage under counter, cooler storage, all on slides. Also, a progressive dynamics converter and other odds and ends. Gonna keep that part pretty simple, or at least that is the plan.

I am still trying to come up with a plan for more small storage in the cabin. Something for drinks, keys, small stuff. Since we have a 6 ft wide to play with, I even considered some sort of narrow(to the wall) shelf or cabinet , or lead get for Atma stuff.. Will see where that ends up.

Thanks,
Brian
Brian


Checkout my buildThe Regal Eagle Bow front for 4
Image
Also my teardrop updates from blog on Dad Rambles
User avatar
Gunguy05
The 300 Club
 
Posts: 385
Images: 6
Joined: Mon Dec 02, 2013 4:45 pm
Location: South GA
Top

Re: 1st Build - Regal Eagle- We have Sawdust !!!!

Postby Ron Dickey » Mon Mar 31, 2014 8:54 pm

Gunguy05 wrote:For storage

Galley will have cabinets, water storage under counter, cooler storage, all on slides. Also, a progressive dynamics converter and other odds and ends. Gonna keep that part pretty simple, or at least that is the plan.

I am still trying to come up with a plan for more small storage in the cabin. Something for drinks, keys, small stuff. Since we have a 6 ft wide to play with, I even considered some sort of narrow(to the wall) shelf or cabinet , or lead get for Atma stuff.. Will see where that ends up.

Thanks,
Brian


Other from above our head storage I to am working on a cabinet on each side above the cabin light switches. left side cabin light, DC plug, and reading light. Right side outside lights, DC plug, other reading light. above these switches I am putting in a cabinet on each side starting from the back of the outside wall and coming out into the cabin about 2 inches The head does not come near that unless it was a really bad night I might make the bottom slant up reducing sharp corners. :roll: These I think will have slide doors so they can be opened from pillow or from door. A swinging door would have to go up other wise.
I am planning on 2 shelves and hanging near top. We had no real place for glasses, keys, and other personals in the Box Kite. :scratchthinking:

Ron
121377......134179
Inside almost done--Trolly top has opening windows & roof.doors need assembling--pictured above waley windows..galley 1/3 done
Cross Bow in Build Journals....http://www.tnttt.com/viewtopic.php?f=50&t=54108
User avatar
Ron Dickey
Silver Donating Member
 
Posts: 3078
Images: 711
Joined: Tue Apr 20, 2004 5:56 pm
Location: Central Coast, CA
Top

Re: 1st Build - Regal Eagle- We have Sawdust !!!!

Postby Gunguy05 » Mon Mar 31, 2014 9:08 pm

Ron Dickey wrote:
Gunguy05 wrote:For storage

Galley will have cabinets, water storage under counter, cooler storage, all on slides. Also, a progressive dynamics converter and other odds and ends. Gonna keep that part pretty simple, or at least that is the plan.

I am still trying to come up with a plan for more small storage in the cabin. Something for drinks, keys, small stuff. Since we have a 6 ft wide to play with, I even considered some sort of narrow(to the wall) shelf or cabinet , or lead get for Atma stuff.. Will see where that ends up.

Thanks,
Brian


Other from above our head storage I to am working on a cabinet on each side above the cabin light switches. left side cabin light, DC plug, and reading light. Right side outside lights, DC plug, other reading light. above these switches I am putting in a cabinet on each side starting from the back of the outside wall and coming out into the cabin about 2 inches The head does not come near that unless it was a really bad night I might make the bottom slant up reducing sharp corners. :roll: These I think will have slide doors so they can be opened from pillow or from door. A swinging door would have to go up other wise.
I am planning on 2 shelves and hanging near top. We had no real place for glasses, keys, and other personals in the Box Kite. :scratchthinking:

Ron


Sounds like you will be making good use of that extra space in the bow part of the cabin. We are going to make ours so that, like the raindrop, the top bunk will be detachable and be able to be made into a seat.

I am trying to come up with some way to make some small shelves like you talked about, maybe somewhere on the sides, real low profile, close to the sides. I figure since we have 6 wide to work with, we might as well make use of it for keys, drinks, phones etc. Just haven't come up with a plan for that yet. :NC

We did a little more work on the floor on sunday afternoon, got the last piece of bottom ply attached. Now for the rest of the framing, foam, and top plywood. On a side note: 1/4 plytnium = junk! I'm glad that we used it on the bottom, that is all I can say about it. The top will be 1/4 birch, and it is much more stable, smooth, and overall good ply. Seems like everytime I picked up the plytanium stuff it felt like it was going to crack. And needless to say, in our high humidity it was even starring to delaminate on the edges a bit. Glad to get it glued up.. not to get some black stuff on it.

Ordered the chrome wheels last night, should be here the end up week.

Then at least we will have some bling to look at! 8)
Brian


Checkout my buildThe Regal Eagle Bow front for 4
Image
Also my teardrop updates from blog on Dad Rambles
User avatar
Gunguy05
The 300 Club
 
Posts: 385
Images: 6
Joined: Mon Dec 02, 2013 4:45 pm
Location: South GA
Top

PreviousNext

Return to Build Journals

Who is online

Users browsing this forum: No registered users and 6 guests