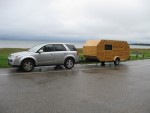
Summertime Benroy Build- Finally named: The "Towster"!

...ask your questions in the appropriate forums BUT document your build here...preferably in a single thread...dates for updates, are appreciated....

Re: Summertime Benroy!

Postby KCStudly » Thu Aug 21, 2014 9:29 pm

Buy the new tool if you want, but time is relative. You really won't save that much... time that is. The real time is in the prep and clean up. Putting the product on is a mere fraction.
KC
My Build: The Poet Creek Express Hybrid Foamie

Poet Creek Or Bust
Engineering the TLAR way - "That Looks About Right"
TnTTT ORIGINAL 200A LANTERN CLUB = "The 200A Gang"
Green Lantern Corpsmen
User avatar
KCStudly
Donating Member
 
Posts: 9633
Images: 8169
Joined: Mon Feb 06, 2012 10:18 pm
Location: Southeastern CT, USA

Re: Summertime Benroy!

Postby Chuckles » Thu Aug 21, 2014 9:44 pm

I don't have any experience with spraying water based poly but wiping down with water to pre-raise the grain does take care of most of the problem. You will still want to sand lightly between coats though. I used two coats on ash (an open grain wood) and I feel like it needs at least one more. Counter tops take a lot of abuse so I would err on the side of caution and add at least 4 or 5 coats.

I'm not a fan of foam brushes except for stain... get a good synthetic bristle brush of you go that route.

Chuck
User avatar
Chuckles
Teardrop Master
 
Posts: 141
Images: 48
Joined: Thu Jan 26, 2012 10:42 pm
Location: NE Wisconsin

Re: Summertime Benroy!

Postby b.inboats » Tue Aug 26, 2014 12:22 am

I've switched to using wipe on poly on almost every project I do. Satin is preferable, as it won't shine or cast a glare on your interior wood surfaces. I'd probably sand everything smooth, put on two light coats to raise any grain, then sand or steel wool. Two more coats with another sanding and wiping in between should do it. Maybe a fifth coat on your countertop. I like the synthetic lambs wool applicator pads, I cut them into thirds and stretch them over slightly curved block of wood with a handle on it. I second the need for good lighting!
b.inboats
Teardrop Inspector
 
Posts: 6
Joined: Wed Jul 16, 2014 3:26 pm
Top

Re: Summertime Benroy!

Postby noseoil » Tue Aug 26, 2014 6:15 am

A word of caution about the steel wool, be careful! I had a friend years ago who went to a guy to get his car painted & insisted on the final prep being done with 0000 steel wool. Long story short, after the first rain (it rains a lot in San Antonio some winters) the rust spots started showing up in the finish. That stuff has a way of sticking to places you can't see, then rusting out when moisture is present.

Not saying you can't use steel wool, just that the prep time with compressed air & a tack rag is important here. I usually have the 3M W/D paper handy to knock down the pimples from dust in the coats. If you do the coating with the surfaces laid flat, runs aren't a big problem. Dust is always there, but a box of tack rags is your friend here.
Build log: viewtopic.php?f=50&t=60248
The time you spend planning is more important than the time you spend building.........

137905
User avatar
noseoil
1000 Club
1000 Club
 
Posts: 1821
Images: 669
Joined: Sun Apr 27, 2014 8:46 am
Location: Raton, New Mexico, living the good life!
Top

Re: Summertime Benroy!

Postby Chuckles » Tue Aug 26, 2014 7:01 pm

noseoil wrote:Not saying you can't use steel wool, just that the prep time with compressed air & a tack rag is important here.


If using water based finish I WOULD say don't use steel wool. Some of the water-borne finish manufacturers advise against it since any little speck of steel wool left on the project will show instantly as a rust spot (or run) when the water based finish is applied. With oil finish these specks are encapsulated in the finish so the don't cause so many problems. Stick with sandpaper or 3M non-metalic abrasive pads for surface prep and between-coats sanding.

Chuck
User avatar
Chuckles
Teardrop Master
 
Posts: 141
Images: 48
Joined: Thu Jan 26, 2012 10:42 pm
Location: NE Wisconsin
Top

Re: Summertime Benroy!

Postby Babartlett » Tue Aug 26, 2014 9:57 pm

I have also heard about the horrors of steel wool on water based poly and I steered clear. I spent this last weekend taking the cabinets apart to stain and finish them.

Long story short, I ended up getting a husky HVLP spray gun and coated all of my cabinets this past weekend! I was very impressed with how the gun worked with the water based poly. Especially considering it was only $50!

Generally I sprayed lightly for the first two coats (lighter than brush) and sanded lightly with 320 after. This helped reduce the raised grain. I sprayed a thicker coat for the third application. I sprayed most surfaces with three coats but the counter got six. The manufacturer recommended waiting two hours before coats, but with the temperature nearly 100 degrees I was able to re-coat within an hour!

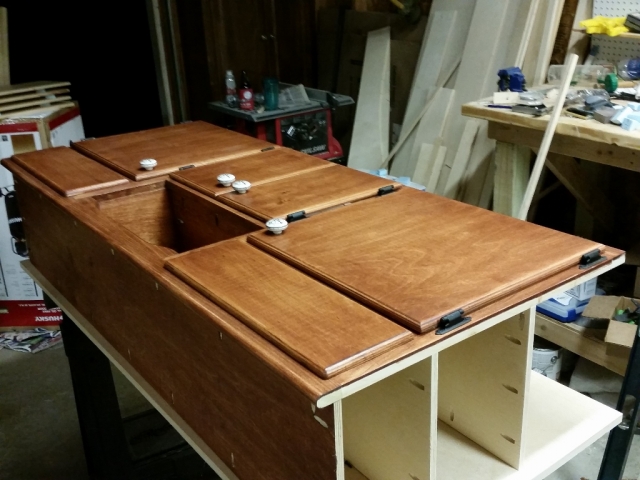
I cut out and routed all of the cabinet doors. Just checking to see how they look!
Image

Working on the electrical panel for the galley. This will include the 1 DIN car stereo, USB port for stereo (not shown), a 12 volt outlet, a couple light switches, and a 120V outlet. There is a similar electrical panel in the cabin and I wanted to make them removable for easy access and upgrades. I was going to use sheetrock screws for mounting but then I found neat threaded inserts at the store. This allowed me to use brown light switch screws that will match the stain much better, and will be much easier to use with a screwdriver.
Image
Image

I also picked up a 7 dollar, 5 quart mixing bowl from walmart for the sink! I ordered one of those water filter faucets on line and picket up a standard wet bar sink drain for the bottom.
Image
Image
Image

Freshly sanded face frame ready for stain!
Image
Image

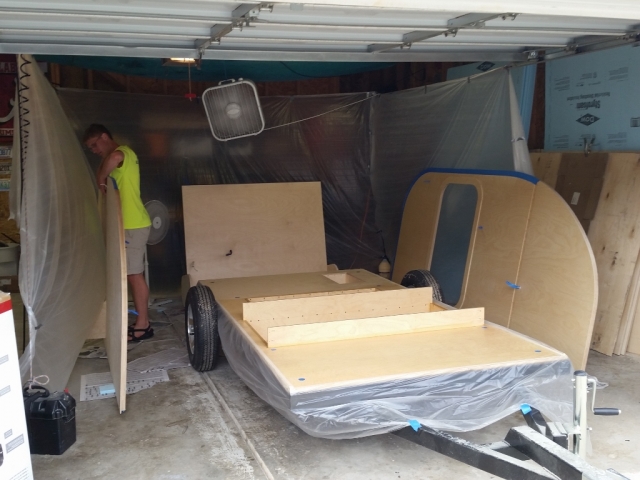
Setting up my satellite stain/ spray booth!
Image

I had some lovely help with the staining and sanding!
Image

I added a third wall to the booth for spraying.
Image

Having fun with the new toy!
Image


Fresh stack of cabinet doors!
Image

Working on the propane storage. This is going to fit into a hole cut under the stove cabinet and the lid will be flush with the floor. This vented compartment will ensure that any propane that may leak from one of the 1lb cylinders will sink out of the galley safely. I am going to add holes on the bottom for ventilation.
Image
Image

Gluing on my inner door seal! I am going for the double seal, with one on both sides of the door.
Image
User avatar
Babartlett
Teardrop Builder
 
Posts: 39
Images: 345
Joined: Tue May 20, 2014 1:01 pm
Top

Re: Summertime Benroy!

Postby Adventure Time » Wed Aug 27, 2014 3:51 am

You have a great build going on. Good time frame also. I went to school for mech engineering also. I patented my idea for my senior project, quit school a semester before graduating to start a business. I was always a terrible employee anyway.
You are creative and skilled. You will go far in your career.
I am interested in how you chose to make your doors. Could you snap a few pics or describe how you are doing them? Thanks
User avatar
Adventure Time
Teardrop Advisor
 
Posts: 58
Images: 6
Joined: Mon Aug 18, 2014 5:03 pm
Top

Re: Summertime Benroy!

Postby KCStudly » Wed Aug 27, 2014 6:53 am

+1. You are putting in some quality work! :thumbsup:
KC
My Build: The Poet Creek Express Hybrid Foamie

Poet Creek Or Bust
Engineering the TLAR way - "That Looks About Right"
TnTTT ORIGINAL 200A LANTERN CLUB = "The 200A Gang"
Green Lantern Corpsmen
User avatar
KCStudly
Donating Member
 
Posts: 9633
Images: 8169
Joined: Mon Feb 06, 2012 10:18 pm
Location: Southeastern CT, USA
Top

Re: Summertime Benroy!

Postby Babartlett » Wed Aug 27, 2014 10:40 am

Adventure Time wrote:You have a great build going on. Good time frame also. I went to school for mech engineering also. I patented my idea for my senior project, quit school a semester before graduating to start a business. I was always a terrible employee anyway.
You are creative and skilled. You will go far in your career.
I am interested in how you chose to make your doors. Could you snap a few pics or describe how you are doing them? Thanks


Thanks for the compliment! I expect to find my own niche in the field as well..

I drew up a diagram of how I plan on sealing my doors. I drew it between class in my note app so it is far from pretty haha.

As for the door construction, It is the same as my walls. 3/4" ripped baltic birch frame with 1/4" skins and insulation in the middle. I have found this composite method to be extremely strong/stiff for its weight.

Image
Attachments
Door Seal Plan.JPG
Door Seal Plan.JPG (151.93 KiB) Viewed 4234 times
User avatar
Babartlett
Teardrop Builder
 
Posts: 39
Images: 345
Joined: Tue May 20, 2014 1:01 pm
Top

Re: Summertime Benroy!

Postby Ned B » Fri Aug 29, 2014 4:35 am

Your build looks great!

Re glue squeeze out, you're using Tight Bond 2, if you get any squeeze out, simply wait until it has skinned over (about half an hour) and you can easily scrape it off without problems with finishes.
User avatar
Ned B
1000 Club
1000 Club
 
Posts: 1036
Joined: Sat Apr 16, 2011 10:25 am
Location: Syracuse NY (ish)
Top

Re: Summertime Benroy!

Postby Adventure Time » Thu Sep 04, 2014 6:33 am

I like the double seal idea. If water makes it past the first seal but not the second what keeps the wood protected?
I am not going to use the T trim around my doors. I am trying to make them seal like a car door and have a clean edge like one also. This may prove to be difficult. I want windows where the seal doesn't show and it has no trim.
I have to say I was very surprised that using T trim on the outside of the aluminum skin ,with the gasket in between, produced a good seal. It seems like water would just find a way to leak in at the top.
One thing I thought of is I want the gaskets mounted only to the door so I don't have dirt building up behind them and I am much less likely to damage it getting in and out.
I bet your doors will be nice and light. I have two slabs of 1" thick plywood for doors. I am going to rout them out to get rid of alot of the weight. If I had it to do over I wouldn't have used 3/4" plywood on the outside. The composite way you are making yours is better.
BTW your welds are spectacular for a 120V machine. I also like how you capped the ends of all the tubes.
Did you order the flexiride axle? Or did someone local have it. What is it rated at? I have a feeling I am going to end up cutting this torsion axle off that I took off my other trailer. I think it is going to be too stiff and ride rough.
User avatar
Adventure Time
Teardrop Advisor
 
Posts: 58
Images: 6
Joined: Mon Aug 18, 2014 5:03 pm
Top

Re: Summertime Benroy!

Postby S. Heisley » Thu Sep 04, 2014 6:21 pm

.
You are doing beautiful work. I look forward to seeing it all come together. :applause:
User avatar
S. Heisley
Super Lifetime Member
 
Posts: 8813
Images: 495
Joined: Mon Sep 17, 2007 10:02 am
Location: No. California
Top

Re: Summertime Benroy!

Postby rebapuck » Fri Sep 05, 2014 10:15 pm

I had a little vintage German trailer for several years. Everyone was surprised that the propane tank was in a cabinet inside the cabin. The cabinet door fitted snugly. There was a I" or so lip at the front edge. And the floor was perforated, with screening (only screening in the trailer). I felt that was perfectly adequate.
Judy
1966 VW camper
1967 VW singlecab
Image
User avatar
rebapuck
.
 
Posts: 2243
Images: 1
Joined: Thu May 14, 2009 1:55 pm
Location: Chapel Hill NC
Top

Re: Summertime Benroy!

Postby Babartlett » Tue Sep 09, 2014 9:13 pm

Adventure Time wrote:I like the double seal idea. If water makes it past the first seal but not the second what keeps the wood protected?
I am not going to use the T trim around my doors. I am trying to make them seal like a car door and have a clean edge like one also. This may prove to be difficult. I want windows where the seal doesn't show and it has no trim.
I have to say I was very surprised that using T trim on the outside of the aluminum skin ,with the gasket in between, produced a good seal. It seems like water would just find a way to leak in at the top.
One thing I thought of is I want the gaskets mounted only to the door so I don't have dirt building up behind them and I am much less likely to damage it getting in and out.
I bet your doors will be nice and light. I have two slabs of 1" thick plywood for doors. I am going to rout them out to get rid of alot of the weight. If I had it to do over I wouldn't have used 3/4" plywood on the outside. The composite way you are making yours is better.
BTW your welds are spectacular for a 120V machine. I also like how you capped the ends of all the tubes.
Did you order the flexiride axle? Or did someone local have it. What is it rated at? I have a feeling I am going to end up cutting this torsion axle off that I took off my other trailer. I think it is going to be too stiff and ride rough.


I just ordered all of my trim, windows, and some other goodies so I will be catching up to you soon! I did order my flexride new from Southwest Wheel in texas. http://www.southwestwheel.com/store/p-2311-2000-lb-flexiride-torsion-axle.aspx The way the flexride parent company (UCF America) works is that they license trailer/ fabrication shops around the company to build their axles for them. Southwest wheel turned out to be the closest for me. I specified the width between the outside of the mounting brackets and it turned out right on the money! I also requested to leave out the idler hubs because I was going to install brake hubs. this brought the price down to around $300. I am excited to get it out on the road!
User avatar
Babartlett
Teardrop Builder
 
Posts: 39
Images: 345
Joined: Tue May 20, 2014 1:01 pm
Top

Re: Summertime Benroy!

Postby Babartlett » Tue Sep 09, 2014 10:27 pm

Trying to finish the build before school started up was definitely wish full thinking! As predicted, the engineering school workload is starting to pile up so I am limited to just weekends now. Regardless, I am very excited about putting my teardrop back together after three weeks of taking it apart to finish the wood!

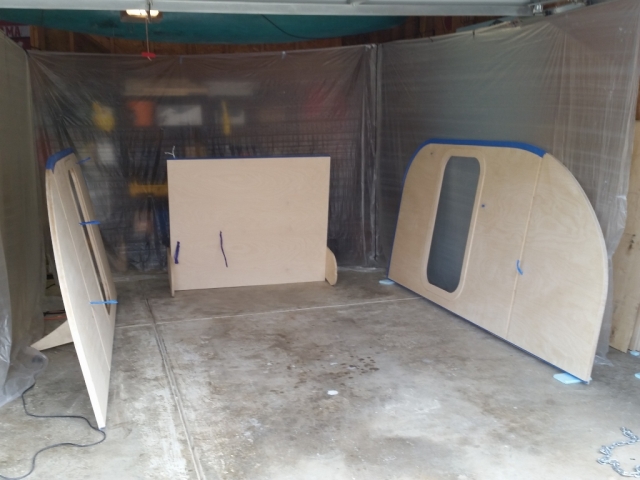
Last Saturday was a big day! I sprayed the interior of the walls, both sides of the bulkhead and the floor finished with water based poly. Because of a rain threat I set up a "spray booth" in the garage this time.
Image
Image

I sprayed everything with five coats because I had the time! Most of the floor will be covered with an automotive style carpet but I decided to go ahead and spray it to help prevent any water from seeping in.
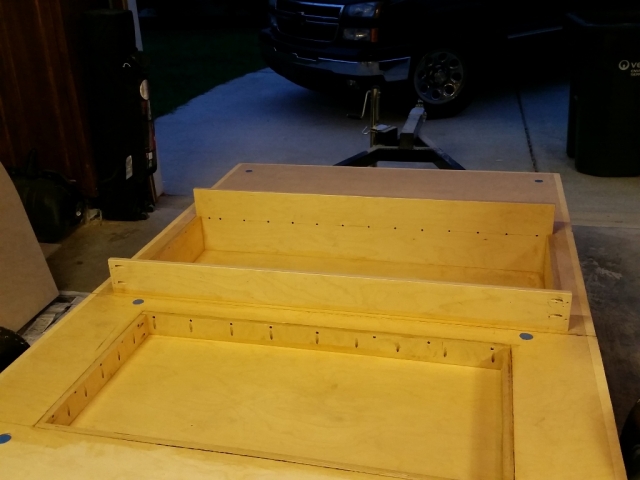
Image


Along with screws every 6 inches, I used PL Premium poly glue on the seam between the floor and the walls. This one bead actually did a good job of reaching both sides of the joint.
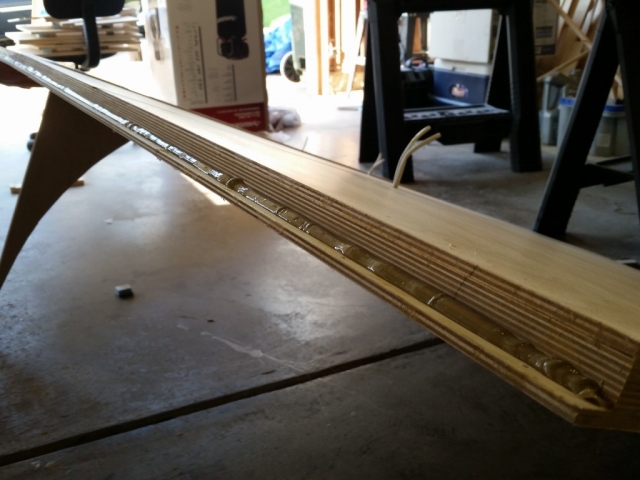
Image

I am trying to be conscious about the water that may get trapped between the inside and outside door seal and here is some kind of water drainage idea that I am playing with. I am not sure exactly how this will work with the Al skin and trim but I hope to allow any trapped water drip out at the bottom of the door. This may be as simple as leaving a small gap on the outside seal where I made the notches in the door jam. I also made sure that the door jambs got 5 solid coats of poly to help protect from water.
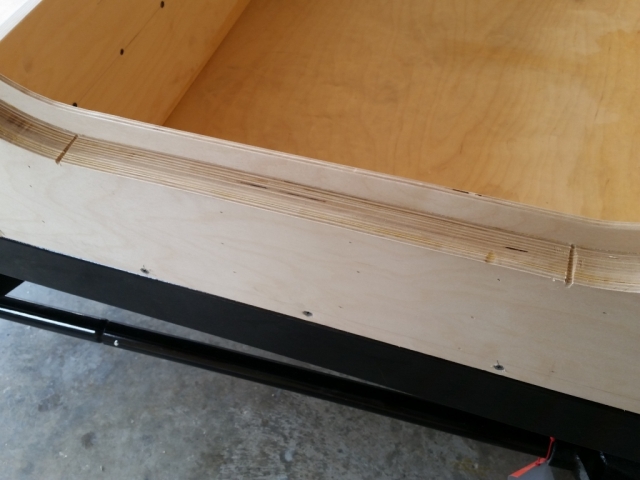
Image

Here is one of the inner door seals after clamping but before spraying.
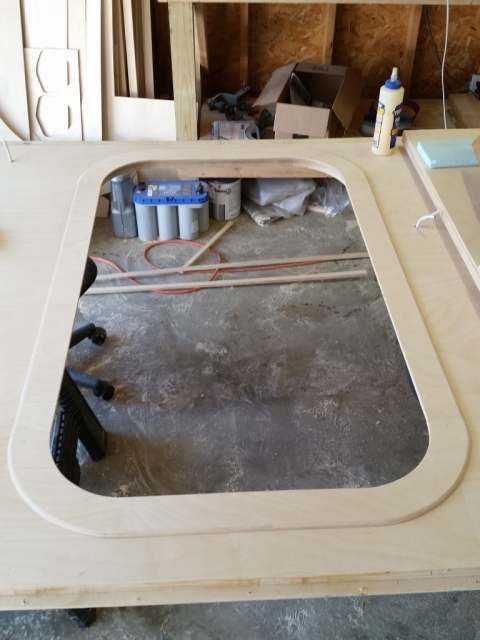
Image

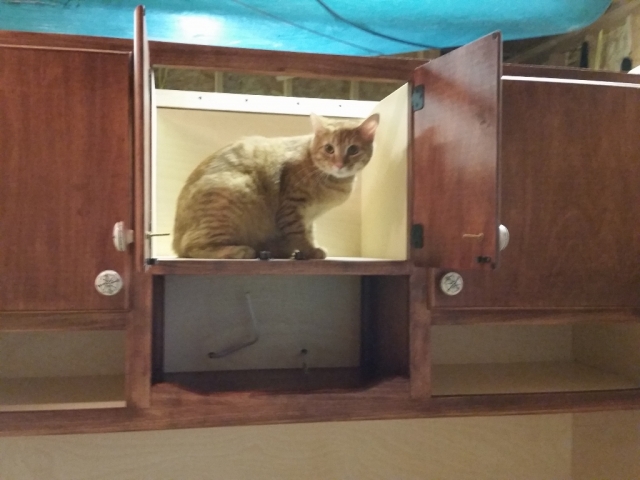
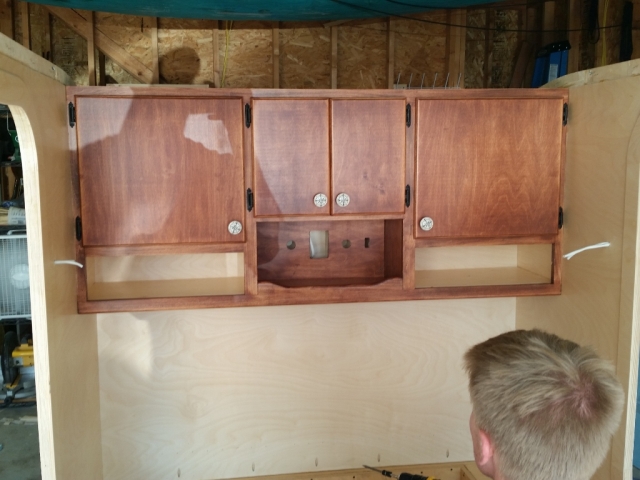
While waiting on the poly to dry I started re-assembling the cabin cabinets after staining and finishing them two weeks ago! My fiancee is responsible for the awesome door knobs! Its hard to tell from the picture, but they are ceramic and have compasses on them.
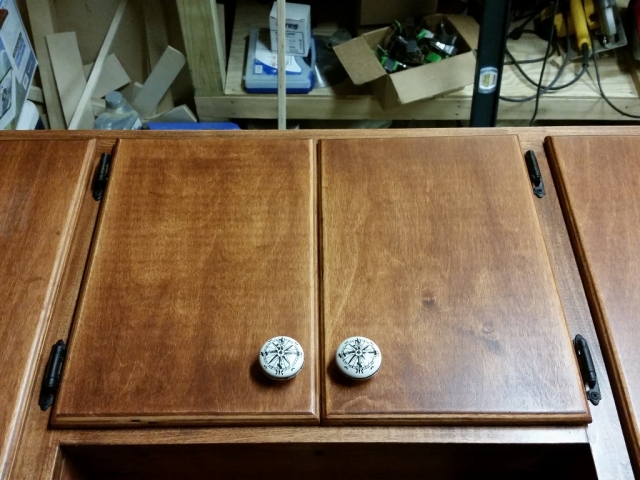
Image
Image

Here you can see the electrical panel in the back of the open storage space on cabinet. I am installing a 110 outlet, standard 12v outlet, double usb charger, and a rocker switch for an accent light in the area.
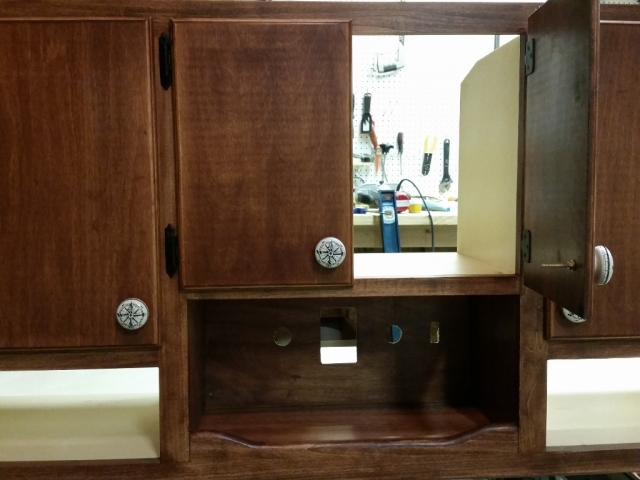
Image

Got them installed! They are held in with probably 30 pocket screws so they shouldn't go anywhere..
Image

Looks like Tiger approves!
Image

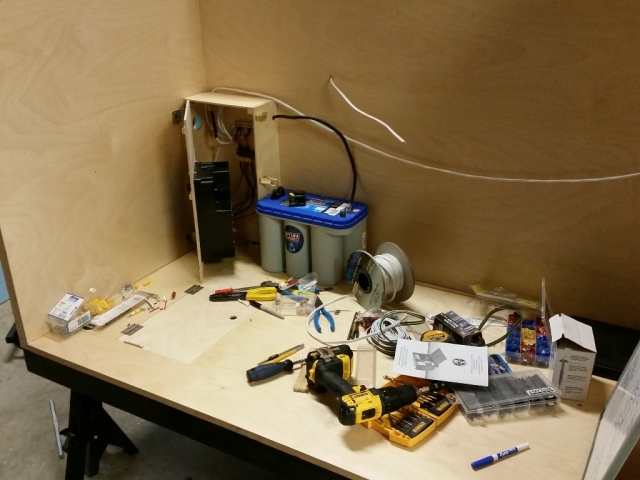
With the walls up, I decided to tackle the power distribution center before I covered it up with the rest of the galley. I don't know why, but this is what happens whenever I work with wires. Soo many pieces..
Image

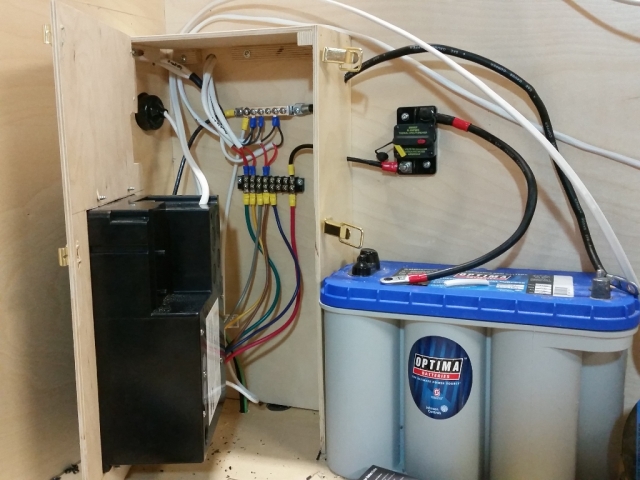
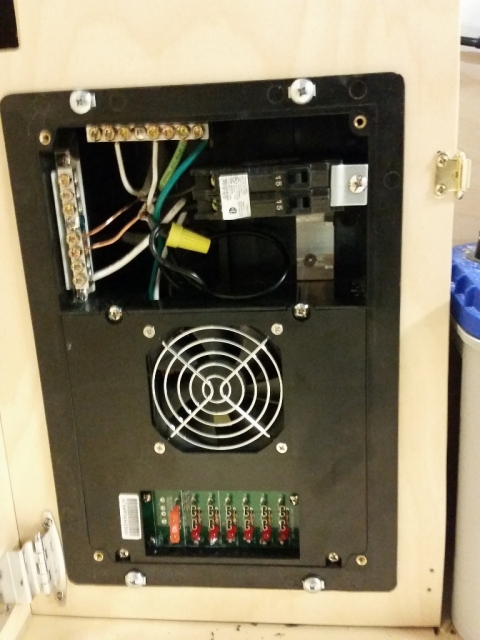
Here is a closer image of the WFCO 35 amp power center (cover removed) and the wiring behind it. I have a few more circuits to run but this is the bulk of it. You can also see where the 120 is coming though the wall, and heading to the power center. This neat little guy takes care of managing both AC and DC. It has a built in AC breaker panel that protects the converter and allows room for other protected AC circuits. It charges your battery (3-stage), converts plenty of DC when on shore power, and also has 6 protected DC circuits. It is a little overkill for a teardrop, but I was happy to have everything in one place! I also have a 50 amp DC circuit breaker on the hot wire from the battery so I can isolate the power before working on any circuits. I decided to get the biggest blue top that Optima makes. Why not!
Image
Image
User avatar
Babartlett
Teardrop Builder
 
Posts: 39
Images: 345
Joined: Tue May 20, 2014 1:01 pm
Top

PreviousNext

Return to Build Journals

Who is online

Users browsing this forum: No registered users and 8 guests