Robbie's Benroy build- Now For Sale...

...ask your questions in the appropriate forums BUT document your build here...preferably in a single thread...dates for updates, are appreciated....

Postby oregonguy » Wed Oct 05, 2011 1:31 pm

Robbie wrote:Thanks Mike that's not a bad idea! I'm definitely going to look into that! Maybe I can find some that are strong enough to glue on the inside of the roof so the door just sticks there with nothing visible at all!


I like to use rare earth magnets intended for use with door sensors in home security systems...because they come with a counter-sunk hole in their center for mounting with a small wood screw. You can get them from just about any home security system installation company. They come in multiple sizes from 3/8" to about 3/4".
Check out our Website: www.oregontrailer.net
User avatar
oregonguy
Teardrop Master
 
Posts: 197
Images: 48
Joined: Tue May 27, 2008 1:30 pm
Location: Eugene Oregon

Postby mike93lx » Thu Oct 06, 2011 7:03 pm

Robbie wrote:I saw on their site they have a 12v battery, the Odyssey PC625, with a rating of "16 Ah @ 10hr rate". Does this mean the battery can handle 16 Amps of output continuously for 10 hours before going "dead"?


that is correct. "dead" is 10.5 volts actually, but either way, it is effectively unusable.

If you think that you'll have a load that will run the battery down to dead often, I'd recommend doing some research on what type of battery is best for your application. You may end up getting a longer life out of an "oversized" battery that doesn't get cycled so much.
mike93lx
Teardrop Inspector
 
Posts: 18
Joined: Thu Aug 13, 2009 7:51 pm

Postby Robbie » Thu Oct 06, 2011 7:08 pm

I think the electrical load on my trailer will be quite slim. It is fairly basic as it is with only a single interior dome light, 2 porch lights, and some outlets for probably using the fan. I'm sure most of these won't be used for long periods of time as we have a few nice LED lanterns. Using the interior light to get situated in bed, using the porch lights for midnight bathroom breaks and the fan is going to be a single 140mm computer case fan.

I'll probably look for a battery with a higher rating just so we have the extra power at our disposal if we need it but I'm sure it won't get fully cycled probably ever.
My aluminum benroy build:
viewtopic.php?t=45640
User avatar
Robbie
Teardrop Master
 
Posts: 250
Images: 86
Joined: Tue May 10, 2011 11:28 am
Location: West Jordan, UT
Top

Postby Robbie » Sun Oct 16, 2011 5:57 pm

Got some more work done on the trailer this weekend. Its finally getting to the point where I need to start spending some money on the big items like getting the trailer finished, getting door hardware and materials, and deciding on/purchasing the outer skin material. But for now I got all the outlets, lights, switch, and wire in from Amazon.

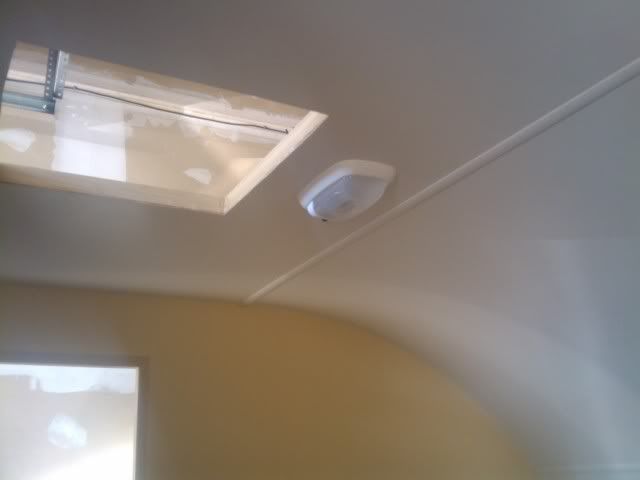
Got the dome light mounted...

Image

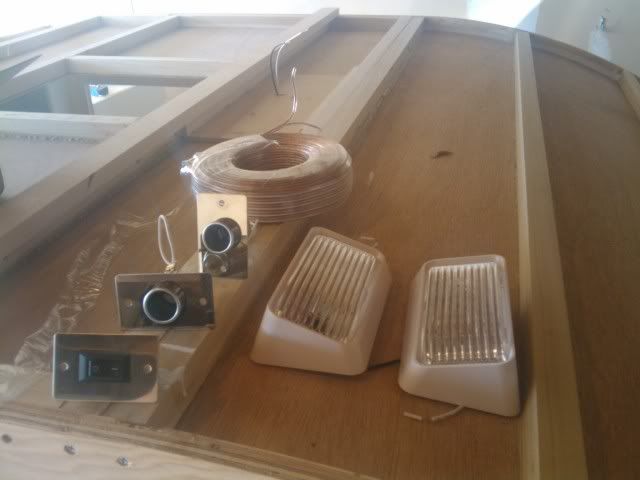
Heres the rest of the stuff (less the storage outlet)...

Image

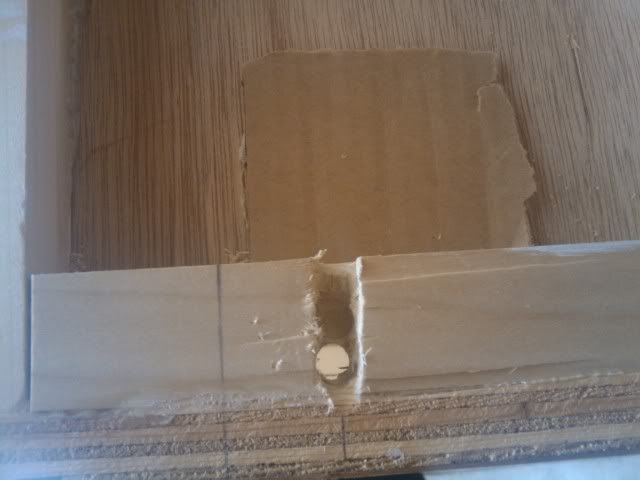
And here is one side of how the wiring for the porch lights is gonna be. I plan on using a wire mold to cover up the wiring on the inside. It should only be about 4" long. If your wondering what that piece of cardboard is for, well, I slipped with the drill and punched an extra hole in the ceiling!

:cry: That cardboard is glued on as a backer so I can patch the hole and repaint it...

Image

And here is from the inside. You can see the patched spot just above the hole in the ceiling...

Image

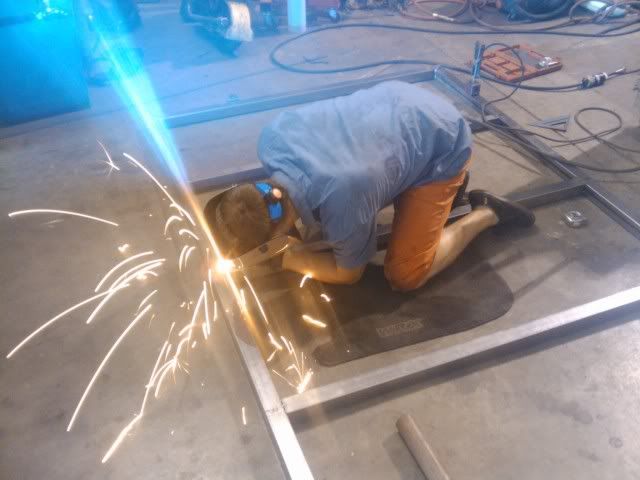
I also got the trailer frame welded up this weekend! My buddy welded it for me in his shop. Now I just need to pick up the axle (Tuesday or Wednesday) and the material for the tongue and then finish welding her up and I can move the trailer cab onto the frame and get her rolling!

Image

Here is a sweet little gem I found in a pile of junk in the corner of my garage. Its an aluminum rack of some sort I got a long time ago from the trash somewhere and it just so happens to hold 4 propane cans perfectly! I just need to make a strap to hold them in place. I'm way excited on this find! I guess trash comes in handy sometimes after all!

Image

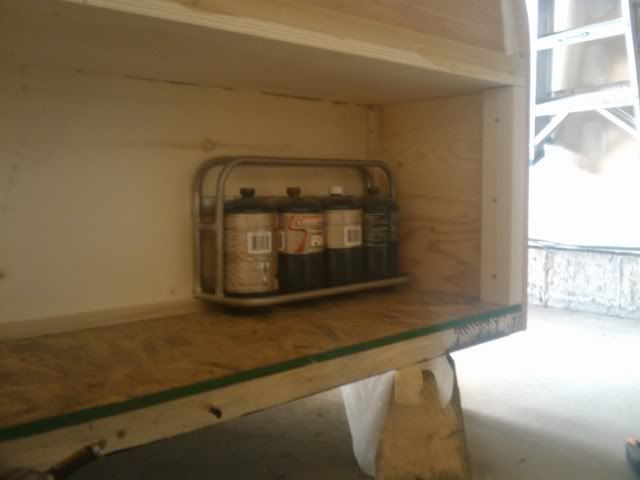
In the above pic you can see I added some material to the opening edge of the storage area so the corner trim and storage opening trim have room to mount in that spot. I just need to cut-out the tailgate and install the stops and then it will be able to go in. I've decided to coat the inside of the storage area with spray on bed liner for durability and to seal up the wood.

I'm hoping I can give some updates next weekend of the cab mounted on the trailer and rolling! Stay tuned...

Robbie
My aluminum benroy build:
viewtopic.php?t=45640
User avatar
Robbie
Teardrop Master
 
Posts: 250
Images: 86
Joined: Tue May 10, 2011 11:28 am
Location: West Jordan, UT
Top

Postby aggie79 » Mon Oct 17, 2011 9:26 am

Hey Robbie,

Your Benroy build is coming along quite nicely! The bright colored interior will make it feel spacious. I really like the propane bottle rack. What a great detail.

Take care,
Tom
Tom (& Linda)
For build info on our former Silver Beatle teardrop:
Build Thread

93503
User avatar
aggie79
Super Duper Lifetime Member
 
Posts: 5405
Images: 686
Joined: Tue Aug 07, 2007 5:42 pm
Location: Watauga, Texas
Top

Postby Robbie » Mon Oct 17, 2011 5:25 pm

Thanks Tom! I really like how light the interior is. It doesn't close it in at all. And the white and yellow with the brushed hardware gives it a nice modern feel.
My aluminum benroy build:
viewtopic.php?t=45640
User avatar
Robbie
Teardrop Master
 
Posts: 250
Images: 86
Joined: Tue May 10, 2011 11:28 am
Location: West Jordan, UT
Top

Postby Robbie » Mon Oct 24, 2011 8:17 am

Got a little more work done this weekend. I got all the wiring ran and soldered up for a good connection. The heat shrink I bought didn't seem to work out (faulty?) so I gave each connection a good few layers of electrical tape. It's not the best method but I don't think these connections will see much load/heat so they should be alright. I also got the door jamb material primed. I just need to borrow my dad's compressor and get them installed. Once I do that I can get the flooring material down and install the base trim and that will just about finish out the interior! I'm ready for the insulation now also. Hopefully after the deer hunt this week I can get going on that this next weekend too!

Stay tuned for pics!
My aluminum benroy build:
viewtopic.php?t=45640
User avatar
Robbie
Teardrop Master
 
Posts: 250
Images: 86
Joined: Tue May 10, 2011 11:28 am
Location: West Jordan, UT
Top

Postby DougH » Tue Oct 25, 2011 4:31 pm

Looking good so far :) I'm a little late with the advice but I would have elimated the front overhead cabinet and incorporated it with the rear one. The top half accessible from the inside and the bottom from outside like you have done.
User avatar
DougH
Teardrop Master
 
Posts: 216
Images: 86
Joined: Tue Sep 05, 2006 12:17 am
Location: Concord CA
Top

Postby Robbie » Tue Oct 25, 2011 4:35 pm

I played around with that idea for a little bit before the final design but my wife and I both decided we like having our heads to the rear of the trailer rather than the front. So with the cabinet at the front like it is we can have our DVD player mounted underneath it for when we decide to watch a movie or something. I had both designs modeled and the front cabinet seemed to make the most sense and just felt right.
My aluminum benroy build:
viewtopic.php?t=45640
User avatar
Robbie
Teardrop Master
 
Posts: 250
Images: 86
Joined: Tue May 10, 2011 11:28 am
Location: West Jordan, UT
Top

Postby Robbie » Fri Nov 18, 2011 9:19 am

It's been a little while since an update! I'm not a cold weather person and I usually find myself hibernating in my basement with my Xbox all winter. Lol. So progress has been slow. That and my wife decided to start renovating our front bedroom so now, lucky me, gets to finish it. But I did get the trailer all welded up last night! So it is a full rolling rig! I got the axle mounted, wheels on, coupler welded on, chains and tongue jack welded on. It turned out to be the perfect height for towing behind my subaru! Sits perfectly level. It may dip a little once its fully loaded but no biggie.

And since photobucket is blocked here at work I'm gonna dump some pics of the build in my album until I can upload them to my thread.

Just to recap... I used 16 gauge 2x2s for the main trailer deck with one cross bar being 11 gauge 1.5x1.5 scrap (so I didn't have to buy another 20' stick). The tongue is all 11 gauge 2x2 and is fully welded all around. The axle is 72" face to face rated at 2000# with 5.30x12 tires. The corner gussets were some 14 gauge brackets my neighbor had lying around. A little extra support never hurt!

I'm debating in my head now whether I want to prime it and paint it with the Rustoleum enamel or just wait until I can afford to have it powder coated. I'm gonna try and get some powder coating quotes today. I plan on the trailer being gloss black with gunmetal painted wheels to match my Outback.
My aluminum benroy build:
viewtopic.php?t=45640
User avatar
Robbie
Teardrop Master
 
Posts: 250
Images: 86
Joined: Tue May 10, 2011 11:28 am
Location: West Jordan, UT
Top

Postby absolutsnwbrdr » Fri Nov 18, 2011 10:35 am

Nice lookin frame Robbie! The powdercoating would probably hold up better over the years, compared to the Rustoleum. If its not too expensive I'd go that route, especially since you have clean metal to work with.

Image
Zach
Coming Soon...
Image Image
User avatar
absolutsnwbrdr
Donating Member
 
Posts: 2657
Images: 412
Joined: Mon Jan 25, 2010 6:10 pm
Location: Hanover, PA
Top

Postby Robbie » Fri Nov 18, 2011 10:38 am

Thanks for posting that image for me Zach! And I'm hoping the PC quotes won't be too outrageous cause I'd love a nice powder coated finish! Especially since it will be stored outside when it's completed. Covered of course, but still outside.
My aluminum benroy build:
viewtopic.php?t=45640
User avatar
Robbie
Teardrop Master
 
Posts: 250
Images: 86
Joined: Tue May 10, 2011 11:28 am
Location: West Jordan, UT
Top

Check out POR15

Postby jonw » Fri Nov 18, 2011 11:20 am

Another alternative to powdercoating is painting on POR15. Rustproof, very tough, and looks and lasts like powdercoating. Google it...
User avatar
jonw
Titanium Donating Member
 
Posts: 525
Images: 163
Joined: Thu Oct 22, 2009 6:22 pm
Location: Marlboro, Mass.
Top

Postby Robbie » Fri Nov 18, 2011 11:23 am

Thanks Jon! I actually have some friends that have used that stuff on their jeep axles. I'll definitely look into that because my first quote was much higher than I want to pay to finish this thing.
My aluminum benroy build:
viewtopic.php?t=45640
User avatar
Robbie
Teardrop Master
 
Posts: 250
Images: 86
Joined: Tue May 10, 2011 11:28 am
Location: West Jordan, UT
Top

Re: Check out POR15

Postby aggie79 » Fri Nov 18, 2011 11:35 am

jonw wrote:Another alternative to powdercoating is painting on POR15. Rustproof, very tough, and looks and lasts like powdercoating. Google it...


POR 15 is good. I used Rust Bullet - a similar product to POR and it too is very tough.
Tom (& Linda)
For build info on our former Silver Beatle teardrop:
Build Thread

93503
User avatar
aggie79
Super Duper Lifetime Member
 
Posts: 5405
Images: 686
Joined: Tue Aug 07, 2007 5:42 pm
Location: Watauga, Texas
Top

PreviousNext

Return to Build Journals

Who is online

Users browsing this forum: No registered users and 10 guests