Dusty Mark's 5 x 10 Build

...ask your questions in the appropriate forums BUT document your build here...preferably in a single thread...dates for updates, are appreciated....

Re: Dusty Mark's 5 x 10 Build

Postby Mushin » Tue Jun 14, 2016 11:05 am

Thx for the info on the blinds, pricey lil things! The costs add up don't they!

Sent from my SM-G920V using Tapatalk
User avatar
Mushin
Teardrop Master
 
Posts: 119
Joined: Tue Dec 15, 2015 2:21 pm

Re: Dusty Mark's 5 x 10 Build

Postby Dusty Mark » Tue Jun 14, 2016 11:50 am

You're welcome and yes they do. Once I knew how much this build might cost at the quality level we wanted, I sold three little boats that I had built and a small sailboat to fund this project. I could have purchased a brand new Little Guy Silver Shadow 5' x 10' for the amount I have in this build, but I like mine better!
Dusty Mark
Teardrop Master
 
Posts: 210
Images: 395
Joined: Mon Feb 29, 2016 6:57 pm

Re: Dusty Mark's 5 x 10 Build

Postby Mushin » Tue Jun 14, 2016 2:01 pm

Yours is definitely special, a beautiful build and a place for the puppy, win win!

Sent from my SM-G920V using Tapatalk
User avatar
Mushin
Teardrop Master
 
Posts: 119
Joined: Tue Dec 15, 2015 2:21 pm
Top

Re: Dusty Mark's 5 x 10 Build

Postby KCStudly » Tue Jun 14, 2016 2:30 pm

Dusty Mark wrote:I could have purchased a brand new (insert OEM brand name here) 5' x 10' for the amount I have in this build, but I like mine better!

Amen brother, amen. ;)
KC
My Build: The Poet Creek Express Hybrid Foamie

Poet Creek Or Bust
Engineering the TLAR way - "That Looks About Right"
TnTTT ORIGINAL 200A LANTERN CLUB = "The 200A Gang"
Green Lantern Corpsmen
User avatar
KCStudly
Donating Member
 
Posts: 9616
Images: 8169
Joined: Mon Feb 06, 2012 10:18 pm
Location: Southeastern CT, USA
Top

Re: Dusty Mark's 5 x 10 Build

Postby aggie79 » Tue Jun 14, 2016 5:23 pm

KCStudly wrote:
Dusty Mark wrote:I could have purchased a brand new (insert OEM brand name here) 5' x 10' for the amount I have in this build, but I like mine better!

Amen brother, amen. ;)


I'll double that "amen".
Tom (& Linda)
For build info on our former Silver Beatle teardrop:
Build Thread

93503
User avatar
aggie79
Super Duper Lifetime Member
 
Posts: 5405
Images: 686
Joined: Tue Aug 07, 2007 5:42 pm
Location: Watauga, Texas
Top

Re: Dusty Mark's 5 x 10 Build

Postby justageorgiaguy » Tue Jun 14, 2016 6:42 pm

If you wanted, you could probably splice an IR extender into the a/c wiring. http://www.rvpartsnation.com/rv-electro ... Al6d8P8HAQ


Sent from my iPhone using Tapatalk
James Davidson
Photographer
http://www.jdavidsonphoto.com
User avatar
justageorgiaguy
Teardrop Advisor
 
Posts: 79
Joined: Wed Aug 04, 2010 8:50 am
Location: Cochran, GA
Top

Re: Dusty Mark's 5 x 10 Build

Postby Dusty Mark » Tue Jun 14, 2016 10:45 pm

Good idea. I thought about the IR extender, but decided to go low tech with line-of-sight little windows. It looks like the air conditioner system is going to work out well with those modifications!
Dusty Mark
Teardrop Master
 
Posts: 210
Images: 395
Joined: Mon Feb 29, 2016 6:57 pm
Top

Trimmed the Galley

Postby Dusty Mark » Tue Jun 14, 2016 10:56 pm

I trimmed the galley, painted the final coat on the underfloor storage covers and applied the final coat of varnish to the air conditioner trim.

Image

I built up the side wall with 1/8" by 1 " aluminum to make it even with the roof line. That also supports the roof trim I applied in the next step quite well.

Image

I'm using Frank Bear's techniques, from Vintage Technologies, to seal and trim the galley walls to receive the hatch.

Image

Close-up of trim. I managed to pound the bottom bumper trim to shape without cutting a bunch of miters.

Image

Ready for turn signals/brake lights.

Image

Upper galley trim on passenger side.

Tomorrow I'll start working on the galley hatch...
Dusty Mark
Teardrop Master
 
Posts: 210
Images: 395
Joined: Mon Feb 29, 2016 6:57 pm
Top

Galley Lid Frame Started

Postby Dusty Mark » Thu Jun 16, 2016 10:36 pm

I've been getting out doing some other activities the past couple of days, but I did get the galley lid frame started.

Image

Clamped in place with a plywood spacer to simulate the exterior plywood skin. I used 5/4 white pine for the end caps and 1/2" Baltic birch plywood for the ribs. I'll add cross ribs and mounting plates for the license plate holder and dome light tomorrow. I'm hoping that I can fit the slam latches before I skin it and they'll still fit after the skinning process...

Image

Pocket hole joinery holds the ribs into 1/4" deep dadoes. Top pictured.

Image

The bottom cap needs to be hand planed flush with the ribs.

Image

It looks like I have the proper setbacks for the trim to rest properly on the wall edge and create a good seal all the way around.

I hope to skin, insulate, and wire the lid tomorrow.
Dusty Mark
Teardrop Master
 
Posts: 210
Images: 395
Joined: Mon Feb 29, 2016 6:57 pm
Top

Plywood Skin Applied to Galley Lid

Postby Dusty Mark » Sat Jun 18, 2016 3:28 pm

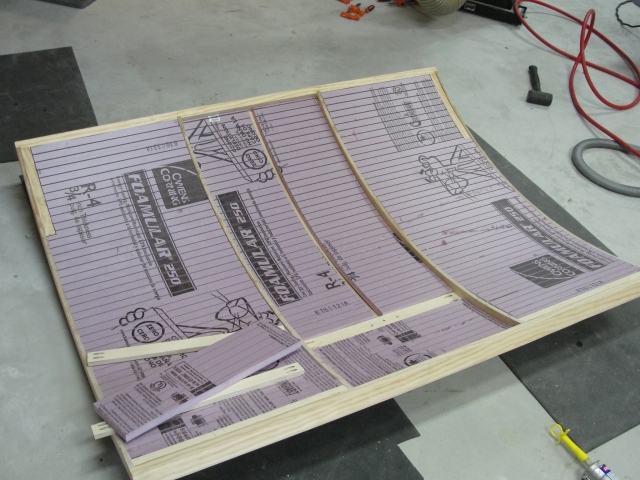
Plywood is applied to the outside and inside of the galley lid.
Image

Exterior skin applied and the two layers of 3/4" foam insulation are being fitted around the bracing and ribs. The groove down the middle is for the wiring.
Image

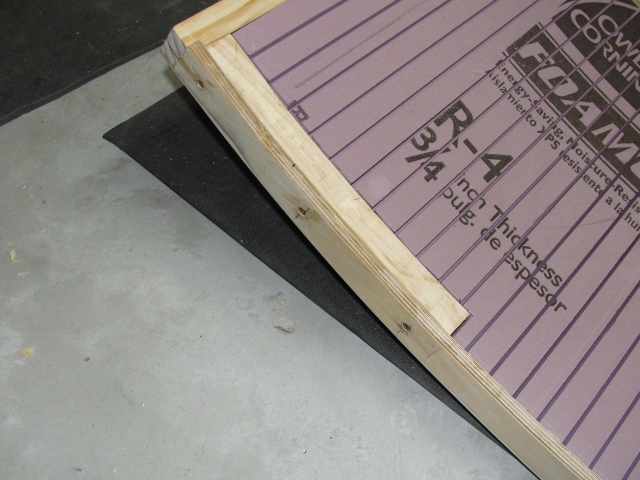
Extra reinforcement and attachment point for the lid support.
Image

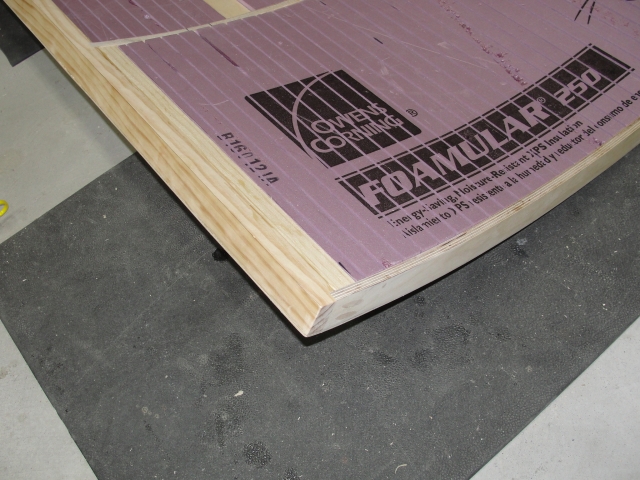
Slam latch hardware will attach and pass through this extra layer of wood.
Image

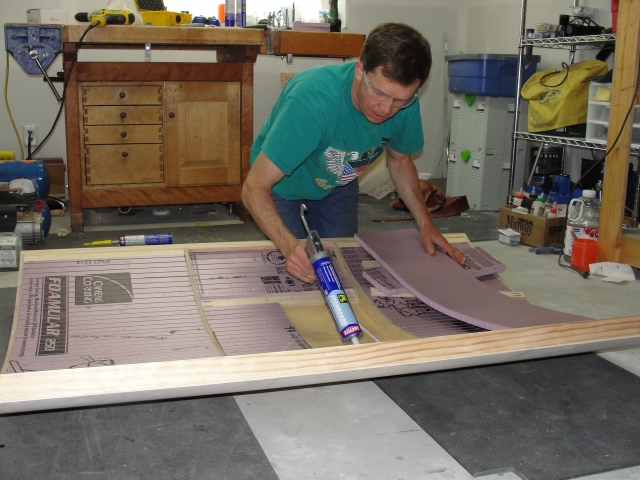
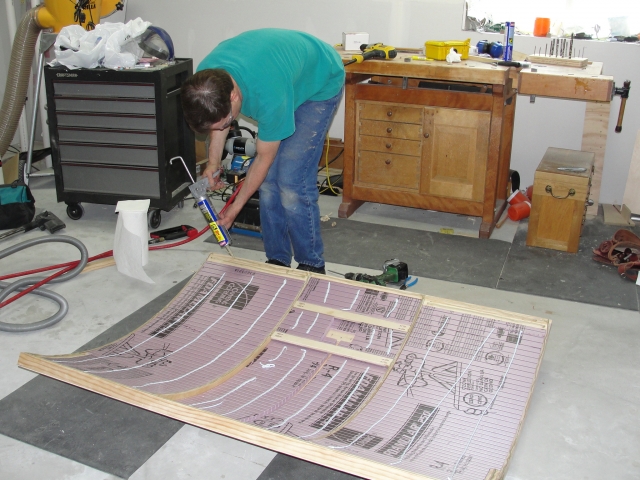
Applying beads of foam glue to hold it down.
Image

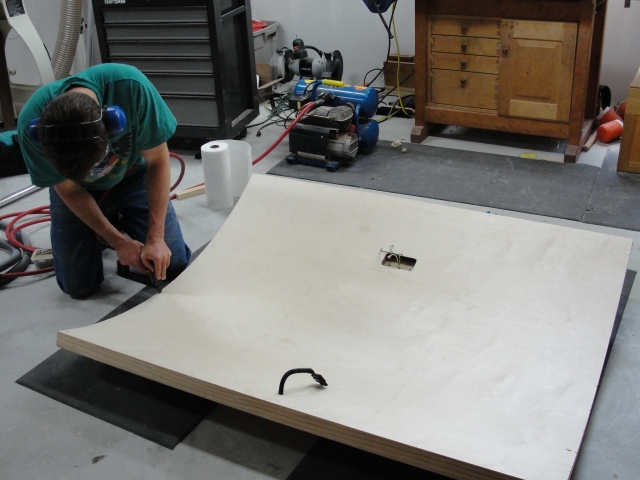
Applying polyurethane glue to frame edges to hold the plywood skin.
Image

Stapling the 1/8" plywood down. One issue with using 1/2" plywood for the ribs is that the staples are so close to the edge of the 1/8" plywood that it chips. This will be covered with aluminum trim, so not really a problem.
Image

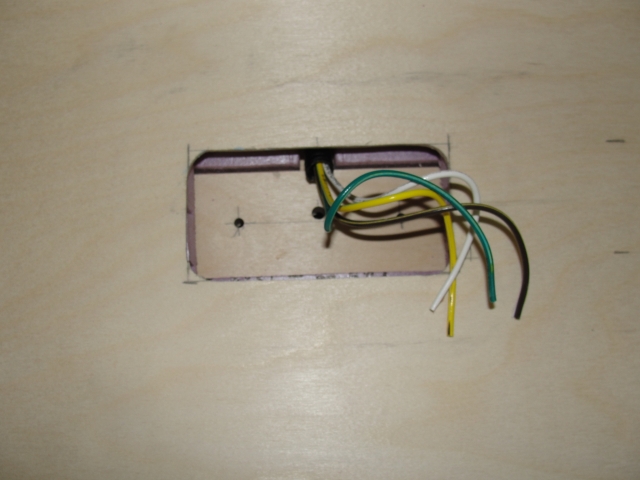
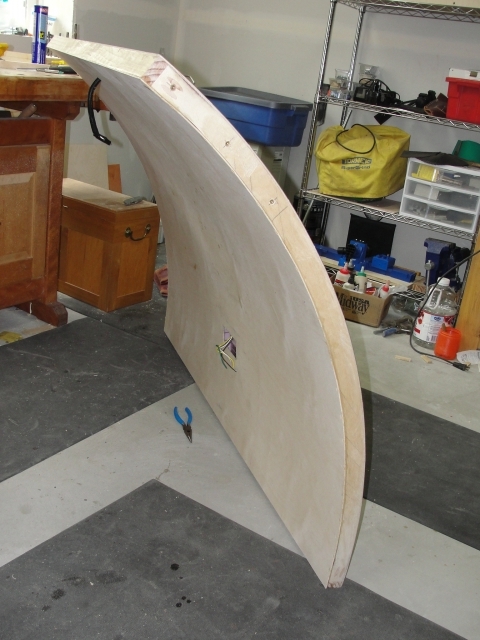
The license plate light and the dome light are back-to-back. This is convenient as I cut an access slot (covered by the dome light) for installation and any future repairs.
Image

Image

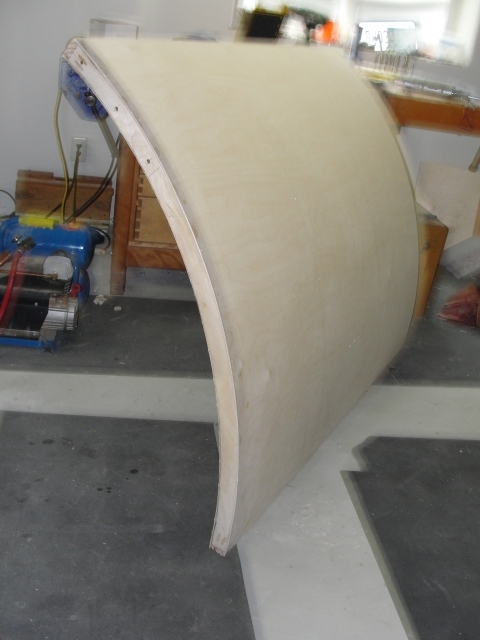
The lid stiffened up nice with the inside layer of skin applied. It appears to be straight (without twists.) Lid weight at this stage of construction is 30.3 pounds.

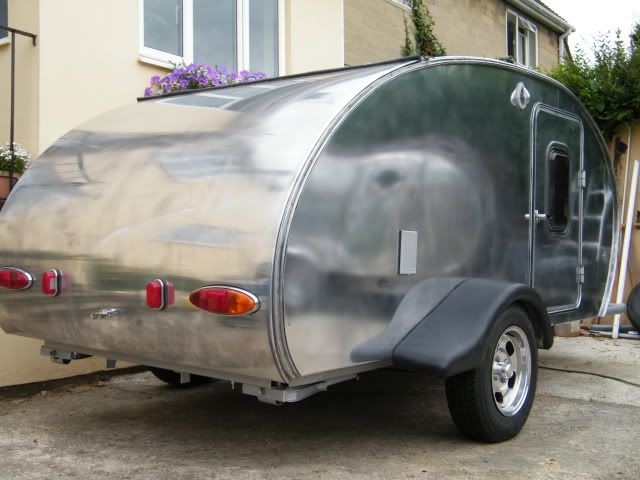
I'll let the glue set a bit before I apply CPES to the outer skin and varnish to the inner skin. I plan to build an angled box (similar to my fan base) in which to install the dome light so that it is pointed straight down when the lid is up. I'll apply the red aluminum and mill finish trim two days from now.
Last edited by Dusty Mark on Sat Jun 18, 2016 7:16 pm, edited 1 time in total.
Dusty Mark
Teardrop Master
 
Posts: 210
Images: 395
Joined: Mon Feb 29, 2016 6:57 pm
Top

Re: Dusty Mark's 5 x 10 Build

Postby KCStudly » Sat Jun 18, 2016 3:56 pm

Looking very nice, indeed! :thumbsup:
KC
My Build: The Poet Creek Express Hybrid Foamie

Poet Creek Or Bust
Engineering the TLAR way - "That Looks About Right"
TnTTT ORIGINAL 200A LANTERN CLUB = "The 200A Gang"
Green Lantern Corpsmen
User avatar
KCStudly
Donating Member
 
Posts: 9616
Images: 8169
Joined: Mon Feb 06, 2012 10:18 pm
Location: Southeastern CT, USA
Top

Re: Dusty Mark's 5 x 10 Build

Postby Dusty Mark » Sat Jun 18, 2016 5:55 pm

Thanks! The test will be if it rests tight enough to not need extra weatherstripping to prevent leaks... :thinking:
Dusty Mark
Teardrop Master
 
Posts: 210
Images: 395
Joined: Mon Feb 29, 2016 6:57 pm
Top

Re: Dusty Mark's 5 x 10 Build

Postby retep » Sun Jun 19, 2016 6:15 am

Your build is progressing very well. I am very grateful you are sharing all the details. It is looking incredible. Thanks Peter :)
retep
Teardrop Master
 
Posts: 106
Joined: Wed Mar 16, 2016 3:55 pm
Top

Re: Dusty Mark's 5 x 10 Build

Postby Dusty Mark » Sun Jun 19, 2016 12:25 pm

Thanks! It will be about 3 1/2 months from start to finish...not bad for an amateur builder. I wish that we'd come up with the idea a month sooner since this is starting to impact our summer activities. For instance, we haven't continued our trek north on the Superior Hiking Trail yet. I did this in a worse way last summer when I built and completely outfitted three layout duck hunting boats for my hunting crew. I need to get back to furniture building and stop these huge projects. :lol:
Dusty Mark
Teardrop Master
 
Posts: 210
Images: 395
Joined: Mon Feb 29, 2016 6:57 pm
Top

Re: Dusty Mark's 5 x 10 Build

Postby Vedette » Sun Jun 19, 2016 2:23 pm

Your build looks wonderful! :thumbsup:
Thanks for all of the pictures.
3 1/2 months is not long for all of the work you have done.
Wish my build only took that long??? :(
Good Roads
Brian & Sandi
Good Roads
Brian & Sandi
Here is a link to my Build Journal
viewtopic.php?f=50&t=50912
Image109106109111109110138766
User avatar
Vedette
Silver Donating Member
 
Posts: 5141
Images: 443
Joined: Thu Dec 01, 2011 4:28 am
Location: Westbank B.C.
Top

PreviousNext

Return to Build Journals

Who is online

Users browsing this forum: No registered users and 7 guests