2bits wrote:Tonight I cut the 2" x 3/8" rabbet out of the bottom of the 3/4" sides tonight.
Teardrops n Tiny Travel Trailersor t n ttt for short (tnttt.com) |
The LT... Thomas' Luxury Tent
![]() by Sparksalot » Sun Jun 22, 2008 10:33 am
by Sparksalot » Sun Jun 22, 2008 10:33 am
Thanks for that idea. I did the same thing yesterday.
Holy cow, Rose is a teenager now! Done? Surely you jest. A teardrop is never "done".
The Compass Rose build thread: viewtopic.php?t=23213
Inspiration: http://tnttt.com/Design_Library/Trailer%20for%20Two.htm
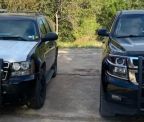
It's got a cop motor, a 5.3 LS plant, it's got cop tires, cop suspensions, cop shocks. ~ Elwood Blues
The Compass Rose build thread: viewtopic.php?t=23213
Inspiration: http://tnttt.com/Design_Library/Trailer%20for%20Two.htm
It's got a cop motor, a 5.3 LS plant, it's got cop tires, cop suspensions, cop shocks. ~ Elwood Blues
-
Sparksalot - Silver Donating Member
- Posts: 1624
- Images: 682
- Joined: Fri Feb 15, 2008 9:36 pm
- Location: Texas by God
![]() by 2bits » Sun Jun 22, 2008 2:36 pm
by 2bits » Sun Jun 22, 2008 2:36 pm
Thanks for the awesome comments guys, I was thinking about my next step and it is going to be the headliner! Wow, with alot of pre production, once constructions starts it really comes together fast!
I'll be cutting and gluing the headliner sections together per the benroy plans so I don't have to place double spars at each joint. Then stain and poly the other side throughout the week and we'll see when I can get it up. I plan on tacking it in with brads and titebond.
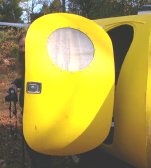
I am thinking I want a really wide sun roof that is directly above my head while I am laying down so I can lay back and see the stars. I was thinking about a car sun roof, but I don't know if I will be able to get one with clear glass. Research time!
I'll be cutting and gluing the headliner sections together per the benroy plans so I don't have to place double spars at each joint. Then stain and poly the other side throughout the week and we'll see when I can get it up. I plan on tacking it in with brads and titebond.
I am thinking I want a really wide sun roof that is directly above my head while I am laying down so I can lay back and see the stars. I was thinking about a car sun roof, but I don't know if I will be able to get one with clear glass. Research time!
Thomas

-

2bits - 2bit Member
- Posts: 5130
- Images: 8
- Joined: Thu Dec 27, 2007 6:04 pm
- Location: Lake Tawakoni, TX


 Love the color of your TD. Keep it up and you will be camping real soon.


 I will chime in here and say Thomas you have a very nice build going there (need a popcorn emoticon):pipe: I will continue to watch. Just do me a favor never park that trailer next to mine (cause it will make mine look terrible
  )
)