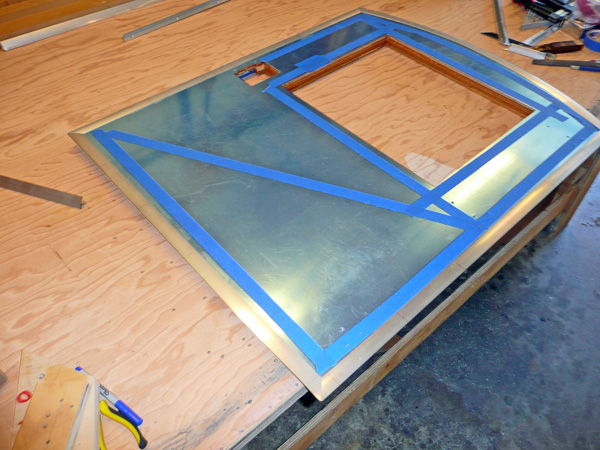
Silver Beatle - She's now with an old friend!

...ask your questions in the appropriate forums BUT document your build here...preferably in a single thread...dates for updates, are appreciated....

Postby S. Heisley » Tue Sep 21, 2010 12:31 am

Perfect doors?! The good fairy sprinkled good luck dust on you; you live right; and I'm jealous! :lol:

Seriously, ya done good. :thumbsup: :applause:
User avatar
S. Heisley
Super Lifetime Member
 
Posts: 8772
Images: 495
Joined: Mon Sep 17, 2007 10:02 am
Location: No. California

Postby aggie79 » Wed Sep 29, 2010 12:56 pm

:applause: Thank you again for keeping motivated with the nice comments.

Not much has happened on my build since the last update. I'm fortunate to not get sick very often - once every five years or so - but something took hold of me in the middle of September, and I missed two weekends of build time. By skipping the Loyd Park (rainfest) outing last weekend, I did get a few things done.

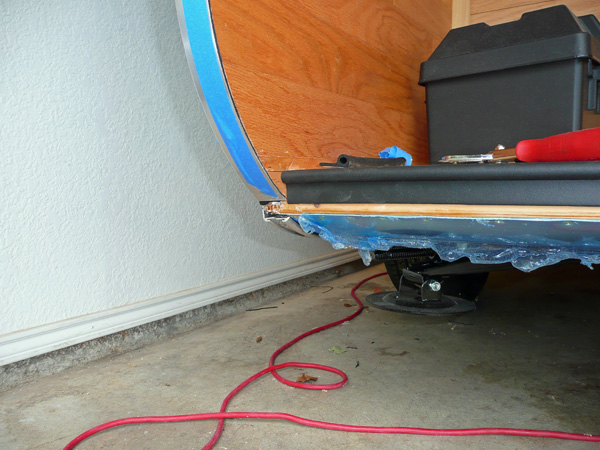
My mantra lately has been trim work, sealing, trim work, sealing, etc. Where my hatch abuts the lower edge of my galley floor, I installed "P" shaped weatherseal.
Image

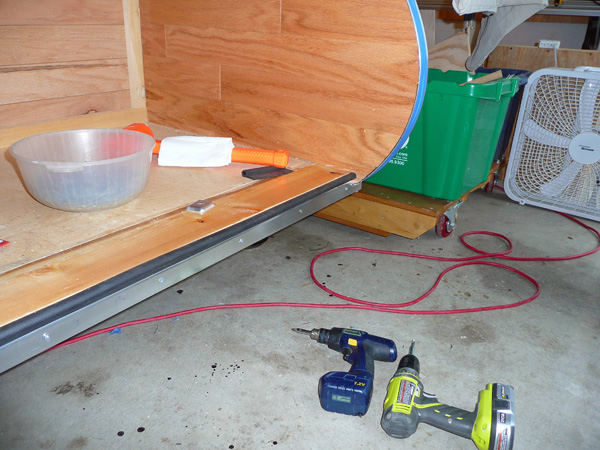
I then capped the lower leg of the seal with some aluminum trim to give it a finished look.
Image

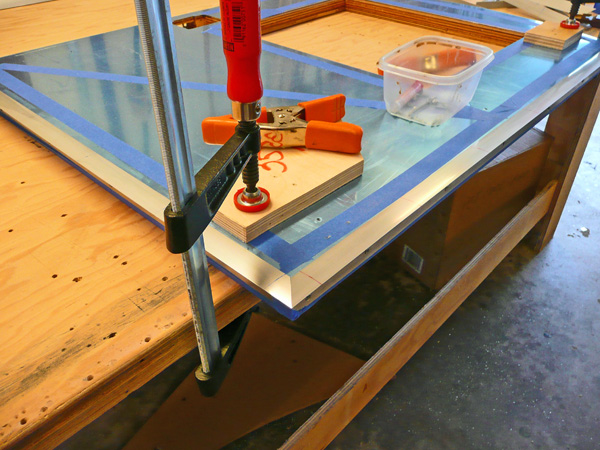
Then it was time to finish up the door trim. I'm using double seals at the doors - interior door surround and seal to for the inside weatherseal and t-molding and seal on the outside of the door for the outside weatherseal.

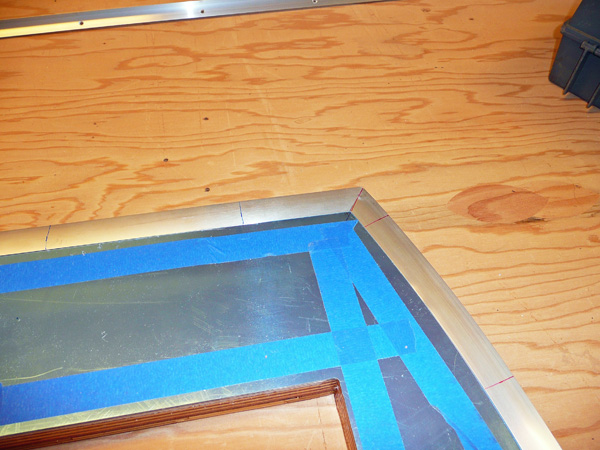
I was dreading trying to fit the t-molding, but the first and second pieces went on okay.
Image

The first cuts were simple 45-degree miters. After that it was time to figure out how to fit the miters where the arched top part of the door met the two vertical sides. After a lot of trial and error, inspired utterances, and teeth-knashing, I got it done.
Image

One door down - one more to go.

Image

If the pattern holds true on other parts of my build, the second door will take about 1/4 of the time the first one did.

:thumbsup: Gig'em, Tom
Last edited by aggie79 on Wed Sep 29, 2010 3:23 pm, edited 1 time in total.
Tom (& Linda)
For build info on our former Silver Beatle teardrop:
Build Thread

93503
User avatar
aggie79
Super Duper Lifetime Member
 
Posts: 5405
Images: 686
Joined: Tue Aug 07, 2007 5:42 pm
Location: Watauga, Texas

Postby planovet » Wed Sep 29, 2010 2:42 pm

Looking good Tom. Should be ready by LCG! :thumbsup:
ImageMark (& Cindi)
Visit our website: Little Swiss Teardrop

I was wondering why the water balloon was getting bigger... and then it hit me.

ImageImageImageImage
User avatar
planovet
The Cat Man
 
Posts: 5583
Images: 3
Joined: Tue Nov 27, 2007 4:48 pm
Location: Plano, Texas
Top

Postby Rlowell » Wed Sep 29, 2010 7:40 pm

:applause: :applause: Looking real good! Glad to see you back at er!
Rod
Plan your work...work your plan...at least that's the plan. Oh, just do it anyway!
gallery/image_page.php?album_id=1425&image_id=76342
User avatar
Rlowell
2000 Club
2000 Club
 
Posts: 2004
Images: 42
Joined: Wed May 23, 2007 12:39 pm
Location: Orlando, Fl.
Top

Postby Lookfar » Wed Sep 29, 2010 8:40 pm

Tom, I believe Mark is right. I'll be looking forward to pic's of the SB from LCG.
Butch
Image
User avatar
Lookfar
Donating Member
 
Posts: 225
Images: 22
Joined: Sun Jan 31, 2010 9:58 am
Location: Arkansas
Top

Postby 2bits » Wed Sep 29, 2010 11:45 pm

Nice progress Tom! My T molding trim went exactly like yours (and the second door went alot faster!

I am totally stealing the "P" Seal for the bottom of the hatch too! I've been using the stick on stuff with minimal success, thanks! You're teaching now buddy! Did you order it from somewhere or is it a box store item?
Thomas

Image
User avatar
2bits
2bit Member
 
Posts: 5130
Images: 8
Joined: Thu Dec 27, 2007 6:04 pm
Location: Lake Tawakoni, TX
Top

Postby jss06 » Thu Sep 30, 2010 11:19 am

Aswome work. I hope my body looks that nice when its done.
User avatar
jss06
Palladium Donating Member
 
Posts: 663
Joined: Mon May 12, 2008 7:48 pm
Location: Carrollton, TX
Top

Postby aggie79 » Sat Oct 02, 2010 9:03 pm

Thanks everyone.

Today I finished fitting the t-molding on the second door. I then removed the trim from both doors, applied sealant, and reinstalled the trim.

Next up were the fenders. They had been painted, but I wanted to apply undercoating on the bottom side. I masked off the fenders and then sprayed the rubberized undercoating.

Image

By then it was late afternoon. Thomas (2-bits) came by to check on my progress and help motivate me to get this thing done. :beer:

After some contemplation, we decided to pull off the protective plastic on the aluminum at the front of the teardrop to get an idea what it's going to look like.

Image

:thumbsup: I'm happy with the way it looks. Thanks for coming by Thomas!
Last edited by aggie79 on Mon Oct 11, 2010 5:39 pm, edited 1 time in total.
Tom (& Linda)
For build info on our former Silver Beatle teardrop:
Build Thread

93503
User avatar
aggie79
Super Duper Lifetime Member
 
Posts: 5405
Images: 686
Joined: Tue Aug 07, 2007 5:42 pm
Location: Watauga, Texas
Top

Postby S. Heisley » Sat Oct 02, 2010 9:29 pm

Yay, Thomas 2bits! It looks good, Tom! :thumbsup:
User avatar
S. Heisley
Super Lifetime Member
 
Posts: 8772
Images: 495
Joined: Mon Sep 17, 2007 10:02 am
Location: No. California
Top

Postby 2bits » Sun Oct 03, 2010 12:11 am

It was good to hang out with you again Tom! I just HAD to see what it would look like with some of that protect-o-sheet pulled off and I was only there for a little while! I don't know how you held out so long! haha It looks REALLY good and this weather is a great motivator too eh!! Thanks for the goodies too!

Oh here is a pic of the hasp I installed as "insurance" to keep my hatch closed that we talked about. I had to look around to find one with enough reach since the part that screws into the underside sticks out a quarter of an inch. You might not have that problem since yours sits closer. It's not a shin knocker either.

Image

Oh and not to thread jack, but my floor AC exhaust hole stayed totally dry while driving up to Loyd park in the rain the other day, so that was cool for me. I just saw it in the pic and thought I'd say something... back to the beetle ;)
Thomas

Image
User avatar
2bits
2bit Member
 
Posts: 5130
Images: 8
Joined: Thu Dec 27, 2007 6:04 pm
Location: Lake Tawakoni, TX
Top

Postby Lookfar » Tue Oct 12, 2010 4:41 pm

Bump... How's progress Tom?
Butch
Image
User avatar
Lookfar
Donating Member
 
Posts: 225
Images: 22
Joined: Sun Jan 31, 2010 9:58 am
Location: Arkansas
Top

Postby aggie79 » Tue Oct 12, 2010 5:23 pm

Lookfar wrote:Bump... How's progress Tom?


Hi Butch,
How's your build going?

:NC For me, it's been s...l...o...w going.
After Thomas came by, life seemed to intervene. My wife and I did take this past Saturday off to see the Rangers versus Rays ALDS baseball game. (The outcome wasn't so hot, but the weather was gorgeous, the energy in the stadium was incredible and the traffic wasn't too bad. We had a great time overall.)

I did work on my trailer lighting - it's almost done - and I have finished almost all of the aluminum trim work which has taken way longer than I thought. Although it seems to be fading fast, LCG is still my goal.

Take care,
Tom
Tom (& Linda)
For build info on our former Silver Beatle teardrop:
Build Thread

93503
User avatar
aggie79
Super Duper Lifetime Member
 
Posts: 5405
Images: 686
Joined: Tue Aug 07, 2007 5:42 pm
Location: Watauga, Texas
Top

Postby Lookfar » Tue Oct 12, 2010 5:59 pm

Mine is coming along, though I've taken about a week off to help my brother rennovate his bathroom. A worthwhile project; my sister in law is happy.
I'm feeling more/less confident that I'll be campable by month end, but that might be a stretch. If so, I'll toast all of you at LCGV and probably wish I hadn't cancelled my reservation.
You are doing such a nice job with the SB, I don't know that I should be allowed in the same campground anyway.
Oh yeah, I grew up in Tampa, so I'll pass on the comments on the game. Too bad they can't come up with a football team.
Butch
Image
User avatar
Lookfar
Donating Member
 
Posts: 225
Images: 22
Joined: Sun Jan 31, 2010 9:58 am
Location: Arkansas
Top

Postby starleen2 » Wed Oct 13, 2010 7:14 am

Image

NICE! :thumbsup:
User avatar
starleen2
5th Teardrop Club
 
Posts: 16272
Images: 224
Joined: Sat May 12, 2007 8:26 pm
Location: Pea Ridge ,AR
Top

Postby aggie79 » Wed Oct 13, 2010 6:54 pm

I'm still making the push to be campable by LCG V even though the date is fast approaching. Can't make the trip without trailer lighting, so I started my electrical work. Previously, I had installed conduit below the teardrop from the front bulkhead to the galley. So, I started pulling wires, and pulling wires, and...

Image

I've not had good luck with trailer wiring in the past, so I am going overkill on the teardrop trailer wiring. A separate power and ground is run to each light. All the trailer lighting "meets up" at the galley bulkhead. I'm using terminal blocks for each leg of the trailer wiring.

Image

Next up, it was time to start drilling holes for the trailer lighting.

Image

I finished the side marker lights at the front and the rear tailights.

Image

Image

Once I get the clearance lights and rear side marker lights installed, I'll try everything to see if it works.

:thumbsup: Gig'em!
Tom (& Linda)
For build info on our former Silver Beatle teardrop:
Build Thread

93503
User avatar
aggie79
Super Duper Lifetime Member
 
Posts: 5405
Images: 686
Joined: Tue Aug 07, 2007 5:42 pm
Location: Watauga, Texas
Top

PreviousNext

Return to Build Journals

Who is online

Users browsing this forum: No registered users and 11 guests