MyAway build - Updates for space usage & organization

...ask your questions in the appropriate forums BUT document your build here...preferably in a single thread...dates for updates, are appreciated....

Postby 2bits » Fri Sep 18, 2009 10:01 pm

I did my entire interior headliner with 3 coats of waterbased poly out on my patio in the spring. I got a few buggies but not bad at all, I think it has alot to do with the time of day when they are out too...

Image
Thomas

Image
User avatar
2bits
2bit Member
 
Posts: 5130
Images: 8
Joined: Thu Dec 27, 2007 6:04 pm
Location: Lake Tawakoni, TX

Postby S. Heisley » Sun Sep 20, 2009 9:03 am

Thanks for the encouragement, everyone. Just by your words, you make this building thing a little easier.
User avatar
S. Heisley
Super Lifetime Member
 
Posts: 8774
Images: 495
Joined: Mon Sep 17, 2007 10:02 am
Location: No. California

Postby S. Heisley » Mon Sep 21, 2009 10:44 pm

The lady at RV supply store had suggested that I purchase only lights that could be attached flush with the ceiling. That was good advice; but, I was so dazzled with this one set of lights that what she said didn’t even register in my mind and I ordered them anyway. :o

These lights require holes to be made in my newly attached ceiling skin to accommodate them. I thought about making platform boxes for them but didn’t think it would look right and it might have caused some performance issues. So, I decided that, if I was going to cut the ceiling plywood, I might as well do it now, before coating it with urethane. That way, if I goofed, I wouldn’t have wasted urethane or as much effort. Talk about being a chicken! :chicken: It took me two days to think about how I would do it and to get up the nerve to make the cuts! I cut only as much as was necessary to allow about 1/8’ space between the area where the wires are and the plywood. However, I have wood boxes built into the ceiling framework so that the lights will have their own dedicated space.

Image

All the ceiling lights have been cut in and fitted. The little single in the corner is for the middle-of-the-night porta-potty.

Image
User avatar
S. Heisley
Super Lifetime Member
 
Posts: 8774
Images: 495
Joined: Mon Sep 17, 2007 10:02 am
Location: No. California
Top

Postby 2bits » Mon Sep 21, 2009 11:21 pm

I have VERY similar lights in mine, I love the look of these lights. As long as you have the board lined up for the screws to sink in to and you don't cut the hole dramatically too big, it's easy as pie. Easy to say once it's done eh! I think you are smart for taking the time to think about things, More than once, I have thanked myself for thinking about things for days on end. Sometimes that nagging feeling is right, and you discover what could have been a fatal error! But you know what, many times I have done this and still over looked something, especially when you get deeper into the build and you find that you have made an error that completely invalidates your plans... So what do you do? change your plans, think on your toes and invent, create, accommodate, and just like writing a song, sometimes and error will lead you to a different way of thinking that in the beginning is just a compensation, but in the end you like better than the original plan! (I screwed up my headliner cutting my moonroof hole, but now I get to make a really cool cover for it). So think hard and expect the errors, you will find ways to fix em that you like like better
:)
Thomas

Image
User avatar
2bits
2bit Member
 
Posts: 5130
Images: 8
Joined: Thu Dec 27, 2007 6:04 pm
Location: Lake Tawakoni, TX
Top

Postby S. Heisley » Tue Sep 22, 2009 12:25 am

That's good advice, Thomas. Thanks! :)
User avatar
S. Heisley
Super Lifetime Member
 
Posts: 8774
Images: 495
Joined: Mon Sep 17, 2007 10:02 am
Location: No. California
Top

Postby Minicamper42 » Sat Sep 26, 2009 2:00 am

What a great inspiring build you have Sharon...I too am using the Compact 3 as my reference to build a compact trailer...I call mine the Mini 4-2...I like what you did with the front section, I think one curved surface looks better then 3 straight pieces...unlike your build I'm going out on a limb and going with only foam and panels...I am basically going to build the shell and do all my wiring and then panel the inside...I'm hoping it will work out :worship: as I am trying to save on build time, of course my process will require interior structural support integrated to support the whole structure when it is finished...I am very enthused with your build and look forward to seeing many more pictures.

Keep up the good work!!
I wish I had a million bucks
Minicamper42
Teardrop Builder
 
Posts: 33
Joined: Wed Sep 23, 2009 10:54 pm
Location: Chaparral NM
Top

Postby robertaw » Sat Sep 26, 2009 10:15 am

:thumbsup: Those lights look sharp! Glad you got brave and went for it.
Roberta
User avatar
robertaw
500 Club
 
Posts: 523
Images: 56
Joined: Mon Jul 13, 2009 3:02 pm
Location: Lake City, Florida
Top

Postby Juneaudave » Sat Sep 26, 2009 12:36 pm

Sharon...do you know what brand those lights are? I'm looking for something similar....Dave
User avatar
Juneaudave
Super Duper Lifetime Member
 
Posts: 3237
Images: 380
Joined: Sun Jul 03, 2005 12:11 pm
Location: Juneau, Alaska
Top

Postby Minicamper42 » Sat Sep 26, 2009 1:43 pm

Another useful light that can be used are the under counter puck lights...they are about 2 3/4" in diameter and use a really nice touch pad with 3 light level settings...these lights I used on a limo build, the only disadvantage is they require a inverter or a converter to work...they use a tiny haligon bulb that puts out really good light...costs only $35 bucks for six lights.
I wish I had a million bucks
Minicamper42
Teardrop Builder
 
Posts: 33
Joined: Wed Sep 23, 2009 10:54 pm
Location: Chaparral NM
Top

Postby TinKicker » Sat Sep 26, 2009 3:15 pm

Sharon, I just caught your build and GREAT JOB!!! I've been off the forum for awhile while repairing some storm damage and improving my garage, and I've missed a LOT. Very nice, and looking forward to more... :thumbsup:
Kelsey
__________
Go ahead and get your project started because it's just like having kids...if you wait to start until you're skilled enough or rich enough, you'll never do it. And just look at what you'd miss!
__________
In planning any project you've never attempted before, always allow for the three three's: It will take you three times longer, three times more material, and three times more money than you thought.
User avatar
TinKicker
Teardrop Master
 
Posts: 228
Images: 11
Joined: Sun Mar 16, 2008 9:26 pm
Location: Jasper, Alabama
Top

Postby S. Heisley » Sat Sep 26, 2009 8:54 pm

Wow! :o I didn’t expect all these responses! Minicamper, Roberta, Dave, and Kelsey, thanks to all of you for your encouragement and compliments. :D

JuneauDave: The lights are made by Gustafson Lighting
Single: #55-9544, AM4019
Double: #55-0128, AM4040

Minicamper42: I can hardly wait to see your Mini 4-2! If you’re using thicker plywood than me, you’ll probably be okay with foam and panels. When I started my build, I chose a thin sandwich wall with stick frame because it is supposed to weigh the least and I needed to watch my trailer weight (still do!). But, I’m not totally convinced that the stick/thin wall construction is lightest. (However, I do tend to overbuild…and then try to trim out the excess later.) If our builds are similar, it’ll be interesting to see what our two builds come in at in pounds per square foot.

TinKicker: Welcome back! Sorry to hear you had storm damage. :( Those darn gremlins are causing trouble everywhere! :lol:
User avatar
S. Heisley
Super Lifetime Member
 
Posts: 8774
Images: 495
Joined: Mon Sep 17, 2007 10:02 am
Location: No. California
Top

Postby Minicamper42 » Sun Sep 27, 2009 10:53 am

Sharon, I have the same habit of over building as well...my build does seem complicated as it seems simple to do...I will need to plan on having wood in areas that will require fasteners and connection points...anyway, I don't want to hijack your thread with my build so I will come back often looking for more pics.

Mini :thumbsup:
I wish I had a million bucks
Minicamper42
Teardrop Builder
 
Posts: 33
Joined: Wed Sep 23, 2009 10:54 pm
Location: Chaparral NM
Top

Postby S. Heisley » Wed Oct 07, 2009 9:11 pm

Prem wanted to see some progress. So, here ya go, Prem. :D My neighbor came over and helped me lift the side walls up on the deck. I did this last week:

Image

The walls are presently held together by one screw on each side, front and back, and a couple cleats. I use the drywall square to ensure they are perpendicular to the floor. Anything else is just temporary support.

I won't get anything done this week as I'm doggy-sitting a very active large dog until next Monday...don't want to use chemicals or tools around her and she follows me everywhere...doesn't want to be left alone. So, that's it for now!
User avatar
S. Heisley
Super Lifetime Member
 
Posts: 8774
Images: 495
Joined: Mon Sep 17, 2007 10:02 am
Location: No. California
Top

Postby Steve_Cox » Thu Oct 08, 2009 6:02 am

Oh Sharon,

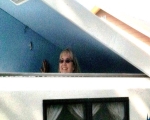
This must have been a proud moment when you took this picture. The plan is coming together! :thumbsup:
Image :thumbsup:
Steve
User avatar
Steve_Cox
4000 Club
4000 Club
 
Posts: 4903
Images: 196
Joined: Sun Apr 03, 2005 8:46 am
Location: Albuquerque New Mexico
Top

Postby aggie79 » Thu Oct 08, 2009 8:27 am

:applause: :thumbsup: :applause:

Congrats Sharon on the wall-raising!

It had to be a good feeling to see all your pre-assembly work coming together. Now you can visualize camping in your TTT.

Tom
Last edited by aggie79 on Sat Oct 10, 2009 9:46 pm, edited 1 time in total.
Tom (& Linda)
For build info on our former Silver Beatle teardrop:
Build Thread

93503
User avatar
aggie79
Super Duper Lifetime Member
 
Posts: 5405
Images: 686
Joined: Tue Aug 07, 2007 5:42 pm
Location: Watauga, Texas
Top

PreviousNext

Return to Build Journals

Who is online

Users browsing this forum: No registered users and 48 guests