Wanderlust Build Thread - Updates after two years!

...ask your questions in the appropriate forums BUT document your build here...preferably in a single thread...dates for updates, are appreciated....

Postby parnold » Sun Mar 28, 2010 10:38 am

That picture window is going to be awesome!! I'm not gonna lie.... I'm jealous!


36.00 on ebay! I still can't believe the deal I got on the windows and hatches.


I just picked up this "First-Up" from Wally World for 97.00.

Image

I don't know if you can see it in this picture, but the top is vented.

Image

My tarp leaks, and we're expecting rain so I put it up over my build. The frame is heavy, and it feels like it will last for years if it isn't blown away. I have it well anchored on all four corners.
User avatar
parnold
Donating Member
 
Posts: 2344
Images: 302
Joined: Mon Feb 08, 2010 4:49 pm
Location: Northwest New Jersey

Postby absolutsnwbrdr » Sun Mar 28, 2010 10:41 am

Tell you what Paul - Wallyworld camping gear is pretty inexpensive but it still seems to last a long while! I have tents from there that are probably going on 7 or 8 seasons with minimal wear! I'll probably be getting one of these First-ups too! Let me know how you like it in a few weeks!
Zach
Coming Soon...
Image Image
User avatar
absolutsnwbrdr
Donating Member
 
Posts: 2657
Images: 412
Joined: Mon Jan 25, 2010 6:10 pm
Location: Hanover, PA

Postby parnold » Sun Mar 28, 2010 10:54 am

One other side note on the First-Up. I had my son help, but it is doable with only one person, you just have to walk around it and stretch out the frame a little at a time. You would have to put it up where you want it though, I don't think one person could safely move it. I'd be afraid of the frame twisting if I tried to move it by myself.

As you can see, the tear can be easily moved under the canopy once it is up. The legs have three height adjustment, and I have mine set on the lowest setting, without running back outside, I think the other two are at 6 inch intervals. I'm 5'9" and at the lowest setting, I barely ducked to get under it.
User avatar
parnold
Donating Member
 
Posts: 2344
Images: 302
Joined: Mon Feb 08, 2010 4:49 pm
Location: Northwest New Jersey
Top

Postby parnold » Sat Apr 03, 2010 5:13 pm

Today the weather was perfect, and I had a helper.. got quite a bit done.

Started putting the skin on.....
Image

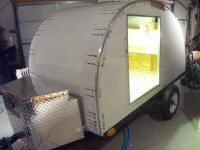
The front curve went very well, I had actually had the panel strapped all night long so it had a pre curve to it. I had a little more trouble with the back panel, since the radius was much smaller, had to use the old "hot" towel trick.
Image

I had the same small radius above the hatch opening, so soaked the towel again...
Image

Some of the very outer layer was damaged, but the panel did not split, I was able to sand this off and make it relatively smooth.
Image

And the first coat of polyester resin applied.
Image

the back view.....
Image

Tomorrow before Easter dinner I will get out the body filler and fill the screw holes and imperfections. I decided that the body filler would adhere better to the polyester resin than the wood. Then a light sanding and 2nd coat of resin. I almost wish I didn't have to go to the family gathering tomorrow.
User avatar
parnold
Donating Member
 
Posts: 2344
Images: 302
Joined: Mon Feb 08, 2010 4:49 pm
Location: Northwest New Jersey
Top

Postby John T. Hodgen » Sat Apr 03, 2010 6:56 pm

Paul..that's looking great :thumbsup: I think on my next one instead of the cheap luan, I'll go with the subfloor luan, the kind with the pattern on the back. I believe its alittle thicker and better quality. :thinking: I have a few issues with some delaminating but I'll try to fix that. Moisture and luan just seems to cause problems. I can't wait to see those windows and hatch cover in!! :applause:
Til later by the fire--John T & Linda 8)
User avatar
John T. Hodgen
The 300 Club
 
Posts: 415
Images: 8
Joined: Thu Jul 24, 2008 5:50 am
Location: Summersville, West Virginia
Top

Postby Miriam C. » Sat Apr 03, 2010 8:21 pm

:thumbsup: :applause: :applause: Good job! I think you might be camping soon! :thumbsup:

Image
“Forgiveness means giving up all hope for a better past.â€
User avatar
Miriam C.
our Aunti M
 
Posts: 19675
Images: 148
Joined: Wed Feb 15, 2006 3:14 pm
Location: Southwest MO
Top

Postby Rlowell » Sun Apr 04, 2010 4:05 am

:thumbsup: :thumbsup: Paul, You are coming right along!!!! Thanks for sharing your build with us. We look forward to further results...Great job.
Rod

P.S. Happy Easter Everyone. :applause: :applause:
Plan your work...work your plan...at least that's the plan. Oh, just do it anyway!
gallery/image_page.php?album_id=1425&image_id=76342
User avatar
Rlowell
2000 Club
2000 Club
 
Posts: 2004
Images: 42
Joined: Wed May 23, 2007 12:39 pm
Location: Orlando, Fl.
Top

Postby DasBaldGuy » Sun Apr 04, 2010 12:51 pm

parnold wrote:...And the first coat of polyester resin applied...


Nice (and fast) work! I'll be watching this one for updates on the PolyResin. I too plan to do the entire exterior surface of mine in Poly Resin.

Rock on!

:thumbsup:
User avatar
DasBaldGuy
Donating Member
 
Posts: 115
Joined: Wed Sep 02, 2009 10:12 pm
Location: Central Ohio
Top

Postby parnold » Sun Apr 04, 2010 6:59 pm

I spent 7 hours today working on the tear, about 2 applying body filler to fill all the screw holes, 5 hours of sanding, sanding, sanding, sanding......

Image

by the way.. sanding is not fun!

After the sanding about another hour putting on second coat of polyester resin. I'm using a 4" foam roller so it lays with a somewhat eggshell finish.

Image

I will give the entire tear another light sanding, hopefully tomorrow, and one or two more coats of resin. The can says you can put it on up to 1/4" thick. That would be about 10 coats or more using a roller. It's taking me two batches of resin to do the whole trailer. The resin starts setting up before I can do the whole thing.

Luckily, I have a painters scale, so I'm able to measure the ratio (2%) with extreme accuracy.

I can almost smell the first campfire! (or is that my neighbor's wood burner?)
User avatar
parnold
Donating Member
 
Posts: 2344
Images: 302
Joined: Mon Feb 08, 2010 4:49 pm
Location: Northwest New Jersey
Top

Postby parnold » Sun Apr 04, 2010 7:03 pm

By the way, I really would like to thank everyone for the words of encouragement, and all the compliments! It really helps to keep the enthusiasm up!!!!!!

:D
User avatar
parnold
Donating Member
 
Posts: 2344
Images: 302
Joined: Mon Feb 08, 2010 4:49 pm
Location: Northwest New Jersey
Top

Postby Ageless » Sun Apr 04, 2010 7:05 pm

Parnold; put the resin in the fridge. It will take longer to set-up
Strangers on this road we are on; we are not two, we are one - Raymond Douglas Davies
User avatar
Ageless
Platinum Donating Member
 
Posts: 1603
Images: 8
Joined: Tue Aug 04, 2009 8:34 am
Location: Pt. Orchard, WA
Top

Postby John T. Hodgen » Sun Apr 04, 2010 8:06 pm

Sooooo Paul,
Looking great :applause: :thumbsup: With all the work that you did today was you still able to get in the family gathering? I like how its coming along!!!
Til later by the fire--John T. & Linda 8)
User avatar
John T. Hodgen
The 300 Club
 
Posts: 415
Images: 8
Joined: Thu Jul 24, 2008 5:50 am
Location: Summersville, West Virginia
Top

Postby parnold » Sun Apr 04, 2010 9:02 pm

With all the work that you did today was you still able to get in the family gathering?


I spent a very nice afternoon at my brother's home. Got to see all the little kiddies (my brother and sister are both grandparents), and even used my brother's computer to log into mikenchell.com to show off my build... :)
User avatar
parnold
Donating Member
 
Posts: 2344
Images: 302
Joined: Mon Feb 08, 2010 4:49 pm
Location: Northwest New Jersey
Top

Postby Rlowell » Mon Apr 05, 2010 7:45 am

parnold wrote:
With all the work that you did today was you still able to get in the family gathering?


I spent a very nice afternoon at my brother's home. Got to see all the little kiddies (my brother and sister are both grandparents), and even used my brother's computer to log into mikenchell.com to show off my build... :)

Keep up the good work there Paul! :applause: :applause: :applause:
Looking real good from the "O" town :thumbsup: :thumbsup:
Rod
Plan your work...work your plan...at least that's the plan. Oh, just do it anyway!
gallery/image_page.php?album_id=1425&image_id=76342
User avatar
Rlowell
2000 Club
2000 Club
 
Posts: 2004
Images: 42
Joined: Wed May 23, 2007 12:39 pm
Location: Orlando, Fl.
Top

Postby absolutsnwbrdr » Tue Apr 06, 2010 1:18 pm

Looks like its a race to the finish for us Paul! Its really looking great! I'm getting almost excited to see yours finished as I am my own!
Zach
Coming Soon...
Image Image
User avatar
absolutsnwbrdr
Donating Member
 
Posts: 2657
Images: 412
Joined: Mon Jan 25, 2010 6:10 pm
Location: Hanover, PA
Top

PreviousNext

Return to Build Journals

Who is online

Users browsing this forum: No registered users and 15 guests