the "Simmons Hide-a Bed"updated 9/26/11 pg. 3

...ask your questions in the appropriate forums BUT document your build here...preferably in a single thread...dates for updates, are appreciated....

Postby David S » Wed Aug 03, 2011 3:23 pm

Thanks Tom,Id like to be ready by September but as you know all too well this heat is really getting me down.All of the work I've had the last 3 weeks was outside so when I get home, working in a hot shop is not much fun.
User avatar
David S
Donating Member
 
Posts: 218
Images: 53
Joined: Wed Aug 05, 2009 9:18 pm
Location: Rose Hill Kansas

Postby kentucky bryan » Wed Aug 03, 2011 4:31 pm

Great Looking Teardrop. :thumbsup: :thumbsup:

All that polishing would drive me crazy.

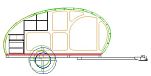
Is your side cut from a single 4x8? Some how it has the look of being longer.

Try and keep cool :icedtea:

Bryan
Seems like as soon as we got done paying for the "Sins of Our Youth" , We needed to start saving for our retirement.

My Build at:http://www.tnttt.com/viewtopic.php?t=45264
User avatar
kentucky bryan
Teardrop Inspector
 
Posts: 24
Joined: Sun Jun 26, 2011 11:09 am
Location: Lexington, Kentucky

Postby David S » Wed Aug 03, 2011 5:27 pm

Thanks Bryan, it's a 5x10 the joint in the ply sides is at the front edges of the entry doors.the top pc of walnut covers most of the top.there will be a bottom pc of walnut and the door trim will cover the rest.I biscut jointed it and kregg screwed where they wouldn't be seen.
User avatar
David S
Donating Member
 
Posts: 218
Images: 53
Joined: Wed Aug 05, 2009 9:18 pm
Location: Rose Hill Kansas
Top

Postby gunn » Wed Aug 03, 2011 6:40 pm

this is looking fantastic :applause: and i like the lift on the rear idea.
i will be watching this build also.
gunn
Teardrop Inspector
 
Posts: 5
Joined: Wed Jul 27, 2011 7:42 pm
Location: GA
Top

Postby Woodstramp » Mon Aug 08, 2011 12:20 pm

If I was a professional cabinet maker, like you are, I'd put an understated company logo on that pretty thing. Kind of a rolling billboard.

Folks would see that thing and think "If that guy can make a camper that nice....I wonder what he could do with some cabinets?"

Might even eventually morph your logo to "Simmons Cabinets and Campers". :)
User avatar
Woodstramp
The 300 Club
 
Posts: 438
Joined: Fri Nov 20, 2009 9:28 pm
Location: Aladambama
Top

Postby David S » Sat Sep 24, 2011 8:42 pm

I have gotten quite a bit done the last few weeks but havn't had time to post any pic's.
I srayed and sanded the exterior with 6 coats spar polyurathane.
Got the fenders painted and mounted,Model A tail lights mounted and wired.
Water heater installed along with all the plumbing work.
Installed the rock gaurds and all the exterior edge trim.
Installed all the interior and the exterior porch lights.
Installed the Am Fm mp3 cd stereo and speakers
Installed the battery and wiring to it.
so much done but alot to do yet.I really hoped to use it at least once this year but I'm not sure I will beat the cold.
Image
Head board cabinet installed
Image
Stereo installed
Image
Fantasic Fan installed
Image
I'm not sure if anybody else dose this,but I used some aluminum tape with a sticky butyl backing on all my corners and joint ie. rock gaurd etc.I get it when I buy windows from Pella but Lowes has it with out the logo and in smaller rolls
Image
Fenders and tail lights installed
Image
Rear rock gaurd and moldings installed
Image
Front rock gaurd,battery deck and battery installed
Image
I had to temporary a door mounting to see how it looked.The next project is getting the doors mounted and some trim for the windows fabicated and finished. :hammer:
Image
OH! and since I didn't have enough to do already I found this on craigs list for cheap 13 1/2 '.My next build will probally be a TT so I"ll have a good frame with electric brakes,windows,water and holding tanks,some appliances (frige is shot)and whatever else I can salvage.I thought about rebuilding but the ceiling.floor and corners have extensive water damage.I couldn't even buy an axel and springs much less the steel for a frame for what I paid for it.
User avatar
David S
Donating Member
 
Posts: 218
Images: 53
Joined: Wed Aug 05, 2009 9:18 pm
Location: Rose Hill Kansas
Top

Postby droid_ca » Sat Sep 24, 2011 8:43 pm

Wow your trailer is looking GOOD
There is a world, just beyond now,
where reality runs a razor thin seam between fact and possibility;

Anywhere I roam where I lay my head is home....
Image
“Fide Canem”
Please check out my build thread
viewtopic.php?f=5&t=52816
User avatar
droid_ca
Donating Member
 
Posts: 1981
Images: 176
Joined: Thu Sep 30, 2010 5:08 am
Location: Prince George BC Canada
Top

Postby David S » Sat Sep 24, 2011 8:48 pm

Thanks,droid_ca
User avatar
David S
Donating Member
 
Posts: 218
Images: 53
Joined: Wed Aug 05, 2009 9:18 pm
Location: Rose Hill Kansas
Top

Postby Wolffarmer » Sat Sep 24, 2011 9:24 pm

When you tare that trailer down you may be surprised how little steel there really is in the frame.

Great looking teardrop

Randy
"these guys must be afraid of the dark"
User avatar
Wolffarmer
Donating Member
 
Posts: 4612
Images: 309
Joined: Wed May 02, 2007 1:32 pm
Location: Idaho Rupert
Top

Postby David S » Sat Sep 24, 2011 9:45 pm

Thanks Wolffarmer,The frame is exposed underneath,2"x 4" from tounge to back on the sides with a 4"x4" bumper on the back then it has the usual wedge shaped out riggers going out from the frame to the outside walls.it also has cross bracing between the main frame in several spots.
Gladding Del Ray built a good stout trailer although like others were heavy because of all the particle board.The step actually has a steel frame supporting it unlike trailers I,ve worked on in the past that were just bolted through the floor,If this one had been made like,that the shape the floor is in the step would have been long gone. :lol:
User avatar
David S
Donating Member
 
Posts: 218
Images: 53
Joined: Wed Aug 05, 2009 9:18 pm
Location: Rose Hill Kansas
Top

Postby David S » Mon Sep 26, 2011 9:27 am

Got a little more done yesterday.Installed the doors and the door handle/locks
Image
No that air matress is not my bed,the queen size memory foam is in there but I'm not going to cut the bag open till I get the windows in which is the next thing on the to do list.
Image
User avatar
David S
Donating Member
 
Posts: 218
Images: 53
Joined: Wed Aug 05, 2009 9:18 pm
Location: Rose Hill Kansas
Top

Postby Jpageau » Mon Sep 26, 2011 10:29 am

Wow!!!!!! :applause: nice!! Very nice!!!
User avatar
Jpageau
Teardrop Advisor
 
Posts: 75
Joined: Tue Sep 20, 2011 11:05 am
Location: Wakefield nh
Top

Postby David S » Mon Sep 26, 2011 10:50 am

:) Thanks,Jpageau
User avatar
David S
Donating Member
 
Posts: 218
Images: 53
Joined: Wed Aug 05, 2009 9:18 pm
Location: Rose Hill Kansas
Top

Postby Jpageau » Mon Sep 26, 2011 12:30 pm

Of course! The walut is really stunning!
User avatar
Jpageau
Teardrop Advisor
 
Posts: 75
Joined: Tue Sep 20, 2011 11:05 am
Location: Wakefield nh
Top

Postby David S » Mon Sep 26, 2011 1:31 pm

Jpageau wrote:Of course! The walut is really stunning!

I probally wouldn't have used the walnut but I had some left off a 20' conference table I built a while back.I'm thinking about mixing walnut and some cherry on the cabinet doors.I like the looks of contrasting wood.
Image
Last edited by David S on Mon Sep 26, 2011 8:50 pm, edited 1 time in total.
User avatar
David S
Donating Member
 
Posts: 218
Images: 53
Joined: Wed Aug 05, 2009 9:18 pm
Location: Rose Hill Kansas
Top

PreviousNext

Return to Build Journals

Who is online

Users browsing this forum: No registered users and 12 guests