The Dog House *It's done!!!! 6/20/2015"

...ask your questions in the appropriate forums BUT document your build here...preferably in a single thread...dates for updates, are appreciated....

Postby Juneaudave » Sun Oct 03, 2010 3:49 pm

:thumbsup: Looks good! :thumbsup:
User avatar
Juneaudave
Super Duper Lifetime Member
 
Posts: 3237
Images: 380
Joined: Sun Jul 03, 2005 12:11 pm
Location: Juneau, Alaska

Postby jss06 » Wed Oct 06, 2010 1:45 pm

Now that I have almost finished my frame. It's time to start thinking about the body.

I put a boring meeting to good use today. :D I think this is how I am going to do my walls. I work better in free hand than I do in CAD.

Image
Last edited by jss06 on Tue Jun 16, 2015 9:21 pm, edited 1 time in total.
User avatar
jss06
Palladium Donating Member
 
Posts: 663
Joined: Mon May 12, 2008 7:48 pm
Location: Carrollton, TX

Postby aggie79 » Wed Oct 06, 2010 4:25 pm

John,

Your trailer looks outstanding. You are really on a roll.

Tom
Tom (& Linda)
For build info on our former Silver Beatle teardrop:
Build Thread

93503
User avatar
aggie79
Super Duper Lifetime Member
 
Posts: 5405
Images: 686
Joined: Tue Aug 07, 2007 5:42 pm
Location: Watauga, Texas
Top

Postby jss06 » Sun Oct 10, 2010 3:54 pm

Frame almost 100% complete. Spent the weekend putting on the frame extensions. At least now it does not look like its 40ft long behind the Jeep.

I used a large piece of scrap plywood and a clamp to give me a stable surface to fit and tack weld the frame extensions.

Image

Everyone should have one of these in their shop

Image

Eveything together. Looks a lot shorter now.

Image

I left the box for the rear cross member open and added a piece on the passenger side just in front of the tire to give me a place to mount accessories in the future.

Image

I still have to do the body mount tabs and the tongue braces. My plasma cutter is down waiting on a replacement part so I cant shape the tongue braces yet.
Last edited by jss06 on Tue Jun 16, 2015 9:22 pm, edited 1 time in total.
User avatar
jss06
Palladium Donating Member
 
Posts: 663
Joined: Mon May 12, 2008 7:48 pm
Location: Carrollton, TX
Top

Postby PhotoGuy » Mon Oct 11, 2010 7:53 pm

looking good. cant wait to see more :thumbsup:
PhotoGuy
Teardrop Master
 
Posts: 132
Images: 2
Joined: Wed Jun 09, 2010 1:16 am
Location: St Thomas Ont Canada
Top

Postby jss06 » Fri Oct 15, 2010 4:43 pm

Decided to mount the jack inside the A-frame. If I want to move it later I just need to spend a couple of bucks for another piece to weld to the frame.

Image

Time to start making sawdust.

Bought a rack for the Jeep to allow me to get lumber without borrowing a pickup. It's made by Olympic 4x4 and works great.

Image

Getting ready to lay the keel. Most of the wiring will run through the floor instead of through the walls or ceiling. More to come later.

Image
Last edited by jss06 on Tue Jun 16, 2015 9:22 pm, edited 1 time in total.
User avatar
jss06
Palladium Donating Member
 
Posts: 663
Joined: Mon May 12, 2008 7:48 pm
Location: Carrollton, TX
Top

Postby steve smoot » Sat Oct 16, 2010 4:56 am

Wow, you are off and running. It looks great. Wish I could weld like that. :thumbsup:
I am not a complete idiot, some parts are missing...
User avatar
steve smoot
Lifetime member
 
Posts: 1355
Images: 62
Joined: Thu Sep 17, 2009 5:42 pm
Location: Boone NC
Top

Postby jss06 » Sun Oct 17, 2010 2:18 pm

Spent some more time in the garage today. Have the main layout of the floor complete. I don't want to go any further until the frame is completed and painted.

Cut and fit the main floor panels.

Image

I routed and overlapped the panels to make the floor act as a single piece.

Image

The tongue box will be integrated into the body. So I used the same technique for joining the panels. I used a hand chisel to square off the corners of the routed area.

Image

Fits like a glove

Image

Shaping the floor of the tongue box.

Image

And all together.

Image

Still have to glue everything together. That will have to wait until the frame is completed and painted. I should have the replacement part for my plasma torch tomorrow so I can finish the frame construction this week.
Last edited by jss06 on Tue Jun 16, 2015 9:23 pm, edited 1 time in total.
User avatar
jss06
Palladium Donating Member
 
Posts: 663
Joined: Mon May 12, 2008 7:48 pm
Location: Carrollton, TX
Top

Postby jss06 » Sat Oct 30, 2010 3:23 pm

Finally got the parts for my plasma torch so I can finish the frame and get it ready for rhino lining.

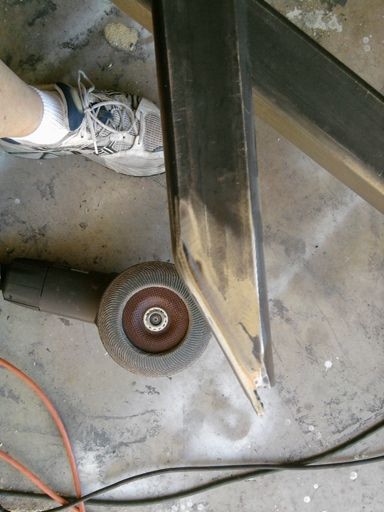
Started by fishmouthing the tongue support braces.

Image

Cleaned up the cuts and closed the mouth.

Image

Welded the mouth closed. This will provide a ramp to help pull the frame over obstacles.

Image

Mounting the braces.

Image

Now I can at last take it down to the shop and have it rhino lined. Then I can get back to work on the body.
Last edited by jss06 on Tue Jun 16, 2015 9:24 pm, edited 1 time in total.
User avatar
jss06
Palladium Donating Member
 
Posts: 663
Joined: Mon May 12, 2008 7:48 pm
Location: Carrollton, TX
Top

Postby myoung » Sat Oct 30, 2010 6:10 pm

Interesting touches. I'll look forward to more.
Mike Young
build thread: viewtopic.php?t=40459
User avatar
myoung
500 Club
 
Posts: 644
Images: 250
Joined: Sat Aug 07, 2010 11:21 am
Location: Nipomo, CA
Top

Postby jss06 » Wed Nov 17, 2010 2:06 pm

Picking up the frame this evening after work. Had it rhinolined to help protect it.
User avatar
jss06
Palladium Donating Member
 
Posts: 663
Joined: Mon May 12, 2008 7:48 pm
Location: Carrollton, TX
Top

Postby aggie79 » Wed Nov 17, 2010 3:52 pm

Very cool John!

I had my frame built and even though they used "new" steel, it was a bear to finish/paint the frame. I think getting it coated is the way to go.

Tom
Tom (& Linda)
For build info on our former Silver Beatle teardrop:
Build Thread

93503
User avatar
aggie79
Super Duper Lifetime Member
 
Posts: 5405
Images: 686
Joined: Tue Aug 07, 2007 5:42 pm
Location: Watauga, Texas
Top

Postby jss06 » Wed Nov 17, 2010 7:25 pm

Couple of pics. This stuff even makes my welds look good. :lol:

Image

Image

Image

Now I can start working on the body.
Last edited by jss06 on Tue Jun 16, 2015 9:24 pm, edited 1 time in total.
User avatar
jss06
Palladium Donating Member
 
Posts: 663
Joined: Mon May 12, 2008 7:48 pm
Location: Carrollton, TX
Top

Postby Cliffmeister2000 » Wed Nov 17, 2010 11:03 pm

jss06 wrote:
Image


Take it back! They got fingerprints on your springs! :?
God Bless

Cliff

♥God. ♥People.
1 John 4:9-11

My Teardrop build pictures
User avatar
Cliffmeister2000
Titanium Donating Member
 
Posts: 3622
Images: 157
Joined: Thu Jul 26, 2007 10:18 pm
Location: Phoenix, AZ
Top

Postby aggie79 » Thu Nov 18, 2010 9:16 am

John -

Your frame looks great. You've got a great platform to build upon.

Tom
Tom (& Linda)
For build info on our former Silver Beatle teardrop:
Build Thread

93503
User avatar
aggie79
Super Duper Lifetime Member
 
Posts: 5405
Images: 686
Joined: Tue Aug 07, 2007 5:42 pm
Location: Watauga, Texas
Top

PreviousNext

Return to Build Journals

Who is online

Users browsing this forum: No registered users and 40 guests