Terry's TTT Garageable Standy Build modifications

...ask your questions in the appropriate forums BUT document your build here...preferably in a single thread...dates for updates, are appreciated....

Postby starleen2 » Thu Mar 17, 2011 7:54 pm

terryjones1 wrote:Image

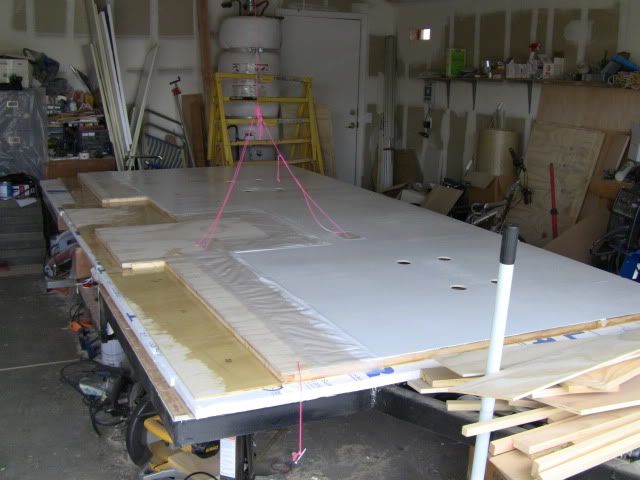
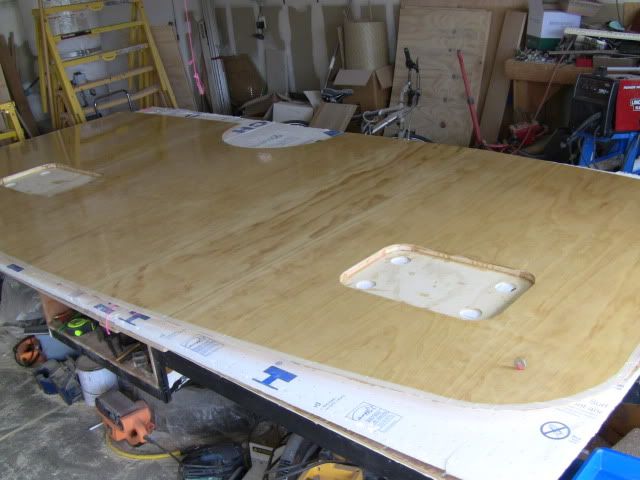
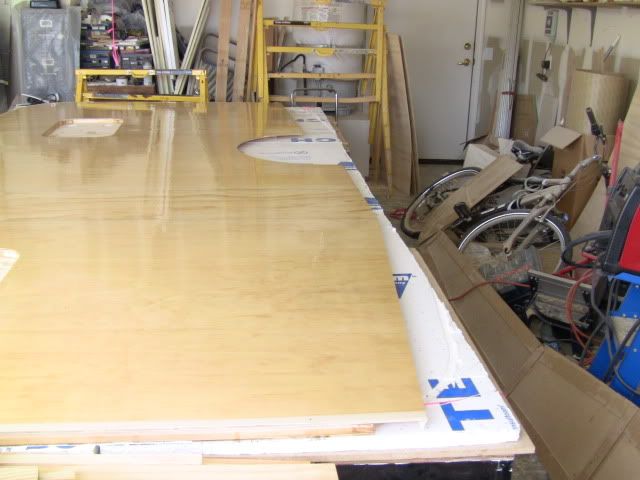
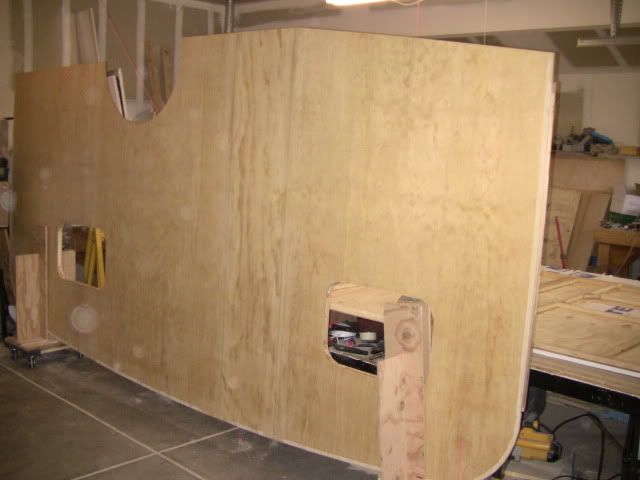
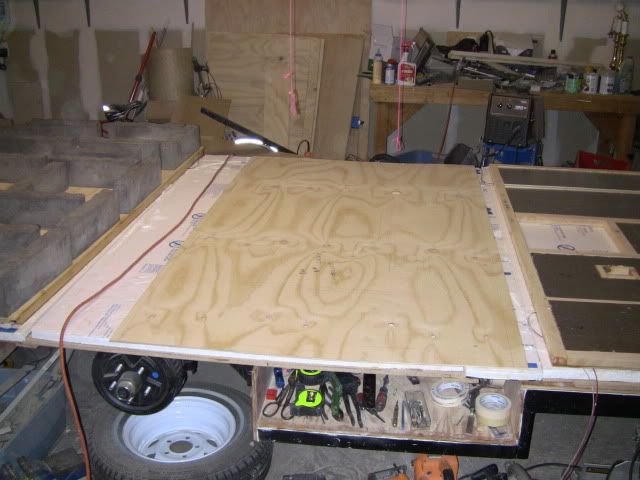
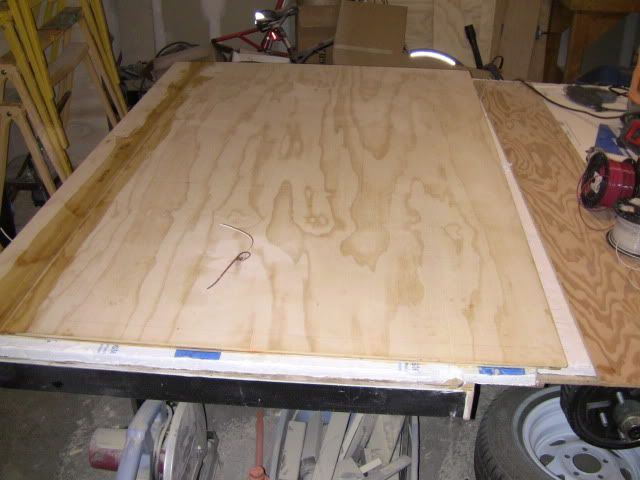
Looks like you could skate on that - super smooth and bright finish :thumbsup:
User avatar
starleen2
5th Teardrop Club
 
Posts: 16272
Images: 224
Joined: Sat May 12, 2007 8:26 pm
Location: Pea Ridge ,AR

Postby terryjones1 » Sat Mar 19, 2011 3:14 pm

On the seams of the left outside plywood wall, I have installed 1-1/2" fiberglass tape and two coats of epoxy over the fiberglass tape.


Image


Next, I will cover the outside wall with epoxy.
My TTT Garageable Standy Build Journal: viewtopic.php?f=50&t=40591
User avatar
terryjones1
Gold Donating Member
 
Posts: 266
Images: 1
Joined: Wed Aug 25, 2010 2:09 pm
Location: Lincoln, Ca

Postby terryjones1 » Mon Mar 21, 2011 12:55 pm

Previously I had purchased a Router Guide Kit.

Image

I have used my router and the Router Guide Kit to cut out wheel wells as shown below: I also used the Router Guide Kit to cut the front and back arcs at top of wall.

Image

I initially started cutting the arc at both ends for approximately 6". I then attached the blocks at the bottom so that I could finish cutting the arc.

Image

The photo below shows the finished arc.

Image
My TTT Garageable Standy Build Journal: viewtopic.php?f=50&t=40591
User avatar
terryjones1
Gold Donating Member
 
Posts: 266
Images: 1
Joined: Wed Aug 25, 2010 2:09 pm
Location: Lincoln, Ca
Top

Postby terryjones1 » Tue Mar 22, 2011 4:24 pm

I have given the left outside wall two coats of RAKA epoxy. It took 48 ozs in total.

Image

I have also cut out windows and trimmed the lower portion of the wall to my plan. The router worked very well for this operation.

Image
My TTT Garageable Standy Build Journal: viewtopic.php?f=50&t=40591
User avatar
terryjones1
Gold Donating Member
 
Posts: 266
Images: 1
Joined: Wed Aug 25, 2010 2:09 pm
Location: Lincoln, Ca
Top

Postby terryjones1 » Thu Mar 24, 2011 1:35 pm

These two photos are of the left side of the trailer wall. The first photo is of the inside wall. The wall is stored upside down in my movable storage rack.

Image

The next photo is of the outside wall. Notice the right side wall is in the lower right hand corner.

Image

I will now be starting back to work on the right side wall.
My TTT Garageable Standy Build Journal: viewtopic.php?f=50&t=40591
User avatar
terryjones1
Gold Donating Member
 
Posts: 266
Images: 1
Joined: Wed Aug 25, 2010 2:09 pm
Location: Lincoln, Ca
Top

Postby bdosborn » Thu Mar 24, 2011 8:45 pm

Well it looks like you were right, no tear out from the router.

:applause: :applause:

Bruce
2009 6.5'X11' TTT - Boxcar
All it takes is a speck of faith and a few kilowatts of sweat and grace.
Image
Boxcar Build
aVANger Build
User avatar
bdosborn
Donating Member
 
Posts: 5494
Images: 772
Joined: Wed May 05, 2004 11:10 pm
Location: CO, Littleton
Top

Postby lstyles » Fri Apr 15, 2011 10:32 am

Any updates on your build. I am really enjoying your build and plan something similar.
Thanks
Lori :applause:
lstyles
Teardrop Builder
 
Posts: 26
Joined: Tue May 06, 2008 1:05 pm
Top

Postby terryjones1 » Fri Apr 15, 2011 5:21 pm

I have almost completed the right side wall. I have to cut the roof line, and cut the lower wall outline. Pictures will follow in about 2 or 3 days. I didn't do many pictures of the construction of the right wall, because the construction was the same as the left wall.
My TTT Garageable Standy Build Journal: viewtopic.php?f=50&t=40591
User avatar
terryjones1
Gold Donating Member
 
Posts: 266
Images: 1
Joined: Wed Aug 25, 2010 2:09 pm
Location: Lincoln, Ca
Top

Postby terryjones1 » Sun Apr 17, 2011 1:54 pm

The photo shown below is of the outside of right wall. The door is only partially cut out. I wanted to keep some temporary framing & plywood at the door opening in order to provide strength when turning over the wall. The other side (inside) is already painted.

Image
Last edited by terryjones1 on Mon Apr 18, 2011 3:41 am, edited 1 time in total.
My TTT Garageable Standy Build Journal: viewtopic.php?f=50&t=40591
User avatar
terryjones1
Gold Donating Member
 
Posts: 266
Images: 1
Joined: Wed Aug 25, 2010 2:09 pm
Location: Lincoln, Ca
Top

Postby terryjones1 » Sun Apr 17, 2011 6:28 pm

Listed below are trailer parts that I have purchased:

12 DCV LED lights $63.96
12 DCV Master Switch $16.75
Norcold refrigerator DC-0051 $589.99
Lg Lw7010hr Air Conditioneer $340.01
Flexiride axle & brakes $542.95
tires $212.60
TL, LT, RT lights $61.39
Clearance lights $34.08
inside lights, porch light $32.28
12 DCV outlet $10.75
12 DCV Rocker Switch $9.86
TV inlet/12 Volt recepticle, outside recepticle $26.07
120ACV Circuit Breakers $12.53
Fantastic Fan roof vent $175.95
Thetford Porti Potty 365 $125.25
windows $389.40
Detmar table leg $53.64
Detmar table pedistal inc
Detmar table leg inc
rims $113.85
Trailer Jacks, coupler $95.90
Trailer Jacks, tire carrier $210.41
Gas Grill $107.25
additional hardware to date $187
additional electrical to date $191
wood to date $1135
steel to date $451
epoxy to date $634
paint & calking to date $393
argon gas to date $156

Listed below are parts that I still need to buy:

WFCO Converter or Progressive Dynamics Converter
Trimetric TM2020 battery monitor & Shunt
4 D AGM battery
110 ACV inlet
door
vinyl sheet flooring
cusions
interior cabinet plywood
interior bench & bed wood
My TTT Garageable Standy Build Journal: viewtopic.php?f=50&t=40591
User avatar
terryjones1
Gold Donating Member
 
Posts: 266
Images: 1
Joined: Wed Aug 25, 2010 2:09 pm
Location: Lincoln, Ca
Top

Postby aggie79 » Mon Apr 18, 2011 9:45 am

Terry,

The anticipation is killing me. When are the walls going up?

Very nice work and very detailed build!

Take care, Tom
Tom (& Linda)
For build info on our former Silver Beatle teardrop:
Build Thread

93503
User avatar
aggie79
Super Duper Lifetime Member
 
Posts: 5405
Images: 686
Joined: Tue Aug 07, 2007 5:42 pm
Location: Watauga, Texas
Top

Postby terryjones1 » Mon Apr 18, 2011 4:40 pm

Today, I am measuring levelness of the trailer floor.

Tomorrow, I start to work on the front & back walls (They will be made on my temporary work bench{the trailer}). They will probably take up to 3 weeks (This includes epoxying & painting).

After that, I will start on the roof. It should take no more than a week (This includes interior roof painting). I will only be doing the roof spars & interior roof plywood at that time.

After the walls & roof manufacture, I will be installing the front & rear walls. Then, I will install the side walls. After that, the roof.
My TTT Garageable Standy Build Journal: viewtopic.php?f=50&t=40591
User avatar
terryjones1
Gold Donating Member
 
Posts: 266
Images: 1
Joined: Wed Aug 25, 2010 2:09 pm
Location: Lincoln, Ca
Top

Postby terryjones1 » Thu Apr 28, 2011 3:02 pm

Shown below is the back wall framing & inside wall plywood. The Window Air Conditioner 18-3/4" x 14-1/4" framing is at the middle right of the photo. The framing has not yet been epoxyed to the plywood panel. The wall panels measure 46-1/8" H & 76" W for both front and back walls.

Image

Shown below is the front wall framing & inside wall plywood. The verticle mounted Fantastic Vent 14" x 14" framing is at the middle left of the photo.

Image
My TTT Garageable Standy Build Journal: viewtopic.php?f=50&t=40591
User avatar
terryjones1
Gold Donating Member
 
Posts: 266
Images: 1
Joined: Wed Aug 25, 2010 2:09 pm
Location: Lincoln, Ca
Top

Postby terryjones1 » Thu May 05, 2011 8:19 am

Shown below is a Photo of the back wall outside skin, that is being held down to the frame while the epoxy is curing. Each concrete block weighs 15 pounds.

Image

Shown below is the front wall, with foam insulation installed, ready for epoxying the outside skin. The large hole is the framing for the Fantastic Vent instalation. The small hole is the framing for installation of 110 ACV electrical box.

Image

Shown below is the front wall outside skin ready for applying epoxy.

Image
My TTT Garageable Standy Build Journal: viewtopic.php?f=50&t=40591
User avatar
terryjones1
Gold Donating Member
 
Posts: 266
Images: 1
Joined: Wed Aug 25, 2010 2:09 pm
Location: Lincoln, Ca
Top

Postby terryjones1 » Thu May 05, 2011 8:44 am

Shown below is a photo of the back wall. The outside skin has been epoxyed to the frame. Fiberglass tape and epoxy have been applyed to the plywood seam. The wall has been pre-wired for 12 DCV electrical for overhead lights & license plate light. A string has been installed for pulling 110 ACV Air Conditioneer wiring later. The opening for the Air Conditioneer installation wil be cut later.


Image

Shown below is a photo of the front wall. Fiberglass tape and epoxy have, also, been applyed to the plywood seam. The hole at the left is for the Fantastic Vent installation. The wall has been pre-wired for 12 DCV electrical for Fantastic Vent and overhead lights. A string has been installed for pulling 110 ACV wiring later.

Image

Next, I will epoxy the outside of the front and back walls. Then, I will paint the inside of the front & back walls. After that, I will start on the roof build.
My TTT Garageable Standy Build Journal: viewtopic.php?f=50&t=40591
User avatar
terryjones1
Gold Donating Member
 
Posts: 266
Images: 1
Joined: Wed Aug 25, 2010 2:09 pm
Location: Lincoln, Ca
Top

PreviousNext

Return to Build Journals

Who is online

Users browsing this forum: No registered users and 29 guests

cron