The Justintime: 6/21/11 update *interior finishing*

...ask your questions in the appropriate forums BUT document your build here...preferably in a single thread...dates for updates, are appreciated....

Postby asianflava » Sat Nov 20, 2010 6:54 pm

RockyMountainTeardrops wrote:I've spent too many nights tending the fire of a wood-burning pit to want to do that for just myself anymore.
(The wife is not much of a red meat person, so a 12-14 lb brisket is just too much food, and you can only have so many batches of chili before she threatens to make you sleep on the sofa.)

Lee


I only do briskets and pork butts when I have people to feed. When I have a bunch of it to eat, I get tired of it. Traegers (pellet poopers) are nice, there were a few of'em at the BBQ class I took. Not too much intervention needed with them. That's also why I got the DigiQ controller, once I set it I can go to bed. I have 2 BGEs an XL and a LG, I bought the XL first but it was a bit of a charcoal hog when I was just grilling for the two of us. Plus the ceramic insulates against the temprature swings we have here.
User avatar
asianflava
8000 Club
8000 Club
 
Posts: 8412
Images: 45
Joined: Mon Aug 02, 2004 5:11 am
Location: CO, Longmont

Postby RockyMountainTeardrops » Fri Nov 26, 2010 3:36 pm

asianflava wrote:Plus the ceramic insulates against the temprature swings we have here.

Could of used that yesterday....smoked a turkey for Thanksgiving.....with the wind chill, it was 45° BELOW when it went on the smoker at 6:00 am.
Used up 12 hours worth of pellets in 6 hours trying to keep the smoker at 275° .

Here's a picture of the work bench lifted to the ceiling.
(going shopping right now, so more later)
Image

Lee
User avatar
RockyMountainTeardrops
Super Teardrop Manufacturer
 
Posts: 99
Images: 233
Joined: Fri Oct 22, 2010 1:28 pm
Location: 4,000 above Denver, CO

Postby H-Balm » Tue Nov 30, 2010 6:34 pm

:o

I will not complain of the cold again.... for a few weeks (at least).
Image
User avatar
H-Balm
Teardrop Master
 
Posts: 243
Joined: Sat May 27, 2006 5:52 am
Location: Where NY/NJ/PA Meet
Top

The Justintime -11/30 update

Postby RockyMountainTeardrops » Wed Dec 01, 2010 12:06 am

H-Balm wrote:I will not complain of the cold again.... for a few weeks (at least).

Yea, it can get pretty brutal at my altitude...
But ask me what the weather is like in August!!
:relaxing:

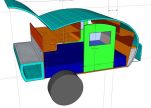
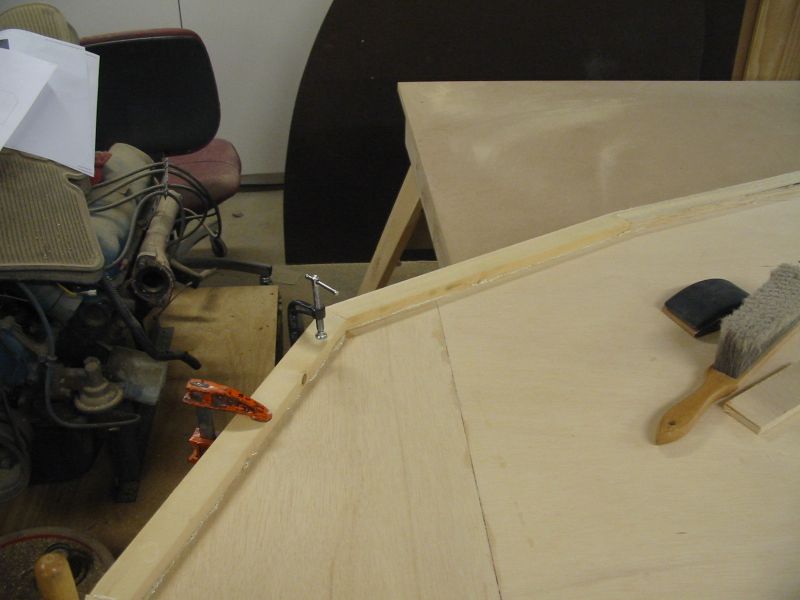
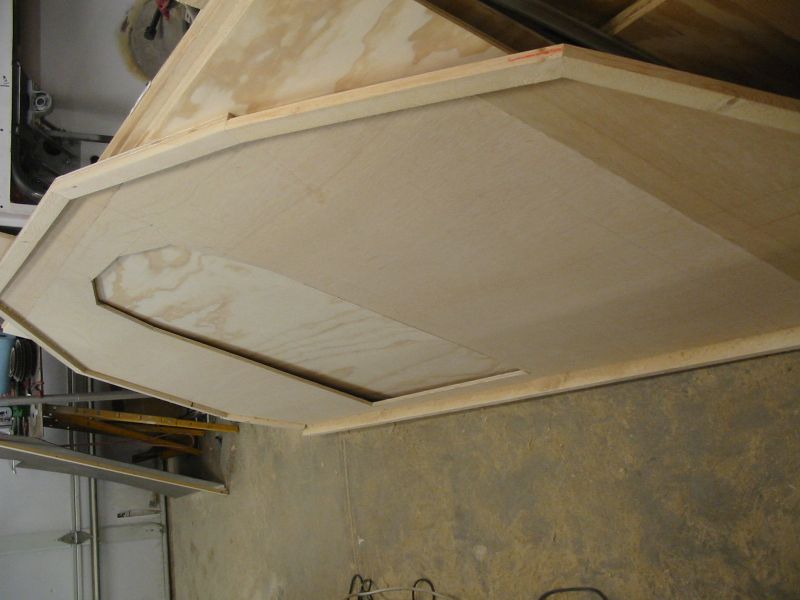
Now it's side wall framing time.
FYI, I used 1/2" birch plywood from HD for the sides.
Glued and screwed 1x2's to "outline" the sides.
In hind sight...this was a wasted step. The roof doesn't need that much material to attach to. Could of used 1x1's (3/4" square) instead. (or maybe skip this all together?)
I did need to use 1x2's at the hatch area so it wasn't totally wasted.
(I'll show what I did at those areas in another post)
Image

This is the back/bottom of the side, showing the floor cleat.
The 1x2 "on edge" will be setting directly on the trailer frame.
Image

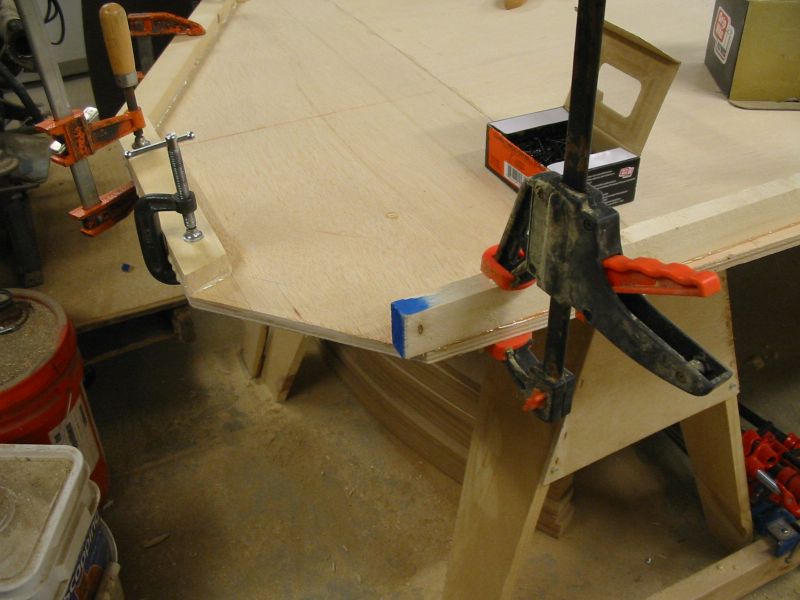
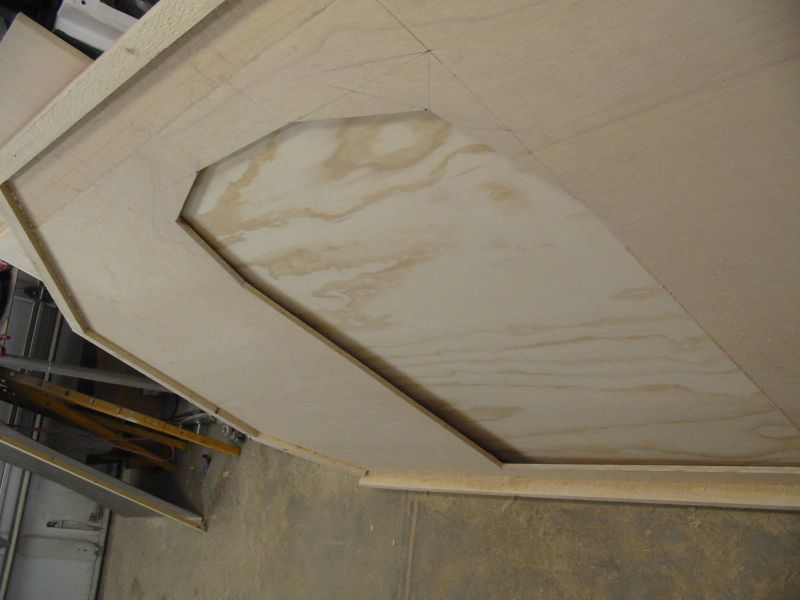
This is a front/bottom of the side, showing the floor cleat sloping along the sides.
This gives the tear a "raked" look.
The bottom and the top both slope from front to back to accent the tear shape (even though it's a "square" shape, I think it gives it a nice profile)
Sorry, but I HATE the look of tears with a flat bottom....they look like a big round pimple on top of the flat frame.
Image

I just :lol: at myself....I see that I used whatever clamps I had at hand.

Finished side with door cutout.
If you look close, you can see the rake in the plywood "adder" on the top of the side.
Image

I struggled for hours (LITERALLY!) about the shape of the doors.
I don't like the sloped shape on the Benroy plans, but I really had a hard time deciding on the shape of these....but I think they came out pretty nice.

I'll show the rest of the wall "framing" in another post.

Image

The plywood behind the wall is the 1/4" for the roof and all of the shelving and cabinets. Plain ol' A/C sanded.

Enough for tonight.
More later,
Lee
User avatar
RockyMountainTeardrops
Super Teardrop Manufacturer
 
Posts: 99
Images: 233
Joined: Fri Oct 22, 2010 1:28 pm
Location: 4,000 above Denver, CO
Top

Postby S. Heisley » Wed Dec 01, 2010 12:23 am

You're doing good. The shape of the doors looks great with the shape of your tear. You'll be happy with them. :thumbsup: :applause:
User avatar
S. Heisley
Super Lifetime Member
 
Posts: 8774
Images: 495
Joined: Mon Sep 17, 2007 10:02 am
Location: No. California
Top

Postby RockyMountainTeardrops » Wed Dec 01, 2010 9:43 am

S. Heisley wrote:You're doing good. The shape of the doors looks great with the shape of your tear. You'll be happy with them.

Wait'll you see the final side profile, I'm very pleased with it.
ooo000 wrote:Is that mdf ply wood in your pictures

I have MDF for the benchtop and the bucks for the future (and final) tear, but this build is all plywood.
Birch (five plys plus 2 veneers) for the walls and A/C sanded for everything else.
No MDF used in this build.

Lee
User avatar
RockyMountainTeardrops
Super Teardrop Manufacturer
 
Posts: 99
Images: 233
Joined: Fri Oct 22, 2010 1:28 pm
Location: 4,000 above Denver, CO
Top

Postby RockyMountainTeardrops » Wed Dec 15, 2010 11:32 am

Okay,
Time for floors and walls.
Cut two sheets of the 1/2" plywood for the floors.
63" long, 48" wide makes a floor area of 61-1/2" x 96"
(outside width of tear is 64", less 1/2" X 2 for plywood, less 3/4" X 2 for the wall framing)
Image
No fancy scarfing joint here, just a plain butt joint with lots of biscuits and glue to hold everything together.
Waxed paper to keep from gluing it to the bench.
Image
I didn't take any pictures of the floor before I turned it over and started to add the walls, but here's a Sketchup drawing of the floor (upside down)
Image
Since the trailer frame is going to be around the four sides (carrying the load of the walls) and three cross members running across the width (carrying the load of the floor), I think that running the "floor joists" perpendicular to the trailer "beams" adds enough strength to the unit to do what is needed.
I can use fewer steel supports this way. In fact, all I am using is the two supports needed for the axle, and one more for the spare tire carrier. (plus the four sides)

Here's a couple of pictures of the underside of the trailer showing this idea in action.
Image
Image
Oh, and I just used a good exterior primer for the bottom. I'm not "sold" on the idea that roofing tar on the bottom does any good.

First wall going up.
Image
You can really see the rake to the wall in this picture. The add-on piece of plywood at the top of the wall is parallel to the bottom that you can't see.
I had to be very careful to make the door square to the floor, not the bottom or top of the wall.
Since I attached the floor cleat to the sides & notched the wall "studs" at the front and back, I could just slip the wall onto the floor and it would hold it self up until I could get some fasteners into it.
The wall is not setting on the floor, it runs beside the floor on a slope and is glued and screwed together.

Roof spars going in.
Image
This picture also shows the front wall of the cabin (attached cleat).
I want a little slope to the inside wall, and I had all sorts of ideas for the wasted space.

More later,
Lee
User avatar
RockyMountainTeardrops
Super Teardrop Manufacturer
 
Posts: 99
Images: 233
Joined: Fri Oct 22, 2010 1:28 pm
Location: 4,000 above Denver, CO
Top

Postby aggie79 » Wed Dec 15, 2010 2:52 pm

Lee,

Your teardrop is coming along nicely! (You're almost caught up with me and I started two years before you.)

Keep up the good work and try to stay warm.

Tom
Tom (& Linda)
For build info on our former Silver Beatle teardrop:
Build Thread

93503
User avatar
aggie79
Super Duper Lifetime Member
 
Posts: 5405
Images: 686
Joined: Tue Aug 07, 2007 5:42 pm
Location: Watauga, Texas
Top

Postby RockyMountainTeardrops » Wed Dec 15, 2010 4:33 pm

aggie79 wrote:Lee,

Your teardrop is coming along nicely! (You're almost caught up with me and I started two years before you.)

Keep up the good work and try to stay warm.

Tom

Actually......This one is much further along than the build shows....All that I have left is 1/2 of the carpet on the inside walls, the counter top, a tiny bit of wiring, and new hatch props, and.....and ....and....:cry:

You gotta get moving! Summer is going to be here before you know it!
I'm so glad we pushed last summer to get this one "done enough" to use.

Lee
Last edited by RockyMountainTeardrops on Mon Dec 27, 2010 11:33 am, edited 1 time in total.
User avatar
RockyMountainTeardrops
Super Teardrop Manufacturer
 
Posts: 99
Images: 233
Joined: Fri Oct 22, 2010 1:28 pm
Location: 4,000 above Denver, CO
Top

Postby RockyMountainTeardrops » Mon Dec 27, 2010 11:31 am

Okay,
Time for another update!

Noticed I didn't upload this picture of the roof spars.
All spars are 1x2 pine, nothing fancy, just "furring" strips from Lowes.
Attached to side walls with 2" deck screws. Didn't bother to notch the wall framing, I don't think it's needed.
Image

Starting the galley shelving:
Image


Couple of things going on in the next picture:
The hole in the galley is a removable panel to allow a real mattress to be put into the cabin, yet I can still take it out if it gets wet or dirty.
Remember from the first post? "Must have a real mattress"?

Well, this is how I got a full size, inner spring, pillow top mattress into the cabin without removing the roof or building the tear around it.

Next thing is the notch where the galley hatch will set.
I've noticed that most people just use a rubber seal on top of the walls to keep water out.....I have a lip on the side of the galley hatch and a "notch" on the side walls.
This, combined with a rubber seal, will go a long way to keeping water out. (and I think it looks better than the traditional method too)
Image

Here's a sketch of the detail.
Image

First idea was to have a built in cooler under the galley counter-top, (but this has been abandoned as "unworkable")
Here's a picture of the cooler (3" of blue foam, with two layers of 10oz fiberglass and epoxy).
I cannot tell you how hard it was to rip this back out after the first trip.:cry:
Image

Here's a picture of the rear galley, showing the back panel and shelving.
Image

More later,
Lee
User avatar
RockyMountainTeardrops
Super Teardrop Manufacturer
 
Posts: 99
Images: 233
Joined: Fri Oct 22, 2010 1:28 pm
Location: 4,000 above Denver, CO
Top

Postby Miriam C. » Mon Dec 27, 2010 2:33 pm

:applause: :thumbsup: :thumbsup: You are doing a great job of getting this done in time for camping. Looks GREAT! :thumbsup:
“Forgiveness means giving up all hope for a better past.â€
User avatar
Miriam C.
our Aunti M
 
Posts: 19675
Images: 148
Joined: Wed Feb 15, 2006 3:14 pm
Location: Southwest MO
Top

Postby 2bits » Tue Dec 28, 2010 12:13 am

I have seen a couple of other examples of the notched hatch design and they have worked great! I've has good luck with mine, but I've had as much good as bad luck, just in different areas and I am happy!

Good call on the mattress install! You might think about getting a plastic bed liner from the wally store to cover the mattress as you do the finish work. I kept mine out until I was pretty much done for fear of sawdust, and had to fold it through the door like a taco (by myself!). It was an inner spring mattress too. Lucky I did the wide door on mine, it took me a good 30 min to get it in!
Thomas

Image
User avatar
2bits
2bit Member
 
Posts: 5130
Images: 8
Joined: Thu Dec 27, 2007 6:04 pm
Location: Lake Tawakoni, TX
Top

Postby RockyMountainTeardrops » Tue Dec 28, 2010 9:10 am

Miriam C. wrote::applause: :thumbsup: :thumbsup: You are doing a great job of getting this done in time for camping. Looks GREAT! :thumbsup:

Thank you!

2bits wrote:Good call on the mattress install! You might think about getting a plastic bed liner from the wally store to cover the mattress as you do the finish work. I kept mine out until I was pretty much done for fear of sawdust, and had to fold it through the door like a taco (by myself!). It was an inner spring mattress too. Lucky I did the wide door on mine, it took me a good 30 min to get it in!

The nice thing about the mattress hatch is it doesn't take any space from anything else. (The interior/cabin side is used as foot room, so I couldn't use it for galley shelves anyway.)
And the mattress can be put in at any time, even the morning right before you leave for camping!

Lee
User avatar
RockyMountainTeardrops
Super Teardrop Manufacturer
 
Posts: 99
Images: 233
Joined: Fri Oct 22, 2010 1:28 pm
Location: 4,000 above Denver, CO
Top

Postby RockyMountainTeardrops » Sat Jan 01, 2011 12:06 pm

Figured I'd do a quick post this morning while waiting for the garage to warm up some...
-44° with wind chill!!!!!! (29.8° inside the garage)
:snowstorm:
Image

This picture shows the removable mattress access panel in place.
Image

Here's a picture of the bottom structure at the rear-galley area.
For some reason I attached the side cleat upside down....the miter is backwards. No big deal.
Image

This shows the double miter for the transition between the bottom angled "kick" panel and the vertical rear panel at the galley.
Image
Anybody want to buy a manifold for a small block Chevy?
:money:

I can't wait till spring.....
This winter stuff sucks. :disappointed:

Lee
User avatar
RockyMountainTeardrops
Super Teardrop Manufacturer
 
Posts: 99
Images: 233
Joined: Fri Oct 22, 2010 1:28 pm
Location: 4,000 above Denver, CO
Top

Postby YuGun » Sat Jan 01, 2011 12:31 pm

:applause: :applause: :applause:
Ä° like your teardrop and very good work,
Ä° wish for you have a good change of your build.
User avatar
YuGun
The 300 Club
 
Posts: 445
Joined: Sun Apr 11, 2010 1:25 pm
Location: Turkey
Top

PreviousNext

Return to Build Journals

Who is online

Users browsing this forum: No registered users and 39 guests