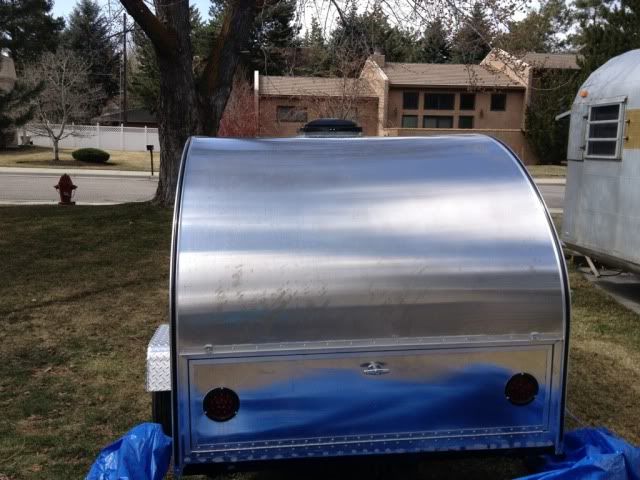
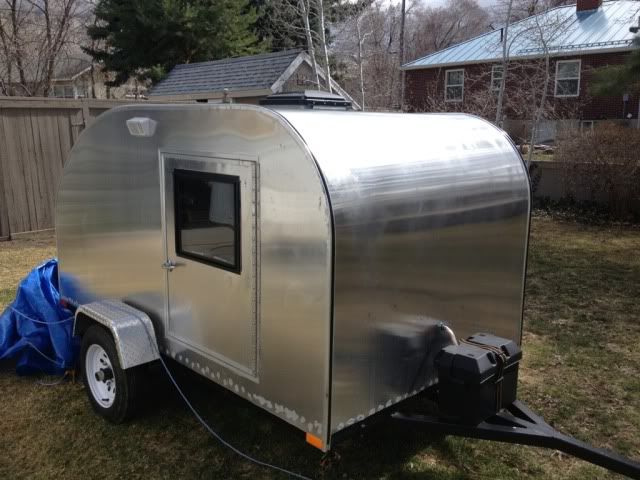
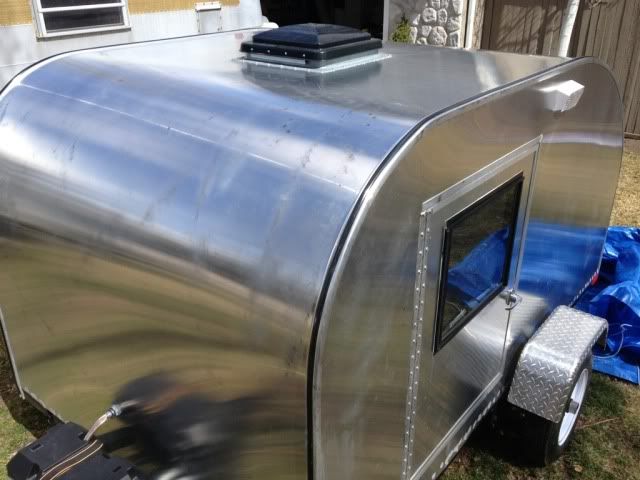
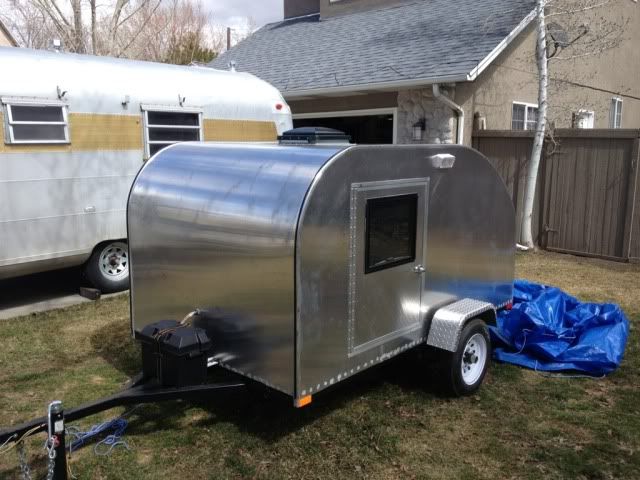
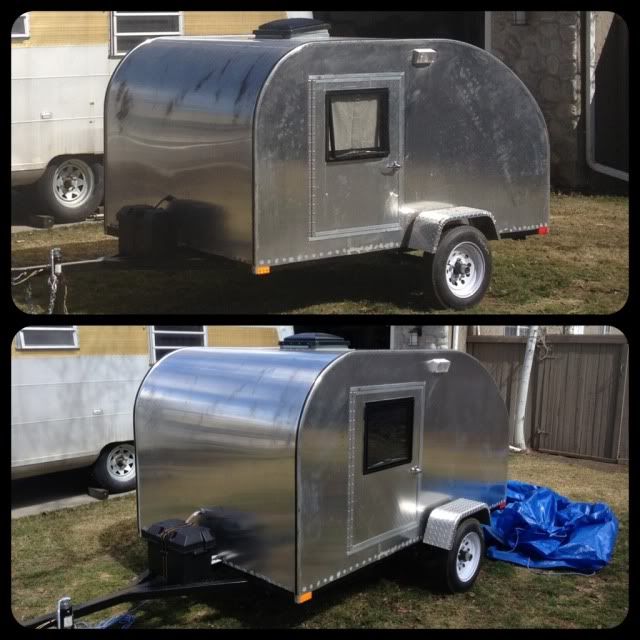
Robbie's Benroy build- Now For Sale...

...ask your questions in the appropriate forums BUT document your build here...preferably in a single thread...dates for updates, are appreciated....

Re: Robbie's Benroy build- Maiden Voyage... SUCCESS!!!!

Postby Robbie » Thu Feb 28, 2013 2:43 pm

Joe, I was pretty worried about water getting in past the door seals also. If I ever build another teardrop I am most definitely going to go with the pre-fab doors that lil' guy uses. They screw right to the walls and are a complete package. Seals, locks, windows, handles, etc. Although they are a little pricey the extra cost is completely worth it in my opinion as it saves you guess work, lots of time, and they look great!

http://www.ebay.com/itm/RV-Teardrop-Pas ... a5&vxp=mtr

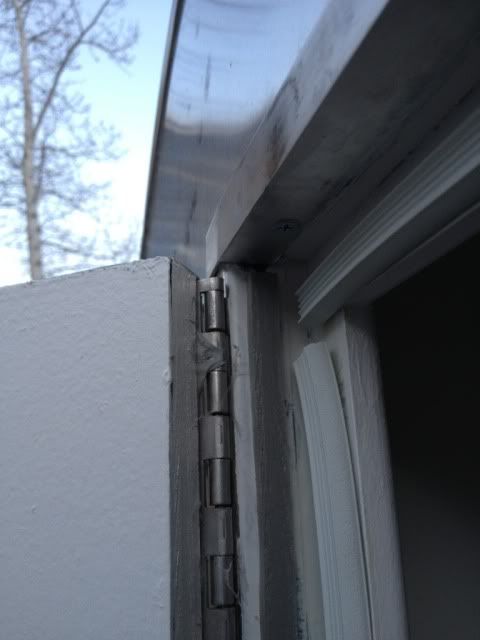
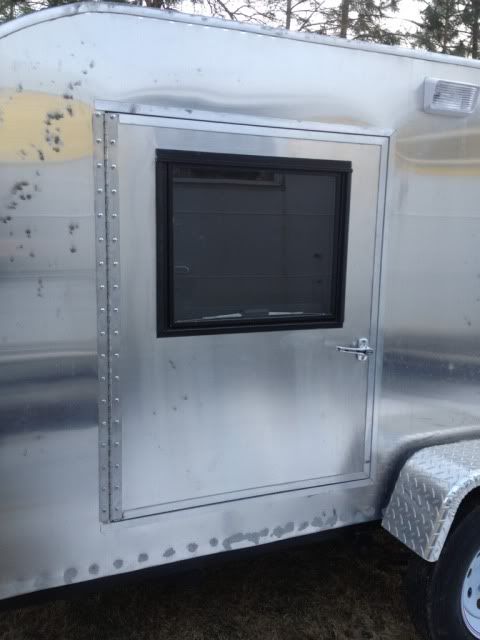
But, if you're building on a budget or want that custom look then here's what I did (and I can get you some pictures tonight). I started with just a square hole in the side. I think I made mine 28" wide by 36" tall. I undersized the door panel .25" on 3 sides and .125" on the last side (or front side). Reason being, I wrapped the opening and door with 1/16" thick angle aluminum on the top, bottom, and rear edge to protect the end grain on the wood. I also painted the entire door with Rustoleum Enamel prior to anything to ensure it was sealed. I cut the aluminum skin slightly smaller that the door and window opening and just stapled around the edges to secure it. I then applied the aluminum angle to the 3 sides, leaving the front edge un-covered because the piano hinge screws there. I did the same with the door opening. I screwed the piano hinge to the door side first. Figuring I had 1/8" gap there I laid the piano hinge on the door and folded it over the edge and stuck some 1/16" shim spacers under it then pushed it against the side of the door. So now I have my hinge in position on the door with the gap between the door and wall edge split evenly. So I clamped it and screwed it. Keep in mind during this whole process I was terrified of the thought of possible water damage to the wood so I used a TON of industrial grade 30-year sealant between everything! Under the aluminum skin edges, then under the angle pieces, under the hinge, in the screw holes, etc. Then I wiped the excess smooth so it looked nice.

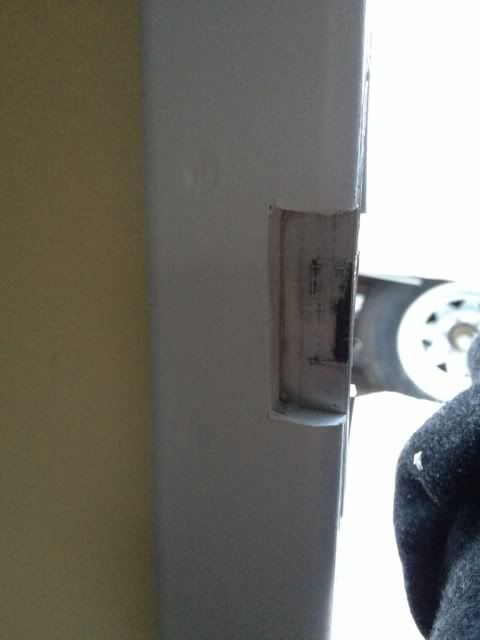
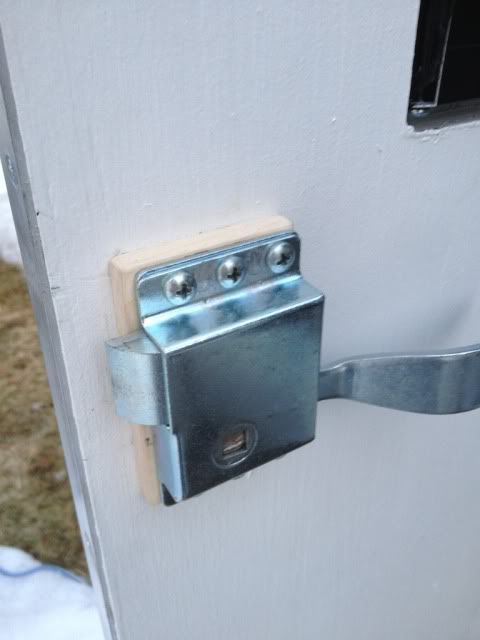
As for the seal portion, I made door jamb material out of .5" thick by 2" wide maple solid. I applied a 1/4" thick by 1" wide piece of trim around the entire inside of the opening. This is where the jamb will mount to so you have 1/4" space for the seal. But then I just screwed/glued the jamb to that spacer with the corners mitered. For my particular door handles (and this is another reason i suggest the pre-fab doors) I had to notch the rear jamb section where the handle was and added a piece of 1/8" thick aluminum there for the latch to hit. This wasn't easy and took a while to get right but it worked out perfect! Then I used a generic weatherstrip seal against the door jamb and that filled the gap between the door and jamb nicely. I actually had to replace the handle spacer as it was a little too tight and hard to close. I'm going to be replacing the seals this year before we take it though as the cold winter weather made them shrink quite a bit.

I hope this isn't to confusing but I will take a bunch of pics tonight and will post them here tonight or tomorrow so you can see what I mean... :thumbsup:

Robbie
My aluminum benroy build:
viewtopic.php?t=45640
User avatar
Robbie
Teardrop Master
 
Posts: 250
Images: 86
Joined: Tue May 10, 2011 11:28 am
Location: West Jordan, UT

Re: Robbie's Benroy build- Maiden Voyage... SUCCESS!!!!

Postby Robbie » Sat Mar 02, 2013 12:05 am

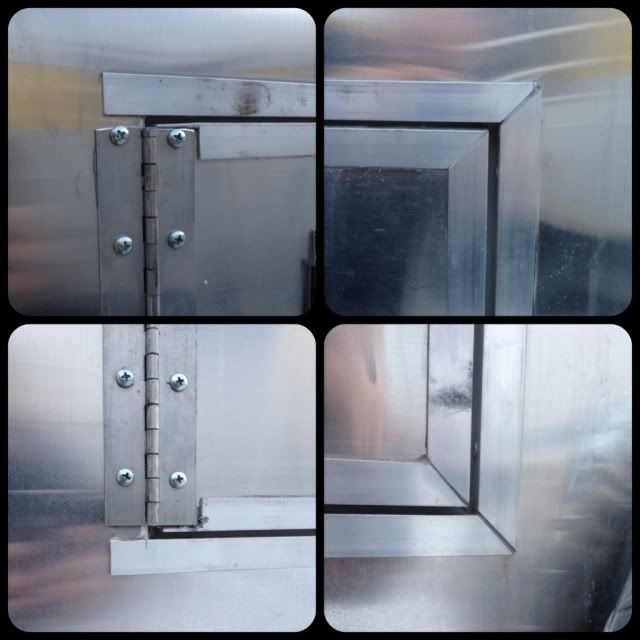
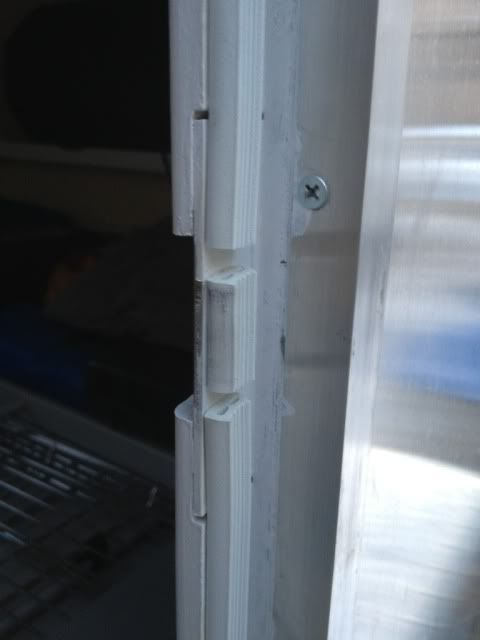
Here's all the trim/hinge joints on the outside. And yes, I am going to be replacing all of the door weatherstripping once the weather warms up a little. Lol.

Image

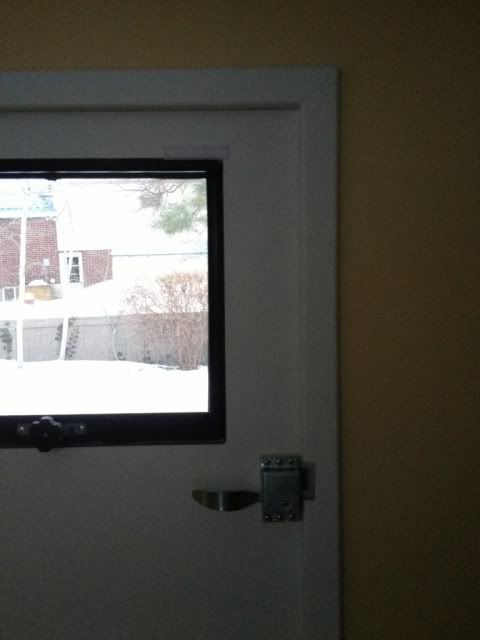
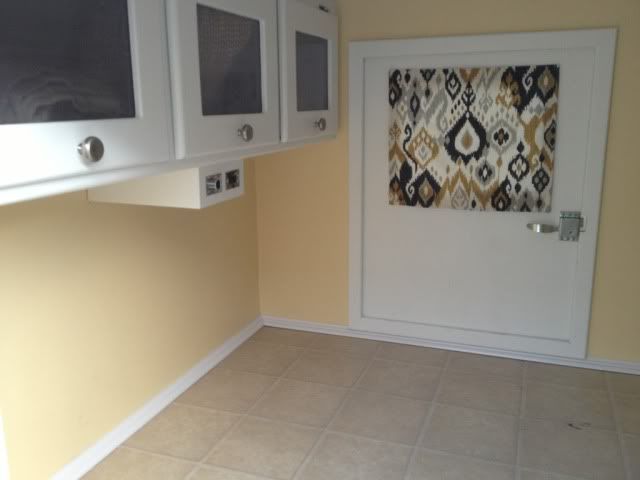
Here it is from the inside.

Image

Image

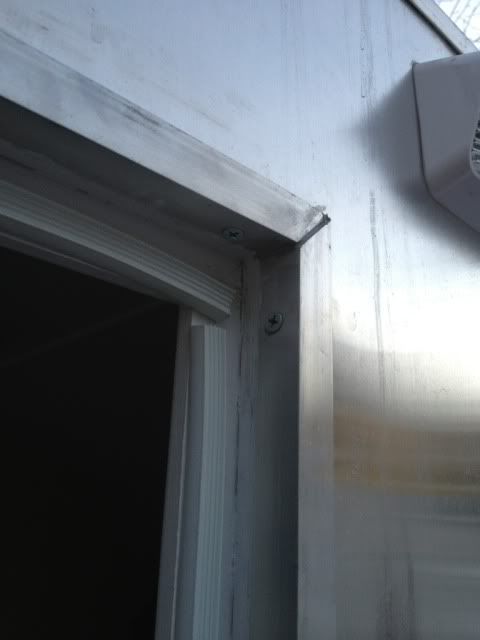
Here's the aluminum plate that the latch catches on. There are 2 grabber screws that hold it sturdy.

Image

Image

Image

Image

Image
My aluminum benroy build:
viewtopic.php?t=45640
User avatar
Robbie
Teardrop Master
 
Posts: 250
Images: 86
Joined: Tue May 10, 2011 11:28 am
Location: West Jordan, UT

Re: Robbie's Benroy build- Maiden Voyage... SUCCESS!!!!

Postby Junkboy999 » Sat Mar 02, 2013 2:54 am

Humm

I pick up a cheap tarp and it has that silver backing. I might have to get rid of it and get a better one.
Mine is a woody but if that silver got into the wood. That would not be good.

I used 3M™ Urethane Foam Tape ⅜ thick for my seal. It will not shrink or expand as much as the vinyl seals.
You can get it thicker if you need it. I design my door for the thickness of this seal tape because I had 3 rolls
of it laying around.
User avatar
Junkboy999
1000 Club
1000 Club
 
Posts: 1259
Images: 52
Joined: Fri Jul 06, 2012 9:18 pm
Location: Wichita, KS
Top

Re: Robbie's Benroy build- Maiden Voyage... SUCCESS!!!!

Postby Modstock » Sat Mar 09, 2013 12:28 am

Maybe take it over to a wheel polisher at Sapp brothers on 13th so. They might be able to shine that right up.
User avatar
Modstock
1000 Club
1000 Club
 
Posts: 1075
Joined: Wed Feb 01, 2012 1:18 am
Location: Salt lake , Utah
Top

Re: Robbie's Benroy build- Maiden Voyage... SUCCESS!!!!

Postby Cummins01 » Mon Mar 11, 2013 1:06 pm

Robbie-
I have read every page of this thread, nice job! I was planning on building doors but now I'm kinda worried after reading how you would buy pre-fab doors next time. I guess it's back to deciding whether or not to attempt to build them. Anyhow, very nice project, sorry to hear about the tarp issues on the skin.
-Brad-
If it doesn't fit......... get a bigger hammer.

Build Thread:
viewtopic.php?f=50&t=54285&p=987867#p987867
User avatar
Cummins01
Teardrop Builder
 
Posts: 39
Joined: Mon Jan 28, 2013 5:45 pm
Location: Oregon
Top

Re: Robbie's Benroy build- Maiden Voyage... SUCCESS!!!!

Postby Robbie » Mon Mar 11, 2013 1:43 pm

Thanks Brad! It was a really fun project! The doors were definitely the hardest and most time consuming part of the build. I would recommend teh pre-fab Lil' Guy doors for simplicity, ease of installation, and they are tried and true! You never know what is going to happen when building your own doors. My doors now have a slight warp to them also so the top corners don't seal as tight as I'd like. I don't think it will be a problem with leakage but just knowing they don't seal as tight as they used to bums me out. I'm thinking of running a piece of all-thread from top to bottom over the door latch and into pieces of L bracket to torque the door into a sort of concave so the top corners hit the seals before the latch so I know they'll seal good and tight. There was another member that did that with his doors... Let me try and find the pic thread...

gallery/image_page.php?album_id=2118&image_id=14909

gallery/image_page.php?album_id=2118&image_id=14908

gallery/image_page.php?album_id=2118&image_id=14907
My aluminum benroy build:
viewtopic.php?t=45640
User avatar
Robbie
Teardrop Master
 
Posts: 250
Images: 86
Joined: Tue May 10, 2011 11:28 am
Location: West Jordan, UT
Top

Re: Robbie's Benroy build- Time for a Spring tune-up.

Postby Robbie » Wed Mar 13, 2013 10:02 am

Well I finally got around to installing the base trim so our flooring stops curling on the ends. There was a ton of sand under the flooring from our last trip so this should help keep crap from getting under there. I still need to run a bead of white silicon caulk around the floor/base joint but it looks a ton better! And I got our little curtains hung on the doors. I should see our new Poly foam 4" mattress here pretty soon so I can ditch the air mattress finally!

Image
My aluminum benroy build:
viewtopic.php?t=45640
User avatar
Robbie
Teardrop Master
 
Posts: 250
Images: 86
Joined: Tue May 10, 2011 11:28 am
Location: West Jordan, UT
Top

Re: Robbie's Benroy build- Maiden Voyage... SUCCESS!!!!

Postby WhitneyK » Wed Mar 13, 2013 11:54 am

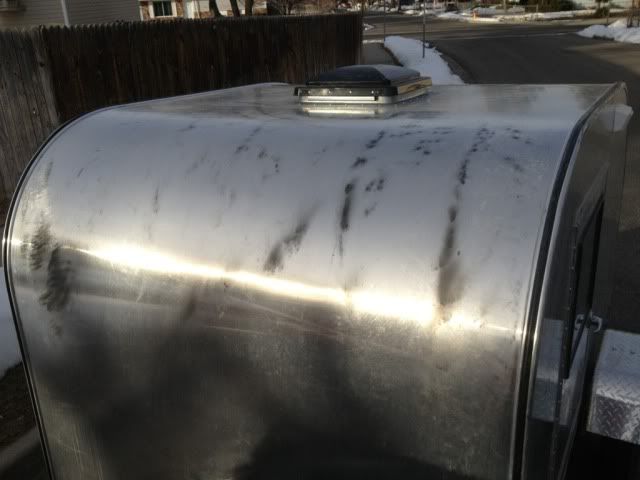
Robbie wrote:I'm not looking forward to cleaning and polishing this thing when the weather warms up! But worse case scenario my buddy and I are going to wet sand the entire thing and then polish it. Here's what I got when I pulled the tarp off...
Image


Have faith my friend

I am in the process of making some aluminum polish. It's sorta the formula that the guy used to polish my tool box years ago. I just did a small section of trim with little effort, I'm considering polishing the whole li'l camper. :thinking: Sure has to beat painting it. I may start on it this weekend just to see how it's going to go. The cost of the polish is cheap, and some labor, but like I say, I have more time than money.
Here's how that little section turned out.....
103229
Whitney & Tracie
Crothersville, IN

We never really grow up, we only learn how to act in public.

Do not confuse what you hear with what I mean.

My build: http://www.tnttt.com/viewtopic.php?t=41955

160061-------------------------------101114
States we've drug our
li'l camper through. (44 States + Vancouver Island and over 45,000 miles so far)
User avatar
WhitneyK
Gold Donating Member
 
Posts: 559
Images: 412
Joined: Sun Dec 12, 2010 10:28 pm
Location: IN, Crothersville (36mi N or Louisville)
Top

Re: Robbie's Benroy build- Time for a Spring tune-up.

Postby Robbie » Wed Mar 13, 2013 11:57 am

That little section looks amazing! I'd love for my whole trailer to look like that. Maybe share your secret formula? :lol: I've yet to try anything on the aluminum. The weather is getting nicer though! I just need to make sure it is camp ready and then I can address it's outer beauty.
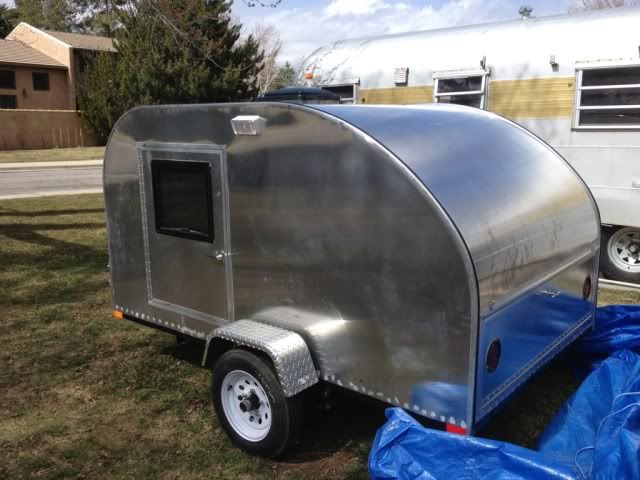
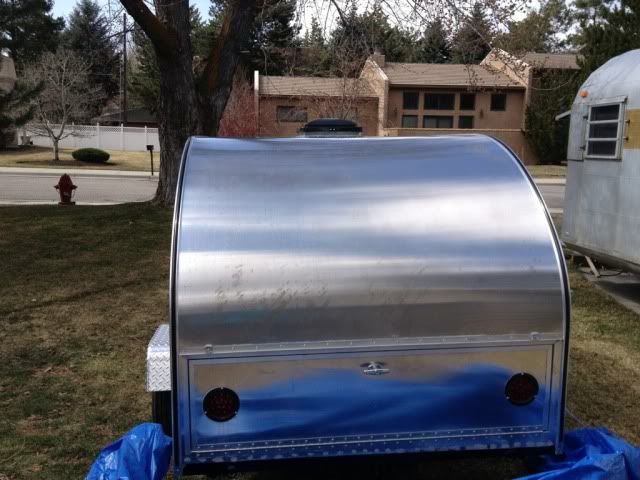
My aluminum benroy build:
viewtopic.php?t=45640
User avatar
Robbie
Teardrop Master
 
Posts: 250
Images: 86
Joined: Tue May 10, 2011 11:28 am
Location: West Jordan, UT
Top

Re: Robbie's Benroy build- Time for a Spring tune-up.

Postby Robbie » Mon Mar 18, 2013 8:30 am

I put in a little elbow grease this weekend and along some hydrochloric acid containing aluminum cleaner I got most of the black stains off. Thank god! It still doesn't look perfect but I think a good wax and polish will make it look fresh again. I don't know much about waxing and my arms were beat which is why the aluminum looks a little cloudy and inconsistent. Our new mattress should be in tomorrow too! We're excited to ditch the air mattress finally!

Image

Image

Image

Image

Image

Image

Image

And here's a little before and after of the worst stains.

Image
My aluminum benroy build:
viewtopic.php?t=45640
User avatar
Robbie
Teardrop Master
 
Posts: 250
Images: 86
Joined: Tue May 10, 2011 11:28 am
Location: West Jordan, UT
Top

Re: Robbie's Benroy build- Time for a Spring tune-up.

Postby WhitneyK » Mon Mar 18, 2013 8:51 am

Glad to hear you slept well over the weekend :lol:
I too, did a little polishing on mine while the weather was good on Saturday. I'm trying to get my polish recipe figured out. It's a combination of polishing rouge and mineral spirits. The first round pictured below is just that combination, worked well, worked easy,.....until I ran out of my "sample" mixture. :x
103380
Frugal (read titewad) as I am and attempting to be as "environmentally friendly" as I can, it always comes back to bite me. Went with the "green" mineral spirits instead of the real deal, didn't work near as good as the "nasty" stuff. :x
Anyway, after several hours of experimenting with different mixes, buffing techniques, etc., here's the results of the front. It did take off the bird poop stains that went with us to Montana and back.
103381 103382

I'll be sure to share the recipe when I get it figured out.
Hopefully I can get the rest done by camping season...... 8)
Whitney & Tracie
Crothersville, IN

We never really grow up, we only learn how to act in public.

Do not confuse what you hear with what I mean.

My build: http://www.tnttt.com/viewtopic.php?t=41955

160061-------------------------------101114
States we've drug our
li'l camper through. (44 States + Vancouver Island and over 45,000 miles so far)
User avatar
WhitneyK
Gold Donating Member
 
Posts: 559
Images: 412
Joined: Sun Dec 12, 2010 10:28 pm
Location: IN, Crothersville (36mi N or Louisville)
Top

Re: Robbie's Benroy build- Time for a Spring tune-up.

Postby PSBreen » Mon Mar 18, 2013 10:01 am

@ Whitney

I hear you and feel your pain. I have yet to find any "green/enviromentally freindy" product that works well.
Steve & Cynthia
User avatar
PSBreen
Donating Member
 
Posts: 185
Images: 93
Joined: Tue May 24, 2011 12:36 pm
Location: Layton, UT
Top

Re: Robbie's Benroy build- Now For Sale...

Postby Robbie » Thu Sep 05, 2013 11:11 am

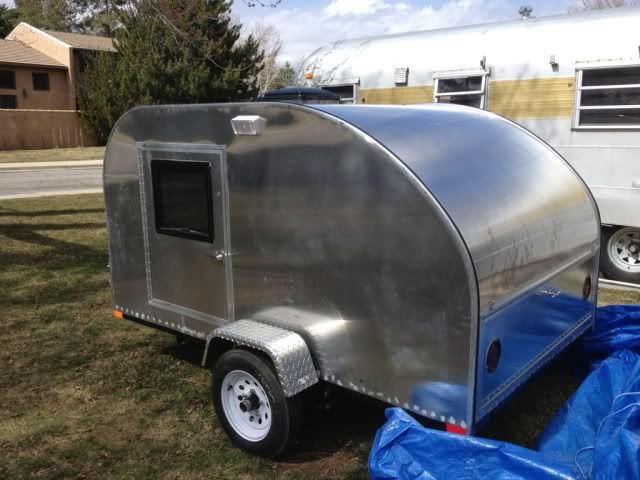
This has been a great project and we've had a blast with it! It served us well as I know it will it's future owners. But we must move on to bigger and better things with our growing family so this little guy is posted for sale in the FS section. We are asking $3,500 or best offer...

Robbie
My aluminum benroy build:
viewtopic.php?t=45640
User avatar
Robbie
Teardrop Master
 
Posts: 250
Images: 86
Joined: Tue May 10, 2011 11:28 am
Location: West Jordan, UT
Top

Previous

Return to Build Journals

Who is online

Users browsing this forum: Bing [Bot], Google [Bot] and 27 guests

cron