Robbie's Benroy build- Now For Sale...

...ask your questions in the appropriate forums BUT document your build here...preferably in a single thread...dates for updates, are appreciated....

Postby campmaster-k » Wed Sep 21, 2011 10:46 am

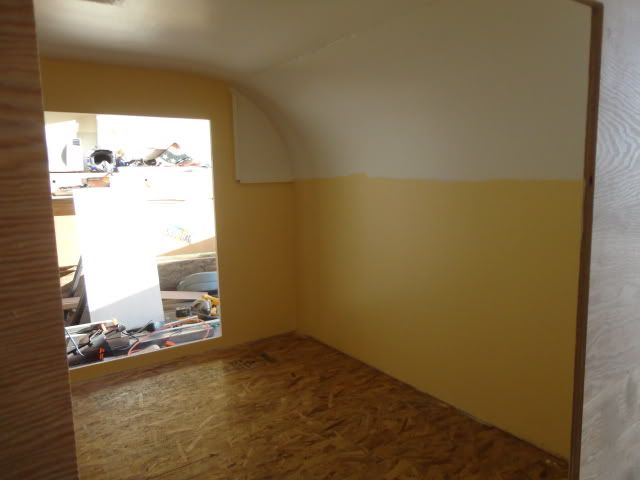
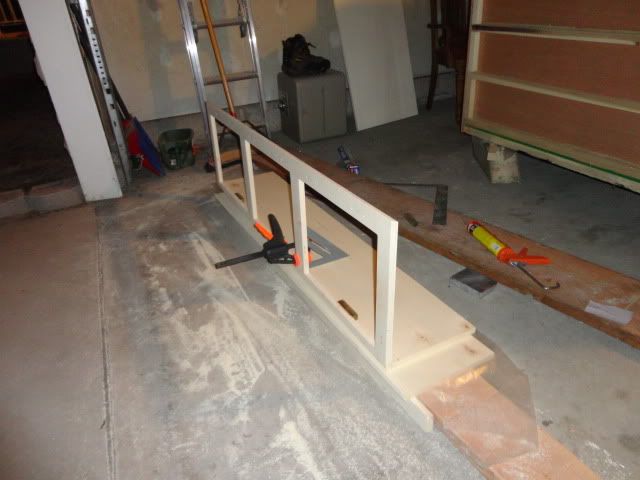
I like the vertical blocking you used in your frame. I would do that next time. Lots more area to screw to.
-Kirk

>TnTTT ORIGINAL 200A LANTERN CLUB

>CEO Coleman Recovery Inc.

>Nor Cal Camping Pinewood Racing Team


Build thread -

viewtopic.php?t=45307&postdays=0&postorder=asc&start=180

Check out my Pictures -

http://s1199.photobucket.com/albums/aa4 ... 0QQtppZZ24
User avatar
campmaster-k
Lifetime member
 
Posts: 3030
Images: 17
Joined: Fri Jun 17, 2011 5:02 pm
Location: Colusa, California

Postby Robbie » Wed Sep 21, 2011 10:50 am

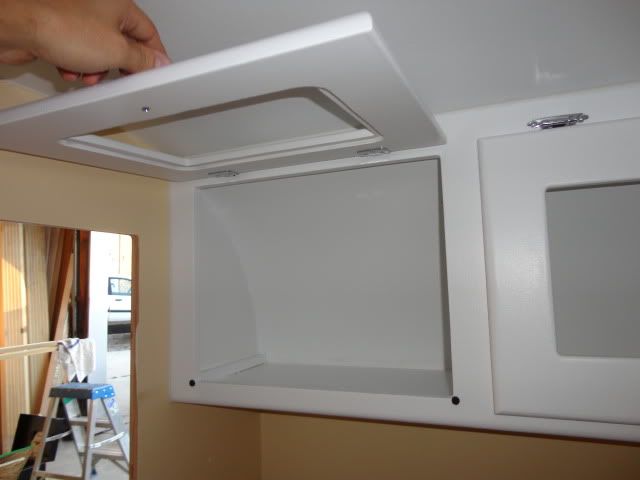
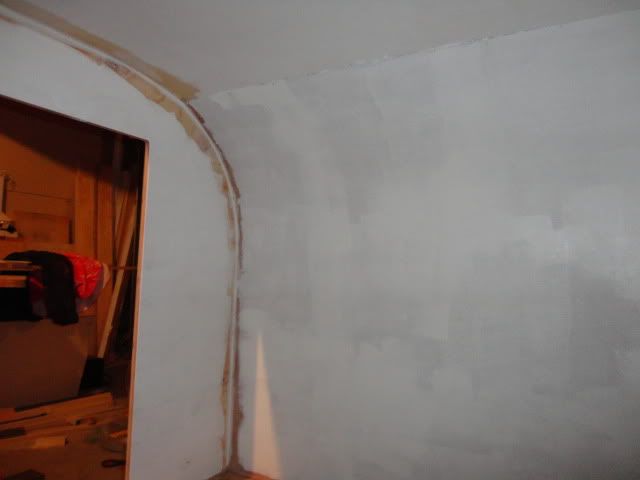
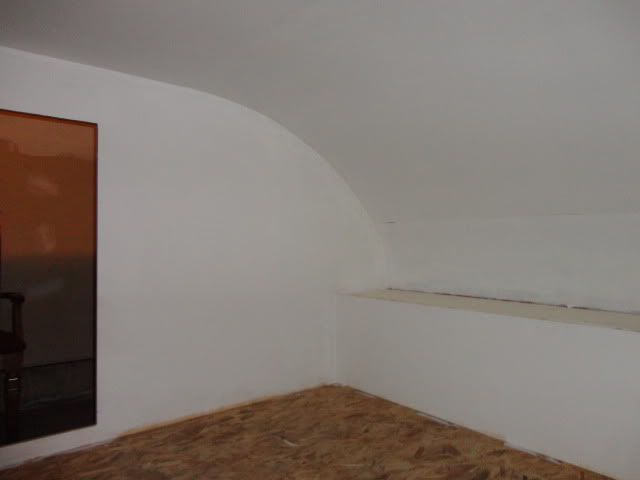
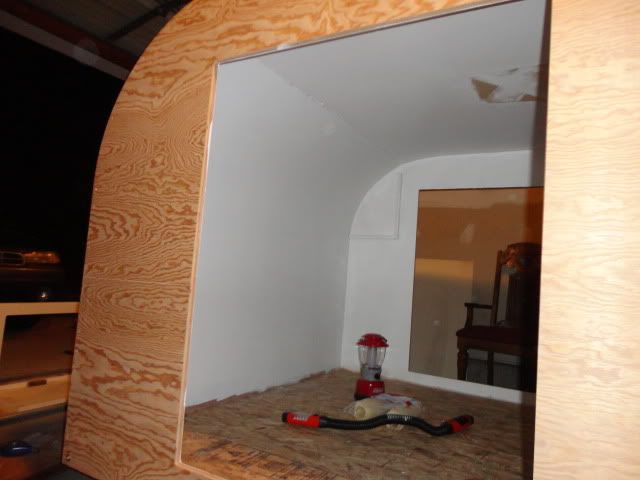
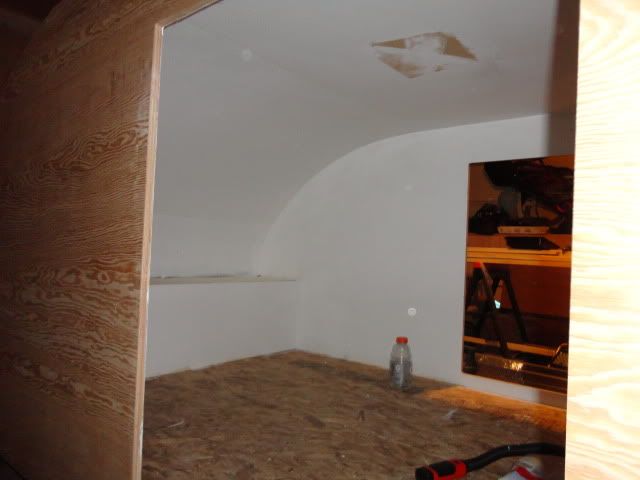
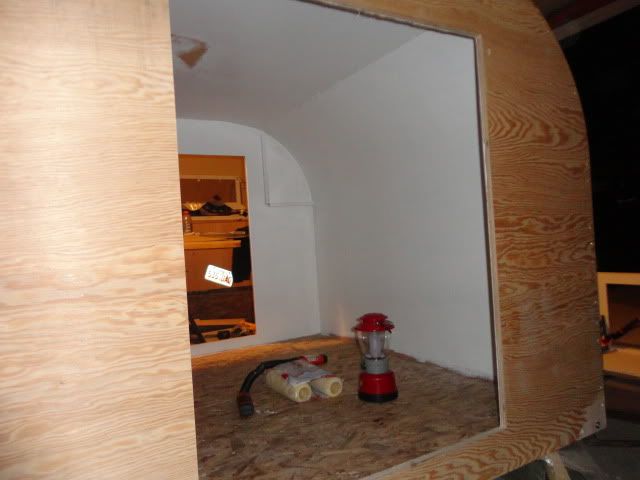
Ya the edges of the ceiling panels were a little flimsy at the straight sections so this helped to stiffen them up. I wish I would have CNC'd out a 3/4" thick piece to do that all the way around the edge of the sides so all of the ceiling edge had a little more support. Oh well, something to keep in mind for #2!
My aluminum benroy build:
viewtopic.php?t=45640
User avatar
Robbie
Teardrop Master
 
Posts: 250
Images: 86
Joined: Tue May 10, 2011 11:28 am
Location: West Jordan, UT

Postby Robbie » Wed Sep 21, 2011 10:14 pm

So I got a little more work done tonight. I got a second coat of primer on the entire inside so I think were ready for paint. The paint also has primer in it so 2 or 3 coats of that and we should be good! I also cut out the bottom of the cabinet and got the face frame assembled to it. Once the glue dries and stiffens up I'll get some primer on that and then paint it with the finish color when i do the inside and then install it. This way I'll just have to paint over the pin nail holes and not hassle with painting inside of it while its installed.

Here are some pics...

Image

Image

Image

Image

Image

Image

And here is the paint color that will be on the inside. It's kind of a light blue with a hint of gray. This is our basement family room painted with the same paint. Should look nice. Can't wait to get it painted!

Image

Robbie
My aluminum benroy build:
viewtopic.php?t=45640
User avatar
Robbie
Teardrop Master
 
Posts: 250
Images: 86
Joined: Tue May 10, 2011 11:28 am
Location: West Jordan, UT
Top

Postby CliffinGA » Wed Sep 21, 2011 10:25 pm

Robbie looks good bud!! What kind of flooring material are you installing? I put my linoleum in first so I would scratch my finished walls and just covbered it in card board and taped the edges by the walls until I finished. I did the opposite on my first tear I bought and then painted, and the wife about strangled me when she saw the scratches thru the paint into the walls :lol:. Now she laughs at it, some any way. Keep up the work bud.

Cliff (& Sheri) :thumbsup:
In God we trust, shoot the rest and he will sort out!

My Build:

viewtopic.php?f=50&t=42628
User avatar
CliffinGA
1000 Club
1000 Club
 
Posts: 1499
Images: 207
Joined: Sat Nov 14, 2009 1:29 pm
Location: Jefferson, GA
Top

Postby Robbie » Wed Sep 21, 2011 10:34 pm

Thanks cliff! I'm not sure on the flooring yet either sheet linoleum, vinyl tiles, carpet tiles...? I don't know yet. The wife will probably chime in when the time comes for it. But if we do sheet linoleum I'll under size the width about half an inch or so and then let the base trim cover up the little short coming.
My aluminum benroy build:
viewtopic.php?t=45640
User avatar
Robbie
Teardrop Master
 
Posts: 250
Images: 86
Joined: Tue May 10, 2011 11:28 am
Location: West Jordan, UT
Top

Postby CliffinGA » Wed Sep 21, 2011 10:53 pm

Sounds good bud, yse the sheet as the tiles are a pain and messy to boot. Its hard as heck to get straight lines and they stick so well when you first lay them down. Too bad your not closer as I have several large pieces I was given by the flooring people on our job site.

Cliff
In God we trust, shoot the rest and he will sort out!

My Build:

viewtopic.php?f=50&t=42628
User avatar
CliffinGA
1000 Club
1000 Club
 
Posts: 1499
Images: 207
Joined: Sat Nov 14, 2009 1:29 pm
Location: Jefferson, GA
Top

Postby aggie79 » Thu Sep 22, 2011 8:54 am

Hey Robbie,

Y'all are rocking and rolling on the build! Looks fantastic. I think y'all will have your teardrop complete in a month or two at this pace.

I like the plexiglass cabinet door detail. I had thought about doing that but chickened out because I hadn't done anything like it before.

BTW, don't worry about getting the teardrop shell onto the frame. I built my shell off-frame and, with some good redneck engineering and several adult beverages, was able to get the shell onto the frame by myself.

Keep up the good work!

Take care,
Tom
Tom (& Linda)
For build info on our former Silver Beatle teardrop:
Build Thread

93503
User avatar
aggie79
Super Duper Lifetime Member
 
Posts: 5405
Images: 686
Joined: Tue Aug 07, 2007 5:42 pm
Location: Watauga, Texas
Top

Postby Robbie » Thu Sep 22, 2011 1:10 pm

Thanks Tom! I'd be stoked if we could have it done in about a month! Could probably still take it out for an over nighter if that was the case. I have a question for those of you who painted your interiors. I have 2 coats of the Kilz 2 Premium primer/sealer on the inside and the walls feel really rough. Like 80 grit sand paper rough in some spots. I'm thinking its just because of the texture of the plywood and the primer getting soaked in. Should I hit it with a sanding block real quick to smooth it out some or...? I just don't want it to feel scratchy on the inside after we get it all finished out.

Hopefully tonight I can get the front cabinet all primed up and smooth out the walls somehow so I can get the final coats of paint on the ceiling and cabinet. The ceiling color is a frost white. We painted our kitchen cabinets with this stuff and after 2 years they still look good and are holding up great!

Once the ceiling is all dry I'm going to tape it off and start on the walls!

Then its onto the wiring and getting the lights/outlets in place so I can close this puppy in!
My aluminum benroy build:
viewtopic.php?t=45640
User avatar
Robbie
Teardrop Master
 
Posts: 250
Images: 86
Joined: Tue May 10, 2011 11:28 am
Location: West Jordan, UT
Top

Postby kinto » Thu Sep 22, 2011 1:32 pm

nice work man :thumbsup:

regarding the floor, i was originally thinking about marine carpet for mine (like in the bottom of a boat, on some docks, etc...) but then realized when it inevitably gathers dirt, mud, leaves, bits of whatever, it would be a giant PITA to clean vs. just sweeping out/ wiping down a kitchen floor type of material... just my 2 cents, but probably better to stay away from carpet tiles...

anywayz... looking great & keep it up! :applause:


kent
:)
Is a hippopotamus just a really cool opotamus?

imay ildbay urnaljay

Image
User avatar
kinto
Gold Donating Member
 
Posts: 228
Images: 465
Joined: Tue Jul 19, 2011 10:20 am
Location: STL
Top

Postby Robbie » Thu Sep 29, 2011 9:06 am

Been busy the last few days with the interior almost complete! It is completely painted inside with a nice yellow paint on the walls (didn't have enough of the blue) and frost white on the ceiling and front cabinet. I love this front cabinet! It looks good and is going to be the perfect storage solution to a hatchless design. I have a bunch of pics and will get them posted up once the doors are back on. I also cut out the hole for the storage vent on the ceiling and that gave us some nice working light and ventilation. Painting in a small space like that can definitely give you a headache!

Punchlist for interior:
- Install doors on front cabinet
- Cut out, paint, and install rear shelf
- Caulk ceiling joint trim and front cabinet
- Cut, paint, and install door jambs
- Install flooring and base trim
- Install dome light and power outlet

Not too much left for the inside. I'm hoping I can get the trailer frame welded up this weekend and then I can get the axle on and get this thing rolling!

Stay tuned for updated pics in the next day or 2!!!

Robbie
My aluminum benroy build:
viewtopic.php?t=45640
User avatar
Robbie
Teardrop Master
 
Posts: 250
Images: 86
Joined: Tue May 10, 2011 11:28 am
Location: West Jordan, UT
Top

Postby Robbie » Sun Oct 02, 2011 10:28 pm

Alright its taken me some time but here are the pics of the interior.... The last few pics showing the gray panels in the doors are not current. We decided to use a smoked piece of plexi/acrylic instead of the scrapbook paper.... which I screwed up miserably. :lol: I guess I'll leave the craft stuff for the wife!

Image

Image

Image

Image

And with the doors installed!

Image

Image

Image

Image

Image

For this next week I'm going to work on getting the door jambs cut, painted, and installed along with the rear shelf. Then I need to order the wire, lights, and power outlets to get all the wiring ran before insulation and THEN its time to focus on getting the trailer built before the weather goes south.
My aluminum benroy build:
viewtopic.php?t=45640
User avatar
Robbie
Teardrop Master
 
Posts: 250
Images: 86
Joined: Tue May 10, 2011 11:28 am
Location: West Jordan, UT
Top

Postby Zboom » Sun Oct 02, 2011 11:21 pm

The cabinets look awesome Robbie! :applause:
User avatar
Zboom
Teardrop Advisor
 
Posts: 50
Images: 32
Joined: Sun Aug 28, 2011 12:22 pm
Location: New Mexico
Top

Postby Robbie » Mon Oct 03, 2011 7:48 am

Thanks! They turned out a lot better than I was anticipating! I just need to get the ball latches installed and get some sort of stay to keep the doors open so we don't have to hold it on our heads while were getting in there.
My aluminum benroy build:
viewtopic.php?t=45640
User avatar
Robbie
Teardrop Master
 
Posts: 250
Images: 86
Joined: Tue May 10, 2011 11:28 am
Location: West Jordan, UT
Top

Postby campmaster-k » Mon Oct 03, 2011 11:17 am

Great work Robbie. :thumbsup:
-Kirk

>TnTTT ORIGINAL 200A LANTERN CLUB

>CEO Coleman Recovery Inc.

>Nor Cal Camping Pinewood Racing Team


Build thread -

viewtopic.php?t=45307&postdays=0&postorder=asc&start=180

Check out my Pictures -

http://s1199.photobucket.com/albums/aa4 ... 0QQtppZZ24
User avatar
campmaster-k
Lifetime member
 
Posts: 3030
Images: 17
Joined: Fri Jun 17, 2011 5:02 pm
Location: Colusa, California
Top

Postby aggie79 » Mon Oct 03, 2011 11:19 am

Robbie,

I love your interior cabinets. The smoke plexiglass is a nice detail. (Have you thought about backlighting them with LEDs?)

Take care,
Tom
Tom (& Linda)
For build info on our former Silver Beatle teardrop:
Build Thread

93503
User avatar
aggie79
Super Duper Lifetime Member
 
Posts: 5405
Images: 686
Joined: Tue Aug 07, 2007 5:42 pm
Location: Watauga, Texas
Top

PreviousNext

Return to Build Journals

Who is online

Users browsing this forum: No registered users and 27 guests