Lance and Becky's Sagwagon

...ask your questions in the appropriate forums BUT document your build here...preferably in a single thread...dates for updates, are appreciated....

Re: Lance and Becky's Sagwagon - Cabin Finished

Postby BillZ » Mon May 06, 2013 9:04 pm

Looks great Becky!
I hope to see it up close sometime this season.
User avatar
BillZ
The 300 Club
 
Posts: 308
Images: 0
Joined: Tue Feb 16, 2010 7:39 pm
Location: College Park, Maryland

Re: Lance and Becky's Sagwagon - Cabin Finished

Postby Melven » Mon May 06, 2013 11:51 pm

Awesome work Becky!
User avatar
Melven
Teardrop Master
 
Posts: 140
Joined: Wed Jun 13, 2012 9:47 am

Re: Lance and Becky's Sagwagon - Cabin Finished

Postby PKCSPT » Tue May 07, 2013 6:16 am

:thumbsup: you have almost the same electrical system I have,,, simple and cheap but works.
Great job on the tear
121172 116946 159644
PKCSPT
Silver Donating Member
 
Posts: 1515
Images: 61
Joined: Wed Mar 31, 2010 11:27 pm
Location: Minnesota
Top

Re: Lance and Becky's Sagwagon - Cabin Finished

Postby aggie79 » Tue May 07, 2013 8:41 am

Fantastic Becky!

Your finished cabin looks incredible.I like your uncluttered approach. It's almost camping time!

Take care,
Tom
Tom (& Linda)
For build info on our former Silver Beatle teardrop:
Build Thread

93503
User avatar
aggie79
Super Duper Lifetime Member
 
Posts: 5405
Images: 686
Joined: Tue Aug 07, 2007 5:42 pm
Location: Watauga, Texas
Top

Re: Lance and Becky's Sagwagon - Cabin Finished

Postby pbeardsley » Tue May 07, 2013 12:06 pm

Great work Becky and Lance. Loving the finished cabin, I am blown away by how light and airy it looks in the pictures. :thumbsup:

Countdown to camping, 10 days and counting ...........
Pete
User avatar
pbeardsley
Teardrop Inspector
 
Posts: 12
Joined: Thu Mar 14, 2013 4:43 pm
Location: Nottingham UK
Top

Re: Lance and Becky's Sagwagon - Cabin Finished

Postby burlesot » Tue May 07, 2013 6:32 pm

Your build looks great!
User avatar
burlesot
Teardrop Master
 
Posts: 280
Images: 62
Joined: Mon Jul 16, 2012 3:10 pm
Top

Re: Lance and Becky's Sagwagon - Cabin Finished

Postby Oldragbaggers » Tue May 07, 2013 8:12 pm

Thanks so much everyone. I appreciate all the nice comments. Hopefully the title of my entry this weekend will be "I'M DONE."
Life is sooooo good.........
Sail...camp....bike...repeat
Becky

Build Journal http://www.tnttt.com/viewtopic.php?f=50&t=45917
Visit our blog at http://www.oldragbaggers.com
Image Image
User avatar
Oldragbaggers
Gold Donating Member
 
Posts: 1842
Images: 331
Joined: Mon Aug 01, 2011 9:22 pm
Location: Essex, MD
Top

Re: Lance and Becky's Sagwagon - Cabin Finished

Postby harleykamper » Wed May 08, 2013 11:18 pm

That's a SWEET look'n teardrop. Very nice job. Clean, classy and sassy. (i'll bet just like Becky). So many nice details and finishing touches. So professional! I'm VERY impressed! :thumbsup: :thumbsup:
Paul & Marilyn Moon
2008 anniversary edition Harley Davidson ElectraGlide Ultra Classic
Kustom KlamShell tent Trailer. (In build now)
The ClamShell Tent Trailer Build Journal viewtopic.php?f=50&t=54531
User avatar
harleykamper
Teardrop Master
 
Posts: 102
Images: 206
Joined: Fri Feb 08, 2013 4:30 pm
Location: Reno Nv.
Top

Re: Lance and Becky's Sagwagon - Cabin Finished

Postby Oldragbaggers » Thu May 09, 2013 9:06 am

Aw shucks, harleykamper....thanks a million!!
Life is sooooo good.........
Sail...camp....bike...repeat
Becky

Build Journal http://www.tnttt.com/viewtopic.php?f=50&t=45917
Visit our blog at http://www.oldragbaggers.com
Image Image
User avatar
Oldragbaggers
Gold Donating Member
 
Posts: 1842
Images: 331
Joined: Mon Aug 01, 2011 9:22 pm
Location: Essex, MD
Top

Re: Lance and Becky's Sagwagon - Hatch Finally ON!!

Postby Oldragbaggers » Sun May 26, 2013 10:34 pm

My primary goal today was to get the hatch installed, and strictly speaking I got that done. Some things still didn't work out like I thought they would, but I decided it was time to just push through, modify what I could and make it work. The end caps for the hatch side trim didn't work for me. Some little problem with rivets and placement. I think I'm going to do without them. (Still haven't figured out exactly how I will close up the ends and I'm open to suggestions) However, because I had already drilled holes through my vinyl insert to accommodate those end caps I need to order new vinyl now. This isn't the end of the world. I'll call Grant on Tuesday.

I can't say it is a great fit. I can't say I am thrilled with it. I still have big gaps at the top, bigger on one side than the other. All I can say is that with enough caulk and gasketing, and a good pair of draw down latches I will get it to work. And after all that if I can't get it watertight, I will make a canvas snap on cover and head on down the road. Next item is to trim up the floor and the bottom of the hatch so I can get those latches on, draw it down and see where and how much gasketing I'll need to use.

(Sorry the pictures are so dark, it was getting late when I finally started cleaning up.)

Image

Image

This is my biggest issue. Grrrrr.....

Image

This hatch has completely worn me out and I have no confidence whatsoever that doing it over would yield any different result, so one way or another, whatever I have to do, we will make this one work, go camping and have ourselves a blast.

Okay, enough with the hatch. On to happier subjects.

The prop poles came out great and I am very happy with those. I used boat bimini hardware. I had to mount them on a pretty severe curve to get them to come down onto the counter where I needed them to be, and I also wanted them to fold in so I could store them in the hatch in clips. I found deck fittings with an articulation point and everything worked perfectly. Just open up and drop them down. They're pretty too. The poles are 1" oak dowel. The hardware came from Sailrite.

Image

Image

Image

Image

Image

And how will I keep the hatch from blowing up in the wind? I'm so glad you asked. Since I started with boat hardware, I thought I'd just carry the theme through and use cleats and little eyes. A bowline, a couple wraps around the cleat and the hatch is going nowhere. The cleats are on the back of the poles and aren't even visible looking straight on at the hatch.

Image

I got the extension table mounted using the hardware I got from Compact Camping Concepts. A nice adjustable leg that folds up under the table and is held in place with a little permanently mounted bungee cord, and a mounting rail.

Image

Nice, lightweight, easy to take on and off and gives me lots of extra room. The table top is covered with the same Formica as the counter.

Image

The leg is out far enough to allow the cabinet door underneath to be opened completely for easy access when the table is in place.

Image

We used the inexpensive Haulmaster light set from Harbor Freight with one of our many discount coupons and it fits the look of the teardrop perfectly. I may add some reflectors at some point.....or not.

Image

Image

Inside the cabin I have installed my led lights. These are simple wireless stick up lights that came six to a pack at Costco and have a neat little remote control that has a holder which I mounted by the door. The remote turns all six of them on or off at once but you can use them individually by pushing on them. They put off a lot of light. I just hope they have decent battery life.

Image

Image

Image

The curtains came out good. We are very happy with the interior. The bed is comfy, the fan puts out a nice breeze, it's light and airy and seems plenty roomy to us.

Image

So that's it for now. Enjoy the rest of your Memorial Day weekend and God Bless our Veterans.
Last edited by Oldragbaggers on Sun May 26, 2013 10:59 pm, edited 1 time in total.
Life is sooooo good.........
Sail...camp....bike...repeat
Becky

Build Journal http://www.tnttt.com/viewtopic.php?f=50&t=45917
Visit our blog at http://www.oldragbaggers.com
Image Image
User avatar
Oldragbaggers
Gold Donating Member
 
Posts: 1842
Images: 331
Joined: Mon Aug 01, 2011 9:22 pm
Location: Essex, MD
Top

Re: Lance and Becky's Sagwagon - Hatch Finally ON!!

Postby Forrest747 » Sun May 26, 2013 10:52 pm

:thumbsup: :thumbsup: :thumbsup: :thumbsup: :applause: :applause: :applause: :applause: :P :P :P :wine: :wine: :wine: :ok: :ok: :awesome:

I was wondering how you held the prop rods in place and teh cleats and eyelet is perfect. its nice for sure.
"All the success on the trail can not compensate for having square headlights"

"I've got a fever and the only prescription is more cowbell!"
http://www.tnttt.com/viewtopic.php?f=50&t=37701 Build Journal
User avatar
Forrest747
Cowbell Donating Member
 
Posts: 1327
Images: 447
Joined: Mon Apr 06, 2009 3:40 am
Location: West Valley Utah, Utah
Top

Re: Lance and Becky's Sagwagon - Hatch Finally ON!!

Postby LDK » Sun May 26, 2013 11:17 pm

Oldragbaggers wrote:


And how will I keep the hatch from blowing up in the wind? I'm so glad you asked. Since I started with boat hardware, I thought I'd just carry the theme through and use cleats and little eyes. A bowline, a couple wraps around the cleat and the hatch is going nowhere. The cleats are on the back of the poles and aren't even visible looking straight on at the hatch.

Image


I'm sure others will copy on this idea. Good job Becky! :thumbsup:
LDK
Gold Donating Member
 
Posts: 1419
Images: 1
Joined: Fri Jan 22, 2010 8:29 pm
Top

Re: Lance and Becky's Sagwagon - Hatch Finally ON!!

Postby S. Heisley » Mon May 27, 2013 12:20 am

Good job, Becky. You're almost done for sure! :thumbsup: :applause:
Your hatch "legs" are very nice, as are your curtains and everything else. :applause:
User avatar
S. Heisley
Super Lifetime Member
 
Posts: 8774
Images: 495
Joined: Mon Sep 17, 2007 10:02 am
Location: No. California
Top

Re: Lance and Becky's Sagwagon - Hatch Finally ON!!

Postby mezmo » Mon May 27, 2013 2:53 am

Hi Becky,

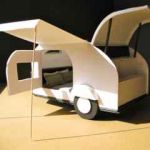
Good to see you've got the hatch done. It looks great. In fact
your whole TD shows the care and effort you've invested in its
nice clean design.

Those side hatch gaps can be dealt with. Once you get it totally
trimmed down they probably won't be as large and you can weather-strip
them "away".

Here's a novel solution I ran across on an Australian Vintage Caravan
forum I belong to. One of their members bought an in-progress large
TD and is finishing it out as a small toyhauler/TD combo. He wanted
to use some vintage car tail lights on it that he had, but needed a very
large gasket to fit it to the rear curved body. Such a gasket didn't exist.
[It is, after all, a one-off custom build - as is yours !] So he fabricated
a couple out of a pair if flip-flops ! Think of it - flip-flop soles are after
all, just a very dense foam. Maybe you could adapt this idea and make
a custom wedge out of some flip-flops to use as the topmost parts of the
side's weather stripping, if you still need to close in a larger gap. Just
fabricate the needed pieces to size and glue in place with the appropriate
glue and then continue the rest of the weather stripping with the usual
types you'd planned to use.

Here's a link to the Aussie Vintage Caravans forum thread page showing
what he did. Look for reply #169 on the page.

http://vintagecaravans.proboards.com/in ... 745&page=7

Maybe his idea could help you out. Your hatch looks so nicely done, that
I think you're right to decide to just deal with what problems there may be
and not rebuild it or build another.

Cheers,
Norm/mezmo

P.S. Just happened to think... If the flip-flop sole foam thickness doesn't
completely fill a gap, maybe it'd be enough as a base that you could still
use it and then run the 'regular' types of weather stripping on top of that.
Also, another source of an even thicker dense foam would be those foam
weeding kneelers you can buy for a couple-few bucks at a garden store or
garden section in a larger big box store.
Last edited by mezmo on Mon May 27, 2013 3:16 am, edited 1 time in total.
If you have a house - you have a hobby.
User avatar
mezmo
1000 Club
1000 Club
 
Posts: 1817
Images: 194
Joined: Fri Jan 01, 2010 4:11 am
Location: Columbia, SC
Top

Re: Lance and Becky's Sagwagon - Hatch Finally ON!!

Postby donnan » Mon May 27, 2013 3:02 am

When I saw those oak legs to support the hatch, the first thing I thought was... "what happens when a big wind comes along and blows the hatch door upwards" but you got it covered in a very creative way....WELL DONE!!! :applause:

Your paint finish is excellent...did you spray inside and out?

Nice to watch such a great build happening Becky. :D

Paul
Life is too short not to enjoy it :)
When I gamble I like to win.
http://www.realpayers.com
User avatar
donnan
Teardrop Advisor
 
Posts: 64
Images: 8
Joined: Sun May 12, 2013 12:18 pm
Location: Tamworth Australia
Top

PreviousNext

Return to Build Journals

Who is online

Users browsing this forum: No registered users and 13 guests