roam with a view first camping trip done

...ask your questions in the appropriate forums BUT document your build here...preferably in a single thread...dates for updates, are appreciated....

Postby rebapuck » Fri Oct 21, 2011 10:24 pm

Put a stop on that front storage lid. Would hate for it to break that big window.
Judy
1966 VW camper
1967 VW singlecab
Image
User avatar
rebapuck
.
 
Posts: 2243
Images: 1
Joined: Thu May 14, 2009 1:55 pm
Location: Chapel Hill NC

Postby Deryk the Pirate » Fri Oct 21, 2011 11:37 pm

eye lids lol
Build Thread lil vardo 1: http://tinyurl.com/baqe6py
Build Thread lil vardo 2: http://tinyurl.com/b3rwffm
User avatar
Deryk the Pirate
500 Club
 
Posts: 809
Images: 158
Joined: Tue Aug 18, 2009 11:03 am
Location: Parlin NJ

Postby LDK » Sun Oct 23, 2011 7:48 am

Hey Jeremy

It's been awhile since I visited your build thread. Your camper is looking really cool! :thumbsup:
LDK
Gold Donating Member
 
Posts: 1419
Images: 1
Joined: Fri Jan 22, 2010 8:29 pm
Top

RE: Evolving Design

Postby mezmo » Wed Oct 26, 2011 10:37 pm

Hi Jeremy/jbyrd,

Interesting to see your design evolve. Building what you want and need
is what it's all about I think. You're making good progress, even with the
in-progress partial redesign.

Forgive me, but all I could think of, when I saw the new tongue box was,
"Wow, its got a schnoz now!" Ya need to make a pair of giant Groucho
glasses for it now and you'll be the talk of every campground you're ever
in with it wearing them!?!?!?! - as I said - forgive me! Ha!

Cheers,
Norm/mezmo
If you have a house - you have a hobby.
User avatar
mezmo
1000 Club
1000 Club
 
Posts: 1817
Images: 194
Joined: Fri Jan 01, 2010 4:11 am
Location: Columbia, SC
Top

Re: roam with a view updated 10-17-11

Postby jbyrd » Mon Aug 06, 2012 6:45 am

Ok so, I know it's been way overdue, but I finally am getting close to being done.
I suffered a major setback in the form of some leakage which ended up busting most of my seams
and really just disgusted me to the point I was going to scrap it and start all over again
But a good friend of mine convinced me that we could salvage it, so he come over for a weekend
and we completely sanded it down to bare wood again and started over.
Image
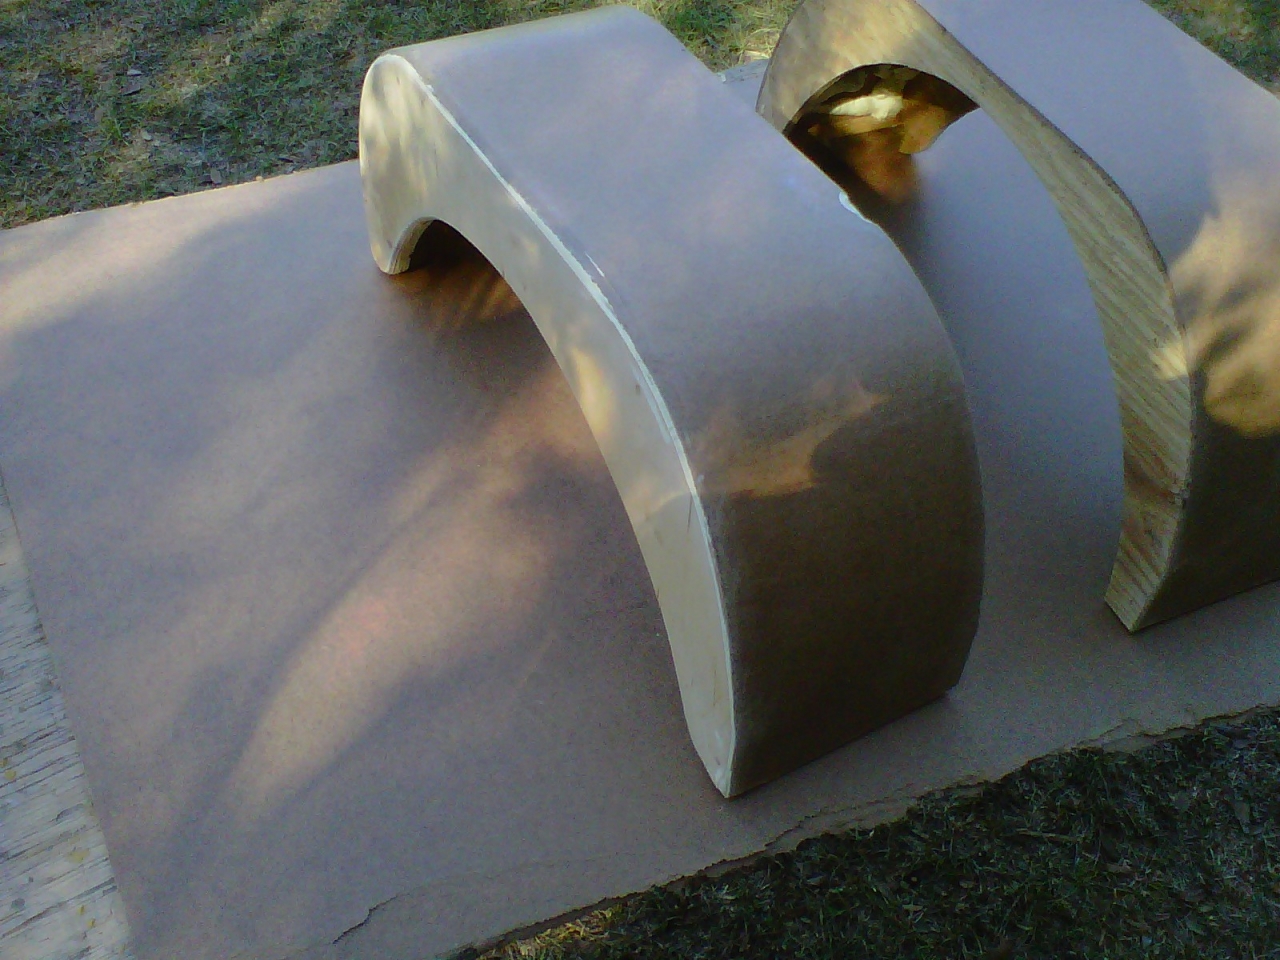
The fenders completed
Image
at this point it had 6 coats of a grey tinted kool seal, which I ended up HATING (looked like primer) :shock:
Image
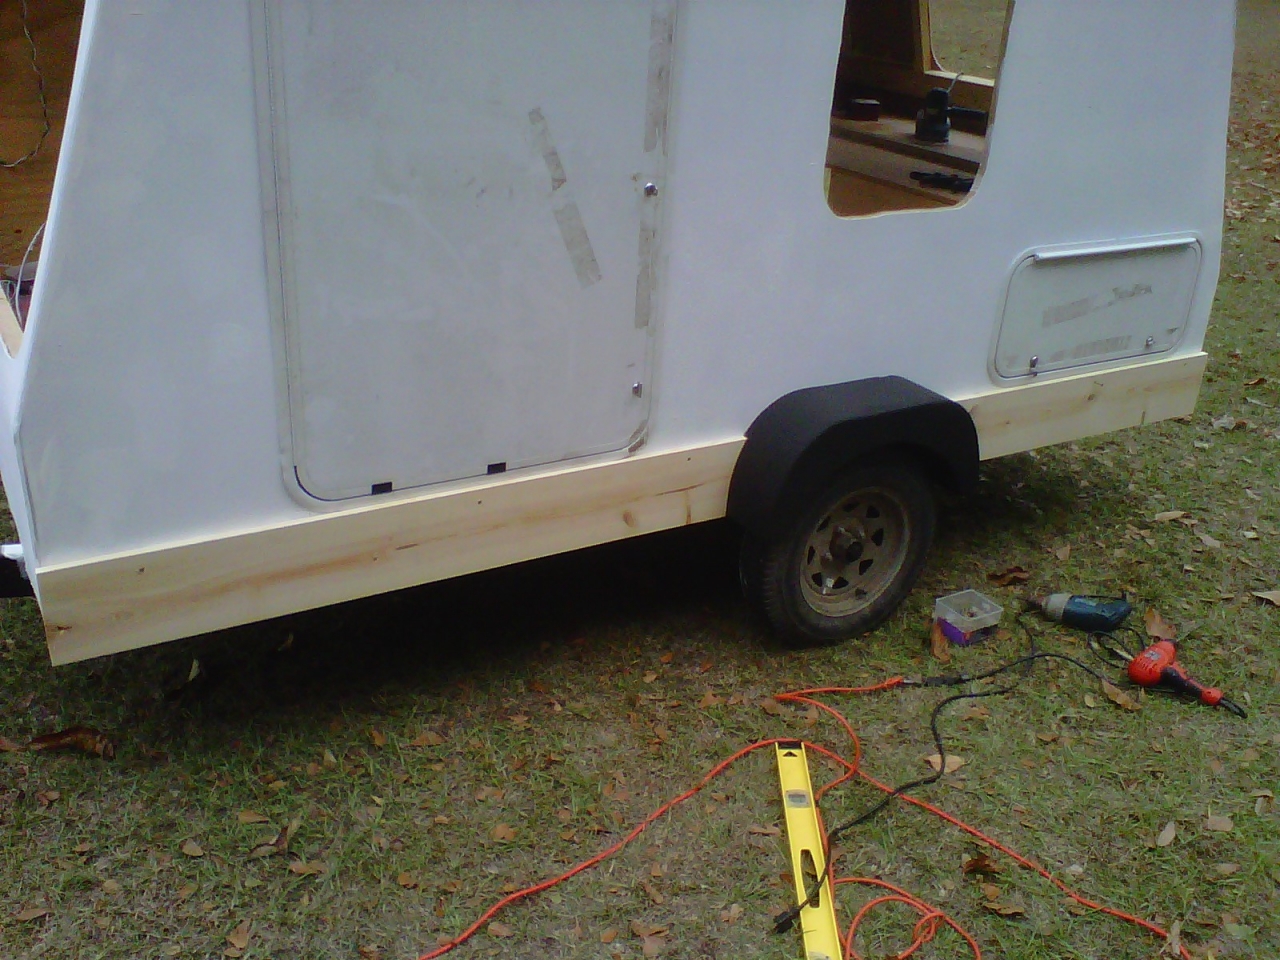
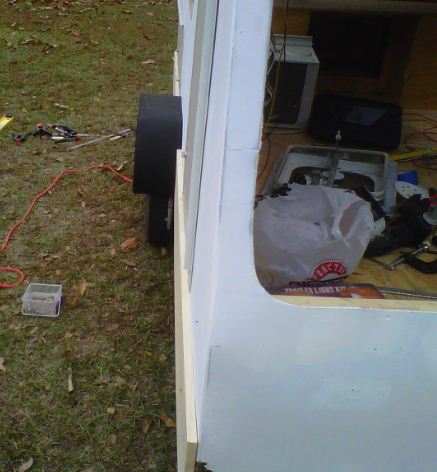
Putting the side skirts on
Image
Image
The fenders were completely encapsulated in an asphalt fence paint (which by the way is almost impossible to get off) :thumbsup:
Image
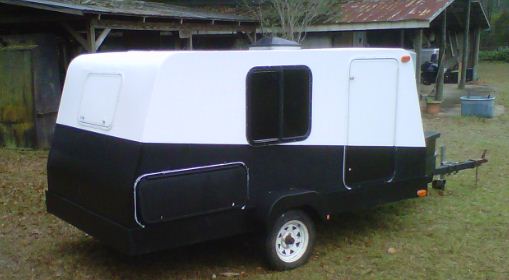
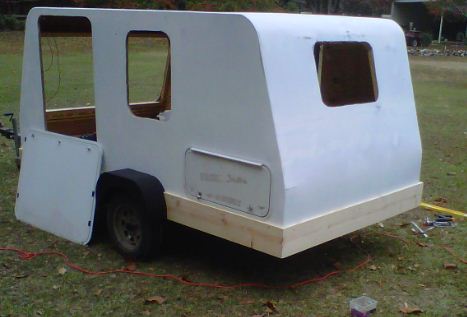
I missed taking pictures of a few steps to this point. It had another six coats of white kool seal,
but I didn't like the flat finish, so I did a two tone paint job with rustoleum enamel satin finish, which looked great.
also did a silver stripe between the black and white (but no picture of that) :x
Image
Image
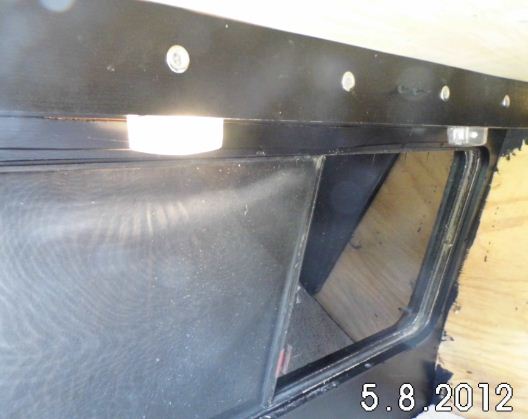
Ok so here is the point it all went wrong, due to the crazy heat down here and lack of long enough screws,
the front window pulled loose from the body and let water leak in which soaked in through out and caused the wood to swell
which busted a big portion of my seams. so thats when I gave up on it, just tarped it up and let it sit until 3 weeks ago.
I did'nt take any pics of the redoing aspect because I was rushing to get it done to go camping.
Image
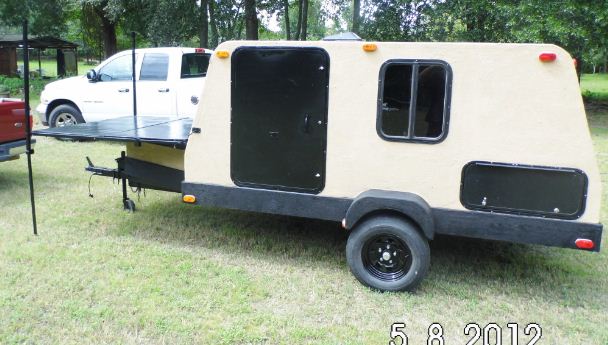
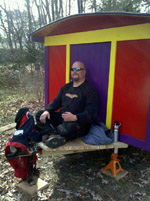
here it is! We took it down to bare wood then epoxy resined and fiberglass taped all of the seams,
then coated it with 3 coats of this product I found called deck armor, It's like a bedliner type material but
can be colored in about 30 different colors. It's pretty cool is about 1/4" thick and still has a flexable aspect to it but grips to the wood like krazy glue.
Image
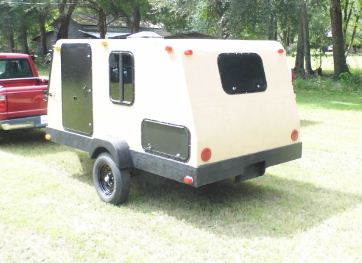
I then painted the bottom skirting with rustoleom spray enamel to break up the colors alittle bit.
Image
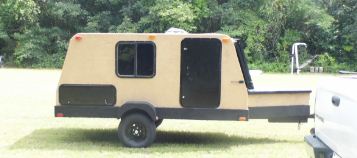
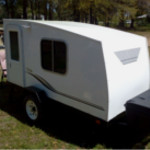
this is a better shot of the true color, it's called sandstone
Image
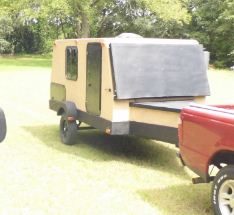
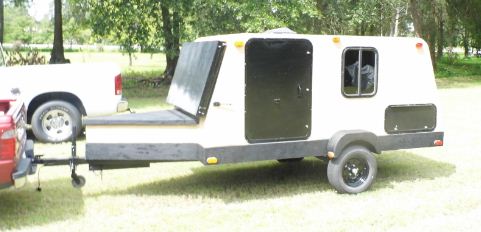
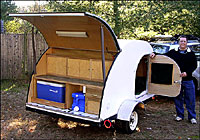
As you can see I also built a window cover to protect that big front window, but whats really cool about it is.....
Image
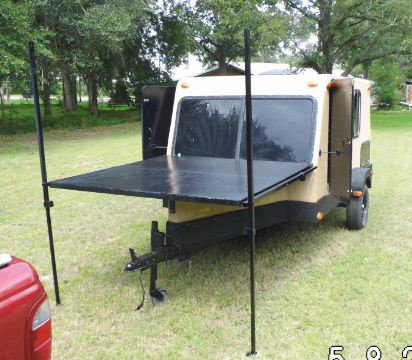
It also doubles as a huge table that makes all the space over the tongue useable. Tadah instant galley :D
Image
I left the legs long so that I can string camping lights from it.
Image
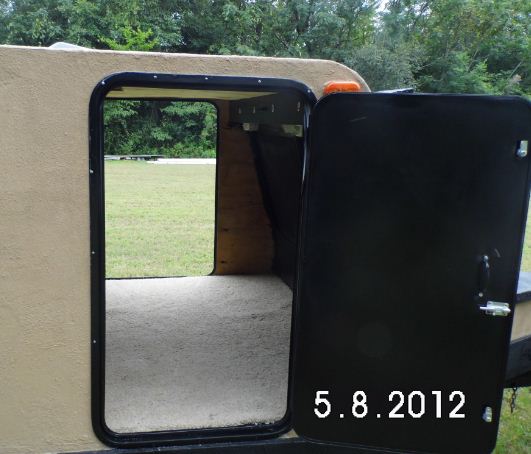
the inside is not completed yet but It is enough to go camping this week.
Image
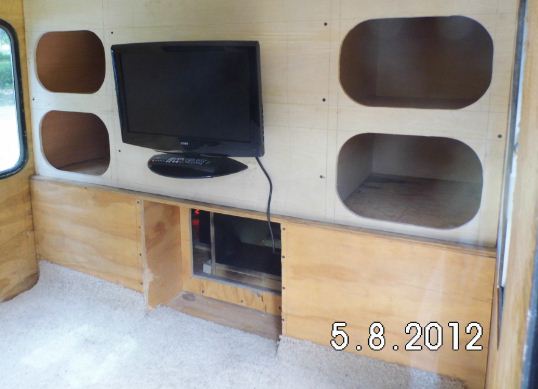
I left the stand on the tv/dvd player so that we can take it out when we are camping and have it outside with us.
cubbies for clothes and inside storage to the left and right, a/c at the bottom.
Image
simple lighting setup two 12 volt lights above the head of the bed and then the 4 little dots above those are blue led accent lights, which look very cool at night.
I still need to skin the inside and paint cover or what I don't know yet, but it is campable and going this week.
Oh and the front window is now BOLTED in so hopefully no more leaks.
Til later, See ya
Jeremy

My build journal #1 "SOLD" : viewtopic.php?t=45945
my build journal #2 "SOLD": viewtopic.php?f=50&t=59216
User avatar
jbyrd
Teardrop Master
 
Posts: 146
Images: 172
Joined: Sun Aug 28, 2011 8:24 pm
Location: marianna, Florida
Top

Re: roam with a view updated 8-6-12

Postby crumbruiser » Mon Aug 06, 2012 7:19 pm

I hated to hear about the setback, the leak and seperation of seams but, your pursevearence [spelling?] payed off. It looks really great. :thumbsup: Congradulations.
Frank
I am not weird, I am a Limited Edition.
Facebook http://www.facebook.com/profile.php?id=100000303236631
User avatar
crumbruiser
Teardrop Master
 
Posts: 266
Images: 255
Joined: Sun Jul 10, 2011 6:11 pm
Location: Central Ohio
Top

Re: roam with a view updated 8-6-12

Postby jeff0520 » Mon Aug 06, 2012 7:47 pm

The finished product is looking really good. I'd LOVE to have a window in the front like that, but "she who must be obeyed" has decreed the entire front wall shall be covered in cabinets to all the camping stuff can remain packed in the Command Post to allow spur-of-the-moment camping urges to be fulfilled. I have to admit, she has a point.
Hypno-Toad's Command Post, the build thread! http://www.tnttt.com/viewtopic.php?f=50&t=50384

Image
User avatar
jeff0520
The 300 Club
 
Posts: 389
Images: 128
Joined: Sun May 13, 2012 7:09 am
Top

Re: roam with a view updated 8-6-12

Postby CliffinGA » Mon Aug 06, 2012 8:12 pm

Looks great Jeremy and you still got more done than I have bud! Sorry for all the setbacks on the build but I've learned you always have them in a build :lol:. Enjoy camping in it bud!

Cliff :thumbsup:
In God we trust, shoot the rest and he will sort out!

My Build:

viewtopic.php?f=50&t=42628
User avatar
CliffinGA
1000 Club
1000 Club
 
Posts: 1499
Images: 207
Joined: Sat Nov 14, 2009 1:29 pm
Location: Jefferson, GA
Top

Re: roam with a view updated 8-6-12

Postby jbyrd » Tue Aug 07, 2012 5:38 am

crumbruiser wrote:I hated to hear about the setback, the leak and seperation of seams but, your pursevearence [spelling?] payed off. It looks really great. :thumbsup: Congradulations.
Frank

Thank you very much

jeff0520 wrote:The finished product is looking really good. I'd LOVE to have a window in the front like that, but "she who must be obeyed" has decreed the entire front wall shall be covered in cabinets to all the camping stuff can remain packed in the Command Post to allow spur-of-the-moment camping urges to be fulfilled. I have to admit, she has a point.

thank you, yeah when I was loading up last night I thought to myself I don't really have that much inside storage space, but after it was all loaded I still have one side compartment and the entire tongue box thats completely empty. So it should not be a problem.

CliffinGA wrote:Looks great Jeremy and you still got more done than I have bud! Sorry for all the setbacks on the build but I've learned you always have them in a build :lol:. Enjoy camping in it bud!

Cliff :thumbsup:

Thank you, Yeah but I don't ever want to have to scramble like that again to complete a build ( it wore my butt out with all this heat down here) but alas It is campable so It was worth it. Now I can enjoy being on ttt time for the week :beer:
Til later, See ya
Jeremy

My build journal #1 "SOLD" : viewtopic.php?t=45945
my build journal #2 "SOLD": viewtopic.php?f=50&t=59216
User avatar
jbyrd
Teardrop Master
 
Posts: 146
Images: 172
Joined: Sun Aug 28, 2011 8:24 pm
Location: marianna, Florida
Top

Re: roam with a view updated 8-6-12

Postby TJinPgh » Fri Aug 10, 2012 8:06 am

Awesome build.

I'm kind of curious about the Deck Armor stuff. Around here, the box stores carry a product called Deck Restore which I'm thinking is probably similar to what you used.

Could you possibly take a close up pic of it? I was curious how rought it is to the touch or if it can be somewhat smoothed?
-TJ
TJinPgh
The 300 Club
 
Posts: 446
Images: 90
Joined: Fri Oct 28, 2011 1:50 pm
Top

Re: roam with a view updated 8-6-12

Postby jbyrd » Sat Aug 11, 2012 6:15 am

TJinPgh wrote:Awesome build.

I'm kind of curious about the Deck Armor stuff. Around here, the box stores carry a product called Deck Restore which I'm thinking is probably similar to what you used.

Could you possibly take a close up pic of it? I was curious how rough it is to the touch or if it can be somewhat smoothed?

desk restore is the same product, you can get it kind of smooth but not totally, (kind of reminds me of stucco) it is fairly rough but as we kept painting it we realized using a brush got a much smoother texture, but it was too late as we put the first coat on with the supplied roller. The main reason I chose to use that product was being rushed for time, I didn't have time to sand all of the resin and fiberglass back down smooth, so It works very well for hiding imperfections as it has a really good self leveling property.
Til later, See ya
Jeremy

My build journal #1 "SOLD" : viewtopic.php?t=45945
my build journal #2 "SOLD": viewtopic.php?f=50&t=59216
User avatar
jbyrd
Teardrop Master
 
Posts: 146
Images: 172
Joined: Sun Aug 28, 2011 8:24 pm
Location: marianna, Florida
Top

Re: roam with a view updated 8-6-12

Postby jbyrd » Sat Aug 11, 2012 6:43 am

Well we got our first camping trip with it under our belt.
Although it wasn't camping like I wanted to do, our friends went with us also and they brought their giant 5th wheel down, so everybody ended up hanging around that monstrosity.
We still had a good time just did'nt get to spend as much time around our ttt as I would have liked.
We went to St Andrews state park in panama city beach, got lucky mostly with the weather, got to do some swimming and fishing took our boat out to Shell Island, seen some dolphins up close.
In the whole park there was only 2 other kool campers a vintage scotty, and homebuilt box camper (did'nt get pics of either :x ) I have got to get better at keeping my camera around lol. Stopped and talked to both of them, very cool people.
Image
Image
Image
Thinking about taking another short trip this coming week and using work as an excuse lol (I really need to go work some outlying areas for my job, been putting it off because of distance and gas) If we do go It will be just my wife and I.
Til later, See ya
Jeremy

My build journal #1 "SOLD" : viewtopic.php?t=45945
my build journal #2 "SOLD": viewtopic.php?f=50&t=59216
User avatar
jbyrd
Teardrop Master
 
Posts: 146
Images: 172
Joined: Sun Aug 28, 2011 8:24 pm
Location: marianna, Florida
Top

Re: roam with a view first camping trip done

Postby TJinPgh » Sat Aug 11, 2012 12:24 pm

on the Deck Restore website, they said to get a smoother surface to do the first coat with the roller and, immediately after doing the second coat (while it was still wet) to come in with a brush and smooth it out that way.

I've seen the displays they have of it on deck boards at Home Depot... it wsan't so rough as to be to bad to use, but rougher than I'd like it to be. They didn't have any displays with it smooth so I was just curious how you'd done it.

Looks good and durable, though and definitely something to be considered.

Lots of color choices is always good, too.

How many gallons did you use to do yours?
-TJ
TJinPgh
The 300 Club
 
Posts: 446
Images: 90
Joined: Fri Oct 28, 2011 1:50 pm
Top

Re: roam with a view first camping trip done

Postby jbyrd » Sat Aug 11, 2012 3:26 pm

TJinPgh wrote:on the Deck Restore website, they said to get a smoother surface to do the first coat with the roller and, immediately after doing the second coat (while it was still wet) to come in with a brush and smooth it out that way.

I've seen the displays they have of it on deck boards at Home Depot... it wsan't so rough as to be to bad to use, but rougher than I'd like it to be. They didn't have any displays with it smooth so I was just curious how you'd done it.

Looks good and durable, though and definitely something to be considered.

Lots of color choices is always good, too.

How many gallons did you use to do yours?

I think you could get it alot smoother than they show on that board by only using a brush.
maybe tomorrow I'll do a test sample to see just how smooth it will get.
yeah the color choice is what drew me to it, I was going to use bedliner but lack of color choice (with out spend big dollars) turned me away.
I ended up using 3.5 gals but would have been less because the first coat with that roller used 2 gal by itself.
Til later, See ya
Jeremy

My build journal #1 "SOLD" : viewtopic.php?t=45945
my build journal #2 "SOLD": viewtopic.php?f=50&t=59216
User avatar
jbyrd
Teardrop Master
 
Posts: 146
Images: 172
Joined: Sun Aug 28, 2011 8:24 pm
Location: marianna, Florida
Top

Re: roam with a view first camping trip done

Postby Junkboy999 » Sun Aug 19, 2012 1:46 am

I like that big fold out area. Your window protector. You can go camping at some of the craft and arts fairs.
The Cloggers can use that as a clogging stage. :lol:

hahaha Sorry just had to say that.
It would make a really nice sturdy assemble table for working on my RC planes when I got to the all weekend long Air shows.
User avatar
Junkboy999
1000 Club
1000 Club
 
Posts: 1259
Images: 52
Joined: Fri Jul 06, 2012 9:18 pm
Location: Wichita, KS
Top

PreviousNext

Return to Build Journals

Who is online

Users browsing this forum: No registered users and 31 guests