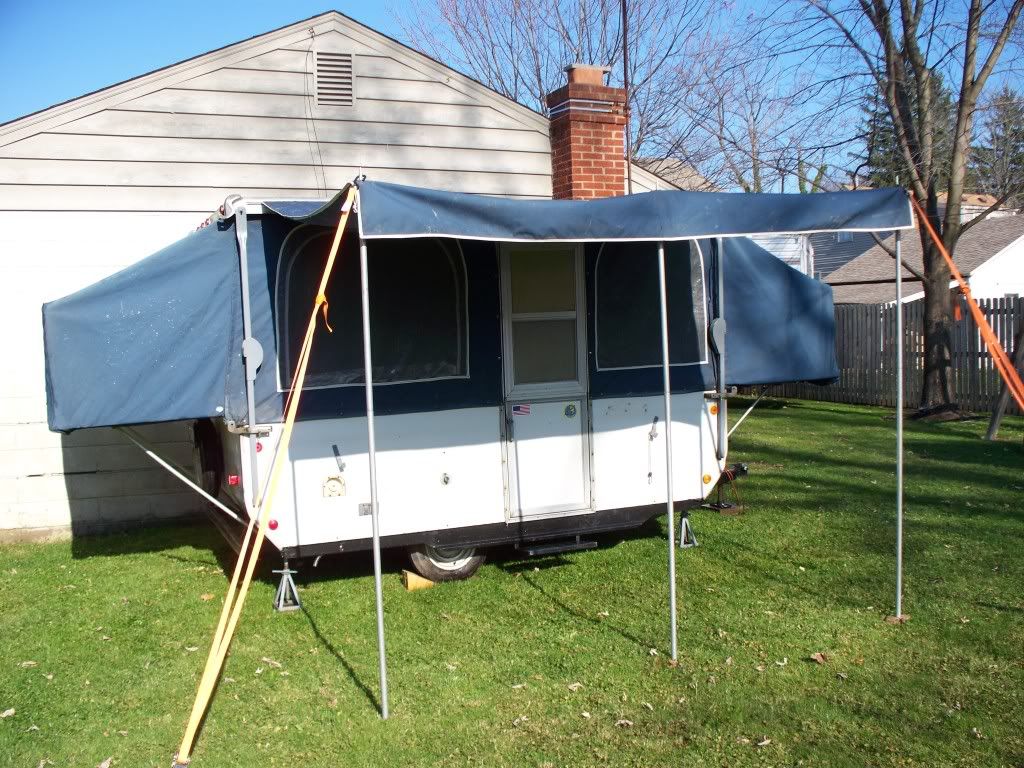
My Epiphany - Sanding - Sanding - Sanding
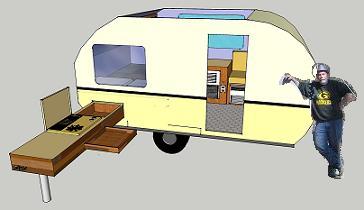
...ask your questions in the appropriate forums BUT document your build here...preferably in a single thread...dates for updates, are appreciated....

Postby aggie79 » Fri Dec 30, 2011 9:49 am

Paul,

I've been following this thread closely and really like where you are going with your design. Hopefully your "donor frame" will work out and we'll see some sawdust soon.

Take care,
Tom
Tom (& Linda)
For build info on our former Silver Beatle teardrop:
Build Thread

93503
User avatar
aggie79
Super Duper Lifetime Member
 
Posts: 5405
Images: 686
Joined: Tue Aug 07, 2007 5:42 pm
Location: Watauga, Texas

Postby parnold » Fri Dec 30, 2011 10:27 am

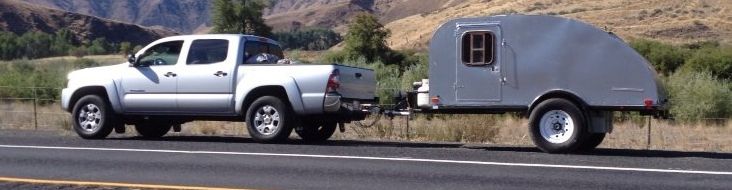
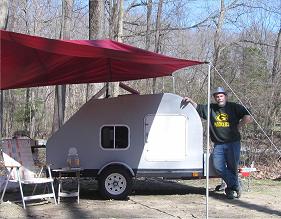
Thanks Tom(&Linda), I hope so too. Seeing this picture gave me new faith in my design concept. This is the same car I have, just a few years older. the trailer dimensions are very close to what I have planned, and he said it towed great!

Image

I'm planning on a trip to Wyoming this year in August for the first ever Wyoming Teardrop Gathering, and it would be nice to have this done in time.

http://www.tnttt.com/viewtopic.php?t=46591&highlight=

Of course, still having #1 is a big plus so I can take my time.
User avatar
parnold
Donating Member
 
Posts: 2344
Images: 302
Joined: Mon Feb 08, 2010 4:49 pm
Location: Northwest New Jersey

Postby Oldragbaggers » Fri Dec 30, 2011 2:28 pm

Paul, I like the design very much and I do like the outdoor slide out kitchen as opposed to the indoor galley on the front counter. With the exception of a possible microwave on that counter, or a coffee pot, I just don't cotton to the idea of cooking in an area that small. Before you know it you would have everything inside saturated with food smells. The idea of being able to sit inside during crappy weather, and having a porta potty, sounds really great as the next step up from a traditional tear without going too large.

:thumbsup:
I will be looking forward to watching this build.
Life is sooooo good.........
Sail...camp....bike...repeat
Becky

Build Journal http://www.tnttt.com/viewtopic.php?f=50&t=45917
Visit our blog at http://www.oldragbaggers.com
Image Image
User avatar
Oldragbaggers
Gold Donating Member
 
Posts: 1842
Images: 331
Joined: Mon Aug 01, 2011 9:22 pm
Location: Essex, MD
Top

Postby parnold » Sun Jan 01, 2012 6:15 pm

It was delivered after dark, and in the rain, so this is just a little tease until I can take pictures tomorrow. I found a pop-up on CL for $150.00. 75" x 110" frame, ideal for what I want. The axle has flanges so that brakes can easily be added. The tongue was so heavy that I convinced the guy to deliver it to my house (20 mile trip). Tomorrow I'll start tearing things out of it, some of which I may be able to make use of, sink, stove, cooler (i don't think it's a fridge), and it has a propane heater.

Image

Image

The best I can tell from my research is that it is circa 1970. Here's a pic of what it looked like before many years of neglect.
Image
User avatar
parnold
Donating Member
 
Posts: 2344
Images: 302
Joined: Mon Feb 08, 2010 4:49 pm
Location: Northwest New Jersey
Top

Postby Woodstramp » Sun Jan 01, 2012 6:34 pm

Paul,

Did you get to check out the shape of the frame? If not rust rotted or bent up I say you scored purty good for $150.
User avatar
Woodstramp
The 300 Club
 
Posts: 438
Joined: Fri Nov 20, 2009 9:28 pm
Location: Aladambama
Top

Postby parnold » Sun Jan 01, 2012 6:46 pm

When I went to look at it, it wasn't raining yet, so I did get down on hands and knees from several angles. It appears that there is surface rust, but none of the steel looks rotted.
User avatar
parnold
Donating Member
 
Posts: 2344
Images: 302
Joined: Mon Feb 08, 2010 4:49 pm
Location: Northwest New Jersey
Top

Postby StPatron » Sun Jan 01, 2012 9:24 pm

Nice score, Paul! :thumbsup:

That chassis looks very similar to the Chuckwagon brand pop-up that I used, particularly that... not sure of the proper name... metal strip running along the frame, below the door. Rayvillian (if memory serves me correctly) warned me that it served a structural purpose and that modifications could impact the frame integrity. Just something to consider, it's of such similar design that it may apply to your model also. I cut part of it away in order to make wheel removal less frustrating. Another tip, you will probably find that when you attempt to remove that wheel, placing the jack under the frame vs. the axle is the trick.

Hope you find some great surprises inside!
User avatar
StPatron
Donating Member
 
Posts: 748
Images: 297
Joined: Tue Dec 15, 2009 8:38 pm
Location: OK
Top

Postby parnold » Sun Jan 01, 2012 9:32 pm

Gary:

Thanks for the tip. When I went to look at the trailer, the tire was flat and had to have the spare put on. Not only does the jack have to be under the frame, but the tire has to be slid upside down under the trailer, then raised up into postition from underneath. If you try to do it any other way the trailer has to be jacked way up.

I can't wait to see what goodies I find inside it tomorrow.
User avatar
parnold
Donating Member
 
Posts: 2344
Images: 302
Joined: Mon Feb 08, 2010 4:49 pm
Location: Northwest New Jersey
Top

Postby absolutsnwbrdr » Sun Jan 01, 2012 9:57 pm

Awesome find Paul! It'll be interesting to see what you can recover and reuse.
Zach
Coming Soon...
Image Image
User avatar
absolutsnwbrdr
Donating Member
 
Posts: 2657
Images: 412
Joined: Mon Jan 25, 2010 6:10 pm
Location: Hanover, PA
Top

Postby StPatron » Sun Jan 01, 2012 10:26 pm

parnold wrote:Not only does the jack have to be under the frame, but the tire has to be slid upside down under the trailer, then raised up into postition from underneath. If you try to do it any other way the trailer has to be jacked way up.


Yeah, does that routine ever sound familiar! Enough to make a preacher man cuss. :lol:

After buying my new tires, I did the bearing job and thread cleaning of the stud holes while I was at it. Hopefully it will last awhile. The thought of monkeying around with it while laying on shoulder gravel during a driving rain, in the blistering heat or freezing cold just might be enough to cause some type of roadside disturbance. :lol:
User avatar
StPatron
Donating Member
 
Posts: 748
Images: 297
Joined: Tue Dec 15, 2009 8:38 pm
Location: OK
Top

Postby parnold » Mon Jan 02, 2012 3:51 pm

Today was Demo Day!

The trailer started looking like this:

Image

I found these little campers hiding in the cooler.

Image

One nice find, this odd yellow colored stove looks like something I can use.

Image

I'm not sure about the furnace, I will try to get it working. It might just find a place in my new trailer. It sure would open up a lot more camping time if I had a reliable heat source.

Image

The bare frame.

Image
User avatar
parnold
Donating Member
 
Posts: 2344
Images: 302
Joined: Mon Feb 08, 2010 4:49 pm
Location: Northwest New Jersey
Top

Postby Colemancooler » Mon Jan 02, 2012 8:06 pm

make sure there is no spider webs in the gas line, (spiders like the smell?) and clean the part that senses the pilot flame with some Scotchbrite, and you should be in business :thumbsup:
Image
User avatar
Colemancooler
Teardrop Master
 
Posts: 167
Joined: Fri Oct 14, 2011 5:26 pm
Location: Yakima, Wa.
Top

Postby Woodstramp » Mon Jan 02, 2012 9:52 pm

Dude, you need to change your handle to "Demo-Demon". :)

You don't play around. :shock:
User avatar
Woodstramp
The 300 Club
 
Posts: 438
Joined: Fri Nov 20, 2009 9:28 pm
Location: Aladambama
Top

Postby absolutsnwbrdr » Mon Jan 02, 2012 9:57 pm

I'm pretty sure I saw a camper on the frame yesterday. :?

Nice work speedy!
Zach
Coming Soon...
Image Image
User avatar
absolutsnwbrdr
Donating Member
 
Posts: 2657
Images: 412
Joined: Mon Jan 25, 2010 6:10 pm
Location: Hanover, PA
Top

Postby parnold » Mon Jan 02, 2012 11:11 pm

I had help with the demo.

Image
User avatar
parnold
Donating Member
 
Posts: 2344
Images: 302
Joined: Mon Feb 08, 2010 4:49 pm
Location: Northwest New Jersey
Top

PreviousNext

Return to Build Journals

Who is online

Users browsing this forum: No registered users and 12 guests