The Wedge ... UPDATE 07/07/2012

...ask your questions in the appropriate forums BUT document your build here...preferably in a single thread...dates for updates, are appreciated....

Re: The Wedge 03/07/2012

Postby mckenney56 » Wed Mar 07, 2012 11:16 pm

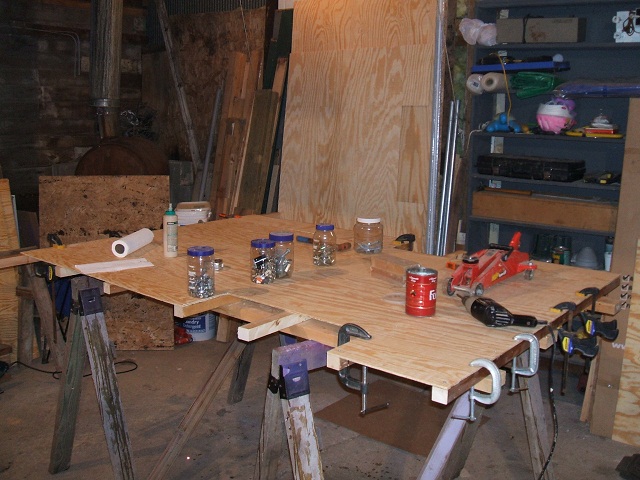
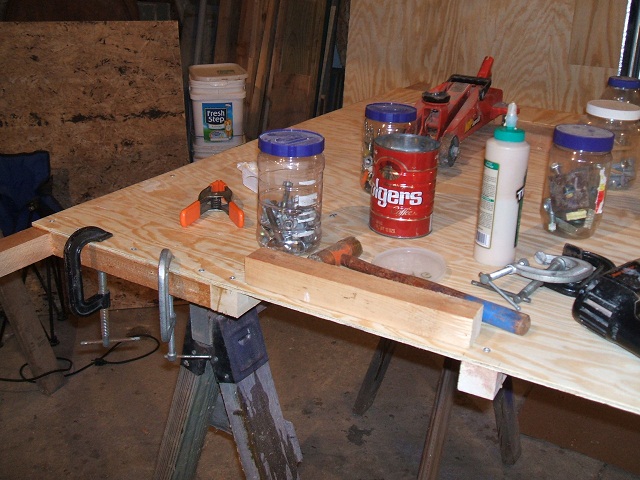
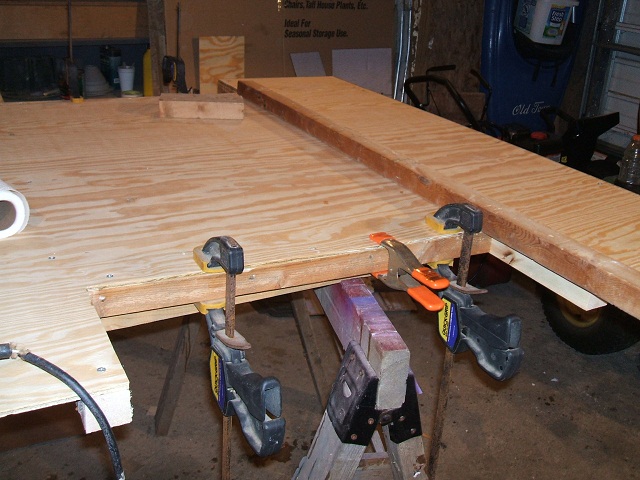
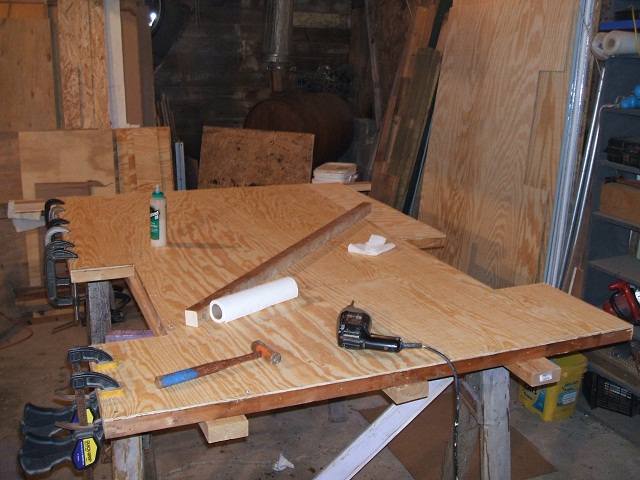
Had 2 nice days weather wise yesterday and today. I wish they would come on the weekend. Anyway, I made some saw dust and cut out the floor and sides from the plywood. Started assembly of the floor. Lots of glue, screws, and clamps. Pictures speak a thousand words.

Image

Image

Image

Image

Image
Last edited by mckenney56 on Thu Mar 08, 2012 9:23 am, edited 1 time in total.
User avatar
mckenney56
Teardrop Advisor
 
Posts: 88
Images: 129
Joined: Thu Feb 09, 2012 8:36 pm
Location: Central Illinois

Re: The Wedge 02/18/2012

Postby Martiangod » Wed Mar 07, 2012 11:45 pm

Let the fun begin....
Glad you chose to go ply and not wafer. You will be happier for that choice in the end
If it ain't broke, fix it till it is

Chris

Deep in the Heart of Nowhere
The topper viewtopic.php?f=50&t=58140, gone to a new home to be converted
into an ice fishing shack...FREEBIE !!! for a nice young family
The trailer viewtopic.php?f=50&t=48156
User avatar
Martiangod
500 Club
 
Posts: 856
Images: 432
Joined: Mon Jan 09, 2012 10:39 pm
Location: Peace River, Alberta

The Wedge update 03/10/2012

Postby mckenney56 » Sat Mar 10, 2012 10:47 pm

Got a little bit done today. I added the blocking in the floor where the bolts will be going through.

Image

I used a hand saw to cut the insulation. It worked great.

Image

But it creates quite a mess.

Image

The floor insulation is finished.

Image
User avatar
mckenney56
Teardrop Advisor
 
Posts: 88
Images: 129
Joined: Thu Feb 09, 2012 8:36 pm
Location: Central Illinois
Top

Re: The Wedge update 03/11/2012

Postby mckenney56 » Sun Mar 11, 2012 4:45 pm

More progress. Lots of glue to close up the floor.

Image

A whole lot of clamping going on. And lots of screws too.

Image

Floor done.

Image

High tech weighing process.
Before lifting one end.
Image

After lifting one end.

Image

Do a little math and the floor weighs in at 86 lbs.

Anybody got an opinion on whether that is light or heavy??

I've used just over 16 oz. of Tite Bond III on the floor.
User avatar
mckenney56
Teardrop Advisor
 
Posts: 88
Images: 129
Joined: Thu Feb 09, 2012 8:36 pm
Location: Central Illinois
Top

Re: The Wedge update 03/11/2012

Postby Martiangod » Mon Mar 12, 2012 8:08 am

mckenney56 wrote:Image


You must have had what I had for lunch///


Looking good, Should ne good and strong.
Smells like the walls are about to be built
If it ain't broke, fix it till it is

Chris

Deep in the Heart of Nowhere
The topper viewtopic.php?f=50&t=58140, gone to a new home to be converted
into an ice fishing shack...FREEBIE !!! for a nice young family
The trailer viewtopic.php?f=50&t=48156
User avatar
Martiangod
500 Club
 
Posts: 856
Images: 432
Joined: Mon Jan 09, 2012 10:39 pm
Location: Peace River, Alberta
Top

Re: The Wedge update 03/12/2012

Postby mckenney56 » Mon Mar 12, 2012 10:40 pm

Tested out the floor strength.

It holds up a 15 pound cat

Image

And it holds up me.

Image

Progress today. I sorted through all my 1 by lumber and ripped and cut for a while to make the frame pieces for the sides and front.

Image
User avatar
mckenney56
Teardrop Advisor
 
Posts: 88
Images: 129
Joined: Thu Feb 09, 2012 8:36 pm
Location: Central Illinois
Top

Re: The Wedge update 03/14/2012

Postby mckenney56 » Wed Mar 14, 2012 10:31 pm

More progress. Side walls framed and insulation installed. I going to wait until I have the front wall and rear tail gate made before I install them.

Image
User avatar
mckenney56
Teardrop Advisor
 
Posts: 88
Images: 129
Joined: Thu Feb 09, 2012 8:36 pm
Location: Central Illinois
Top

Re: The Wedge update 03/11/2012

Postby Elizabeth C. » Thu Mar 15, 2012 6:17 am

mckenney56 wrote:High tech weighing process.
Before lifting one end.
Image


Greg, I don't think you would see many women builders brave enough to post this type of picture. If I did it, I would have to photoshop it before letting anyone see it ;) .

Nice floor, very well thought out and executed. And I like the Kitty cat too!!!

Thanks for the Pics,
Dr. C-Dawg
Our build in e-book form "The Teardrop Year" available at e-book, book or pdf at book or pdf

Read my Hubbys version here: CrowsWing Teardrop
User avatar
Elizabeth C.
Donating Member
 
Posts: 70
Images: 356
Joined: Mon Feb 07, 2011 6:38 pm
Location: King George, Virginia
Top

Re: The Wedge update 03/17/2012

Postby mckenney56 » Sat Mar 17, 2012 9:38 pm

Progress report.

Front and back framed and insulated.

Image

Time for undercoating. I found this on a shelf in my barn. Decided to give it a try.

Image

Taped off all but the bottom layer.

Image

Trouble was, one can wasn't quite enough.

Image

The spots in the middle are where I started by covering the screws.

I guess I'll have to go the the store and find another can of this stuff.
User avatar
mckenney56
Teardrop Advisor
 
Posts: 88
Images: 129
Joined: Thu Feb 09, 2012 8:36 pm
Location: Central Illinois
Top

Re: The Wedge update 03/19/2012

Postby mckenney56 » Mon Mar 19, 2012 12:51 pm

I aquired more black stuff and applied it to the bottom of the floor.

Image

Here is a view of the edge with the masking tape removed. I was attempting to make sure that plywood edge was sealed up good.

Image

While that dries, I turned my attention to packing for an up coming canoe/camping trip to Arkansas. I don't think I'll have the camper ready by then so my galley looks like it always did.

Image

After sorting out what I wanted to take, leave home, and replenishing some things in there I decided to weigh this stuff. Those 4 containers weigh about 65.8 lbs. Add my tent and chair bring that up to about 82.2 lbs. Add 3 gallons of water you get 106.2 lbs.
Ice chest with ice, food, and beverages I'm guessing is at least 50 lbs.
Total 156.2

Other things to consider that I haven't weighed yet are:
Sleeping Pad
Sleeping Bag
Blanket
Pillow
Floor pad
Tarp, poles, ropes, and stakes
Clothes bag, extra shoes, hiking boots
A kitchen sink
A half cord of firewood
Paddling gear bags ??
Paddles ??
Canoes 80lbs

Just kidding about the sink and firewood. I might throw in a box of kindling though. I seem to be generating quite a bit of small bits of lumber lately, but I can't figure out why.
User avatar
mckenney56
Teardrop Advisor
 
Posts: 88
Images: 129
Joined: Thu Feb 09, 2012 8:36 pm
Location: Central Illinois
Top

Re: The Wedge update 03/19/2012

Postby Martiangod » Mon Mar 19, 2012 4:11 pm

We got 3 days of campfires out of scrap from the build :)
If it ain't broke, fix it till it is

Chris

Deep in the Heart of Nowhere
The topper viewtopic.php?f=50&t=58140, gone to a new home to be converted
into an ice fishing shack...FREEBIE !!! for a nice young family
The trailer viewtopic.php?f=50&t=48156
User avatar
Martiangod
500 Club
 
Posts: 856
Images: 432
Joined: Mon Jan 09, 2012 10:39 pm
Location: Peace River, Alberta
Top

Re: The Wedge update 03/19/2012

Postby S. Heisley » Mon Mar 19, 2012 4:16 pm

.
You're doing good, Greg. Keep up the good work!

I weighed everything before and during, too. It really helps keep you from over-building and that's smart. That way, you have a pretty good idea where you stand at all times. :yes:
User avatar
S. Heisley
Super Lifetime Member
 
Posts: 8774
Images: 495
Joined: Mon Sep 17, 2007 10:02 am
Location: No. California
Top

Re: The Wedge update 03/31/2012

Postby mckenney56 » Sat Mar 31, 2012 9:20 pm

I got back into the shop today and started on the wheel wells. I encountered some bad places with large voids in my CDX quarter inch ply.

Image
Image

I decided to to build the wheel wells in place one piece at time. Seemed to take forever, but I got it done.

Image
Image
Image
Image

Maybe tomorrow I'll finally install the walls and front.
User avatar
mckenney56
Teardrop Advisor
 
Posts: 88
Images: 129
Joined: Thu Feb 09, 2012 8:36 pm
Location: Central Illinois
Top

Re: The Wedge update 04/01/2012

Postby mckenney56 » Sun Apr 01, 2012 1:09 pm

Finished the wheel wells.

Image

And installed two of the walls.

Image

Image

But now it is time for NASCAR.
User avatar
mckenney56
Teardrop Advisor
 
Posts: 88
Images: 129
Joined: Thu Feb 09, 2012 8:36 pm
Location: Central Illinois
Top

Re: The Wedge update 04/01/2012

Postby mckenney56 » Sun Apr 01, 2012 9:18 pm

More progress. I got the other wall side installed. And test fit the tailgate. It's finally starting to look like something.

Image

The side walls won't stay square. They are splayed out at the top. I experimented with a couple of options.
One was put a brace on the outside, then I could mount the tail lights to them.

Image

Image

The problems I see with this option are that thing will catch some air flow and also catch mud from the tires.

The other option is put it on the inside. I'll have to make them narrow enough so I can still load 4 foot wide sheet goods in the trailer when I want to use it to carry plywood home (To build campers with of course).

Image

Any other ideas out there?

I still have to come up with how to latch the tailgate in place. Then I'll move on to constructing the roof.
User avatar
mckenney56
Teardrop Advisor
 
Posts: 88
Images: 129
Joined: Thu Feb 09, 2012 8:36 pm
Location: Central Illinois
Top

PreviousNext

Return to Build Journals

Who is online

Users browsing this forum: Bing [Bot] and 6 guests