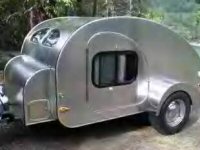
My first build "Ruby Red"

...ask your questions in the appropriate forums BUT document your build here...preferably in a single thread...dates for updates, are appreciated....

My first build "Ruby Red"

Postby CHUNKYMONKEY » Sun Feb 26, 2012 6:33 pm

I've been reading this forum like a romance novel for several months now. I am going to journal my build as I'm sure other have done, somewhat for accountability. I have wanted a teardrop for about three years now and my friend in FL bought one and it pushed me over the edge. I can't afford one but I have decent carpentry skills and all of you who have journaled truly gave me the courage to say the words," I'm going to build a tear drop".

I picked up my trailer last weekend (5x8 utility) that was my Dads. He passed away 2 years ago and building on this is sentimental. He would have loved to help me build it.

Today I picked up materials to start my floor. I cut 1/2 (4x8) ply into 4x5 pieces for the flooring so I have now made sawdust. I have found a place close by where I can get 3/4 (4x8) MDO. Zack and his XII was where I got the MDO info. I can get the (4x8) sheets for about $53 each. I plan to use the Generic Benroy profile. At the moment I'm thinking about stretching my MDO to (5x8) for the additional height.

I'm attaching photos of my trailer. I have a friend who is going to remove the side rails and weld my levelers on th back. I also plan to have a 2" receiver on the tongue for my bike rack.

Well now I have to figure how to attach the photo.

Ange
:thinking:
User avatar
CHUNKYMONKEY
Donating Member
 
Posts: 70
Images: 55
Joined: Tue Feb 14, 2012 4:49 pm
Location: Fernandina Beach, FL

Re: My first build "Ruby Red"

Postby Martiangod » Sun Feb 26, 2012 9:48 pm

Make sure the side rails are not the strength of the trailer. Lot of landscape type trailers need the side rails to be structurally sound.
And have fun.
Oh and as I was told.....Lots of pictures, we like pictures round here :pictures:
If it ain't broke, fix it till it is

Chris

Deep in the Heart of Nowhere
The topper viewtopic.php?f=50&t=58140, gone to a new home to be converted
into an ice fishing shack...FREEBIE !!! for a nice young family
The trailer viewtopic.php?f=50&t=48156
User avatar
Martiangod
500 Club
 
Posts: 856
Images: 432
Joined: Mon Jan 09, 2012 10:39 pm
Location: Peace River, Alberta

Re: My first build "Ruby Red"

Postby KCStudly » Sun Feb 26, 2012 10:17 pm

Welcome and congratulations on taking the plunge!! :thumbsup:

There's a sticky in the general discussion area that instructs on adding pictures to a post. I'll try to summarize from my experience, but knowing me, will likely give you more details than you can handle!!! :oops:

First you have to resize your pictures so that they are small enough to be accepted. Also, if you make your images too big, it makes it so that everyone has to scroll across to see the images and then it widens the page and lets the text in follow up post string out, too. Annoying to some people, polite to try to avoid.

I find that the standrad 640 x 480 size is big enough to be able to see a good amount of detail without being ridiculous.

Then you need to upload the photos to your personal gallery on this site (your gallery was created for you when you signed up). I open my gallery in a new tab (right click on the "Gallery" icon at top right on the header, and select "open in new tab".

You will need to be logged into the forum. Part way down the gallery page you will see "Your Personal Gallery", click on your user name and it takes you there. (There are other ways to get there, but this is the way I find works best for me becasue the "Gallery" icon is always available on the header.)

You should now see the "NewImage" button; press that and it takes you to the upload screen. I like to use the "browse" button to navigate into the folder where I have my resized pictures stored and just double click on the file I want to add (I try to add them into my Gallery in the order that I plan on using them, because this makes it easier later), also, unless you know the name of the file, it can be helpful to have your navigation window "views" set to "thumbnails". In Windows the icon for views kind of looks like the navigation window with tiled mini icons on it (for me, with default settings, it is the far right icon on the header).

Once you have double clicked on the pic file (or single clicked and selected "open") it will take you back to the upload screen and you can either browse for another pic to upload or select continue. I find that with 640 x 480 images I can only upload 4 files at a time or it will give an error, even though it looks like you can load upto 7 (or so) files at a time.

Once you hit continue it will take you to a preview screen where you can edit the title of the image (if you want it to be something other than your original file name, and you can add a more detailed description (tho I'm not sure where this decription shows up in the end).

Then hit submit. If all goes according to plan you should be given the all clear signal and the option to return to your gallery or back to the board.

When adding images to a post I like to have the post composition open in one tab and my gallery open in another. In the gallery single click on the image you want, single click in the URL field at the top of the header (where it says "http:/www.tnttt..." etc.) so it is highlighted. Press CTRL+C to copy the URL.

Go back to your post by switching tabs. Press the "Img" button. Your cursor should be in the middle of the bracketed [img] bookends, and then press CTRL+V to paste the url of your image. You now have to delete the "_page" part that shows up in the middle of the pasted URL. If you select "preview" at this point you should be able to confirm that your image will show up correctly in your post. There should be no spaces between the [img] bookends and your URL, and it is better to put this mess on its own line with no text as it makes it easier to read the post and avoids the side scroll issue.

If, when in your gallery, when you select the image you want to post, you where to double click instead of single click, I think this might avoid having the "_page" part in there, but i find it is easier just to use the single click and delete _page because it allows me to just move on to the next image I want to include (if I loaded them in the order that I want to post them) by selecting the previous or next image scoll buttons to the left or right of the currnet image in the "single click" single image screen. Otherwise, from the double click no "_page" in the URL screen you would have to use the "back" button and then select the next image. I find that bouncing back and forth thru 2 screens takes longer than just deleting the "_page" from the pasted URL.

Just to double check myself, I will use the double click method here and see if I can add a pic of my cat.
Image

Yup, that works.
Last edited by KCStudly on Mon Feb 27, 2012 6:40 pm, edited 2 times in total.
KC
My Build: The Poet Creek Express Hybrid Foamie

Poet Creek Or Bust
Engineering the TLAR way - "That Looks About Right"
TnTTT ORIGINAL 200A LANTERN CLUB = "The 200A Gang"
Green Lantern Corpsmen
User avatar
KCStudly
Donating Member
 
Posts: 9611
Images: 8169
Joined: Mon Feb 06, 2012 10:18 pm
Location: Southeastern CT, USA
Top

Re: My first build "Ruby Red"

Postby CHUNKYMONKEY » Mon Feb 27, 2012 7:11 am

testing
Attachments
trailer1.jpg
Here is the trailer I will build on
trailer1.jpg (5.53 KiB) Viewed 3440 times
User avatar
CHUNKYMONKEY
Donating Member
 
Posts: 70
Images: 55
Joined: Tue Feb 14, 2012 4:49 pm
Location: Fernandina Beach, FL
Top

Re: My first build "Ruby Red"

Postby CHUNKYMONKEY » Mon Feb 27, 2012 7:12 am

Ant thanks to you both for your great advice and instructions on the pictures. I think I am getting the hang of it.

:pictures: :thumbsup:
User avatar
CHUNKYMONKEY
Donating Member
 
Posts: 70
Images: 55
Joined: Tue Feb 14, 2012 4:49 pm
Location: Fernandina Beach, FL
Top

Re: My first build "Ruby Red"

Postby Martiangod » Mon Feb 27, 2012 10:07 am

Looking at that pic, I'm bettin the sides are an integral part of the trailer strength, consider incorperating them into the wall rather than removing them
If it ain't broke, fix it till it is

Chris

Deep in the Heart of Nowhere
The topper viewtopic.php?f=50&t=58140, gone to a new home to be converted
into an ice fishing shack...FREEBIE !!! for a nice young family
The trailer viewtopic.php?f=50&t=48156
User avatar
Martiangod
500 Club
 
Posts: 856
Images: 432
Joined: Mon Jan 09, 2012 10:39 pm
Location: Peace River, Alberta
Top

Re: My first build "Ruby Red"

Postby CHUNKYMONKEY » Mon Feb 27, 2012 10:50 am

Thanks Chris, I will do that or add reinforcement to the frame. My friend who will be doing the work is the expert and I will talk it over with him.

:ok:
User avatar
CHUNKYMONKEY
Donating Member
 
Posts: 70
Images: 55
Joined: Tue Feb 14, 2012 4:49 pm
Location: Fernandina Beach, FL
Top

Re: My first build "Ruby Red"

Postby droid_ca » Mon Feb 27, 2012 4:53 pm

Welcome ChunkyMonkey looking good so far this site is great for people who have done it all before so you can learn from there mistakes as well as everyone just seems to get along for the most part So I have just one question about your build the name why you calling it Ruby Red? ...is there some hidden meaning to it? good luck with your build and to second Chris we do like pictures here
Last edited by droid_ca on Wed Feb 29, 2012 10:29 pm, edited 1 time in total.
There is a world, just beyond now,
where reality runs a razor thin seam between fact and possibility;

Anywhere I roam where I lay my head is home....
Image
“Fide Canem”
Please check out my build thread
viewtopic.php?f=5&t=52816
User avatar
droid_ca
Donating Member
 
Posts: 1981
Images: 176
Joined: Thu Sep 30, 2010 5:08 am
Location: Prince George BC Canada
Top

Re: My first build "Ruby Red"

Postby CliffinGA » Wed Feb 29, 2012 12:00 am

Hey Ange hope all is well with you! Great start so far with the trailer and the floor. Like Chris said and I found on mine the side and the back angle is the main strength of the landscape trailer. It can be stregnthen especiallt by adding more angle iron to the trailer, and he will need to redo the back angle especually to add the hitch to it. I didn't do that to mine and I can easily flex the back bumper even with the way I built my subfloor sustem. Before you start screwing down the floor you need to check and see if the axle needs to be moved back some. I didn't move mine back and it affected the placement of the door about 6" due to using a 14" wheel and fender. If you need anything give me a call, I'll send ya the number in a pm.

Good luck and enjoy the rain :lol:,

Cliff & Sheri :thumbsup:
In God we trust, shoot the rest and he will sort out!

My Build:

viewtopic.php?f=50&t=42628
User avatar
CliffinGA
1000 Club
1000 Club
 
Posts: 1499
Images: 207
Joined: Sat Nov 14, 2009 1:29 pm
Location: Jefferson, GA
Top

Re: My first build "Ruby Red"

Postby CHUNKYMONKEY » Wed Feb 29, 2012 9:19 pm

I've worked a couple nights this week framing my floor. I'm using 2x4's on end. I finished the frame and started screwing the 1/2 ply to the frame. By the weekend I'll be flipping it and adding the insulation and waterproofing it with the Fencepost Asphalt. Good times!

Since everyone wants photos, I'm attaching a few of the floor and frame.

I'll be picking up my side plys on Saturday and taking my trailer for the amendments and reinforcement by Sunday, I hope.

I haven't ordered my doors, fan, hendges, but I'm trying to wait for a few more bucks in my pocket. I'm trying to sell another house and that takes a lot out of my wallet.

Thank goodness I had an extra day this month to get more work done. Happy Leap Day

:wine: :money:
User avatar
CHUNKYMONKEY
Donating Member
 
Posts: 70
Images: 55
Joined: Tue Feb 14, 2012 4:49 pm
Location: Fernandina Beach, FL
Top

Re: My first build "Ruby Red"

Postby CHUNKYMONKEY » Wed Feb 29, 2012 10:02 pm

Image

Image

Image
Last edited by CHUNKYMONKEY on Sun Mar 11, 2012 9:54 am, edited 1 time in total.
User avatar
CHUNKYMONKEY
Donating Member
 
Posts: 70
Images: 55
Joined: Tue Feb 14, 2012 4:49 pm
Location: Fernandina Beach, FL
Top

Re: My first build "Ruby Red"

Postby droid_ca » Wed Feb 29, 2012 10:43 pm

droid_ca wrote: So I have just one question about your build the name why you calling it Ruby Red? ...is there some hidden meaning to it?
:roll:
There is a world, just beyond now,
where reality runs a razor thin seam between fact and possibility;

Anywhere I roam where I lay my head is home....
Image
“Fide Canem”
Please check out my build thread
viewtopic.php?f=5&t=52816
User avatar
droid_ca
Donating Member
 
Posts: 1981
Images: 176
Joined: Thu Sep 30, 2010 5:08 am
Location: Prince George BC Canada
Top

Re: My first build "Ruby Red"

Postby CHUNKYMONKEY » Thu Mar 01, 2012 6:28 am

One of my friends refers to me The Ruby Red Girl. I love red and it was the name that seem appropriate for the Tear. I should say I guess it could change but I don't know what to. I plan to paint some of the exterior red. I'm thinking red and silver as my towing vehicle is silver suv. I've thought about kissing it with some ruby red slippers and the quote, "There's no place like home". Compliments of the Wizard of Oz.
I also thought of the Red Dirt girl, but I'm thinking I saw another Tear with that name. Do you have any ideas including Red? Ruby Red is a great color.

I'm sorry, I meant to respond to your question the other day.

;)
User avatar
CHUNKYMONKEY
Donating Member
 
Posts: 70
Images: 55
Joined: Tue Feb 14, 2012 4:49 pm
Location: Fernandina Beach, FL
Top

Re: My first build "Ruby Red"

Postby CHUNKYMONKEY » Thu Mar 01, 2012 6:29 am

User avatar
CHUNKYMONKEY
Donating Member
 
Posts: 70
Images: 55
Joined: Tue Feb 14, 2012 4:49 pm
Location: Fernandina Beach, FL
Top

Re: My first build "Ruby Red"

Postby droid_ca » Thu Mar 01, 2012 10:03 am

oh thats funny :lol: Cause I had read the series of Rose Red and saw the made for Television series about a haunted house that has ever changing rooms :? and I thought maybe it was a spin on that :cry: but I do like the idea of wizard of oz :thumbsup: you could go a lot of ways with that :thinking: I'll keep thinking and if I come up with anything I'll let you know :twisted: good luck with your build your off to a great start :applause: :applause: :applause:
There is a world, just beyond now,
where reality runs a razor thin seam between fact and possibility;

Anywhere I roam where I lay my head is home....
Image
“Fide Canem”
Please check out my build thread
viewtopic.php?f=5&t=52816
User avatar
droid_ca
Donating Member
 
Posts: 1981
Images: 176
Joined: Thu Sep 30, 2010 5:08 am
Location: Prince George BC Canada
Top

Next

Return to Build Journals

Who is online

Users browsing this forum: No registered users and 20 guests