First time teardrop builder - project on 4x8 HF

...ask your questions in the appropriate forums BUT document your build here...preferably in a single thread...dates for updates, are appreciated....

Re: First time teardrop builder - project on 4x8 HF

Postby txcamper » Wed May 02, 2012 10:32 am

So after all that work to get the headliner in, I was having fun drilling holes in it last night.

Test fit one of my lights in some scrap 1/8" birch
Image

Figured out where we wanted everything, made up a jig from a piece of scrap wood and started drilling. We have 4 cabin lights, one switch (drivers side only on the trailer, I may regret this down the road) will turn on all four lights and then when it's in the off position, there will be a switch for each of the lights towards the front of the trailer to work as reading lights when needed. These are simple spring mounted swivel LEDs off amazon. I have 4 more going in the hatch.

Image
Image

Here they are installed for testing, everything was removed and my wife stained the rest of the headliner last night (no pics of that yet).
Image

Hopefully I can get all of this wired together by this weekend.
User avatar
txcamper
Teardrop Master
 
Posts: 120
Images: 129
Joined: Wed Mar 21, 2012 12:25 am

Re: First time teardrop builder - project on 4x8 HF

Postby txcamper » Mon May 07, 2012 10:18 am

Another weekend update.

Wiring...

Started with this pile of stuff.
Image

Made up some fuse panel diagrams in excel and then wired everything in, also ran the trailer wire, speaker wires and power for hatch lights through to the galley. I used someone's suggestion to run a plug between trailer and hatch in case I ever need to remove the hatch. I'll be adding a plug for the hatch power and the speakers as well. I decided to run green for positive wires for all the accessories and stick with the usual red for anything I considered primary. This was just to help me separate the wires during the process for the most part.

Fuse diagram
Image

Completed fuse panels (with jumpers on the barrier strips for the ground - another great suggestion from the electrical section of the board here)
Image

Roof wiring and hatch 'exit'
Image
Image

Lights are all in except hatch of course, but I tested those and fan wires successfully to make sure I could start the exterior skinning this week.
Image

The outermost two lights are independently operated with their own switches.
Image

Porch light test, talk about nervous - had to drill half way into the wall from the outside, and from in between spars and then down from the top to connect the two partially through holes to 'S' the wire into the roof from outside.
Image

We had a friend that got all new flooring and they gave us some of their laminate floor that was being removed instead of trashing it. It doesn't match, but for free and covered with a mattress 99% of the time, we thought it would be a good solution.
Image

While wiring outside, my wife sealed all of the stain with 3 coats of varnish and did some touch up paint in the galley. You can see the nice new shine on the interior lighting pictures above.

Plans for this week are to insulate and skin the outside, skin the exterior of hatch and test mount it. Also I didn't get a picture, but I made my window frames for the doors this weekend. Need to get plexiglass and then finish assembling those. Hopefully next weekend's update will include completed doors as well so we can start the epoxy putty and paint process.
User avatar
txcamper
Teardrop Master
 
Posts: 120
Images: 129
Joined: Wed Mar 21, 2012 12:25 am

Re: First time teardrop builder - project on 4x8 HF

Postby Oldragbaggers » Mon May 07, 2012 11:31 am

Very nice job. I love your cabinets. It's hard to believe you've never built them before. They look great.
Life is sooooo good.........
Sail...camp....bike...repeat
Becky

Build Journal http://www.tnttt.com/viewtopic.php?f=50&t=45917
Visit our blog at http://www.oldragbaggers.com
Image Image
User avatar
Oldragbaggers
Gold Donating Member
 
Posts: 1842
Images: 331
Joined: Mon Aug 01, 2011 9:22 pm
Location: Essex, MD
Top

Re: First time teardrop builder - project on 4x8 HF

Postby txcamper » Mon May 07, 2012 12:06 pm

Thanks Becky - those were 100% my wife's idea for the bead board and block trim. Her attention to detail made those work, she made templates for hinge and knob location for each size door to keep everything consistent and nice looking. I'd probably have a piece of tarp stapled in and draped over the openings if not for her. :)
User avatar
txcamper
Teardrop Master
 
Posts: 120
Images: 129
Joined: Wed Mar 21, 2012 12:25 am
Top

Re: First time teardrop builder - project on 4x8 HF

Postby Forrest747 » Mon May 07, 2012 1:00 pm

Oldragbaggers wrote:Very nice job. I love your cabinets. It's hard to believe you've never built them before. They look great.


+1
"All the success on the trail can not compensate for having square headlights"

"I've got a fever and the only prescription is more cowbell!"
http://www.tnttt.com/viewtopic.php?f=50&t=37701 Build Journal
User avatar
Forrest747
Cowbell Donating Member
 
Posts: 1327
Images: 447
Joined: Mon Apr 06, 2009 3:40 am
Location: West Valley Utah, Utah
Top

Re: First time teardrop builder - project on 4x8 HF

Postby txcamper » Tue May 15, 2012 8:47 am

Another update - 9 days left until it needs to be campable!

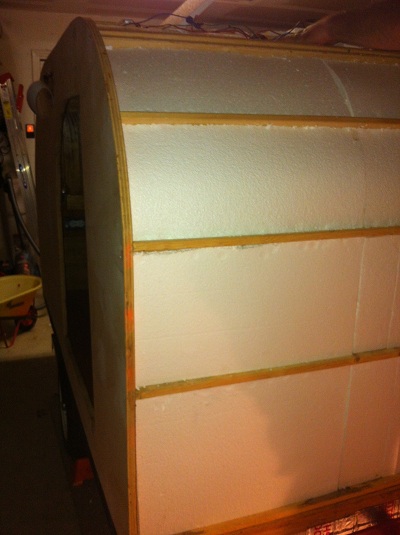
Insulation is in roof
Image

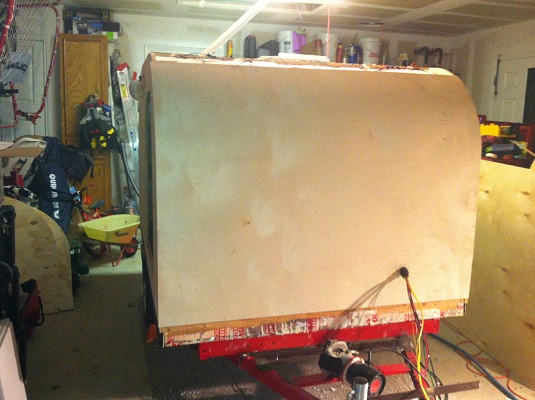
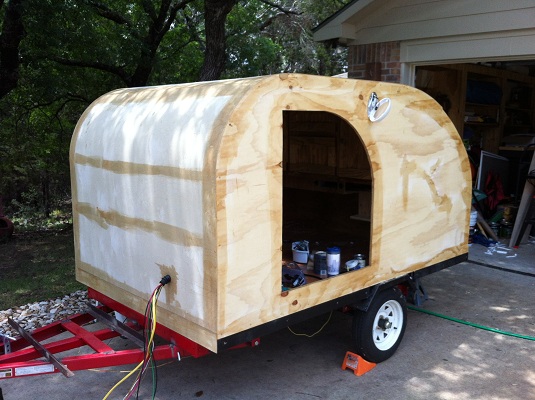
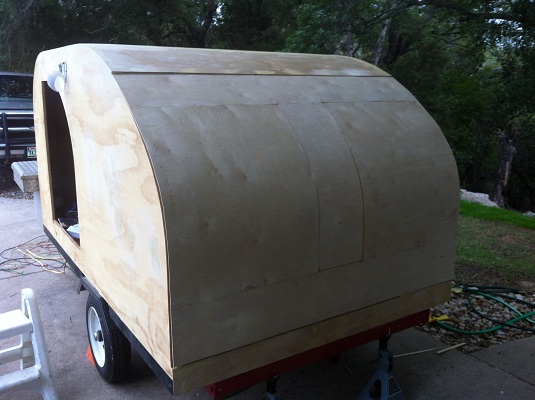
Skinned the outside, ran my wires through an automotive firewall boot off amazon. I'm going to add silicone around it as well, but if I'm not comfortable after the first rain I may add a piece of angle iron attached to some butyl tape over it for additional water diversion.

Image
Image

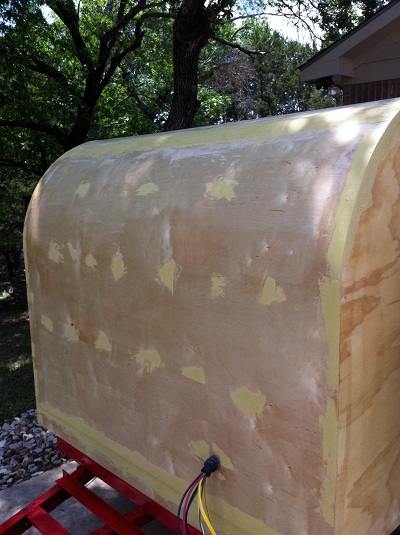
Wood hardener, then epoxy bondo

Image
Image
Image

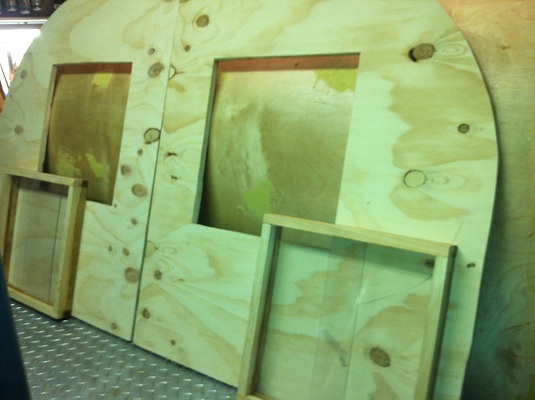
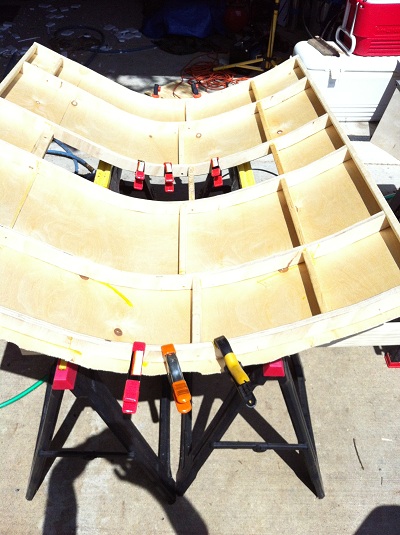
We used a simple piece of trim with a couple grooves cut on the table saw and some plexiglass for the windows. These are a temporary solution but I'm happy with them. Still need to add finish to them and then wrap the outside with the house screen material we got off craigslist for almost nothing. All in all, should be less than $40 for both windows. Would've been less but I ruined the first piece of plexiglass. For the second one, my better half did an awesome job of scoring and cutting the plexiglass perfectly. :)

Image

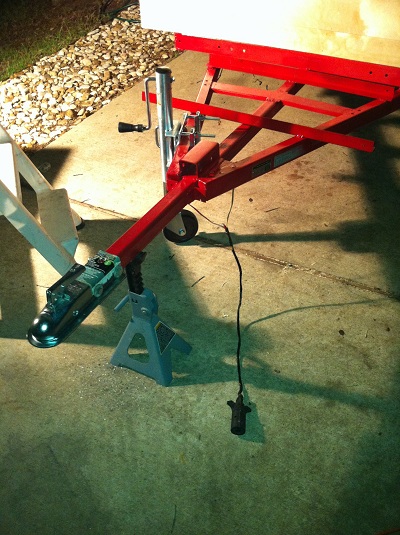
Welded on the battery box (tool box) mounts on the front, and added my coupler. This toolbox really messes with the profile on the trailer because it sticks out past the sides, I'm watching craigslist for an 'in-bed' toolbox replacement down the road.

Image

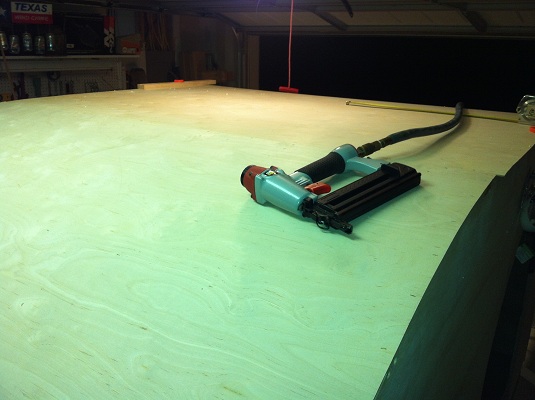
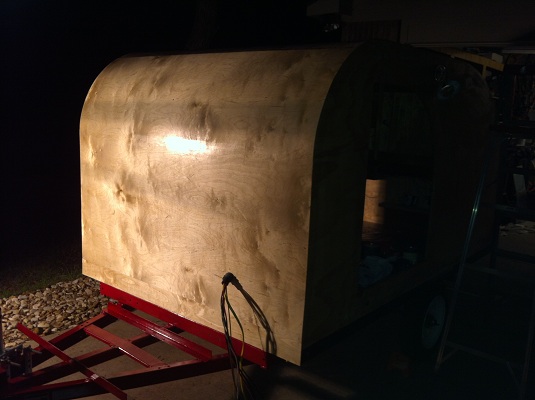
Finished skinning the hatch and trimmed it with the router

Image
Image

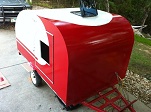
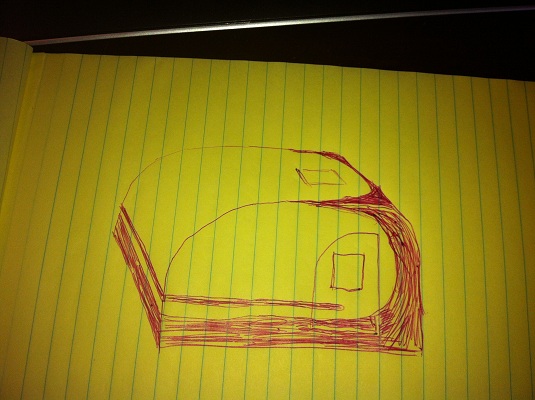
I think we've decided on a paint design (white base coat and red design)

Image

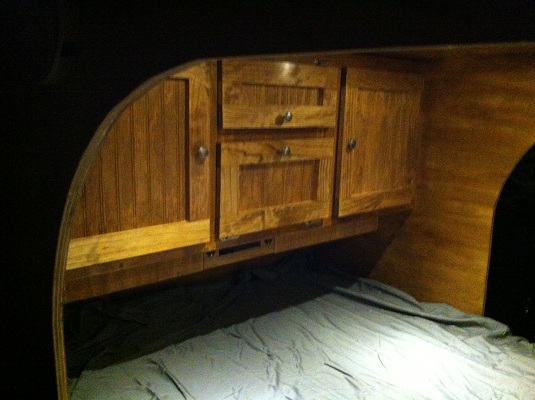
Parting shot for the week - the bed arrived yesterday and the test fit was perfect. Getting closer!

Image


For this week:

1. hardener on hatch and doors
2. putty sanding on body
3. putty and sand hatch and doors
4. Base coat white paint over body, hatch and doors
5. Assemble and trim - big job with lots of time on the drill press needed.
6. Finish and install windows
7. Add paint design
8. Mount and wire up toolbox
9. Plus anything else I'm forgetting.
User avatar
txcamper
Teardrop Master
 
Posts: 120
Images: 129
Joined: Wed Mar 21, 2012 12:25 am
Top

Re: First time teardrop builder - project on 4x8 HF

Postby Oldragbaggers » Tue May 15, 2012 7:46 pm

Wow...you're speed-building. And it looks really good. Hope you make your deadline. You apparently work very well under pressure.
Life is sooooo good.........
Sail...camp....bike...repeat
Becky

Build Journal http://www.tnttt.com/viewtopic.php?f=50&t=45917
Visit our blog at http://www.oldragbaggers.com
Image Image
User avatar
Oldragbaggers
Gold Donating Member
 
Posts: 1842
Images: 331
Joined: Mon Aug 01, 2011 9:22 pm
Location: Essex, MD
Top

Re: First time teardrop builder - project on 4x8 HF

Postby txcamper » Tue May 15, 2012 8:16 pm

Thank you! A little high on the self induced pressure on this project. :shock: :)

I'm loving every minute though, it's been a family affair to get this far.

...and I just realized I found this website two months ago yesterday. I'm blaming this on everyone here for making these look like so much fun to build. :lol:
User avatar
txcamper
Teardrop Master
 
Posts: 120
Images: 129
Joined: Wed Mar 21, 2012 12:25 am
Top

Re: First time teardrop builder - project on 4x8 HF

Postby Rob & Mel » Tue May 15, 2012 10:47 pm

Hey TX,

Looking good! Your paint design looks eerily similar to what I was thinking for mine (only red), and your time crunch is 16 days sooner too. Keep up the good work, you're in the home stretch!

-Rob
User avatar
Rob & Mel
Teardrop Advisor
 
Posts: 50
Images: 143
Joined: Fri Mar 16, 2012 4:56 pm
Location: Sacramento, CA
Top

Re: First time teardrop builder - project on 4x8 HF

Postby bc toys » Wed May 16, 2012 10:56 am

welcome Txcamper you'll are doing a great job looking like a camper you should be proud of hope you make the deadline you are shooting for Enjoy it you've done a good job. :thumbsup: :thumbsup: :thumbsup: :applause: :applause: We are heading to Texas in 1 week maybe we will get to meet you at a gathering. :lol: :lol:
bc toys
2000 Club
2000 Club
 
Posts: 2217
Images: 42
Joined: Sun Jun 28, 2009 2:45 pm
Location: LAS VEGAS NV
Top

Re: First time teardrop builder - project on 4x8 HF

Postby Oldragbaggers » Wed May 16, 2012 6:09 pm

Just took a good look at your roof skin and hatch. I think it looks great. Can't wait to see it painted. I wish I could come up with some snazzy paint scheme but trolling eBay for decals is about the best I can come up with.
Life is sooooo good.........
Sail...camp....bike...repeat
Becky

Build Journal http://www.tnttt.com/viewtopic.php?f=50&t=45917
Visit our blog at http://www.oldragbaggers.com
Image Image
User avatar
Oldragbaggers
Gold Donating Member
 
Posts: 1842
Images: 331
Joined: Mon Aug 01, 2011 9:22 pm
Location: Essex, MD
Top

Re: First time teardrop builder - project on 4x8 HF

Postby txcamper » Fri May 18, 2012 10:27 am

Thanks for the kind words and continued encouragement all!

We had our first casualty, or at least 'that'll need more work' victim from our rushed schedule. Trying to use 5 different pieces of 1/8" birch and seam them together for the hatch is entirely possible, but will need time we don't have to appear completely smooth and transition-less. At this point we made the decision to go for 'sealed' and will go back to accomplish 'looks good' after a summer/fall of camping trips.

So for now, here is our 25' hatch - any closer and you'll spot the issues between pieces. :)
Image

Also, my wife started painting the transitions, knots in the wood, putty patches etc last night (we wanted 3 coats on these spots and are planning on two full coats over all). Tonight, we'll do the first coat with the roller, and hopefully tomorrow the second coat. I'll be running the drill press for a lot of the trim items while she's painting and we hope to have hatch and doors mounted by Sunday.

Image
User avatar
txcamper
Teardrop Master
 
Posts: 120
Images: 129
Joined: Wed Mar 21, 2012 12:25 am
Top

Re: First time teardrop builder - project on 4x8 HF

Postby Rob & Mel » Fri May 18, 2012 11:50 am

Hey TX,

You're making me nervous about my second layer of 1/8" lauan, I was planning on taking the 3' x 4' sections of leftover lauan and using them to double up the roof. There would be a seam down the middle that I would have to worry about lining up right, and patching, sanding, etc. How did the wood hardener work out? Does it make the roof skin more stiff? I'm just trying to eliminate some of the flex in the sheets I put on. Let me know about your problems with the hatch when you get time. Oh and thanks for the tip on the coupler holes, I didn't know about that.

-Rob
User avatar
Rob & Mel
Teardrop Advisor
 
Posts: 50
Images: 143
Joined: Fri Mar 16, 2012 4:56 pm
Location: Sacramento, CA
Top

Re: First time teardrop builder - project on 4x8 HF

Postby txcamper » Fri May 18, 2012 1:36 pm

Hi Rob,

I don't think a seam down the middle would be nearly as bad, especially over a more level surface. My hatch framing was all jigsawed and we had a couple issues there with not-so-smooth curves causing voids spots between frame and skin. My stencil was consistently wrong at least, they all look the same. Lessons learned right? :)

When you splice a smaller piece of skin into a 'void' area on the hatch frame it makes good contact with the slightly lower spot on the frame versus the larger piece next to it that was forced to curve more consistently riding the 'higher' spots. If I had a single constant piece over the frame and wanted to add another spliced layer on top that 'base', I don't think I would have had any issues.

Hope that makes sense, but here's a picture to show off my mess up... New skin piece in the middle made good contact at the lower point where the red arrows are.

Image

I wouldn't worry about a lengthwise seam down the middle, that should be a consistently level attachment point for yours making the piece to piece transition a lot less work.

If you can lay the second layer on there and have a consistently touching edge (with the layer below it), the two sides should require minimal putty, even if the alignment isn't exact - the gap between pieces isn't what got me, it was the level differences.

Hope this helps ease the nervous concerns.

The hardener helped some, soaked in well and took a few coats to get that shiny outer layer. I wouldn't stand on my roof, but I would lay on it with weight distribution. (and did while sanding seams).

-Michael
User avatar
txcamper
Teardrop Master
 
Posts: 120
Images: 129
Joined: Wed Mar 21, 2012 12:25 am
Top

Re: First time teardrop builder - project on 4x8 HF

Postby parnold » Fri May 18, 2012 3:32 pm

Impressive!

:thumbsup: :thumbsup:
User avatar
parnold
Donating Member
 
Posts: 2344
Images: 302
Joined: Mon Feb 08, 2010 4:49 pm
Location: Northwest New Jersey
Top

PreviousNext

Return to Build Journals

Who is online

Users browsing this forum: No registered users and 56 guests