Wyoming Woody Teardrop Build (Completed: 6/22/2013)

...ask your questions in the appropriate forums BUT document your build here...preferably in a single thread...dates for updates, are appreciated....

Re: Wyoming Woody Teardrop Build

Postby Vedette » Sat Jan 05, 2013 8:33 pm

Glad to here that you are making progress.
Keep up the momentum.......you are definitely committed now!
Good Roads
Brian & Sandi
Good Roads
Brian & Sandi
Here is a link to my Build Journal
viewtopic.php?f=50&t=50912
Image109106109111109110138766
User avatar
Vedette
Silver Donating Member
 
Posts: 5141
Images: 443
Joined: Thu Dec 01, 2011 4:28 am
Location: Westbank B.C.

Re: Wyoming Woody Teardrop Build

Postby PubUltraStar » Sun Jan 06, 2013 12:15 am

veetors wrote:Have you tried going to a local Fastenal store?


I found the zinc ones at Ace Hardware locally for $.37 each. I'll continue to search for the stainless steel version, but at least I have options. Thanks for the tip.
Image
There is always risk in being awesome!
http://www.diy-teardrop.com/
http://www.m2-photo.com
User avatar
PubUltraStar
Gold Donating Member
 
Posts: 184
Joined: Thu Jul 26, 2012 8:11 pm

Re: Wyoming Woody Teardrop Build

Postby _Ryan_ » Sat Jan 12, 2013 3:12 pm

Just a quick update. I have done quite a bit over the last couple weeks. Walls are almost complete! Pictures to follow soon!
User avatar
_Ryan_
Teardrop Master
 
Posts: 241
Images: 356
Joined: Fri Nov 16, 2012 6:24 pm
Top

Re: Wyoming Woody Teardrop Build

Postby _Ryan_ » Mon Jan 14, 2013 9:34 am

So here are the pictures from my build over the last 2 weeks. Most all of the work involved getting the walls up.

Transferring the profile to my wall templates. I made 2 section templates for both the inside and outside . I used a 2 inch grid and drew the curves connecting the marks with a thin piece of scrap.
Image

I used a sharpie to thicken the outside of the line to run the jigsaw against. This also allowed me to easily see if I needed to take extra material off with the hand plane later.
Image

Went back with a small hand plane and a sander to finish the curves.
Image

Completed templates layed out.
Image

I had to splce 2 3/4" 4x8 sheets of ACX plywood to make each wall panel. I used a half-lap joint 3.5 inches across.
Image

Gluing the wall sections togather.
Image

Routing out the 1/4" deep mortise on the bottom and edges of the walls. This technique worked well with a new sharp bit in the router.
Image

Getting the curves were a bit of a problem as I used the inside of the inner template as a fence. It didn't quite match up so I had to do it in 1 foot sections.
Image
Image

Next step cut out the holes in the walls for insulation, and start thinking about cabinets!
User avatar
_Ryan_
Teardrop Master
 
Posts: 241
Images: 356
Joined: Fri Nov 16, 2012 6:24 pm
Top

Re: Wyoming Woody Teardrop Build

Postby KCStudly » Mon Jan 14, 2013 4:26 pm

Good progress. :thumbsup:
KC
My Build: The Poet Creek Express Hybrid Foamie

Poet Creek Or Bust
Engineering the TLAR way - "That Looks About Right"
TnTTT ORIGINAL 200A LANTERN CLUB = "The 200A Gang"
Green Lantern Corpsmen
User avatar
KCStudly
Donating Member
 
Posts: 9613
Images: 8169
Joined: Mon Feb 06, 2012 10:18 pm
Location: Southeastern CT, USA
Top

Re: Wyoming Woody Teardrop Build

Postby _Ryan_ » Tue Jan 22, 2013 11:54 am

Lots of good progress was made over the weekend. I managed to completely finish the walls, and get the majority of materials I will need for the rest of the project.

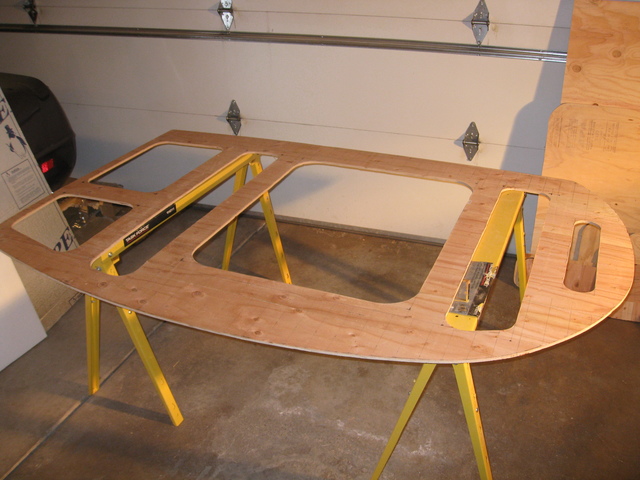
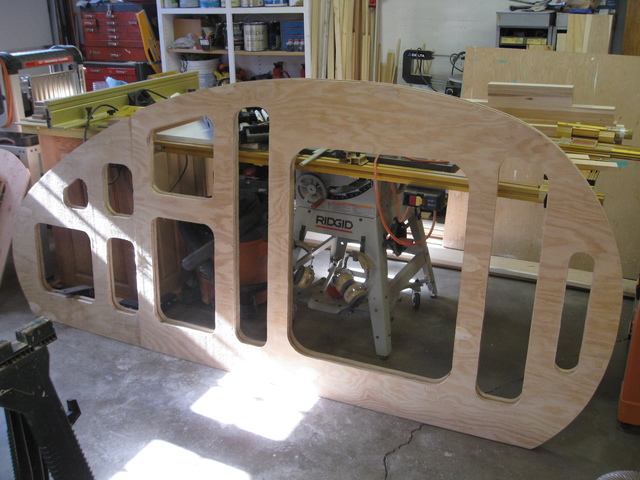
Measuring and marking the cuts for the voids in the sidewalls on my wall template. Thanks to a suggestion by Dave (DMcCam) I used a 2" radius on the corners which should help the wall retain some strength over square corners.
Image

Cutting out the holes with a jigsaw. I have to say in all modesty these were the best cuts I have ever made, and compared to my previous cuts, they didn't require much cleanup afterward. :thumbsup:
Image

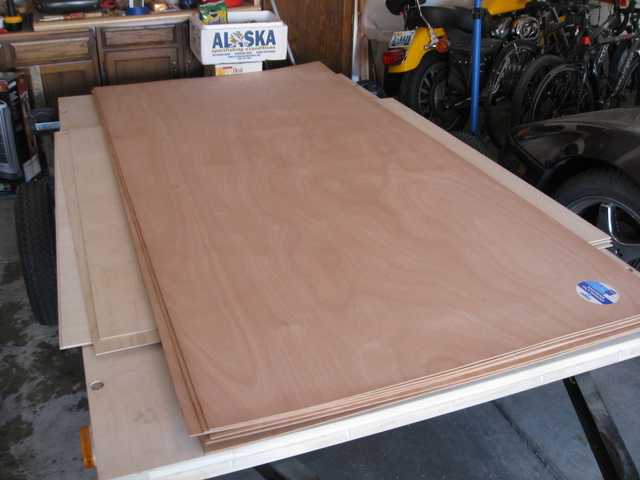
I took a quick trip down to my lumber store and picked up the wood for my cabinets as well as the skins for the interior and exterior walls. After talking with Doug Hodder (BIG thanks Doug!), and looking at his work, I decided to go the Okoume plywood route for the exterior skins. They are 4mm thick and a close relative to mahogany, it is also a marine grade plywood. I think they will look great after some finishing with aniline dye and under some varnish and epoxy! By the way Okoume is hard to find in the middle of the country.
Image

Cutting the voids out with a router. I was worried about the rigidity of the sidewall with all those holes but it still feels quite strong and much lighter!
Image
Image

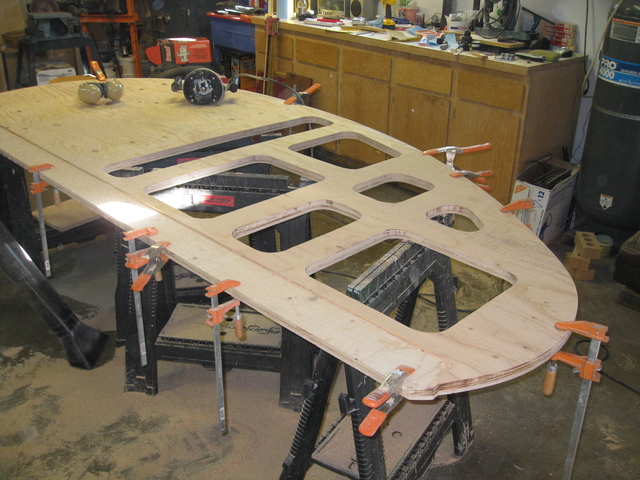
Finished sidewalls! If you look closely you can see the 3 1/2 inch wide half-lap slice I made to join the plywood sheets. I planned ahead so that the entire width of that splice would be lined up with a wall support.
Image

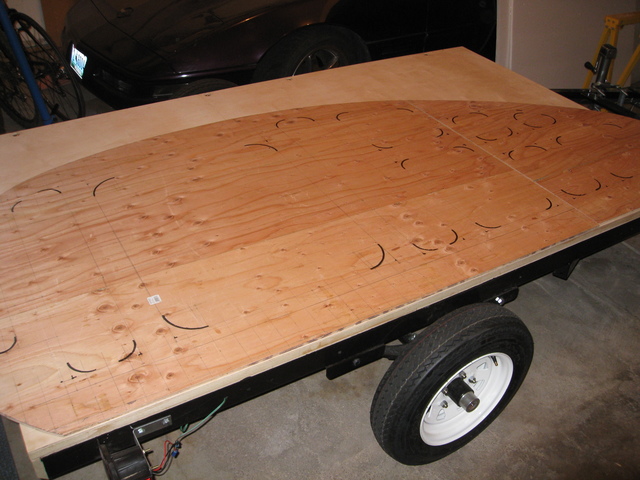
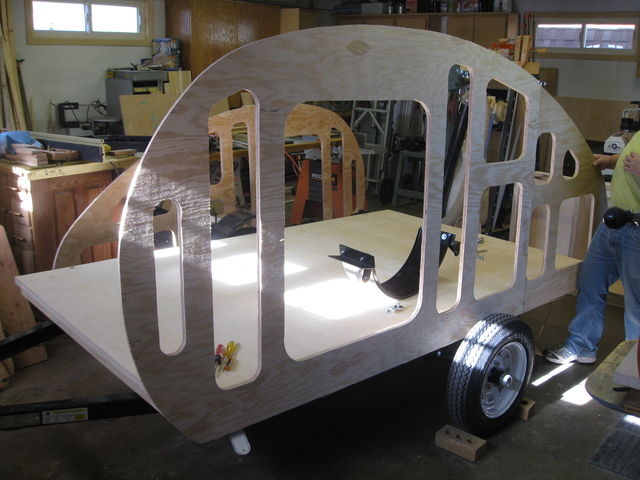
After we finished we dryfit a sidewall to the deck and to my relief it fit like a glove! It's starting to look like a teardrop trailer now! :thumbsup:
Image
User avatar
_Ryan_
Teardrop Master
 
Posts: 241
Images: 356
Joined: Fri Nov 16, 2012 6:24 pm
Top

Re: Wyoming Woody Teardrop Build

Postby Thawley » Tue Jan 22, 2013 12:39 pm

_Ryan_ wrote:I was worried about the rigidity of the sidewall with all those holes but it still feels quite strong and much lighter!

Once you bond the inner & outer skins, it'll be stronger than you'll ever need.

Looks great. Really enjoying this build.
User avatar
Thawley
Teardrop Advisor
 
Posts: 98
Images: 10
Joined: Sun Aug 21, 2011 1:24 pm
Location: Santa Ana, CA
Top

Re: Wyoming Woody Teardrop Build

Postby WhitneyK » Fri Jan 25, 2013 9:27 am

Go, Go, Go, Go!!!! :applause:

(Man this stuff is like a drug, just can't get enough of it :? )

I'm enjoying your build, thank you!
Whitney & Tracie
Crothersville, IN

We never really grow up, we only learn how to act in public.

Do not confuse what you hear with what I mean.

My build: http://www.tnttt.com/viewtopic.php?t=41955

160061-------------------------------101114
States we've drug our
li'l camper through. (44 States + Vancouver Island and over 45,000 miles so far)
User avatar
WhitneyK
Gold Donating Member
 
Posts: 559
Images: 412
Joined: Sun Dec 12, 2010 10:28 pm
Location: IN, Crothersville (36mi N or Louisville)
Top

Re: Wyoming Woody Teardrop Build

Postby Billy K » Fri Jan 25, 2013 10:48 pm

X2
I'm with Whitney, it's too much fun watching others solve their chosen puzzle !!
"...influence is no government." - George Washington
Billy K
Teardrop Master
 
Posts: 276
Joined: Sun Dec 06, 2009 8:03 pm
Location: Kokomo,IN
Top

Re: Wyoming Woody Teardrop Build

Postby _Ryan_ » Sat Jan 26, 2013 11:03 am

Thanks everybody, this is a real blast to work on. I'll keep the updates coming as I am hoping to have this thing finished by April :thumbsup:
User avatar
_Ryan_
Teardrop Master
 
Posts: 241
Images: 356
Joined: Fri Nov 16, 2012 6:24 pm
Top

Re: Wyoming Woody Teardrop Build

Postby _Ryan_ » Tue Jan 29, 2013 12:16 am

Weekend update!

The plan for this week was originally to start on the cabinets. Unfortunately my buddy who specializes in cabinet making, and has been helping me out on the build, decided to go out of town for the week. (Apparently he has priorities outside of teardrop construction :lol: ) So instead of cabinets, I figured I would get some other work finished and take advantage of his expertise when he gets back next week. :)

While the walls are still mobile and not skinned I decided it would be a good time to build the blocking for the roof as well as the ribs for the hatch.

Lining up the pattern for the second hatch rib. The first was cut using the sidewall as a pattern. Originally I thought I would use a router to cut each piece but the pattern was a bit too flimsy so I traced the pattern and used a jigsaw instead.
Image

After the ribs were cut I clamped them together and used a rasp to make them as uniform as possible and smooth out the curves. It was important to get these smooth or else my plywood skin might be lumpy or uneven. It turned out better than I expected.
Image
Image

THe roof blocking was done in a similar way.
Image
Image

The roof blocking resting up against the edge of my deck. It still needs a bit of work to even up the seams.
Image

The finished roof blocking resting on the sidewalls, and my shop helper makes an appearance. :)
Image
User avatar
_Ryan_
Teardrop Master
 
Posts: 241
Images: 356
Joined: Fri Nov 16, 2012 6:24 pm
Top

Re: Wyoming Woody Teardrop Build

Postby KCStudly » Tue Jan 29, 2013 4:00 pm

Looking really good :thumbsup:

Are you going to cut the roof blocking up into sections to fit between your roof spars as blocking, or are you going to do like Tom's (aggie79's) Silver Beatle and build a unitized ceiling panel? (I spent some time last night going thru the first part of Tom's build again... if you haven't done so already, it is worth the read.)

I just breezed back thru your design and build threads again, but I didn't see where you may have mentioned this, and it wasn't clear on the model sketches (which, I must say again are quite good!).

Just curious.

Keep up the good work and before you know it you will be camping! :thumbsup: :applause: :applause:
KC
My Build: The Poet Creek Express Hybrid Foamie

Poet Creek Or Bust
Engineering the TLAR way - "That Looks About Right"
TnTTT ORIGINAL 200A LANTERN CLUB = "The 200A Gang"
Green Lantern Corpsmen
User avatar
KCStudly
Donating Member
 
Posts: 9613
Images: 8169
Joined: Mon Feb 06, 2012 10:18 pm
Location: Southeastern CT, USA
Top

Re: Wyoming Woody Teardrop Build

Postby _Ryan_ » Tue Jan 29, 2013 5:27 pm

Tom has a great build there! But I am doing something more like what Dave did in his Atma Travelear build http://www.tnttt.com/viewtopic.php?p=858687#p858687 and cut the blocking to fit between the roof spars. I believe Steve Frederick pioneered this method :D

Not sure if this was in my original design pics, but as time has gone on I have made some changes and finalized some others. It looks like I should update that post as well!
User avatar
_Ryan_
Teardrop Master
 
Posts: 241
Images: 356
Joined: Fri Nov 16, 2012 6:24 pm
Top

Re: Wyoming Woody Teardrop Build

Postby DMcCam » Wed Jan 30, 2013 12:16 am

Hi Ryan, Man, are you moving pal!! She's looking great!!! You'll be amazed how strong the whole thing gets with each lamination. You're right about the blocking method, Steve's the guy! :thumbsup:

Cheers,

Dave
User avatar
DMcCam
Gold Donating Member
 
Posts: 883
Joined: Wed Jan 06, 2010 8:30 pm
Location: Reno, Nevada
Top

Re: Wyoming Woody Teardrop Build

Postby _Ryan_ » Wed Jan 30, 2013 4:03 pm

DMcCam wrote:Hi Ryan, Man, are you moving pal!! She's looking great!!! You'll be amazed how strong the whole thing gets with each lamination. You're right about the blocking method, Steve's the guy! :thumbsup:

Cheers,

Dave


Thanks Dave! As you may have noticed I took your advice on rounding out the inside corners of skelitonized sections and it worked out well!
User avatar
_Ryan_
Teardrop Master
 
Posts: 241
Images: 356
Joined: Fri Nov 16, 2012 6:24 pm
Top

PreviousNext

Return to Build Journals

Who is online

Users browsing this forum: No registered users and 41 guests