Wyoming Woody Teardrop Build (Completed: 6/22/2013)

...ask your questions in the appropriate forums BUT document your build here...preferably in a single thread...dates for updates, are appreciated....

Re: Wyoming Woody Teardrop Build

Postby Junkboy999 » Wed Jan 30, 2013 4:40 pm

Hey Ryan

Things looks like they are coming along just fine. I see you have done stuff like this before.
I also see you have a nice Incra Router table fence on a homemade table. That is the 72” Incra rails and table
saw system on your Ridgid contractors saw? That is a sweet system. Not to brag, but I love mine as well.
Mine is on a Delta Contractor saw and in a rolling table.


Keep up the good work. keep us posted. :thumbsup:
User avatar
Junkboy999
1000 Club
1000 Club
 
Posts: 1259
Images: 52
Joined: Fri Jul 06, 2012 9:18 pm
Location: Wichita, KS

Re: Wyoming Woody Teardrop Build

Postby RandyG » Wed Jan 30, 2013 5:21 pm

Great job so far! What year is your vette and do you plan to use that for towing? If not, would still make for a cool pic. A tear behind a vette... :thinking:
Randy
Aircraft fabricator, novice carpenter, electrical apprentice, audio engineer dropout.
Build thread - http://www.tnttt.com/viewtopic.php?f=50&t=54126
User avatar
RandyG
500 Club
 
Posts: 695
Images: 115
Joined: Thu May 10, 2012 6:52 pm

Re: Wyoming Woody Teardrop Build

Postby _Ryan_ » Sat Feb 02, 2013 11:33 am

RandyG wrote:Great job so far! What year is your vette and do you plan to use that for towing? If not, would still make for a cool pic. A tear behind a vette... :thinking:


Thanks! It's a 93 but I don't think I will be towing with it, although it would be quite a sight! 8)


Junkboy999 wrote:Hey Ryan

Things looks like they are coming along just fine. I see you have done stuff like this before.
I also see you have a nice Incra Router table fence on a homemade table. That is the 72” Incra rails and table
saw system on your Ridgid contractors saw? That is a sweet system. Not to brag, but I love mine as well.
Mine is on a Delta Contractor saw and in a rolling table.


Keep up the good work. keep us posted. :thumbsup:


It makes me happy to read your comment because in reality I have never tackled anything close to the scale of this project before. :D I'm glad it looks like I know what I'm doing, I must be doing a few things right! The process has involved 6 months of research, a couple months of design, a lot of learning and patience, but on top of it all a lot of FUN!

You have a sharp eye, but the workshop you see belongs to my buddy who builds cabinets. He has been assisting me and letting me use his shop throughout the build. There is some nice equipment in there for sure, I would love to have a workshop like his someday!

Thanks for your comments!
User avatar
_Ryan_
Teardrop Master
 
Posts: 241
Images: 356
Joined: Fri Nov 16, 2012 6:24 pm
Top

Re: Wyoming Woody Teardrop Build

Postby _Ryan_ » Wed Feb 27, 2013 4:30 pm

It's been a bit since my last update but work has been progressing, unfortunately there hasn't been any work exciting enough to take pictures of until we got the the cabinets last week.

After the walls, I had to figure out where all the interior and exterior lights were to be installed. After positioning them I outlined them all and drilled holes through the sidewall sections for the wiring before I put on the interior wall skin. This is for the porch light.
Image

We started by cutting out the pieces for the front cabinets! They are mostly 1/2" birch ply with one section of 3/4" birch for the head board section.
Image

We decided on tongue and groove which I must say is very cool and adds much stability. This also adds a bit of work to get the height settings of the tongue and groove bits correct so the pieces match up correctly. It also took some extra time to cut the groves in the middle of a few pieces with a straight edge and a 1/4" straight bit. Chip out was a problem as well but we managed to fix that by taking a shallower cut first, and reducing the speed of the router on the groove cuts. I am learning a lot!
Image

And here we have finished cabinets! I love the way they just snap together, it makes dry fitting that much easier!
Image
Image

Using the template for the inside section of the wall I was able to trim the cabinets to fit the profile nicely.
Image
Image

Next weekend work on the back set of cabinets begins! Now that all the experimenting is done these should hopefully go much quicker!
Last edited by _Ryan_ on Fri Mar 01, 2013 5:57 pm, edited 4 times in total.
User avatar
_Ryan_
Teardrop Master
 
Posts: 241
Images: 356
Joined: Fri Nov 16, 2012 6:24 pm
Top

Re: Wyoming Woody Teardrop Build

Postby Jacquie » Wed Feb 27, 2013 4:37 pm

Even though you have a long way to go. It looks like it will be beautiful when done. The woody teardrops are so lovely! Great job!
User avatar
Jacquie
Donating Member
 
Posts: 53
Images: 1
Joined: Tue Jul 20, 2010 6:08 pm
Location: MA
Top

Re: Wyoming Woody Teardrop Build

Postby _Ryan_ » Fri Mar 01, 2013 6:01 pm

Jacquie wrote:Even though you have a long way to go. It looks like it will be beautiful when done. The woody teardrops are so lovely! Great job!


Thanks Jaquie! I can't wait to finish it but I am probably having just as much fun building it as I will using it! Hopefully it will look like I have imagined!
User avatar
_Ryan_
Teardrop Master
 
Posts: 241
Images: 356
Joined: Fri Nov 16, 2012 6:24 pm
Top

Re: Wyoming Woody Teardrop Build

Postby _Ryan_ » Tue Mar 12, 2013 9:25 am

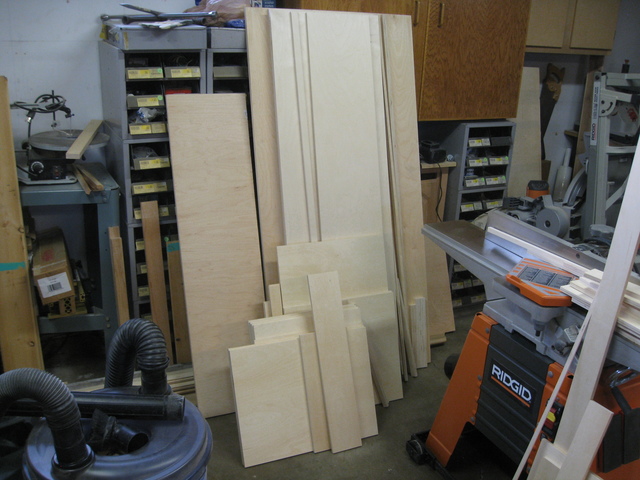
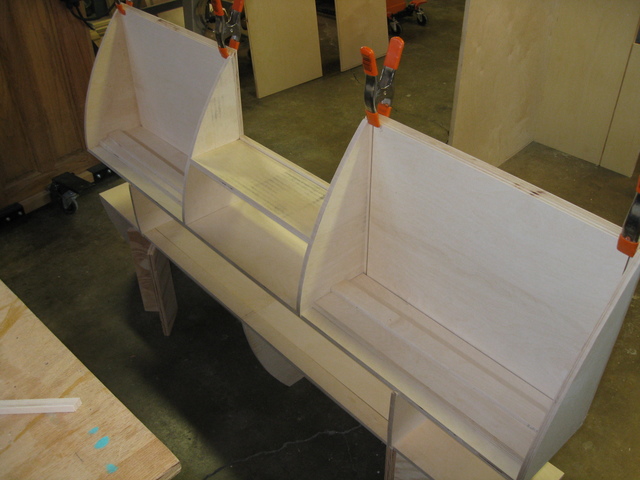
Another update from the last couple weekends, the galley cabinets are now finished for the most part. All cabinet panels and pieces are cut and matched to the profile of the inside wall, tongue and grooves are cut, and the edges are bevelled to match the curve of the profile. Whew that was fun, and it went a lot faster than the front cabinets now that I had a better idea of what I was doing.

Image

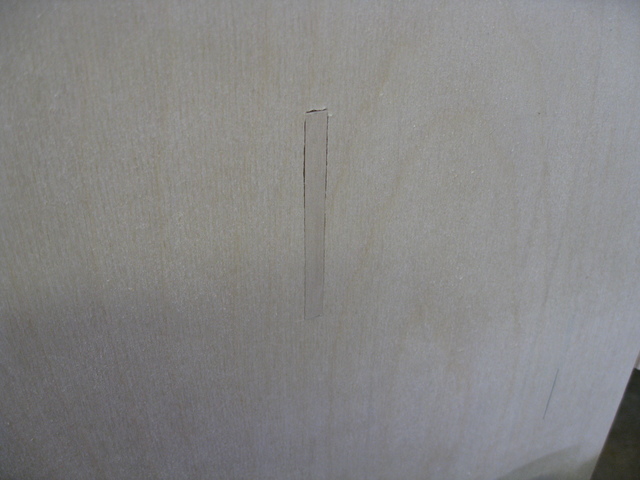
In all that I managed to make a couple mistakes. Actually the only big one wasn't all my fault, when cutting a groove the router bit slipped out of its collet and went through the other side... :(
Image

The good news is that it will only show on the inside of a cabinet so we went ahead and made a plug to hide the mistake.
Image

The finished front cabinets.
Image
Image

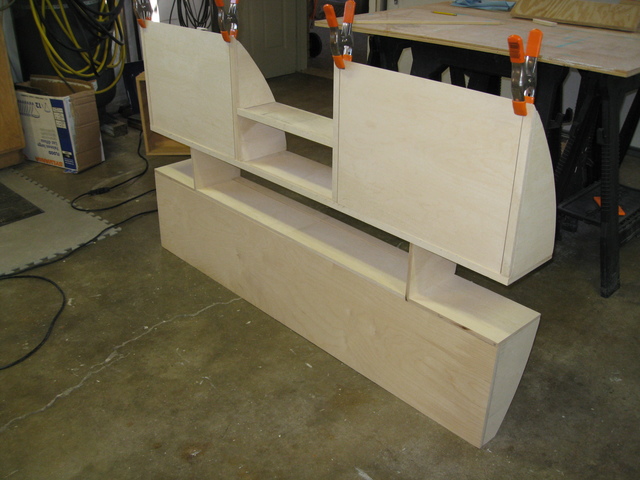
As you can see the back of the cabinets match the curve of the profile. If everything goes well I should be able to drape the headliner panel over this curve and make my life easier down the road.
Image

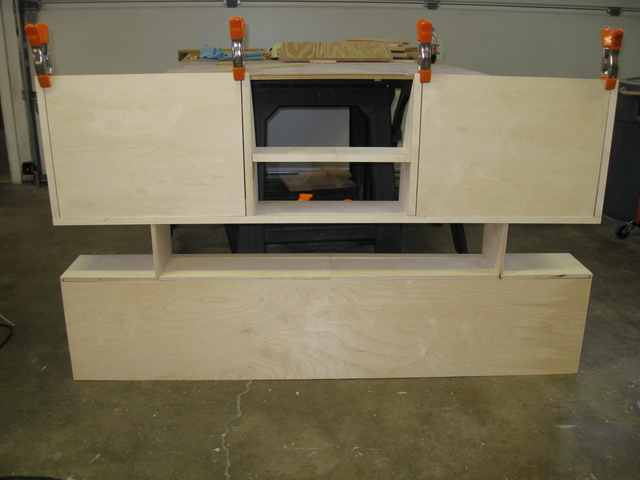
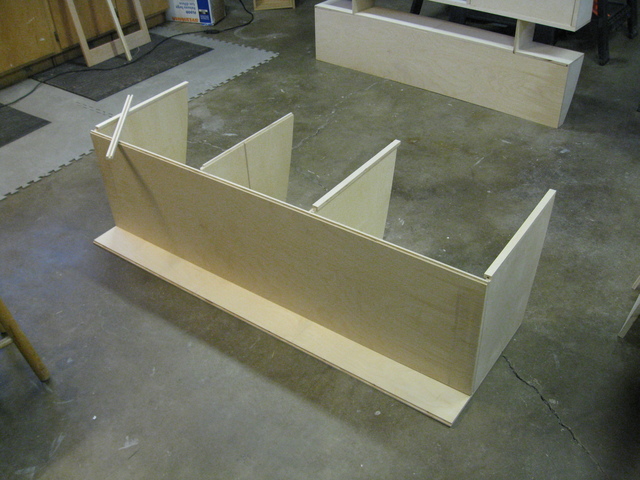
Since this is all dryfit at the moment the back/galley cabinets don't support themselves with just the tongue and groves. Here is a picture of part of the back cabinets laying on the floor.
Image

The next step is sanding all the pieces and making sure every joint fits flush before gluing it all together. Soon enough it should look like a teardrop and not just a bunch of parts in a garage! :D
User avatar
_Ryan_
Teardrop Master
 
Posts: 241
Images: 356
Joined: Fri Nov 16, 2012 6:24 pm
Top

Re: Wyoming Woody Teardrop Build

Postby WhitneyK » Tue Mar 12, 2013 9:49 am

Man you all do good work!!! :thumbsup:
Whitney & Tracie
Crothersville, IN

We never really grow up, we only learn how to act in public.

Do not confuse what you hear with what I mean.

My build: http://www.tnttt.com/viewtopic.php?t=41955

160061-------------------------------101114
States we've drug our
li'l camper through. (44 States + Vancouver Island and over 45,000 miles so far)
User avatar
WhitneyK
Gold Donating Member
 
Posts: 559
Images: 412
Joined: Sun Dec 12, 2010 10:28 pm
Location: IN, Crothersville (36mi N or Louisville)
Top

Re: Wyoming Woody Teardrop Build

Postby _Ryan_ » Tue Mar 12, 2013 11:19 pm

I was so fired up completing the cabinets I decided to take some time this afternoon to get them set up on the trailer. I couldn't stand to wait until this weekend before I could get back to building. :D

Getting the galley cabinets up was a bit of a pain, as they are held together by tongue and groove and a few braces and clamps. One good thing about getting them completely assembled was that it allowed me to spot a couple places where I will need to spend some time getting everything flush. Besides a couple small issues I couldn't be happier!

Image
Image
Image
Image
Last edited by _Ryan_ on Sun Mar 17, 2013 9:50 pm, edited 1 time in total.
User avatar
_Ryan_
Teardrop Master
 
Posts: 241
Images: 356
Joined: Fri Nov 16, 2012 6:24 pm
Top

Re: Wyoming Woody Teardrop Build

Postby GuyllFyre » Wed Mar 13, 2013 12:09 am

It's like a Visible Man (or Woman) model!
You can see the insides from the outside.

Haven't seen someone build innards before outer skin first but I guess there's a first for everything.
Things I have for sale on craigslist:
http://albany.craigslist.org/search/?ar ... catAbb=sss

Things I have for sale on eBay:
http://www.ebay.com/sch/merchant/seansmith
User avatar
GuyllFyre
Donating Member
 
Posts: 209
Joined: Fri May 21, 2010 9:35 pm
Location: Scotia, NY
Top

Re: Wyoming Woody Teardrop Build

Postby Junkboy999 » Wed Mar 13, 2013 1:21 am

Ryan

Learn all you can from your mentor while you can. There is nothing more satisfying than standing back
and admiring all you hard work come together.


Are you guys planning on finishing the cabinets before gluing them together? It would sure make it easier.
User avatar
Junkboy999
1000 Club
1000 Club
 
Posts: 1259
Images: 52
Joined: Fri Jul 06, 2012 9:18 pm
Location: Wichita, KS
Top

Re: Wyoming Woody Teardrop Build

Postby _Ryan_ » Wed Mar 13, 2013 9:09 am

GuyllFyre wrote:It's like a Visible Man (or Woman) model!
You can see the insides from the outside.

Haven't seen someone build innards before outer skin first but I guess there's a first for everything.


Ha, yes looks rather different but cool. Doing it this way lets build, assemble, and square everything beforehand, then when I put it in the trailer as long as it is square and to the proper width, it should (theoretically) fit very snugly.

Junkboy999 wrote:Learn all you can from your mentor while you can. There is nothing more satisfying than standing back
and admiring all you hard work come together.


Oh yeah!

Junkboy999 wrote:Are you guys planning on finishing the cabinets before gluing them together? It would sure make it easier.


All the sanding will be done before assembly, but only a couple places like the back of the front cabinets that are hard to reach will be finished completely. The walls, floor, and head liner are all birch so I was going to do it all at once after assembly.
User avatar
_Ryan_
Teardrop Master
 
Posts: 241
Images: 356
Joined: Fri Nov 16, 2012 6:24 pm
Top

Re: Wyoming Woody Teardrop Build

Postby aggie79 » Wed Mar 13, 2013 10:38 am

Fantastic build! And very good technique too.

I now can see that building the cabinets first is a much easier process than fitting them later after the walls are up. I wished I had seen your build before I started mine.

Keep up the good work!
Tom (& Linda)
For build info on our former Silver Beatle teardrop:
Build Thread

93503
User avatar
aggie79
Super Duper Lifetime Member
 
Posts: 5405
Images: 686
Joined: Tue Aug 07, 2007 5:42 pm
Location: Watauga, Texas
Top

Re: Wyoming Woody Teardrop Build

Postby _Ryan_ » Wed Mar 13, 2013 11:20 am

aggie79 wrote:Fantastic build! And very good technique too.

I now can see that building the cabinets first is a much easier process than fitting them later after the walls are up. I wished I had seen your build before I started mine.

Keep up the good work!


Hi Tom, thanks for the kudos it means a lot!

It's funny you found something to take something away from my build, as I have taken much from yours! I guess that's why this forum is so great. :thumbsup:

Ryan
User avatar
_Ryan_
Teardrop Master
 
Posts: 241
Images: 356
Joined: Fri Nov 16, 2012 6:24 pm
Top

Re: Wyoming Woody Teardrop Build

Postby clintstuckless » Wed Mar 13, 2013 10:56 pm

Beautiful job so far on the unit.

Just a few questions for you. When you "skeletonized" the side walls how did you get the pattern or know how muc to take out without taking too much.

Also would you be willing to share or post your sketchup files?

I want to build one over the next few months and after looking at LOTS of designs I REALLY love your design.

Thanks, from a canadian fan
clintstuckless
Teardrop Inspector
 
Posts: 14
Joined: Wed Mar 13, 2013 3:55 pm
Top

PreviousNext

Return to Build Journals

Who is online

Users browsing this forum: No registered users and 8 guests