Build in NYS - Insurance Problems

...ask your questions in the appropriate forums BUT document your build here...preferably in a single thread...dates for updates, are appreciated....

Re: Build in NYS

Postby pchast » Fri May 09, 2014 8:06 pm

I finished the sides today and did the first fill on the top.
I also started inside the tear. I need to run to the big box
shop for corner bead to finish up tomorrow.

Moving along. Hope its fast enough. :thumbsup:
pchast
Platinum Donating Member
 
Posts: 2025
Images: 97
Joined: Mon Jan 28, 2013 5:47 pm
Location: Athens, NY

Re: Build in NYS

Postby pchast » Wed May 14, 2014 9:34 pm

Monday's post disappeared????

I had a friend show up to help applying the canvas sides. We used Gripper.
I was not impressed by how thick the primer was. The Spackle had dried
for several days but still lifted after primer and canvas was applied.
We rubbed the canvas back down with a segment of pvc pipe all over.

120153
driver's side

120155
Passenger side

pulls and lifted canvas had to be chased several times over 3 hours.
pchast
Platinum Donating Member
 
Posts: 2025
Images: 97
Joined: Mon Jan 28, 2013 5:47 pm
Location: Athens, NY

Re: Build in NYS

Postby pchast » Wed May 14, 2014 10:15 pm

Tuesday I helped my friend with replacing his boat's swing keel and
motored down the Hudson to his dock berth.

Today my wife and I worked on the top cover in one piece, hitch to tail.
We folded the canvas in half along the length and glued one side at a
time. I had stirred the primer with a hook and 1/2" drill for more
then 10 min. It didn't seem much thicker. Slopping more on with
a 1/2" roller seemed to make for better adhesion.

120186
60" fabric

120187
trim to 2" overlap

120189
smooth darts. no folds.
Last edited by pchast on Sun Jun 01, 2014 10:04 am, edited 2 times in total.
pchast
Platinum Donating Member
 
Posts: 2025
Images: 97
Joined: Mon Jan 28, 2013 5:47 pm
Location: Athens, NY
Top

Re: Build in NYS

Postby pchast » Wed May 14, 2014 10:23 pm

I took some time tonight to do a spread sheet of all the receipts I saved.


I culled duplicates...


I still spent $2,624 so far!

I thought I was being careful.
There are still more things to complete.
I've kept all parts on a temp shelving unit.

Hope I don't need much more... OR have lost
anything

(I've already exceeded the 2000 I was "allowed".)
pchast
Platinum Donating Member
 
Posts: 2025
Images: 97
Joined: Mon Jan 28, 2013 5:47 pm
Location: Athens, NY
Top

Re: Build in NYS

Postby pchast » Sat May 17, 2014 8:49 pm

Today was another beautiful day. :thumbsup:

I got to fill the gullies from last night's rain before I had time for
the trailer...

I glued in the 1/4 ply lip for the door seals and began pulling wire
for the running lights and interior light. I hope to tackle routing
the window openings in the doors tomorrow.
:thinking:
pchast
Platinum Donating Member
 
Posts: 2025
Images: 97
Joined: Mon Jan 28, 2013 5:47 pm
Location: Athens, NY
Top

Re: Build in NYS

Postby pchast » Sun May 18, 2014 9:01 pm

Just a few hours this afternoon. Cut in ceiling vents and glued down the canvas.
Continued finding light locations and cutting canvas over light blocks. Ran some
more wires.
:D
2 SLA batteries (almost free) and solar controller (not).
120868
40 watt solar panel.
120869
Load center in rear stores area.
120870

Doors tomorrow. Fit to the openings and cut window holes, canvas...
:thinking:
Last edited by pchast on Mon Jun 16, 2014 11:15 pm, edited 2 times in total.
pchast
Platinum Donating Member
 
Posts: 2025
Images: 97
Joined: Mon Jan 28, 2013 5:47 pm
Location: Athens, NY
Top

Re: Build in NYS

Postby pchast » Mon May 19, 2014 9:25 pm

Well, It was a difficult day. I got one door fitted and ready
for cutting in the window. I found I needed to cut in more
blocking on the other.

Finished some more running light set up in between working
on the doors. Got in a little over 3 hours total.

:)
pchast
Platinum Donating Member
 
Posts: 2025
Images: 97
Joined: Mon Jan 28, 2013 5:47 pm
Location: Athens, NY
Top

Re: Build in NYS

Postby pchast » Thu May 29, 2014 9:35 pm

Had a great holiday weekend. We visited our granddaughter 750 miles away...
:D
Today I was rested enough for routing the window recesses and Spackling
the doors in prep for canvas. I have not used plastic edge for the doors.

120863

Hope the foam is not too soft on top and bottom to hold the canvas square.
:thinking:
I'll find out tomorrow...
:NC
pchast
Platinum Donating Member
 
Posts: 2025
Images: 97
Joined: Mon Jan 28, 2013 5:47 pm
Location: Athens, NY
Top

Re: Build in NYS

Postby pchast » Sat May 31, 2014 11:19 pm

Yesterday I sanded and recoated the spackle filling areas I hadn't seen.
:)
Today I fought with canvas on the doors. Complex but simple as
wrapping a present. I used one piece and painted both the door
and the canvas. It worked better than just pouring it on the foam.

I used the windows as clamping tools.
120866

Neat corners took some careful clipping of the excess canvas.
120867

Note: Spackling the edges provided enough stiffness for good
edges when folding the canvas over them.
pchast
Platinum Donating Member
 
Posts: 2025
Images: 97
Joined: Mon Jan 28, 2013 5:47 pm
Location: Athens, NY
Top

Re: Build in NYS - Canvased - Primed, started paint then wir

Postby pchast » Sat Jun 07, 2014 10:01 pm

Over the last week I've finished a double coat of gripper primer and
2 finish coats on the top, an off white. I do the first coat of blue,
the sides and flat bottom like the boss's car, in the morning after
masking things...
:)
Bought yet another package of connectors for wiring...

Just plugging along.
;)
pchast
Platinum Donating Member
 
Posts: 2025
Images: 97
Joined: Mon Jan 28, 2013 5:47 pm
Location: Athens, NY
Top

Re: Build in NYS - Canvased - Primed, started paint then wir

Postby pchast » Sun Jun 08, 2014 11:19 pm

Ahhh. The paint scheme has changed again.
:o
I went and bought more paint... The top
portion took a full quart. 2 coats, that's
76 sq ft as I measured, not 100...
:oops:
It must have soaked into the roller?
:thinking:
pchast
Platinum Donating Member
 
Posts: 2025
Images: 97
Joined: Mon Jan 28, 2013 5:47 pm
Location: Athens, NY
Top

Re: Build in NYS - Canvased - Primed, started paint then wir

Postby pchast » Wed Jun 11, 2014 4:30 pm

over the last few days:

121328
Fit Hinges and drilled pilot holes.
121329

121330
2 coats on top, first on bottom.
121331

121332
pchast
Platinum Donating Member
 
Posts: 2025
Images: 97
Joined: Mon Jan 28, 2013 5:47 pm
Location: Athens, NY
Top

Re: Build in NYS - Canvased - Primed, started paint then wir

Postby pchast » Mon Jun 16, 2014 11:01 pm

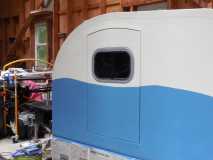
I've done the second coat on the bottom and the doors painted. I had to wait a couple of rainy days for
the latex to dry.( stop being sticky ) The doors stuck to the hardboard used for a painting table on top
of my table saw. While I waited I wired the running lights and started the interior lighting.
:)
Working with no plan I stumbled. the door jamb I glued directly to the foam is not deep enough to add
a gasket. I need to either route it off and add another inside or shim out the door an 1/8th...
:oops:

dry fit of door and window.
121499

I measured and drew a straight line...
I didn't check my masking!!!
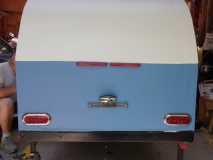
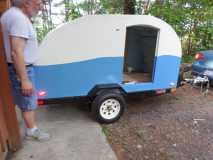
121500

door light on handle side
121501

I could wait no longer!

First hook up test, brakes
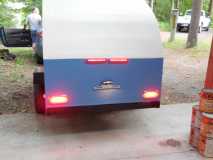
121502

Side lights
121503

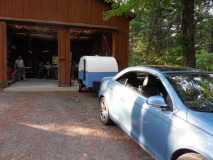
Camper is about 2 inches above the car roof.
It looks huge with the top down on the car.
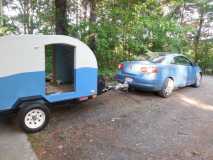
121504

The other perspective...
121505

The car is charging the batteries through a solar controller.
13.47V at idle on my HF VOM.

Also today, I painted the inside of the doors first coat. I stopped
at Lowes and got a sample of black paint to touch up my drips on
the frame.

I'm thinking of getting a pinstripe tape, black, to clean up the 2 tone
junction. Will it stick on this canvas and latex very well or should I
just paint a stripe?
:thinking:
Last edited by pchast on Mon Jun 16, 2014 11:10 pm, edited 1 time in total.
pchast
Platinum Donating Member
 
Posts: 2025
Images: 97
Joined: Mon Jan 28, 2013 5:47 pm
Location: Athens, NY
Top

Re: Build in NYS - Canvased - Primed, started paint then wir

Postby pchast » Mon Jun 16, 2014 11:08 pm

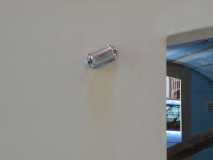
On another note, I have 2 half inch conduit running to the back from the tongue.
One is the battery power the other is the running light circuits. I need to secure
the wires with some sort of strain relief and plug the ends of the conduit entries.
:thinking:
121550
121549
Suggestions would be helpful.
I'll get another picture of just that in the am.

Thanks,
pchast
Platinum Donating Member
 
Posts: 2025
Images: 97
Joined: Mon Jan 28, 2013 5:47 pm
Location: Athens, NY
Top

Re: Build in NYS - Its comming together + questions.

Postby pchast » Wed Jun 18, 2014 9:58 pm

Yesturday, Completed painting outside and doors. Waiting for
the paint to set so it doesn't stick in the heat to other paint...
Worked on interior wiring. Then epoxied 2 computer fans to
the vent, with a friend's help.
:)
Went to lumber yd for 3/4 angle iron to weld a battery box
support this afternoon. Finished weld. Don't look close please.
;)
This morning The Woodworking Club cut out 9 more urns for
the Patriot Guard Riders to use. We'll assemble and finish
them, likely next Wednesday am.
:thumbsup:
pchast
Platinum Donating Member
 
Posts: 2025
Images: 97
Joined: Mon Jan 28, 2013 5:47 pm
Location: Athens, NY
Top

PreviousNext

Return to Build Journals

Who is online

Users browsing this forum: No registered users and 11 guests